How to Make Homemade Pasta: A Complete Guide for Beginners
To make homemade pasta, mix flour and eggs to form a smooth dough, knead it well, then roll and shape it before cooking briefly in boiling salted water. Fresh pasta cooks in just 2 to 4 minutes, resulting in tender, silky noodles perfect for any meal. This simple process works with or without a machine, giving you flexible options based on your kitchen tools.
This guide is designed for home cooks of all skill levels who want to learn how to make homemade pasta from scratch. You’ll get clear steps on choosing ingredients, preparing and rolling dough, shaping pasta by hand or machine, cooking properly, and storing it safely.
Key Takeaways
- Use flour and eggs with higher yolk content for a stronger, silkier pasta dough.
- Knead pasta dough by hand for 2-4 minutes until smooth before resting it 2-5 minutes.
- Roll dough thin using a pasta machine or rolling pin for even thickness.
- Cut fresh pasta shapes by hand or with tools, positioning the dough at a 45° angle for curls.
- Cook fresh pasta in salted boiling water for 2 to 4 minutes until al dente.
- Dry fresh pasta by hanging it over a chair for 10-15 minutes if not cooking immediately.
How to Make Homemade Pasta Dough from Scratch
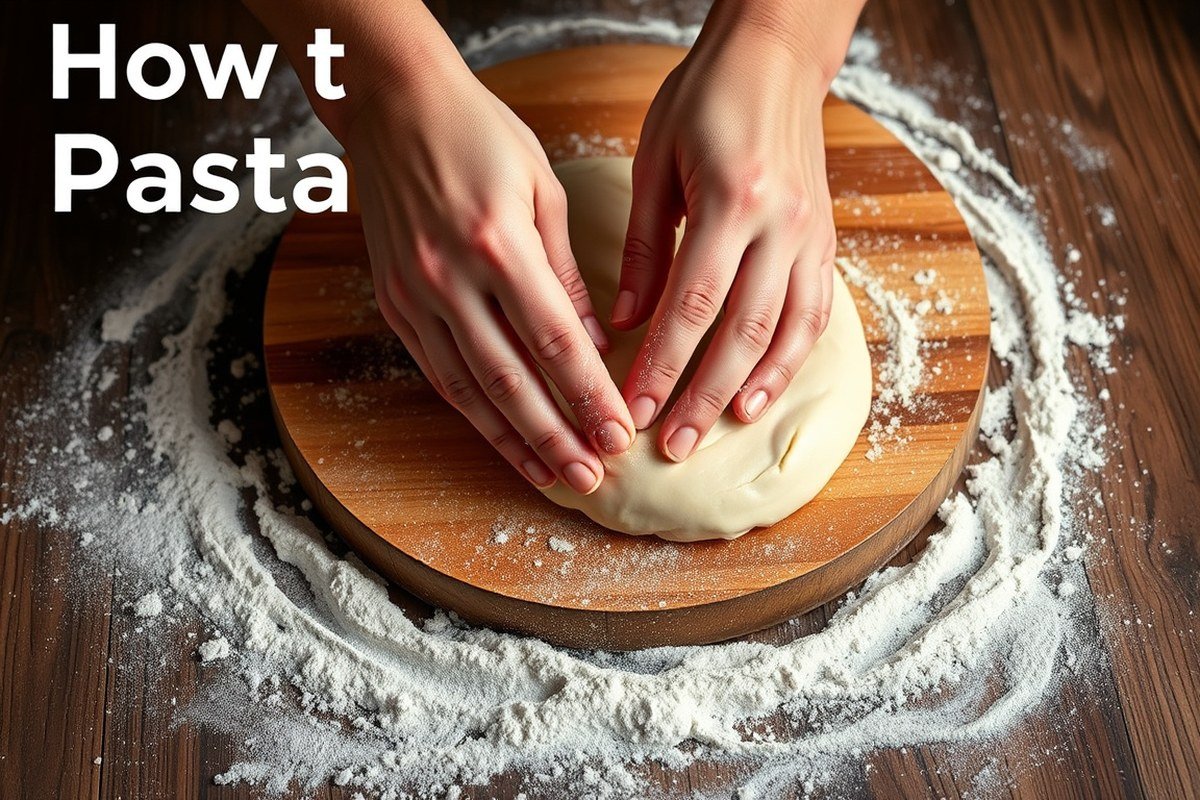
Making homemade pasta dough requires combining just a few simple ingredients, mixing them properly, kneading the dough until smooth and elastic, and allowing it to rest before rolling and shaping. This process is essential for developing the dough’s texture and making it manageable for cutting and cooking. Following the right techniques and timing ensures you achieve tender, silky pasta every time.
Choosing Ingredients for Pasta Dough
Fresh pasta dough traditionally consists of flour and eggs. About 1 cup (125 grams) of all-purpose flour combined with one large egg typically makes enough dough for a single serving. Using all-purpose flour works well for most homemade pasta; specialty flours like 00 or semolina aren’t necessary but can be used for specific textures. Some recipes add a pinch of salt or a small amount of olive oil to improve flavor and dough flexibility, but these are optional.
You’ll want dry, room-temperature eggs and flour that’s been measured accurately by weight or volume. For example, a ratio of 100 grams of flour to 1 large egg creates a well-hydrated dough that isn’t too sticky or dry, which makes kneading easier and results in pasta that isn’t prone to tearing or shrinking.
Mixing and Kneading Techniques
Mixing the pasta dough begins by creating a well of flour on a clean surface and cracking the eggs into the center. Gradually incorporate the flour into the eggs using a fork or your fingers to avoid lumps and ensure even hydration. Once mixed enough to hold together, knead the dough to develop gluten, which gives the pasta strength and elasticity.
Kneading should be done on a lightly floured surface for about 8 to 10 minutes. Use the heels of your hands to push the dough away from you, fold it over, and rotate it 90 degrees before repeating. The dough should become smooth, elastic, and slightly tacky but not sticky. Sprinkle a little flour during kneading only if it feels too wet, but don’t overdo it as too much flour will dry out the dough and make it tough.
- Create a mound of 1 cup all-purpose flour on a clean surface.
- Make a well in the center, then crack 1 large egg into it.
- Use a fork to whisk the egg, slowly mixing in surrounding flour until a shaggy dough forms.
- Begin kneading the dough with your hands, folding and pressing it for 8 to 10 minutes.
- Adjust flour lightly if the dough becomes too sticky during kneading.
- Stop kneading when the dough is smooth and elastic.
Electric or manual pasta makers can simplify mixing and kneading by handling these steps inside the machine’s chamber, but hand kneading offers more control and a better feel for the desired dough consistency.
Proper Dough Resting Times
Resting the dough is a critical step that allows the flour to fully hydrate and the gluten to relax. This results in dough that’s softer and stretches more easily without snapping back when rolled or shaped. Without resting, pasta dough can be difficult to work with and produce tougher noodles.
Once you finish kneading, cover the dough securely with plastic wrap and allow it to sit on the counter for 30 minutes to an hour. This resting phase hydrates the dough fully and relaxes the gluten strands. Keeping the dough in the fridge isn’t ideal unless you aim to work with it the following day, because chilled dough tends to resist rolling.
Once rested, unwrap the dough and give it a quick knead of about 1 minute before rolling. Use the dough within 2 days for best texture and flavor; beyond that, it tends to dry out or ferment.
Which Flour and Eggs Work Best for Making Pasta

The best pasta dough uses a blend of flour types and eggs chosen for texture and flavor. Choosing “00” flour or semolina flour paired with whole eggs and extra yolks usually yields tender, silky pasta. All-purpose flour works in a pinch but changes the dough’s chew and elasticity. Adjusting hydration with water, eggs, or yolks affects dough strength and ease of handling.
Flour Types: Semolina, 00, All-Purpose
Flour selection shapes the pasta’s texture and bite. “00” flour is finely milled, low protein, and makes very silky pasta, ideal for enriched doughs that include eggs. Semolina flour, with its coarser grind and higher protein count, creates a more rustic, chewy texture and works well in recipes without eggs, like pasta bianca.
All-purpose flour is the most accessible and can substitute for “00” or semolina in home cooking. It produces dough that is softer and less elastic, which can affect the pasta’s firmness when cooked. Many recipes specify which flour to use or offer all-purpose as a simpler alternative. Usually, home pasta makers mix semolina with “00” flour to balance tenderness with firmness.
| Flour Type | Protein Content | Texture in Pasta | Best Use |
|---|---|---|---|
| “00” Flour | Low (around 11%) | Silky, smooth | Egg pasta, tender texture |
| Semolina Flour | High (12-13%) | Firm, slightly gritty | Egg-free pasta, rustic chew |
| All-Purpose Flour | Medium (10-12%) | Soft, less elastic | Everyday pasta, easy substitute |
Dusting pasta dough lightly with either semolina or “00” flour helps prevent sticking during rolling and shaping. The flour choice also influences the dough’s hydration needs and elasticity, so adjust liquid accordingly.
Egg Options and Their Effects on Dough
Eggs contribute both moisture and protein to pasta dough. Whole eggs introduce protein and water from whites plus fat from yolks, balancing elasticity and tenderness. Using extra egg yolks boosts richness and softness due to fat content but reduces water, which means the dough feels silkier yet may need more moisture adjustment.
Some recipes replace eggs with water for a lean dough that is firmer and better for shapes like orecchiette or cavatelli, typically made without egg. For an egg-enriched pasta, combining one whole egg plus two or more yolks for about every 5 ounces (140 g) of flour gives a tender and flavorful dough with good strength.
Avoid refrigerating dough with many egg yolks for longer than 2 days; the interaction with flour can turn it grey and affect taste.
Here is a basic decision guide for making pasta dough liquid choices:
- Whole eggs only: Chewy and elastic dough, classic egg pasta texture.
- Whole eggs plus extra yolks: Richer, silkier dough with softer bite and deep flavor.
- Water only: Firm, neutral-flavored dough suited to egg-free recipes or shapes needing less elasticity.
Hydration Levels and Dough Consistency
The type of liquid you use greatly affects flour hydration. Egg yolks have approximately 48% water, egg whites around 90%, and water is entirely water. Since yolks hold more fat and less water, doughs with a lot of yolks need either extra liquid or more kneading to get soft. For standard pasta dough, use close to 100 grams of flour for every 50 grams of liquid, whether eggs or water.
For example, using 400 grams of flour with 4 eggs or 200 grams of water yields balanced hydration for around four servings. Add liquid gradually to fully bring the dough together without making it sticky or dry. Overhydrating makes dough sticky and hard to roll; underhydrating results in crumbly dough that tears easily.
Manual and Machine Techniques for Rolling Pasta
Getting your pasta dough to the right thinness is key for great texture and cooking performance. Use a pasta machine for consistent sheets or roll by hand with the right technique. Adjust thickness settings according to your pasta shape and moisture level to prevent tearing and sticking.
Using a Pasta Machine Effectively
Start by setting the pasta roller to its widest setting, typically marked as “1” on most machines. This setting allows the dough to pass through easily without tearing. Roll the dough three times on this wide setting to smooth it out before thinning.
Pass the dough through the machine on progressively thinner settings, usually moving from 2 to 4, working twice on each setting. The exact numbering differs by brand, but the goal is a gradual thinning to prevent holes. Use both hands to guide and fold the dough evenly as you feed it in, which helps catch any slack and keeps the dough aligned with the rollers. Folding the dough in half before each pass creates uniform layers.
After rolling, let the sheets air dry uncovered for 15 to 20 minutes before cutting or freezing. This step reduces stickiness and makes handling easier.
- Set machine to widest setting (usually 1).
- Cut dough into manageable pieces if large, ideally 8 equal portions.
- Roll each piece through the machine three times at widest setting.
- Fold dough sheets in half before feeding again.
- Thin dough by rolling twice on each setting from 2 to 4.
- Let sheets rest uncovered 15-20 minutes before shaping or storing.
Hand Rolling Tips and Tools
Use a rolling pin or your palms to press the dough into a flat disk roughly 1/4 inch thick before making it thinner. Cut the dough into smaller sections to better manage the shape and control how thin each piece gets. Rolling step-by-step helps avoid tears and keeps the thickness consistent.
Use a smooth, flat surface lightly dusted with flour, but avoid too much flour, which dries out dough and can make rolling harder. Apply even pressure with your rolling pin, rotating and flipping the dough often to maintain roundness and ensure thin, even sheets.
When rolling thin without a machine, aim for about 1/16 inch thickness, but you can go thinner by gently rolling further. A wine bottle works as a simple substitute if you don’t have a rolling pin. Keep dough cool and lightly floured to avoid sticking.
Setting and Achieving Ideal Thickness
Thicker pasta like fettuccine calls for thinner sheets, around setting 4 or 5 on a machine, roughly 1/16 inch thick. Thinner pasta such as angel hair or ravioli wrappers should be thinner, around setting 7 or lower depending on your machine’s scale.
Watch for dough elasticity and moisture during rolling; too wet dough sticks, too dry tears. Stop if the dough stretches too much or starts to wrinkle, fold and rest it briefly to relax the gluten before continuing.
Good rolled pasta feels smooth and slightly firm but still pliable. Sheets that tear easily or stick excessively indicate improper flour ratio or dough resting time. Adjust as needed to achieve a silky, uniform result ready for cutting or shaping.
Cutting and Shaping Fresh Pasta by Hand or Tool
Cutting and shaping homemade pasta requires a bit of patience but creates delicious results and satisfying creativity. Fresh pasta sheets usually measure up to 3 feet long and work well for slicing into fettuccine, tagliatelle, pappardelle, or forming hand-shaped types like orecchiette and gnocchi. Letting the pasta sheets slightly dry before cutting firms up the dough, giving it a pleasant “leathery” feel that helps prevent the strands from sticking together. A sharp knife, a pasta cutter attachment, or simple shaping tools can help you create classic shapes. Avoid sticking by dusting your pasta lightly with flour or semolina and keeping pieces separated on a clean surface or hung on a rod for up to 15 minutes. Follow these steps to cut and shape various types of fresh pasta by hand or with tools:
- Dry the pasta sheet slightly. Hang sheets over a chair back or rod for 10 to 15 minutes until they firm up but remain pliable. Slight drying prevents dough from sticking in the next steps.
- Flour the work surface and pasta sheet. Lightly sprinkle with flour or semolina to avoid sticking during cutting and shaping.
- Cut flat noodles with a sharp knife or cutter. Fold the sheet loosely without pressing, then slice into strips ¼ inch wide for fettuccine, ⅓ to ½ inch wide for tagliatelle, or wider for pappardelle, about ¾ to 1 inch. Alternatively, use a pasta cutter attachment designed for these widths.
- Shape hand-formed pastas on a floured surface. For orecchiette, pinch small dough balls and press the center with a thumb or the back of a knife to form little “ears.” For gnocchi, roll dough into a rope and cut into ½-inch pieces; press each lightly with a fork to create ridges that hold sauce.
- Keep cut or shaped pasta separated. Spread noodles and shaped pieces on floured parchment or a baking tray in a single layer without overlapping. Dust any moist spots with more flour to prevent clumping.
- Hang strands or shapes if possible. Use a pasta drying rack, a clean rod, or even a broom handle to hang noodles for 10 to 15 minutes. This step helps avoid sticking and firms the pasta slightly.
- Cook fresh pasta quickly after shaping. Because fresh pasta cooks in about 2 to 4 minutes, plan your shaping and cooking times closely to maintain the best texture.
Common tools to help with cutting and shaping include a pasta cutter attachment for consistent noodles, a sharp chef’s knife for simple slicing, a fork for gnocchi ridges, and wooden spoons or small spoons for shaping orecchiette. While some shapes require specialized tools, many can be done with everyday kitchen items you already have. Properly drying or dusting your pasta with flour before and after shaping is important to prevent sticking, which is the most common issue home cooks face at this stage.
Cooking Fresh Pasta: Timings and Techniques
Fresh pasta cooks much faster than dried pasta, generally needing only 1 to 3 minutes in boiling salted water to reach al dente, which means it’s tender but still offers a slight bite. Typically, once your water is boiling, add about a tablespoon of salt per four quarts of water to season the pasta properly. This amount helps improve flavor without making it overly salty. Add the pasta gently to the pot, stirring lightly with a wooden spoon or cooking fork right away to prevent the noodles from sticking together. Keep stirring occasionally during cooking, but carefully so the pasta doesn’t break.
Start tasting the pasta about one minute after adding it to the water. Fresh pasta is done when it is tender but still firm to the bite, typically between 1½ and 3 minutes depending on thickness and shape. Thinner pasta like tagliatelle will take closer to one and a half minutes, while thicker ribbons or filled pasta might need a bit longer. Drain the pasta promptly once it hits this texture to avoid overcooking, which causes it to become mushy. Avoid rinsing fresh pasta after cooking to maintain surface starches that help sauces cling.
To keep pasta from clumping during cooking, use plenty of boiling water, about 4 to 6 quarts per pound of pasta, and stir gently but thoroughly during the first minute and intermittently afterward. Using a large pot is key to giving the noodles space. Adding a splash of the hot cooking water to your sauce after draining fresh pasta can help achieve a smooth, emulsified dish.
Use a semolina-dusted tray for fresh pasta waiting to cook or resting after cooking to minimize sticking and help maintain shape.
Some fresh pasta makers lightly dust their pasta with semolina flour and let it rest for about 10 minutes before cooking to firm it up, which can ease handling and improve texture. If you’re cooking pasta immediately, just add it directly to boiling salted water. For frozen fresh pasta, let it cook for an additional minute or two compared to fresh, since it needs extra time to thaw and soften in the water. Avoid overcrowding the pot with too much pasta at once or the water temperature will drop and cooking times will increase unevenly.
Drying, Freezing, and Storing Homemade Pasta Safely
Drying fresh pasta helps preserve it by reducing moisture, preventing spoilage, and extending its shelf life. To dry pasta effectively, lay it out in a single layer on a clean, dry surface or a pasta drying rack. Leave it uncovered at room temperature for 12 to 24 hours, depending on the humidity. The pasta should feel brittle and dry to the touch before storing. Avoid stacking pasta strands during drying to prevent them from sticking together.
Freezing keeps pasta’s texture and taste intact without letting it dry out. Shape fresh pasta dough into small bundles or nests and spread them out on a baking sheet in a single layer. Place the sheet in the freezer uncovered for 1 to 2 hours until the nests firm up. After they freeze solid, move the nests into airtight containers or resealable freezer bags, then keep them frozen at 0°F (-18°C) or below for up to 3 months. Avoid freezing large clumps of fresh dough since they freeze unevenly and are hard to separate later.
When freezing fresh pasta sheets or cut pasta, let it air-dry for 15 to 20 minutes before placing it on the baking sheet to freeze. This slight drying prevents the strands from clumping during freezing. For cooked pasta, cool it completely, toss it lightly with olive oil to prevent sticking, and store it in airtight containers. Cooked pasta keeps safely for up to 4 days in the refrigerator, while uncooked pasta dough stored in the fridge should be used within 24 hours.
Choosing the right containers and wrapping methods is essential for maintaining freshness and preventing freezer burn or drying out. Use airtight plastic containers, glass containers with tight lids, or high-quality resealable freezer bags. When using freezer bags, press out as much air as you can before sealing to prevent freezer burn. For extra protection during freezing, wrap the pasta nests in plastic wrap before placing them in bags or containers.
- Dry pasta on a single layer, uncovered, for 12, 24 hours until brittle
- Freeze pasta nests on a baking sheet until firm (1, 2 hours), then transfer
- Store frozen pasta at 0°F (-18°C) or below for up to 3 months
- Refrigerate fresh dough in airtight containers for up to 24 hours
- Keep cooked pasta refrigerated for up to 4 days in airtight containers
- Toss cooked pasta with a small amount of olive oil before storing
- Use airtight containers or freezer bags to prevent drying and freezer burn
| Storage Type | Storage Method | Temperature | Storage Time |
|---|---|---|---|
| Fresh pasta dough (uncooked) | Airtight container in refrigerator | 35-40°F (2-4°C) | Up to 24 hours |
| Fresh pasta (dry or frozen nests) | Freezer-safe container or bag | 0°F (-18°C) or colder | Up to 3 months |
| Cooked pasta | Airtight container in refrigerator | 35-40°F (2-4°C) | Up to 4 days |
Overdrying pasta can cause brittleness that leads to cracks and breakage, making it harder to cook evenly. Insufficient drying before freezing may cause strands to stick together, creating clumps that are tough to separate later. Properly thaw frozen pasta by transferring it to the refrigerator for several hours or cooking it directly from frozen. Avoid refreezing thawed pasta to maintain quality and safety.
Troubleshooting Common Pasta Dough Issues
Dry or crumbly pasta dough usually means there’s not enough moisture, either from too much flour or small eggs. Using measuring cups can pack the flour more than needed, making the dough dry. Adding a little water or an extra egg yolk can fix this quickly. Gradually add one teaspoon of water at a time, kneading well to absorb the moisture. Avoid adding too much water at once, or the dough will become sticky.
Sticky or overly wet dough is common when too much liquid is added. It’s normal for the dough to feel slightly tacky but it should hold together in a ball, not stick all over your hands or surfaces. To fix sticky dough, sprinkle a little flour onto your work surface and knead gently, adding flour one tablespoon at a time. Avoid over-flouring, which can make the pasta tough.
To prevent tearing or cracking during rolling, let the dough rest wrapped in plastic wrap at room temperature for about 30 minutes. This rest time allows the gluten to relax and moisture to distribute evenly. Dough that is too dry will crack, while dough that’s properly rested will feel supple and bounce back when pressed. Knead forcefully for about 10 minutes initially to create a strong dough structure, then roll out smoothly to about ½ inch thickness before cutting or shaping.
Pasta dough that doesn’t hold its shape after cooking often results from under-kneading, too much water, or incorrect ingredient ratios. Proper kneading develops the dough’s elasticity, allowing it to spring back and hold pasta shapes like curls or indentations. Using eggs that are too small can cause dryness, making the pasta crumble or fall apart. Aim for dough that is smooth, elastic, and holds together in one mass before rolling.
- Add moisture in small increments (one teaspoon at a time) to dry dough.
- Sprinkle flour gradually on sticky dough; avoid packing it in.
- Wrap dough in plastic and rest at room temperature for 30 minutes.
- Knead dough for about 10 minutes until smooth and elastic.
- Roll dough to an even thickness around ½ inch before cutting.
- Use large eggs or supplement small eggs with extra yolks for proper moisture.
Following these steps ensures pasta dough won’t tear during rolling or fall apart after cooking. The dough’s texture should feel like a soft but slightly firm ball that holds together without sticking excessively. Proper balance of ingredients and consistent kneading create dough that’s easy to handle and yields fresh pasta with the right bite and shape.
Creative Homemade Pasta Shapes and Serving Suggestions
Making fun pasta shapes by hand adds a personal touch to your meal and can improve fresh pasta from ordinary to memorable. Orecchiette is a classic shape you can try easily. Roll out a small piece of dough into a rope about ½-inch thick, then cut it into ½-inch segments. Press each segment gently with your thumb against a flat surface while pulling it toward you to create a small ear-shaped indentation. This shape holds sauce well, making it ideal for hearty vegetable or meat ragùs.
For gnocchi-style pasta, roll out the dough into ropes and cut into small ¾-inch pillows. You can shape the gnocchi by pressing each piece with a fork to create ridges or simply leave them as pillows for a softer bite. Boil fresh gnocchi for 2 to 3 minutes until they float to the surface. Serve gnocchi with browned butter, sage, or a simple tomato sauce.
Strozzapreti is slightly twisted pasta made by rolling small dough cylinders and twisting them between your fingers. They pair well with chunky sauces like sausage ragu or a simple garlic and olive oil dressing. To shape, roll dough into ropes, slice into 2-inch pieces, then twist each piece in opposite directions using both hands until you have a spiral form. This irregular shape traps sauce and adds texture.
Another easy shape is the simple pappardelle or tagliatelle cut from rolled dough sheets. Use a sharp knife or pizza cutter to slice noodles about ½-inch wide for pappardelle or thinner for tagliatelle. Dry the noodles slightly before cooking fresh for 1 to 2 minutes in boiling water. Serve with a butter and herb sauce or a rich meat ragu. Fresh pasta pairs best with lighter, less oily sauces to let the texture shine.
Presentation matters when serving homemade pasta. Use a wide, shallow bowl to display pasta nests topped with a sprinkle of grated Parmesan, fresh herbs like basil, and a drizzle of good extra virgin olive oil. This keeps the pasta warm and highlights the sauce and garnish. Adding colorful vegetables or a few toasted pine nuts can improve texture and appeal.
Season pasta water generously with at least 1 tablespoon of salt per 4 quarts of water to improve flavor right from the start. After cooking, reserve some pasta water to loosen the sauce as you toss it together. Finish the dish with a small pat of butter or a drizzle of olive oil for shine and richness. Freshly cracked black pepper and a light sprinkle of cheese add the final touch.
Fresh pasta cooks quickly; keep an eye on it to avoid overcooking and losing that tender bite you worked hard to achieve.
Step-by-Step Action Plan for Making Homemade Pasta
Follow these steps to make fresh pasta successfully from scratch, ensuring great texture and flavor every time.
- Before you start: Gather good quality flour (00 or all-purpose) and fresh eggs. This ensures your dough has the right structure and taste.
- Day 1: Make the pasta dough by mixing flour and eggs, kneading until smooth and elastic. It should spring back when pressed.
- Day 1: Let the dough rest for at least 30 minutes wrapped in plastic or a bowl cover to relax the gluten.
- Day 1: Roll out the dough using a pasta machine or manual rolling pin to your desired thickness, aiming for thin but not see-through sheets.
- Day 1: Cut and shape pasta by hand or with tools like cutters or molds, handling the dough gently to preserve shape.
- Day 1: Cook fresh pasta in boiling salted water for 1 to 3 minutes until al dente, tasting to check doneness.
- Day 1 or later: Store unused pasta by drying on racks for a few hours, freezing in sealed bags, or refrigerating tightly wrapped; use quickly to maintain quality.
- After cooking: Serve with your preferred sauces or toppings, pairing simple shapes with lighter sauces and thicker shapes with hearty ones.
Frequently Asked Questions
How to Make Pasta from Scratch at Home?
Start with flour, eggs, salt, and a bit of water. Mix and knead until smooth, then roll and shape. This process usually takes about an hour total.
How Is Pasta Made from Scratch?
Combine flour and eggs into a dough, knead well, roll thin, and cut the shapes you want. Fresh pasta cooks quickly, usually within a few minutes.
What Ingredients Are Needed for Fresh Pasta?
Four ingredients suffice: all-purpose flour, eggs, salt, and sometimes water. Using just these yields soft, chewy noodles.
How Easy Is It to Make Homemade Pasta?
It’s surprisingly simple and fun, with or without a machine. Making fresh pasta takes about an hour and can be done by any home cook.
Can I Make Fresh Pasta Without a Pasta Machine?
Yes, rolling dough by hand with a rolling pin works fine but takes more effort.
How Long Does Fresh Pasta Last After Making It?
Use fresh pasta within two days or freeze it for longer storage.
Before You Go
Making homemade pasta is a rewarding process that gives you full control over texture and flavor. Start with quality ingredients and take your time rolling and shaping for the best results. Your next step is to try shaping a simple pasta like fettuccine or pappardelle to experience how fresh pasta cooks and tastes. This hands-on practice will build your confidence for more creative shapes and dishes.