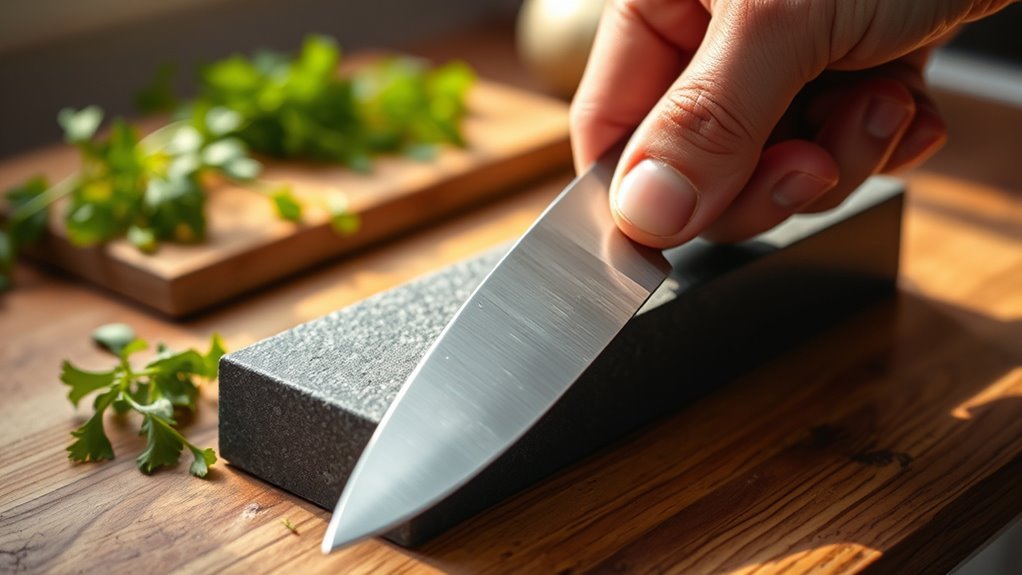
How to Sharpen a Kitchen Knife: A Step-by-Step Guide
Are you tired of struggling with dull knives that make meal prep frustrating? You’re not alone—many people find it challenging to keep their kitchen knives sharp and effective.
Luckily, sharpening your knives is simpler than you think with the right tools and techniques.
To sharpen your kitchen knife, first check for dullness by slicing paper or gently tapping your fingernail. Choose a sharpening tool like a whetstone for better control or a pull-through sharpener for convenience.
Prepare a stable, well-lit workspace and keep your knife clean and dry.
Maintain a consistent 15-20 degree angle while sharpening with smooth, even strokes, alternating sides. Finish by honing with a rod to keep the edge sharp longer.
Keep practicing to master safe techniques and avoid common sharpening mistakes.
Key Takeaways
- Clean and dry the knife, then set up a stable workspace with good lighting and a non-slip surface to keep everything safe while sharpening.
- Pick the right sharpening tool—whetstone for better control, pull-throughs if you’re just starting, or an electric sharpener for quick touch-ups.
- Keep a consistent sharpening angle of 15 to 20 degrees, and use light, controlled strokes. Alternate sides evenly to sharpen the blade effectively.
- After sharpening, polish the edge with fine grit stones or a leather strop. Gently feel the blade with your thumb to remove any burrs.
- Test how sharp your knife is by slicing through paper or tomato skin. Use a honing rod regularly to maintain the edge between proper sharpenings.
Why a Sharp Kitchen Knife Matters
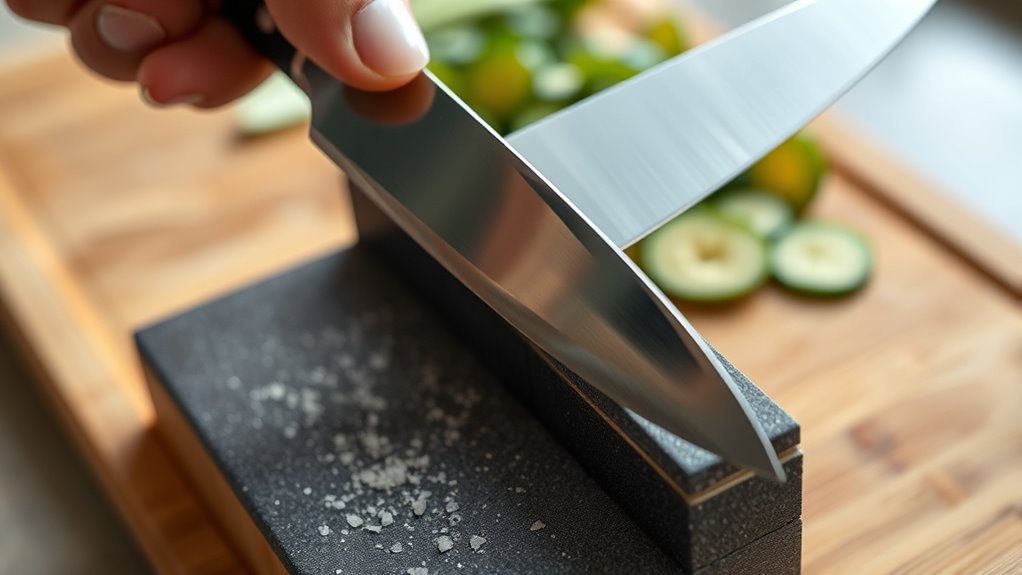
Although it might seem like a small detail, keeping your kitchen knife sharp makes a big difference in your cooking. When your knife is sharp, ingredients slice quickly and cleanly, which speeds up prep time.
A dull blade forces you to apply more pressure, increasing the risk of slipping and causing injury. That’s why knife safety is directly linked to sharpness.
Using a dull knife means more pressure and a higher chance of slipping—sharpness is key to safety.
You’ll have better control, reducing accidents in the kitchen. Plus, a sharp knife preserves the texture and appearance of your food, making your dishes look more appetizing.
Don’t overlook the importance of maintaining a sharp blade. It’s not just about convenience but also about protecting yourself and enhancing your overall cooking experience.
When you keep your knife sharp, you work smarter, safer, and more efficiently every time you cook.
How to Know When Your Kitchen Knife Needs Sharpening
You’ll know your kitchen knife needs sharpening when it starts having trouble cutting through food smoothly or keeps slipping instead of slicing cleanly. A good way to test it is by gently running the blade over a tomato’s skin or a piece of paper—if it tears rather than slices, that’s a sign it’s dull and needs some attention.
You should also take a close look at the blade’s edge. If you notice any nicks or dull spots, those are clear signs it’s time to sharpen the knife. Basically, if your knife isn’t performing like it used to, it’s probably ready for some sharpening.
Dullness Detection Techniques
How can you tell when your kitchen knife needs sharpening? Paying attention to dullness indicators is key for effective knife maintenance.
You can’t always rely on how a knife feels; simple tests help detect dullness before it affects your cooking.
Here’s a quick table to spot dullness signs:
| Test Method | What to Look For | What It Means |
|---|---|---|
| Paper Test | Knife tears or snags paper | Blade is dull |
| Fingernail Test | Blade slides off nail | Edge is blunt |
| Visual Inspection | Chips or shiny rounded edge | Needs sharpening soon |
Use these techniques regularly to keep your knives sharp and safe in the kitchen.
Cutting Performance Signs
Detecting dullness through tests is just the start. Your knife’s cutting performance gives you real-time feedback on its sharpness.
When your knife struggles to slice through ingredients like it usually does, it’s a clear sign it needs sharpening. If you find yourself applying extra pressure or the blade slips during cuts, the edge has likely dulled.
Different knife materials affect how quickly they lose sharpness. Softer steels dull faster than harder ones, so keep that in mind.
If your knife crushes rather than cleanly slices delicate foods like tomatoes or herbs, it’s time to sharpen. Paying attention to these signs helps keep your kitchen knives ready for precise, efficient cutting every time you cook.
Visual Edge Inspection
Although cutting performance shows a lot about your knife’s sharpness, a quick visual edge check can give you immediate clues. Look closely at the blade’s edge under good light. Tiny nicks, chips, or unevenness mean the edge isn’t aligned well and needs sharpening.
A perfectly sharp knife has a smooth, consistent edge without any visible damage or rounded spots. During your inspection, check for small dents or chips along the edge, light reflections, uneven or jagged edges, and dull-looking or rounded areas instead of a sharp line.
Spotting these visual signs early helps you keep your knife performing well and ensures safe use.
Picking the Best Sharpening Tool for Your Kitchen Knife
Which sharpening tool suits your kitchen knife best depends on your skill level, knife type, and how often you sharpen. Different sharpening types and tool materials affect results and ease of use.
For beginners, a pull-through sharpener with ceramic or carbide rods offers simplicity. If you’re experienced, whetstones give you more control for precise sharpening.
Electric sharpeners save time but may remove more metal, so they’re good for frequent use. Choose the right tool based on your needs and comfort level.
| Tool Type | Best For | Tool Materials |
|---|---|---|
| Pull-Through | Beginners, quick touch-ups | Ceramic, Carbide |
| Whetstone | Professionals, control | Waterstone, Oilstone |
| Electric | Regular sharpening | Diamond-coated, Ceramic |
Also, consider your knife’s blade material. Softer steel sharpens easily on whetstones, while harder steel benefits from diamond-based tools.
Matching your sharpening method and tool material helps keep your knife sharp and safe to use.
How to Prepare Your Knife and Workspace for Safe Sharpening
Before you start sharpening, make sure your knife is clean and dry. This helps prevent slipping and ensures you get an even edge. Proper prep is key for both safety and effective sharpening.
Set up your workspace so there’s a clear, stable surface free from clutter. This keeps distractions down and reduces the chance of accidents.
To get ready, try these steps:
- Place a non-slip mat or towel underneath your sharpening tool to keep it steady.
- Make sure you have good lighting so you can see the blade edge clearly.
- Keep your sharpening tools within easy reach to avoid unnecessary movement.
- Clear away any food debris or liquids to keep the area safe and hygienic.
Sharpening With a Whetstone: Step-By-Step
First, you’ll want to soak your whetstone a bit to get it ready for sharpening. Just dunk it in water and let it sit for about 10-15 minutes until it’s fully saturated. Once that’s done, you can start sharpening your knife.
As you work, make sure to keep the correct angle—usually around 20 degrees—so the blade gets a proper edge. Carefully slide the knife across the stone, applying gentle, consistent pressure. Take your time and keep the motion steady.
When you’re done sharpening, finish things off by polishing the edge. You can do this by running the knife along a finer grit stone or a leather strop to make the edge smooth and razor-sharp. And there you go—you’ll have a sharp, smooth knife ready for any task!
Preparing The Whetstone
To get the best results when sharpening your kitchen knife, you’ll need to properly prepare your whetstone. Start by selecting the right whetstone types—usually a coarse grit for dull edges and a fine grit for polishing.
Before use, soak the whetstone in water for about 10-15 minutes until no more bubbles appear. This keeps the stone lubricated during sharpening, which helps prevent damage to your knife and the stone itself.
Place the whetstone on a stable, non-slip surface to keep it steady during use.
Remember to:
- Soak the whetstone thoroughly
- Choose the correct grit based on your knife’s condition
- Keep the stone wet throughout sharpening
- Secure the stone to avoid slipping
These steps will prepare your whetstone for efficient and safe sharpening.
Correct Sharpening Angle
How do you maintain the perfect angle while sharpening your kitchen knife? The angle importance can’t be overstated. It directly affects the sharpness and longevity of your blade.
Most kitchen knives sharpen best at a 15 to 20-degree angle. To achieve this, hold the knife so the blade forms that angle against the whetstone’s surface.
Using consistent sharpening techniques, gently slide the blade back and forth, keeping the angle steady. If you struggle, try visualizing a small wedge between the blade and stone or use angle guides for accuracy.
Remember, maintaining this precise angle guarantees your knife edge sharpens evenly and efficiently. This makes your kitchen tasks smoother and safer.
Consistency here is key to mastering the sharpening process.
Finishing And Polishing
Although the main sharpening is done, you’ll want to move on to finishing and polishing your knife to refine the edge and remove any burrs. This step is essential for maintaining your edge, helping it stay sharp longer and cut smoothly.
Use gentle buffing techniques on the fine grit side of your whetstone or a leather strop to polish the blade. Focus on these key points:
- Use light, consistent strokes to avoid damaging the edge.
- Alternate sides to evenly polish both edges.
- Carefully feel the blade with your thumb to remove burrs.
- Finish with a leather strop or fine grit stone for a mirror-like shine.
These finishing touches will give you a razor-sharp edge and help your knife stay effective longer.
Maintaining Your Knife Edge With a Honing Rod
One simple tool you should keep in your kitchen is a honing rod, which helps maintain your knife’s edge between sharpenings. Unlike sharpening, honing doesn’t remove metal but realigns the blade’s edge, keeping it sharp and effective.
To hone properly, hold the rod vertically with the tip on a sturdy surface. Place your knife at a 15 to 20-degree angle against the rod, then gently draw the blade down and across it, applying light pressure. Repeat this 5 to 10 times on each side, using consistent techniques to ensure even edge realignment.
For rod maintenance, clean it regularly with warm water and mild detergent to remove metal particles and kitchen residue. Avoid dropping or banging the rod, as dents or chips can damage your knife’s edge. By using and caring for your honing rod correctly, you’ll extend your knife’s sharpness and reduce the need for full sharpening sessions.
Using an Electric Sharpener Safely and Effectively
While honing rods help keep your knife edge aligned, there comes a time when you need to sharpen the blade itself to restore its cutting power. Using an electric sharpener is a quick, efficient method, but it’s important to understand the different types and their safety features before you start.
Most models have slots for various sharpening stages, like coarse grinding and fine honing. To use one safely and effectively, start by reading the manufacturer’s instructions to familiarize yourself with your sharpener’s specific features.
Keep your fingers clear of the sharpening slots to avoid injury. Use steady, even pressure and let the machine do the work instead of forcing the knife through. Make sure your knife is dry and clean to prevent slipping during sharpening.
Testing Your Kitchen Knife’s Sharpness After Sharpening
Now that you’ve sharpened your knife, it’s a good idea to test how sharp it really is. One easy way is to try slicing through a sheet of paper—if it cuts smoothly without tearing, that’s a good sign. You can also see how well it cuts into a tomato’s skin; if it glides through effortlessly, you’re in business. And if you’re feeling a bit cautious, gently tapping your fingernail on the edge can give you a sense of how sharp and smooth the blade feels. These simple little tests will help you be confident that your knife is sharp and ready to tackle any kitchen task.
Paper Slice Test
The paper slice test is a quick and easy way to check your kitchen knife’s sharpness after sharpening. All you need is a sheet of standard printer paper—keep in mind, the quality of the paper can affect the test’s accuracy.
Hold the paper upright and slice through it with a smooth, controlled motion. A sharp knife will cut cleanly without snagging or tearing the paper.
Here are some tips for reliable results:
- Use regular printer paper for consistency.
- Hold the paper firmly but avoid crumpling it.
- Slice with a gentle forward motion instead of just pressing down.
- Watch to see if the knife cuts through effortlessly, leaving a clean edge.
This simple test helps you confirm whether your knife is ready for more delicate cutting tasks.
Tomato Skin Check
After you’ve confirmed your knife can slice through paper cleanly, it’s time to test how it handles something with a bit more resistance. Grab a ripe tomato and focus on your knife technique.
Hold the tomato steady and use a gentle sawing motion to slice through the skin without applying too much force. A sharp knife will glide smoothly, cutting cleanly without crushing the fruit.
If you struggle or the skin tears, your blade might need more sharpening. This tomato slicing test is important because it mimics typical kitchen tasks and shows any dull spots.
Fingernail Safety Tap
Anyone can quickly check their knife’s sharpness with a simple fingernail safety tap. This test lets you gauge the edge without risking injury.
To do it right, gently tap the knife’s edge against your fingernail at a shallow angle. If the blade catches or grips your nail, it’s sharp enough. If it slides, it probably needs sharpening.
Always be careful to protect your fingernail and use safe techniques to avoid cuts. Use gentle pressure so you don’t slip, and don’t tap too hard.
Hold your finger steady and keep it away from the blade’s path. Perform the test on the same nail each time for consistent results.
This quick check gives you a reliable way to see if your knife is sharp after sharpening.
Mistakes to Avoid When Sharpening Your Kitchen Knife
When sharpening your kitchen knife, you’ll want to steer clear of common mistakes that can dull the blade or even damage it. One key error is believing in sharpening myths, like using excessive force or sharpening every time you use your knife. These misconceptions can wear down your blade prematurely or cause uneven edges.
Avoid using the wrong angle when sharpening; maintaining a consistent angle guarantees an even, sharp edge. Also, don’t neglect cleaning your sharpening tools—they can get clogged with metal filings that reduce their effectiveness.
Another mistake is rushing the process; sharpening takes patience and controlled movements. Avoid using damaged or inappropriate sharpening stones or tools, as they can harm your knife’s blade. Finally, don’t sharpen a knife with chips or significant damage without professional help, as this can make things worse.
Tips to Keep Your Kitchen Knife Sharp Longer
Avoiding common sharpening mistakes sets a solid foundation, but keeping your kitchen knife sharp longer requires consistent care and smart habits. You can extend the edge life by adopting effective knife maintenance tips and choosing the right kitchen storage solutions. Proper handling and storage prevent unnecessary dulling and damage.
Here are some key tips to keep your knife sharp:
- Always hand wash and dry your knife immediately to avoid corrosion.
- Use a honing steel regularly to realign the blade’s edge.
- Store your knives in a magnetic strip or a knife block to protect the blade.
- Cut on softer surfaces like wood or plastic instead of glass or stone.
Frequently Asked Questions
Can I Sharpen Serrated Kitchen Knives at Home?
Yes, you can sharpen serrated kitchen knives at home using the right techniques and tools. A ceramic sharpening rod or a specialized serrated knife sharpener works best for this.
Focus on gently working each serration, matching the original bevel angle to keep the scalloped edges intact. Avoid using a flat sharpening stone, as it can damage the serrations.
With patience and care, you’ll be able to keep your serrated knives sharp and effective right in your own kitchen.
How Often Should Professional Chefs Sharpen Their Knives?
In terms of sharpening frequency, professional chefs don’t let their knives gather dust. They usually sharpen their blades weekly or even daily, depending on use, to keep them razor-sharp.
It’s part of professional practices to maintain precision and efficiency in the kitchen. If you want to keep your knives in top shape like the pros, don’t wait for the blade to get dull.
Sharpen often and keep your edge on point.
What Materials Are Best for Sharpening Stones?
You’ll want to choose sharpening stones based on grit levels and material. Water stones are popular because they sharpen quickly and come in a range of grits.
Diamond plates last longer and work well on hard steels. Ceramic rods are great for quick touch-ups and maintaining edges. Oil stones provide a slower, more controlled sharpening process.
Sharpening steels don’t actually sharpen blades but help keep your edges in good shape between sharpenings. Pick the right tool based on your knife’s condition and your sharpening style.
Can Sharpening Damage My Knife’s Blade or Handle?
Yes, sharpening can damage your knife’s blade or handle if you don’t use proper techniques. Applying too much pressure or using the wrong angle can wear down the blade unevenly or chip it.
Aggressive sharpening near the handle might also loosen it over time. To avoid this, focus on good knife maintenance by using the right tools and techniques.
Sharpen gently and consistently for a sharp, long-lasting blade. That way, you keep your knife in great shape without risking damage.
Are There Eco-Friendly Sharpening Options Available?
Yes, you can choose sustainable sharpening options that reduce environmental impact. Look for natural abrasives like river stones or sandstone, which are eco-friendly alternatives to synthetic materials.
These natural options are effective and gentle on your knife’s blade while supporting sustainable sharpening practices. By opting for tools made from renewable resources, you’re not only maintaining your knives but also protecting the planet.
Don’t hesitate to investigate these green sharpening solutions!
Conclusion
So, now that you’ve mastered the ancient art of knife sharpening, you’re basically a kitchen ninja. Forget dull blades—your veggies won’t know what hit them. Just don’t start sharpening everything in sight, or you might get labeled “that person” at dinner parties.
Keep your knives sharp, your fingers safer, and your chopping on point. Because honestly, who wants to wrestle with a dull knife when you can slice with surgical precision?
Happy sharpening, chef! Remember to regularly sharpen your kitchen knives to maintain their edge and make your cooking easier and safer.