How to Disguise Kitchen Soffits: A Step-by-Step Guide
Many homeowners find kitchen soffits to be a tricky design feature—either they feel outdated or just don’t blend with their style. You’re not alone; figuring out how to disguise or update soffits can be a real challenge.
Luckily, there are simple, creative ways to transform them into a stylish part of your kitchen.
To disguise your kitchen soffits, start by measuring them accurately to guarantee a perfect fit for your chosen update. You can paint them to match your ceiling or use subtle wallpaper or fabric for texture.
Adding decorative panels, crown molding, or built-in storage makes them both stylish and functional. Incorporate lighting like LED strips or recessed spots to shift focus away.
If soffits are outdated or damaged, consider removal or rebuilding. Keep exploring to uncover even more creative transformation ideas.
Key Takeaways
- Measure soffit dimensions accurately and prepare surfaces by cleaning and repairing before applying any disguise materials.
- Paint soffits to match the ceiling or use contrasting colors to create intentional design features.
- Apply textured wallpaper or fabric with small-scale prints for subtle disguise and to boost your kitchen’s look.
- Install decorative panels, crown molding, or custom shelving to add style and functional storage to soffits.
- Use LED strip lights or recessed lighting to shift focus away from soffits or consider removal for a fresh look.
Why Your Kitchen Soffits Might Need a Refresh
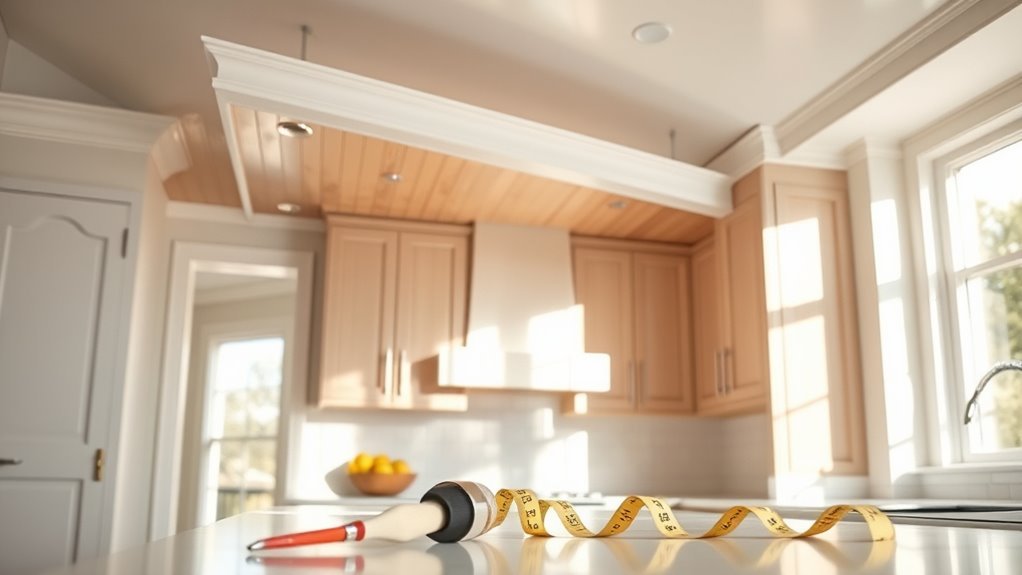
Although soffits often go unnoticed, they play a big role in your kitchen’s overall look. If your soffits look outdated or don’t match, they can drag down your kitchen’s style, even if the rest of the space is modern.
Revitalizing your soffits can instantly improve their appearance, giving your kitchen a cleaner, more cohesive look. When you’re renovating, it’s easy to focus on cabinets, countertops, and floors, but don’t forget about your soffits.
Refreshing your soffits instantly sharpens your kitchen’s look—don’t overlook them during renovations.
They frame your upper cabinets and can either blend in or stand out awkwardly. A well-designed soffit can boost your kitchen’s flow and make the space feel more polished.
If your soffits are stained, chipped, or poorly finished, it’s a sign they need some attention. Addressing them early in your renovation helps you avoid a disjointed look and creates a balanced, fresh, inviting kitchen.
Measuring Your Kitchen Soffits the Easy Way
Once you’ve decided to refresh your soffits, the next step is to get accurate measurements. Proper soffit dimensions are key for a seamless disguise. Grab your measuring tools—like a tape measure, level, and pencil—to ensure precision.
Start by measuring the length, width, and height of each soffit section. Write down your numbers right away to avoid mistakes. Measure multiple points if walls aren’t perfectly even.
Here’s a simple table to help you organize your measurements:
| Soffit Section | Dimension Type | Measurement (inches) |
|---|---|---|
| Section 1 | Length | |
| Section 1 | Width | |
| Section 1 | Height | |
| Section 2 | Length | |
| Section 2 | Width |
Double-check your readings before moving on. Accurate measurements will make your next steps much easier and help you disguise your kitchen soffits perfectly.
Paint and Wallpaper Tricks to Hide Soffits
A fresh coat of paint or a well-chosen wallpaper can instantly transform your kitchen soffits from an eyesore into a subtle design feature. Using smart paint techniques and wallpaper styles, you can make soffits blend seamlessly or stand out tastefully. Here’s how to approach it:
A fresh paint or wallpaper update can turn kitchen soffits from eyesores into elegant design details.
- Match the ceiling color: Paint soffits the same shade as your ceiling to visually minimize their presence with a smooth, continuous look.
- Use contrasting paint: Choose a color that complements your cabinets or walls to turn soffits into an intentional design element.
- Select textured wallpaper styles: Apply subtle textures or patterns that add depth without overwhelming the space.
- Incorporate bold patterns sparingly: Pick wallpaper with small-scale prints to avoid drawing too much attention but still disguise imperfections.
Use Decorative Panels or Beadboard on Kitchen Soffits
Thinking about sprucing up your kitchen soffits? Why not try using decorative panels or beadboard? They can really add a touch of charm and character to your space. Just pick out some panels that match your style, and make sure to prep the soffit surface so everything goes on smoothly.
Once you’ve got everything ready, grab the right tools and get to work. It’s pretty straightforward, and before you know it, those panels will be up, giving your kitchen a fresh, polished look. It’s a simple way to make a big impact!
Choosing The Right Panels
When selecting panels for your kitchen soffits, decorative panels and beadboard are great options to enhance your space’s style. Consider these key points to find the right fit.
First, look at the panel materials. Choose durable options like MDF or PVC that resist moisture and are easy to clean. This helps keep your kitchen looking fresh.
Next, think about the design style. Match the panels with your kitchen’s overall look, whether it’s modern, rustic, or traditional. This creates a cohesive and polished appearance.
Then, decide on the texture and pattern. You can go with smooth surfaces, embossed designs, or grooved patterns. Beadboard adds charm with its distinctive vertical lines.
Finally, pick a color and finish that complement your cabinetry and walls. Whether painted, stained, or in natural wood tones, the right finish ties everything together.
Preparing Soffit Surface
Three key steps will get your kitchen soffits ready for decorative panels or beadboard installation. First, clean the soffit surface thoroughly to remove dust, grease, and any loose paint. This guarantees proper adhesion of your soffit materials.
Next, inspect the surface for damage like cracks or holes. Fill these imperfections with wood filler or spackle, then sand smooth. This creates an even base for your panels.
Finally, prime the soffit with a quality primer suited for your chosen soffit materials. This step improves durability and paint adherence. Taking these careful steps will make your soffits look polished and ready for the makeover without any issues during installation.
Proper surface preparation sets the foundation for a flawless finish.
Installing Beadboard Panels
Begin by measuring your soffit carefully to ensure each beadboard panel fits perfectly.
Choosing the right beadboard style can really boost your kitchen’s look, so pick one that matches your décor.
Use these tips to make the installation smooth:
- Cut panels to size with a fine-toothed saw for clean edges.
- Apply adhesive to the back of each panel to help it stay in place.
- Secure panels with finishing nails, spacing them evenly along the edges.
- Fill nail holes and seams with wood filler, then sand smooth before painting.
Following these steps will give your soffits a fresh, decorative look that blends seamlessly with your kitchen’s style.
Add Crown Molding to Upgrade Kitchen Soffits
Adding crown molding instantly transforms plain soffits into stylish architectural features that enhance your kitchen’s overall look. To start, choose crown molding styles that match your kitchen’s décor—whether it’s traditional, modern, or ornate.
Measure the soffit perimeter carefully so you can cut your molding pieces accurately. Use a miter saw to create clean 45-degree angles for seamless corners.
For installation, apply a high-quality construction adhesive to the back of the molding, then press it firmly against the soffit. Secure it further with finishing nails, making sure to countersink them slightly.
Fill nail holes with wood filler for a smooth finish. Finally, caulk any gaps between the molding and soffit to create a polished look.
Install Open Shelving or Cabinets on Kitchen Soffits
Maximize your kitchen’s storage and style by installing open shelving or cabinets on your soffits. This not only hides those awkward spaces but also adds a fresh, functional touch to your kitchen.
Choose shelving styles that match your decor—whether it’s rustic wood, sleek metal, or minimalist glass. Pick cabinet colors that blend with your existing cabinets for a seamless look or contrast boldly to create a focal point.
Measure your soffits carefully to ensure your shelves or cabinets fit perfectly without crowding the space. Secure them firmly to the soffits, keeping safety and durability in mind.
Create Functional Storage Inside Kitchen Soffits
Transform your kitchen soffits into smart storage spaces by making use of the often-overlooked area inside them. You can boost organization by adding custom shelves or pull-out drawers, turning unused space into practical storage.
This creative approach keeps your kitchen essentials neatly tucked away but still easy to reach. Think about what you want to store and design compartments tailored to those items—spices, baking sheets, or small appliances all fit well.
Using adjustable shelving adds flexibility, so your storage can change as your needs evolve. Here’s a quick guide:
| Storage Type | Ideal For |
|---|---|
| Pull-out drawers | Baking sheets, trays |
| Adjustable shelves | Spices, jars |
| Hidden compartments | Small appliances |
Incorporate Lighting to Distract From Kitchen Soffits
While creating storage inside your kitchen soffits helps utilize space effectively, lighting offers another way to shift attention away from them.
By incorporating ambient lighting and accent illumination, you can transform these areas from eyesores into design highlights. Here’s how to do it:
- Install LED strip lights along the soffit edges to cast soft ambient lighting. This brightens the space without overwhelming it.
- Use recessed spotlights aimed at nearby walls or cabinets for subtle accent illumination that distracts from soffit lines.
- Add under-cabinet lighting below the soffits to create a warm glow that emphasizes your countertops and backsplash.
- Consider battery-operated puck lights inside soffit storage areas to improve functionality and draw focus inward rather than outward.
Cover Kitchen Soffits With Fabric or Wallpaper Murals
Thinking about sprucing up your kitchen soffits? One fun idea is to cover them with fabric or wallpaper murals. It’s a simple way to add some personality and make your space feel more put together. First, pick patterns or designs that match your style and complement the rest of your kitchen.
Next, you’ll want to prep the soffit surfaces to make sure everything sticks nicely and looks smooth. Measure carefully so your fabric or wallpaper fits perfectly without wrinkles or gaps. Then, using a good adhesive, carefully apply your chosen material, smoothing out any bubbles as you go.
In the end, you’ll have a stylish focal point that not only hides those plain soffits but also gives your kitchen a fresh, custom look. It’s a pretty easy update that really makes a difference!
Choosing Fabric Patterns
How do you pick the perfect fabric pattern to cover your kitchen soffits? Start by understanding fabric types, since some handle humidity better than others. Then, focus on pattern choices to make sure your selection complements your kitchen’s style without overwhelming the space.
Choose moisture-resistant fabric types like polyester blends for durability. Opt for patterns that coordinate with your existing colors and textures. Consider the scale—small patterns work well on compact soffits, while larger prints suit bigger areas.
Finally, pick designs that add visual interest but don’t clash with your cabinets or walls. This way, your soffit covering will look great and stay functional.
Preparing Soffit Surfaces
Selecting the right fabric or wallpaper mural sets the tone, but proper surface preparation guarantees your soffit covering adheres smoothly and lasts. Start by cleaning the soffit materials thoroughly. Remove dust, grease, and grime with a mild detergent and water.
Let the surface dry completely before moving on. Inspect for any cracks, holes, or uneven spots. Fill these with spackle or wood filler and sand them smooth once dry.
If your soffits are glossy or slick, lightly sand them to create a better grip for adhesives. Finally, wipe down the surface with a damp cloth to remove sanding dust.
This careful surface preparation assures your fabric or wallpaper mural sticks well and resists peeling, giving your kitchen soffits a flawless, refreshed look.
Applying Wallpaper Murals
Applying wallpaper murals to your kitchen soffits can turn a simple space into a stylish focal point. With trends constantly changing, you have lots of creative options to match your kitchen’s vibe. Here’s how to do it right:
First, measure your soffits carefully to ensure a perfect fit. Next, clean and smooth the surface to remove any imperfections.
You can use wallpaper adhesive or peel-and-stick murals for easier installation. Carefully align the mural and smooth out any bubbles with a wallpaper brush or squeegee.
When to Remove or Rebuild Kitchen Soffits
Although soffits can add character to your kitchen, consider removing or rebuilding them if they look outdated, are damaged, or limit your storage and lighting options. Think about how the change will affect both the look and functionality of your space.
Rebuilding soffits is a great way to modernize your kitchen and add better lighting or storage solutions. When deciding, ask yourself how each option aligns with your style and needs.
Here’s a quick emotional guide to help you decide:
| Feeling | Reason to Remove | Reason to Rebuild |
|---|---|---|
| Frustrated | Blocks natural light | Improves lighting options |
| Overwhelmed | Restricts cabinet space | Adds smart storage solutions |
| Disappointed | Shows visible damage or wear | Updates old, dated design |
| Excited | Ready for a fresh start | Opportunity to customize |
| Confident | Enhances kitchen flow and value | Balances style and function |
Choose the option that best fits your kitchen’s needs and your personal style.
Frequently Asked Questions
What Tools Do I Need to Start Disguising Kitchen Soffits?
You’ll need a few essential tools to get started on your soffit design trends project. Grab a measuring tape, pencil, and level to guarantee precise measurements.
A saw and drill will help you cut and attach materials for creative camouflage. Don’t forget sandpaper for smoothing edges and paintbrushes or rollers for finishing touches.
With these tools, you’ll effortlessly transform your soffits into stylish, disguised features that blend perfectly with your kitchen’s look.
Can Disguising Soffits Increase My Home’s Resale Value?
Think of disguising soffits as giving your kitchen a fresh coat of paint that hides imperfections. Yes, it can boost your home’s resale potential by aligning with current design trends that favor sleek, clean lines.
Buyers often appreciate updated, cohesive spaces, so updating soffits can make your kitchen feel more modern and inviting. This simple change can set your home apart, making it more appealing in a competitive market.
Are There Budget-Friendly Materials for Soffit Makeovers?
Yes, you can find budget-friendly soffit alternatives that work great for your makeover. Materials like beadboard panels, plywood, or even decorative wallpaper are affordable options you can easily install yourself.
These DIY choices let you customize your kitchen without breaking the bank. Plus, painting or staining these materials can give your soffits a fresh, modern look that blends seamlessly with your space.
How Long Does a Typical Soffit Disguise Project Take?
You’ll plan, measure, cut, and install—each step flowing smoothly. A typical soffit disguise project usually takes a weekend or two, depending on your chosen design options and your experience with installation.
Simple drywall or trim updates might be finished in a day, while more intricate woodwork or lighting additions can take longer. If you’re organized and prepared, you’ll be able to transform your space efficiently without unnecessary delays.
Can I Disguise Soffits Myself, or Should I Hire a Pro?
You can definitely disguise soffits yourself if you’re comfortable with DIY techniques like measuring, cutting, and painting. Many homeowners successfully tackle this project with some patience and basic tools.
However, if you’re unsure about structural elements or want a flawless finish, it’s a good idea to seek professional advice. Pros can guarantee safety, efficiency, and a polished look.
Ultimately, it depends on your skill level and how much time you want to invest.
Conclusion
Now that you know these clever ways to disguise your kitchen soffits, imagine the transformation just around the corner. It might seem like a small detail, but once you disguise them, your kitchen’s entire vibe changes—more stylish, spacious, and inviting.
Don’t rush to remove your soffits. Sometimes, the best solution is right in front of you. A simple change can make a huge difference in how your kitchen feels and looks.
Ready to reveal the kitchen you never thought was possible? The secret’s in how you treat those soffits. With a little creativity, you can turn a tricky space into a stunning feature.