How to Pack a Kitchen: A Step-by-Step Guide
Moving your kitchen can feel overwhelming—there’s so much to pack, organize, and protect. You’re not alone; many people struggle with making the process smooth and stress-free. Luckily, with a bit of planning, you can get it done quickly and efficiently.
To pack your kitchen efficiently, start by decluttering. Sort items into keep, donate, or discard piles and clean as you go.
Gather sturdy boxes, bubble wrap, and tape, using towels or newspapers as eco-friendly cushioning. Wrap fragile items carefully, label boxes clearly, and pack pantry goods securely. Organize boxes by weight for safer transport.
Take it step-by-step, and you’ll protect your kitchenware while saving time. Keep going, and you’ll find helpful tips to make unpacking just as smooth.
Key Takeaways
- Declutter by sorting kitchen items into keep, donate, and discard piles while cleaning surfaces and checking expiration dates.
- Gather sturdy boxes, bubble wrap, packing tape, and consider budget-friendly or eco-friendly alternatives for packing supplies.
- Wrap fragile items individually, use dividers, and pack small appliances with cords labeled and cushioned properly.
- Organize pantry items by discarding expired goods, using airtight containers, and placing heavier items at the bottom of boxes.
- Clearly label boxes with contents, color code by category, and stack heavier boxes on the bottom during transport.
How to Declutter Your Kitchen Before Packing
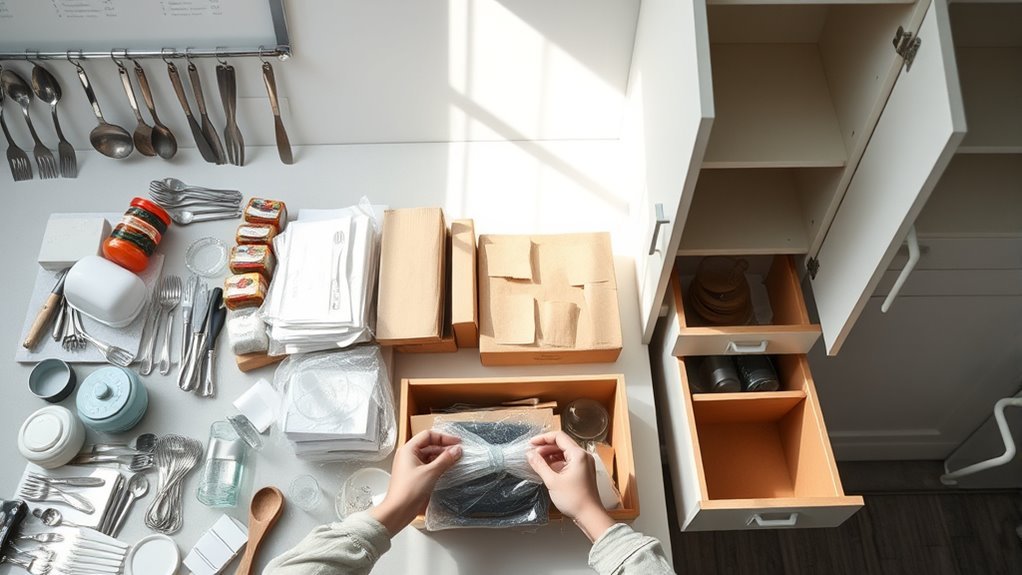
Before you start packing, take some time to declutter your kitchen to make the process smoother and more efficient. Begin by sorting through your cabinets, drawers, and pantry.
Use simple decluttering strategies like categorizing items into keep, donate, and discard piles. This helps you identify what you truly need and what’s just taking up space.
Categorize your kitchen items into keep, donate, and discard to streamline packing and clear out clutter.
Focus on kitchen organization by grouping similar items together—pots with pots, utensils with utensils. This way, you’ll pack more logically and avoid unnecessary clutter in your new space.
Don’t forget to check expiration dates on food and toss anything outdated. Decluttering also gives you a chance to clean surfaces and cabinets, making packing easier.
How to Gather Packing Supplies for Your Kitchen
When you’re getting ready to pack up your kitchen, it’s all about having the right supplies. Think sturdy boxes, plenty of bubble wrap, and some good packing tape to keep everything secure. You can find these supplies at local stores, check out online options, or even swing by your grocery store—they often have spare boxes or containers you can use.
And hey, don’t forget to get a bit creative with your supplies. Reusing old containers or jars can save you some money and reduce waste. Plus, asking neighbors if they have any spare boxes or packing materials is a great way to gather supplies without spending extra. It’s all about being resourceful and making sure your kitchen items stay safe during the move!
Essential Packing Materials
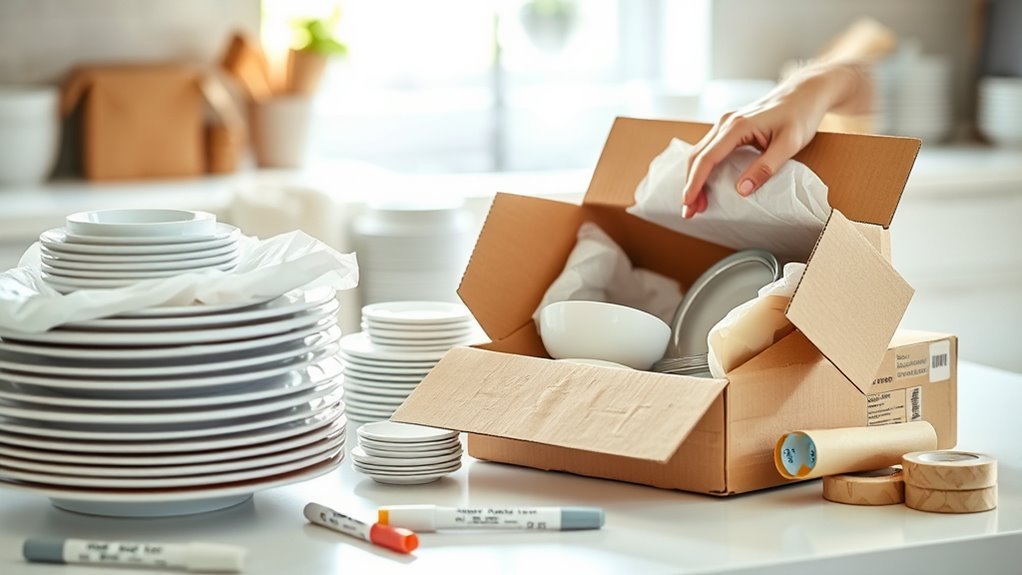
Gathering the right packing materials makes the kitchen packing process much smoother and safer. Start with sturdy cardboard boxes in various sizes to fit different items. Use packing tape to seal boxes securely.
Wrap fragile dishes and glassware in bubble wrap or foam sheets for extra protection. Packing paper works well for filling gaps and preventing movement inside boxes. Ziplock bags are perfect for organizing small items like screws or utensils.
Marker labels help you keep track of what’s inside each box, making unpacking easier. Dish towels and moving blankets provide padded layers for delicate cookware. Finally, packing peanuts add cushioning to fragile packages, ensuring nothing shifts during transit.
With these essentials on hand, you’ll protect your kitchenware and stay organized throughout your move.
Where To Buy Supplies
Where can you find reliable packing supplies without breaking the bank? Start by exploring local stores like hardware shops or specialty shops that often carry eco-friendly materials designed for kitchen items. You’ll find sturdy boxes, bubble wrap, and tape made for fragile goods.
Online options are great too, offering convenience and variety, especially if you’re looking for bulk purchases to save money. Don’t forget discount retailers—they often stock quality packing supplies at lower prices.
When buying, consider these tips: check reviews for durability, compare prices across platforms, and prioritize eco-friendly materials to reduce waste. By combining local stores, online options, specialty shops, and discount retailers, you’ll quickly gather everything you need to pack your kitchen securely.
Budget-Friendly Packing Options
Finding the right packing supplies doesn’t have to drain your wallet. You can find budget-friendly and eco-friendly options that protect your kitchen items without overspending.
Look for reusable containers, recycled boxes, and biodegradable packing peanuts. Thrift stores and online marketplaces often have affordable supplies. Using towels and newspapers you already have can double as cushioning, saving money and reducing waste.
| Packing Supply | Budget-Friendly/Eco Option |
|---|---|
| Boxes | Recycled boxes from stores |
| Bubble wrap | Towels or blankets as padding |
| Packing peanuts | Biodegradable peanuts |
| Tape | Paper tape |
| Labels | Recycled paper or masking tape |
These smart choices keep costs low and support sustainability while securing your kitchen items for the move.
How to Choose Packing Materials for Kitchen Items
When you’re packing up your kitchen, it’s important to choose sturdy packing materials that can handle the weight and shape of your items. Think about the fragility of some pieces—like glassware or ceramics—and remember, they need extra protection. Picking the right padding is really the key to making sure everything arrives safely. So, let’s take a look at how to match the best materials to your specific kitchenware.
Selecting Durable Packing Supplies
Because kitchen items vary in shape, size, and fragility, choosing the right packing materials is essential to protect them during your move. You’ll want durable boxes that can hold heavy cookware without breaking and strong tape to secure everything tightly.
Look for eco-friendly options like recycled cardboard and biodegradable packing peanuts to reduce waste while maintaining packing efficiency. Bubble wrap and foam sheets provide cushioning, but you can also use towels or cloths you already have for padding.
Don’t forget sturdy markers to label boxes clearly. Selecting high-quality supplies not only safeguards your kitchenware but also streamlines unpacking. By focusing on durability and sustainability, you’ll make your packing process smoother and more responsible without sacrificing protection or organization.
Protecting Fragile Kitchenware
Three key packing materials will keep your fragile kitchenware safe during a move: bubble wrap, packing paper, and sturdy boxes. Bubble wrap cushions your delicate items, but if you’re environmentally conscious or out of stock, consider alternatives like foam sleeves or corrugated cardboard.
Wrap each item individually with packing paper to prevent scratches and fill empty spaces to avoid shifting. Use sturdy boxes labeled “Fragile” to alert movers.
Don’t forget kitchenware insurance; it’s essential to protect your valuables in case of damage. Check if your moving company offers coverage or buy a separate policy.
How to Pack Fragile Glassware and Dishes Safely
Packing fragile glassware and dishes requires careful attention to prevent breakage during your move. Start by gathering proper glass storage solutions like sturdy boxes and plenty of cushioning materials.
Wrap each item individually with bubble wrap or packing paper, focusing on edges and handles. Use kitchen packing tips like placing heavier items at the bottom and lighter ones on top. Never overcrowd boxes to avoid pressure on fragile pieces.
To help organize your packing, here’s a handy table:
| Item Type | Wrapping Material | Placement in Box |
|---|---|---|
| Wine Glasses | Bubble wrap | Upright, separated by dividers |
| Plates | Packing paper | Stacked vertically, cushioned |
| Bowls | Bubble wrap or towels | Cradled with padding |
| Cups & Mugs | Packing paper | Upright, spaced apart |
Following these steps will help your glassware and dishes arrive safely at your new home without cracks or chips.
How to Wrap and Protect Pots, Pans, and Utensils
When it comes to wrapping and protecting your pots, pans, and utensils, start by gathering your supplies—things like bubble wrap, dish towels, or packing paper work really well. You don’t want to skimp on this part because proper wrapping can make a huge difference.
Wrap each item carefully, making sure to cover all the surfaces. This helps prevent scratches, dents, and any damage that might happen during the move. It’s a good idea to use enough padding so everything stays secure and snug in the boxes. With the right packing techniques, your kitchenware will arrive in great shape and stay organized when you unpack.
Wrapping Materials Needed
Before you start wrapping your pots, pans, and utensils, gather the right materials to make sure they stay protected during the move.
You’ll need bubble wrap to cushion fragile or non-stick surfaces, preventing scratches and dents. Packing paper is perfect for wrapping utensils and smaller kitchen tools to avoid scratches and keep them organized.
Avoid using newspaper, as ink can transfer and stain your items. Have some sturdy tape on hand to secure the wrapping tightly.
For extra protection, you might want to use foam sheets or old dish towels as padding for heavier pots and pans. With these materials ready, you’ll make sure your kitchenware arrives safely without damage or mess.
Safe Packing Techniques
Once you have your wrapping materials ready, start by protecting your pots and pans individually to prevent scratches and dents. Use safe packing strategies to keep everything secure and organized.
Wrap fragile utensils in bubble wrap or dish towels to avoid damage. Remember, proper kitchen organization tips include packing heavier items at the bottom and lighter ones on top to maintain balance.
To protect your cookware effectively, line your boxes with packing paper for extra cushioning. Wrap each pot and pan separately with bubble wrap or packing paper.
Bundle utensils together in a tight cloth or small box to prevent shifting. This way, everything stays safe and organized during the move.
How to Pack Small Appliances and Electronics
Packing small appliances and electronics needs careful handling to avoid damage during your move. Start by unplugging and thoroughly cleaning each device.
Wrap fragile parts, like glass blender jars or coffee maker carafes, in bubble wrap or packing paper to keep them safe. Use original boxes if you still have them—they’re made to protect your items best.
Protect fragile parts with bubble wrap and use original boxes whenever possible for the best safety.
If you don’t have the original boxes, pick sturdy ones and cushion the bottom with packing peanuts or crumpled paper. Keep cords and accessories together in labeled bags, and tape them securely to the appliance or put them inside the box.
Avoid wrapping cords tightly around devices, as this can cause damage. Label each box clearly with its contents and the room where it belongs. Don’t overload boxes—heavy appliances should be manageable and secure.
Following these steps will help your small appliances and electronics arrive safely and ready to use in your new kitchen.
How to Pack and Organize Pantry Items
After securing your small appliances, turn your attention to the pantry. Proper pantry organization is key to keeping your food safe and easy to access during your move. Start by sorting through your pantry items—get rid of expired goods and group similar products together. This makes packing smoother and helps prevent clutter.
When packing pantry items, follow these simple steps:
- Use sturdy boxes lined with shelf liners or plastic to prevent spills.
- Place heavier items, like canned goods, at the bottom and lighter ones on top.
- Secure bags of flour, sugar, or snacks in airtight containers or resealable bags to keep pests out and prevent spills.
How to Label Kitchen Boxes for Easy Unpacking
Although labeling might seem like a small step, it makes a big difference when you’re unpacking your kitchen boxes. To make things easier, use clear labels that quickly tell you what’s inside each box. Write specific descriptions like “plates and bowls” or “spices and oils” on your boxes. You can also add fragile or heavy warnings when needed.
Color coding works really well too. Pick a color for each category—blue for cookware, red for dishes, green for pantry items. Use colored stickers or markers on the boxes and make a simple chart to keep track. That way, when you get to your new kitchen, you’ll instantly know where each box goes without opening all of them.
How to Safely Load and Transport Kitchen Boxes
When you’re ready to load your kitchen boxes for transport, organizing them by weight and fragility helps prevent damage. Place heavier boxes on the bottom and lighter, fragile ones on top. This stacking method keeps everything stable during the move.
Organize kitchen boxes by weight—heavier on the bottom, lighter fragile ones on top—for a stable move.
Here are some essential transport tips to follow:
- Secure boxes with straps or bungee cords to prevent shifting.
- Fill gaps with soft items like towels to cushion fragile boxes.
- Load boxes tightly together to minimize movement.
Also, handle fragile boxes carefully—avoid tossing or dropping them. Keep breakables upright and clearly marked. If you’re using a moving truck, load from heaviest to lightest and consider using a dolly to make lifting easier.
How to Unpack and Set Up Your Kitchen
Now that your kitchen boxes are safely transported, it’s time to unpack and set up your kitchen efficiently. Start by evaluating your layout to plan where to place appliances for smooth workflow.
Prioritize essentials first—unpack everyday items like cookware and utensils to create functional zones for meal prep, cooking, and cleaning.
Use smart storage solutions like drawer organizers and adjustable shelves to maximize space, making everything easier to access and keeping clutter at bay.
Group similar items together to speed up your routine and stay organized. As you arrange, focus on placing frequently used appliances within easy reach.
Finally, add some decorative touches that match your style without sacrificing practicality. This will help your kitchen look great and work well.
Frequently Asked Questions
How Far in Advance Should I Start Packing My Kitchen?
You should start your packing timeline about two to three weeks before your move. Begin by packing non-essential items first, like specialty gadgets and extra dishes.
Leave your kitchen essentials, such as daily cookware, utensils, and appliances, until the last few days. This keeps cooking manageable and prevents disruption.
This way, you can gradually reduce clutter without feeling overwhelmed. Sticking to this timeline helps you stay organized and ensures you have what you need until moving day.
What Should I Do With Leftover Food Before Moving?
Before moving, plan your meals to use up perishable food and cut down on waste.
Donate unopened, non-perishable items to local food banks or shelters—they’ll really appreciate it.
Avoid packing leftover perishables since they can spoil during transit.
By meal planning, you’ll reduce leftover food, making your move smoother and less stressful.
This way, you save money, help others, and start fresh at your new home.
Are There Any Items I Should Avoid Packing Myself?
You should avoid packing large kitchen appliances like refrigerators and ovens yourself, as they need professional handling.
Also, steer clear of packing hazardous items such as propane tanks or cleaning chemicals.
For delicate gadgets, don’t skimp on quality packing materials. Use bubble wrap and sturdy boxes to protect them.
If you’re unsure about certain items, it’s best to consult professionals to ensure everything arrives safely.
How Can I Keep Knives Safe During the Move?
Did you know that over 150,000 people visit emergency rooms every year because of kitchen knife injuries? That’s a good reason to be extra careful during your move.
To keep your knives safe, wrap each blade in bubble wrap or thick packing paper, then secure them with tape. This helps prevent accidents and keeps the blades from shifting.
Use a knife block or a sturdy container to store your knives. That way, they won’t move around and get damaged or cause injuries.
Choose packing materials that cushion and separate the blades. This protects your knives’ edges and keeps everyone safe during the move.
What Is the Best Way to Handle Perishable Kitchen Items?
You should handle perishable kitchen items by prioritizing proper storage to keep them safe. Use coolers with ice packs for items like dairy, meat, and seafood during transport.
Plan your move so these foods spend as little time as possible without refrigeration. If your move takes over a day, it’s best to eat, donate, or throw away perishables beforehand.
Keeping temperatures low and reducing exposure to air helps prevent spoilage and keeps your food safe.
Conclusion
Packing your kitchen might seem overwhelming, but by decluttering, gathering the right supplies, and carefully protecting each item, you’re setting yourself up for a smooth move.
Remember to label everything clearly and organize your pantry thoughtfully. When you unpack, your effort will pay off in a kitchen that feels like home right away.
After all, isn’t a well-packed kitchen the first step toward a fresh start in a new space? Properly packing your kitchen makes the move easier and helps you settle in faster.