How to Install a Kitchen Sink Drain: A Step-by-Step Guide
Installing a kitchen sink drain might seem straightforward, but many people struggle with leaks or proper fitting. If you’re feeling unsure about the process, you’re not alone. Getting it right saves you time and prevents future headaches.
To install a kitchen sink drain, first gather the right tools and materials like a wrench, plumber’s putty, and compatible drain parts.
Start by removing the old drain and cleaning the sink hole.
Apply plumber’s putty under the drain flange, secure it tightly, then connect the tailpiece.
Assemble the P-trap beneath the sink and tighten all connections to prevent leaks.
Follow these steps smoothly, and you’ll soon handle common issues and advanced tips with confidence.
Key Takeaways
- Gather all the tools and materials you’ll need, like a pipe wrench, plumber’s putty, washers, and compatible drain parts before you start.
- To remove the old drain, disconnect the slip nuts, unscrew the locknut, and give the drain opening a good cleaning.
- Apply plumber’s putty under the drain flange, press it into the sink hole, and secure it with a mounting nut underneath.
- Attach the tailpiece to the drain flange using washers and slip nuts, then connect and assemble the P-trap beneath the sink.
- Finally, test everything for leaks by running water, tighten any loose connections, and fix any slow drainage or odors right away.
Gather Tools and Materials for Kitchen Sink Drain Installation

Before you start installing your kitchen sink drain, gather all the tools and materials you’ll need. Having everything ready helps make the process smoother and saves you time.
You’ll want a pipe wrench, adjustable pliers, plumber’s putty, a screwdriver, and a bucket to catch water. Having these on hand prevents interruptions and keeps the work flowing smoothly.
Next, think about the materials for your drain assembly. Most come in PVC or metal. PVC is lightweight and resists corrosion, while metal—usually stainless steel—is durable and looks classic.
Make sure to pick materials compatible with your existing plumbing to avoid leaks or damage down the line. It’s worth double-checking before you buy.
Also, have some replacement washers, gaskets, and Teflon tape ready. These help create a tight seal and prevent leaks.
Choosing good quality tools and materials from the start makes your installation easier and more durable. Taking a moment to prepare now will pay off later.
Remove the Old Kitchen Sink Drain Assembly
Once you have your tools and materials ready, it’s time to remove the old kitchen sink drain assembly. Start by placing a bucket underneath the drain to catch any water that may spill. Use your plumbing tools, like a wrench or pliers, to loosen and remove the slip nuts connecting the drain pipes.
Carefully disconnect the P-trap from the drain assembly. Next, unscrew the locknut that holds the drain flange in place beneath the sink. You might need to use a plumber’s putty knife to break any seal between the drain flange and sink basin.
Once the locknut is removed, lift the entire drain assembly out from the sink. Check for any remaining plumber’s putty or debris around the drain opening and clean it off. Removing the old drain assembly properly guarantees a smooth installation of your new kitchen sink drain.
Prepare the Sink Basin and Surrounding Area
Before you dive in, make sure to clear the area around your sink. It’s good to have plenty of space to work comfortably. Take a moment to look over the sink basin and all its parts—check for any damage or grime that might need a good cleaning. Getting everything ready now will make the whole installation process much smoother and less stressful.
Clear Workspace Setup
Although it might seem simple, clearing and preparing your workspace helps ensure a smooth installation process. Start by removing any items around the sink area to keep things organized and reduce clutter.
A clean, accessible space helps you focus and prevents accidents. Wipe down the sink basin and surrounding countertops to remove debris or grease.
Make sure you have enough lighting and space to move freely. Arrange your tools nearby so everything you need is within reach.
| Step | Task | Tips |
|---|---|---|
| 1 | Remove all clutter | Clear countertops and cabinets |
| 2 | Clean sink basin | Use mild detergent and cloth |
| 3 | Make sure of good lighting | Use portable lamps if needed |
| 4 | Arrange tools nearby | Keep essentials within reach |
This setup prepares you for a hassle-free installation.
Inspect Sink Components
A thorough inspection of your sink components guarantees a smooth drain installation. Start by examining the sink materials, since different types like stainless steel, porcelain, or composite may need specific handling or seals.
Check the basin for cracks, chips, or corrosion that could affect the drain’s seal. Use proper inspection techniques such as running water through the basin to spot leaks or weak spots.
Inspect the mounting holes and surrounding area for debris or damage that might interfere with the drain assembly. Make sure the sink’s surface is clean and dry before installation.
Install the Kitchen Sink Drain Flange
First, give the sink surface where the drain flange will sit a good cleaning and dry it thoroughly. This helps everything sit smoothly and prevents leaks down the line.
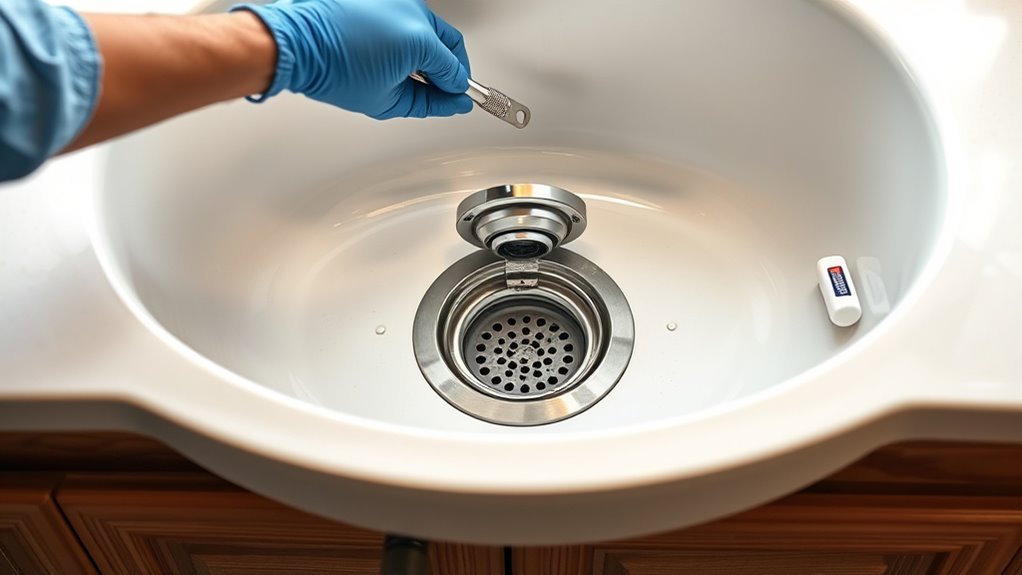
Next, take some plumber’s putty and roll it into a thick bead. Spread that around the underside of the flange—that’s the part that’ll sit inside the sink. This creates a nice watertight seal, so no water sneaks past later on.
Once the putty’s in place, press the flange firmly into the hole in the sink. Make sure it’s centered and seated properly. From underneath the sink, you’ll need to secure it with a nut or mounting assembly, tightening it until everything feels snug and secure.
Prepare Sink Surface
Two key steps assure a secure kitchen sink drain flange installation: cleaning the sink surface thoroughly and applying plumber’s putty correctly. Before you apply anything, focus on sink surface maintenance to avoid leaks and ensure a tight seal.
Follow these cleaning techniques to prepare the sink surface:
- Remove old putty or debris with a plastic scraper.
- Wipe the area with a damp cloth to clear dust.
- Use rubbing alcohol to remove grease and oils.
- Dry the surface completely to prevent moisture interference.
- Inspect for any damage or corrosion that may affect sealing.
Apply Plumber’s Putty
Press plumber’s putty firmly around the underside of the drain flange to create a watertight seal. This step is essential to prevent leaks beneath your sink.
When applying, roll the putty into a rope about a quarter-inch thick before pressing it evenly. Different putty types exist—traditional clay-based putty is common, but some prefer non-hardening synthetic putties for easier cleanup.
Choose a putty that’s compatible with your sink material to avoid damage. Once the putty is applied, press the drain flange into place, making sure it seats evenly on the sink surface.
The putty will squeeze out slightly, which is normal and can be wiped away later. Applying plumber’s putty correctly creates a solid foundation before you secure the flange in the next step.
Secure Drain Flange
Once the plumber’s putty is firmly in place and the drain flange sits evenly on the sink surface, it’s time to secure the flange underneath the sink. To guarantee a tight seal and prevent leaks, grab your tools and follow these flange installation tips. Drain flange materials like stainless steel or brass offer durability, so handle them carefully to avoid damage.
Here’s how to secure the drain flange:
- Slide the rubber gasket and friction ring onto the flange’s tailpiece.
- Screw the mounting nut onto the flange by hand.
- Tighten the nut with a wrench, but don’t over-tighten.
- Wipe away any excess plumber’s putty from the sink surface.
- Double-check that the flange remains centered and snug.
Following these steps will help you install a reliable, leak-free drain flange.
Apply Plumber’s Putty to the Drain Flange
Start by rolling a small amount of plumber’s putty between your hands until it forms a rope-like shape. This helps ensure an even application, which is key for creating a watertight seal.
Next, press the putty rope firmly around the underside edge of the drain flange. Make sure it forms a continuous bead without gaps to prevent leaks once the flange is installed.
When you position the flange into the sink’s drain hole, the putty will compress and create a tight seal between the sink and the flange. This not only keeps water from seeping through but also stabilizes the flange during installation.
Be careful not to use too much putty, as excess will squeeze out and require cleanup. Once the flange is set in place with the plumber’s putty, you’re ready to move on to attaching and securing the sink strainer.
Attach and Secure the Sink Strainer
Now that you’ve spread some plumber’s putty, go ahead and place the sink strainer right into the drain hole. Just make sure it’s sitting in the right spot before you start tightening the mounting nut underneath. Once you tighten it securely, it’ll create a nice, watertight seal and keep the strainer from moving around.
Positioning the Sink Strainer
Three main steps will guide you as you position the sink strainer to guarantee a secure fit. First, identify the right sink strainer type for your sink. Knowing this saves time and prevents leaks.
Next, apply plumber’s putty or a rubber gasket under the strainer flange to create a watertight seal. Then, carefully insert the strainer into the sink drain hole, making sure it sits flush with the sink surface.
Here are some essential installation tips to keep in mind:
- Choose sink strainer types compatible with your sink material and drain size.
- Use enough plumber’s putty for a tight seal, but avoid excess that squeezes out.
- Align the strainer straight to avoid misfits.
- Hold the strainer steady while securing underneath.
- Double-check for any gaps before tightening connections.
Following these steps helps you position the sink strainer correctly for a leak-free drain setup.
Tightening and Sealing
Secure the sink strainer by tightening the locknut from underneath the sink, making sure it compresses the plumber’s putty or gasket evenly to create a watertight seal. Use a wrench to snug the locknut firmly, but don’t overtighten because it can damage the sink or strip the threads.
Proper sealing techniques are essential to prevent leaks and make future drain maintenance easier. After tightening, wipe away any excess putty that squeezes out around the strainer’s edge.
Double-check that the strainer is seated evenly and that the seal feels secure. Once everything is sealed and tightened, run water to test for leaks.
A well-installed strainer with proper sealing will save you time and hassle during drain maintenance down the road.
Connect the Tailpiece to the Drain Flange
Attach the tailpiece directly to the drain flange by aligning the slip nut and washer over the flange’s threaded end. Ensuring proper tailpiece alignment is essential for a secure connection and leak-free performance. First, check that the drain flange is compatible with your tailpiece to avoid any fitting issues.
Slide the washer onto the tailpiece, followed by the slip nut, then carefully screw the tailpiece onto the drain flange threads by hand. To connect the tailpiece effectively, confirm the tailpiece diameter matches the drain flange size.
Position the washer snugly to prevent water leaks and hand-tighten the slip nut before using tools. Avoid cross-threading when attaching the tailpiece and inspect the connection for gaps or misalignment.
Assemble and Attach the P-Trap Under the Sink
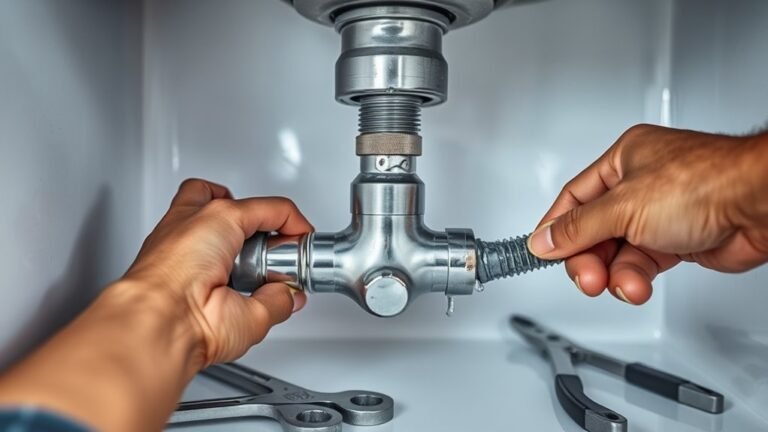
Begin by gathering the P-trap components, including the curved trap arm, slip nuts, and washers. For a smooth P-trap installation, start by sliding a slip nut onto the tailpiece, followed by a washer.
Next, position the curved trap arm beneath the sink, aligning it with the tailpiece and the drain pipe on the wall. Slide another slip nut and washer onto the trap arm’s other end before connecting it to the drain pipe.
Make sure all washers sit snugly inside the slip nuts to guarantee a proper seal during drain assembly. Hold the trap arm in place and hand-tighten the slip nuts on both connections.
This step is crucial for correctly aligning the P-trap for effective drainage and preventing leaks later on. You’ve now successfully assembled and attached the P-trap under your sink, setting a solid foundation for the final tightening and leak check.
Tighten Connections Just Right to Prevent Leaks
After assembling the P-trap and positioning everything properly, it’s time to tighten the slip nuts to create a watertight seal. You want to avoid overtightening, which can crack the fittings, and undertightening, which leads to leaks. Use your hand first, then a wrench to snug the nuts just right.
Keep these tips in mind for proper connection maintenance:
- Tighten slip nuts until they’re firmly hand-tightened plus about a quarter turn with a wrench.
- Avoid using excessive force to prevent damaging plastic parts.
- Check alignment to guarantee no cross-threading occurs.
- Perform leak detection by running water and inspecting each joint carefully.
- If you spot drips, slightly tighten the affected connection, but don’t overtighten.
Troubleshoot Common Kitchen Sink Drain Problems
Even if you’ve followed all the steps carefully, kitchen sink drains can still develop issues like slow drainage or leaks. If you notice slow drainage, start by checking for clogged drains—food debris and grease buildup are common culprits. Use appropriate cleaning solutions designed for kitchen pipes to break down blockages without damaging your plumbing.
Odor issues often come from trapped debris or dry traps. Running water regularly and using mild disinfectants can help keep things fresh. Leaking pipes usually mean loose fittings or installation mistakes, so double-check all connections and tighten them if needed. If leaks persist, consider replacing worn gaskets or seals.
For persistent problems, exploring drain alternatives like installing a garbage disposal or a modern trap design might improve performance. Regular maintenance tips include avoiding pouring grease down the drain and flushing pipes with hot water monthly.
Frequently Asked Questions
Can I Install a Kitchen Sink Drain Without Professional Help?
Yes, you can handle drain installation yourself if you’re comfortable with basic DIY plumbing. With the right tools and a clear plan, you’ll save money and gain confidence.
Just make sure to follow instructions carefully, check for leaks, and use proper seals. If you run into trouble or feel unsure, don’t hesitate to call a professional.
Taking on drain installation yourself can be rewarding and practical when done right.
What Materials Are Best for a Durable Kitchen Sink Drain?
Choosing the right drain materials is like picking armor for your sink. It needs to withstand daily battles.
For durable options, go with stainless steel or brass. They resist corrosion and last longer than plastic.
PVC is budget-friendly but less sturdy over time. If you want a drain that won’t betray you with leaks or rust, stainless steel is your best bet.
It keeps your kitchen running smoothly without frequent repairs.
How Often Should I Replace My Kitchen Sink Drain Assembly?
You should replace your kitchen sink drain assembly every 10 to 15 years, but regular drain maintenance tips can help extend its life.
Keep an eye out for signs that it needs replacing, like leaks, corrosion, or persistent clogs. If you notice slow drainage or foul odors that don’t improve with cleaning, it’s probably time to swap it out.
Staying proactive ensures your sink works smoothly and helps prevent costly water damage.
Are There Eco-Friendly Options for Kitchen Sink Drains?
Imagine a kitchen sink drain made from sustainable materials like bamboo or recycled stainless steel, blending durability with eco-friendliness. You can choose these options to help reduce your environmental impact.
Some drains also come with built-in water conservation features, helping you save gallons each day. By switching to eco-friendly options, you not only protect the planet but also promote efficient water use.
Every drop counts in your kitchen routine, so making these small changes can make a big difference for the environment.
What Safety Precautions Should I Take During Installation?
You should always turn off the water supply before starting to avoid unexpected leaks.
Wear gloves and safety glasses to protect your hands and eyes from sharp edges or debris.
Use the right installation tools to guarantee a secure fit and prevent drain leaks.
Work in a well-lit area, and double-check all connections for tightness.
Taking these precautions will keep you safe and help your installation go smoothly.
Conclusion
Now that you’ve gracefully danced through each step, your kitchen sink drain is ready to flow smoothly, quietly carrying away yesterday’s dishes and today’s memories.
With a little patience and care, you’ve turned a tricky task into a seamless part of your kitchen’s rhythm. Remember, a well-tuned drain isn’t just plumbing. It’s the unsung hero keeping your kitchen fresh and inviting.
It works quietly behind the scenes so you don’t have to worry about clogs or leaks. A properly installed kitchen sink drain makes your kitchen chores easier and keeps everything running smoothly.