How Do You Paint Kitchen Cabinets? The Complete Answer
Are you dreaming of a fresh, updated look for your kitchen but feeling overwhelmed by the idea of painting your cabinets? You’re not alone—many people struggle with figuring out where to start and how to get those professional-looking results.
Luckily, with a little guidance, you can transform your space without breaking the bank.
To paint your kitchen cabinets, start by removing doors and hardware, then clean and sand surfaces for paint to stick. Choose durable paint like acrylic latex or enamel in a color that suits your kitchen’s vibe.
Prime the cabinets thoroughly and apply paint using brushes for details and sprayers for flat surfaces. Fix common issues by sanding between coats, and finish with a clear protective topcoat for durability.
Keep going to uncover expert tips and techniques that guarantee stunning, long-lasting results.
Key Takeaways
- Remove all cabinet doors, drawers, and hardware. Then clean and sand the surfaces to help the paint stick better.
- Pick a durable paint made for kitchens, like acrylic latex, oil-based, or enamel, with moisture-resistant finishes.
- Use a primer suited for your cabinet material. Make sure surfaces are clean and lightly sanded before you start priming.
- Spray paint on flat surfaces for a smooth finish, and use brushes for detailed areas. Apply thin, even coats and sand lightly between coats.
- Finish with a clear protective topcoat once the paint is dry. Apply several light coats and let it fully cure for lasting durability.
Preparing Your Kitchen Cabinets
Begin by removing all cabinet doors, drawers, and hardware to give yourself full access to every surface. This step is vital for a smooth, thorough paint job. Once everything is off, clean each piece meticulously to remove grease and grime that could prevent paint from adhering properly.
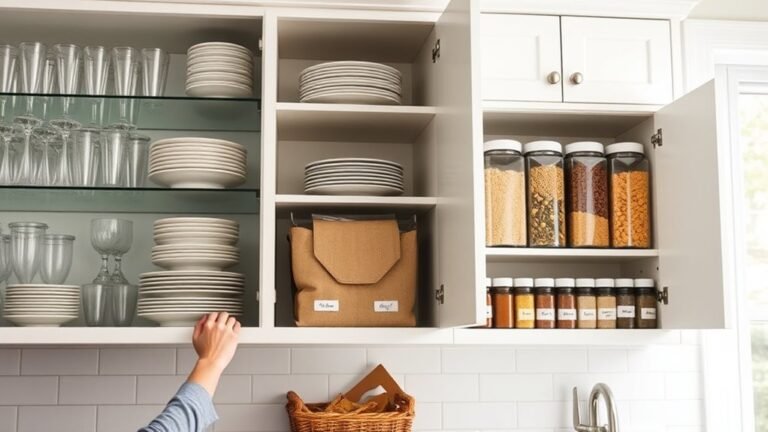
Next, sand the surfaces lightly to create a texture for the paint to grip onto. While prepping, consider your cabinet organization—this is a great time to sort and label doors and drawers so reassembly is hassle-free.
Also, think about color psychology when choosing your paint. Lighter shades can make your kitchen feel airy and spacious, while darker hues add warmth and coziness. Proper preparation guarantees your cabinets not only look great but also last longer.
Taking your time here saves you from peeling or chipping later. So don’t rush this vital stage before moving on to painting.
Essential Tools and Materials for Painting Kitchen Cabinets
Getting started with painting your kitchen cabinets is all about having the right tools and materials on hand. You’ll want to grab some good brushes, rollers, and sandpaper to make sure your finish comes out smooth and flawless.
Choosing the best paint is just as important—something durable that can stand up to daily use while also matching your style. And don’t forget about the prep work! Having the proper materials to clean and sand your surfaces will help your paint last longer and give you that professional-looking finish you’re aiming for.
Must-Have Painting Tools
A well-stocked toolkit makes painting kitchen cabinets smoother and more efficient. To get a professional finish, it’s important to gather the right tools before you start.
Different brush types serve specific purposes, like angled brushes for edges and foam brushes for smooth surfaces. If you prefer spray techniques, a quality paint sprayer can save you time and give you an even coat.
Besides brushes and sprayers, other essential items help you prep and protect your workspace. Make sure you have:
- Various brush types for detailed and broad strokes
- A reliable paint sprayer for fast, uniform coverage
- Sandpaper and painter’s tape for prep and clean lines
With these tools, you’ll be ready for a flawless cabinet painting project.
Selecting Cabinet Paints
Because your choice of paint affects both the look and durability of your cabinets, selecting the right type is essential. When choosing cabinet paint types, consider options like acrylic latex, oil-based, or enamel paints. Acrylic latex is popular for its easy cleanup and durability, while oil-based paints offer a smooth, hard finish but require longer drying times. Enamel paints provide a tough, glossy surface ideal for high-traffic kitchens.
For color selection tips, think about your kitchen’s style and lighting. Lighter shades can brighten a small space, while darker tones add sophistication. Test samples on a small cabinet area to see how colors look in different lighting throughout the day. Ultimately, pick a paint that balances aesthetic appeal with lasting performance for your kitchen cabinets.
Preparing Surface Materials
Choosing the right paint is only part of the process. Getting your cabinets ready will determine how well that paint sticks and lasts. Start by thoroughly cleaning the surface to remove grease, dirt, and grime.
Next, do a damage assessment to spot scratches, dents, or peeling paint that need fixing. Proper preparation guarantees a smooth, durable finish.
Gather these essential tools and materials before you begin:
- Sandpaper or a sanding block to smooth surfaces and promote adhesion
- Wood filler or putty for repairing dents and holes
- Degreaser or a mild cleaner to ensure the surface is spotless
Removing Cabinet Doors and Hardware Safely
Start by carefully removing your cabinet doors and hardware to ensure a smooth painting process. First, open each cabinet door and use a screwdriver to unscrew the hinges. Support the door with one hand while removing the screws to prevent it from falling and causing damage or injury. Once the doors are off, place them on a padded surface to avoid scratches.
Next, remove all hardware like knobs, handles, and hinges. Store these pieces in labeled containers or bags so you keep the hardware protected and don’t lose any small parts. Handle screws and hinges gently to prevent bending or stripping. Taking these steps keeps your cabinets and hardware in good condition and sets you up for a flawless paint job.
How to Sand Cabinets for a Smooth Paint Finish
To get a smooth paint finish, it’s really important to sand your cabinets properly. Start with the right grit to make the process easier and more effective. Use a medium grit (around 120) to remove old paint and smooth out imperfections.
Next, switch to a finer grit (220 or higher) to create a sleek surface. Proper sanding techniques help prevent damage and make sure the paint sticks well.
Always sand with the grain to avoid scratches. Use a sanding block or an orbital sander to apply even pressure. After sanding, make sure to clean off all the dust so nothing gets in the way of a smooth finish.
Pay extra attention to edges and corners. These spots often need gentle hand sanding to keep their shape. Mastering these techniques and grit choices will give you a professional-looking finish on your cabinets.
Choosing the Right Paint and Color for Kitchen Cabinets
Now that your cabinets are smooth and ready, it’s time to pick the perfect paint and color. When it comes to kitchens, you’ll want to consider paints and finishes that can stand up to moisture, heat, and frequent cleaning. So, it’s worth exploring options like semi-gloss or satin finishes—they’re durable and easy to wipe down.
As for the color, think about what matches your style and the overall vibe you want in your kitchen. Also, keep in mind how natural and artificial lighting will affect the look of your cabinets. Lighter shades can brighten up the space, while darker tones add a touch of sophistication. Ultimately, choosing the right paint and color will really tie everything together and make your kitchen feel fresh and inviting.
Types Of Cabinet Paint
When choosing paint for your kitchen cabinets, you’ll want to think about both the type of paint and the color carefully. Different paints offer unique benefits depending on your needs for finish, durability, and style.
You can opt for oil-based paints, which are known for their excellent durability. Water-based options dry faster, emit fewer fumes, and are easier to clean up. Chalk paint gives a matte, vintage look with less prep work required.
Spray paint can help you achieve a smooth, even coat easily. Enamel finishes are popular because they’re hard-wearing and long-lasting. Don’t forget to consider eco-friendly choices if you’re aiming to reduce environmental impact.
And finally, explore various color options to find the perfect shade that complements your kitchen’s style.
Best Paint Finishes
Choosing the best paint finish for your kitchen cabinets can really change how they look and how long they last.
Glossy finishes give a shiny, reflective surface that’s super easy to clean, making them great for busy kitchens. If you want something more subtle, matte finishes offer a smooth, non-reflective look that hides imperfections well.
Semi-gloss finishes strike a nice balance by adding a slight sheen without being too shiny. Satin finishes, known for their soft glow, resist moisture and stains, making them a durable choice.
When picking your paint, consider eco-friendly options to cut down on harmful fumes and help the environment. Each finish impacts your cabinets’ appearance and wear over time, so choose one that matches your style and how you use your kitchen.
Choosing Cabinet Colors
How do you pick the perfect color to transform your kitchen cabinets? Start by considering current color trends to keep your kitchen fresh and stylish. Think about how colors influence mood; warm tones create coziness, while cool hues bring calmness. Don’t forget your kitchen’s lighting. Natural light can brighten colors, while dim spaces may need lighter shades to open up the area.
Reflect on your personal style and how it pairs with your kitchen’s existing elements. Balance bold colors with neutral tones for a timeless look. Test paint samples on cabinet surfaces to see how they look throughout the day.
How to Prime Kitchen Cabinets
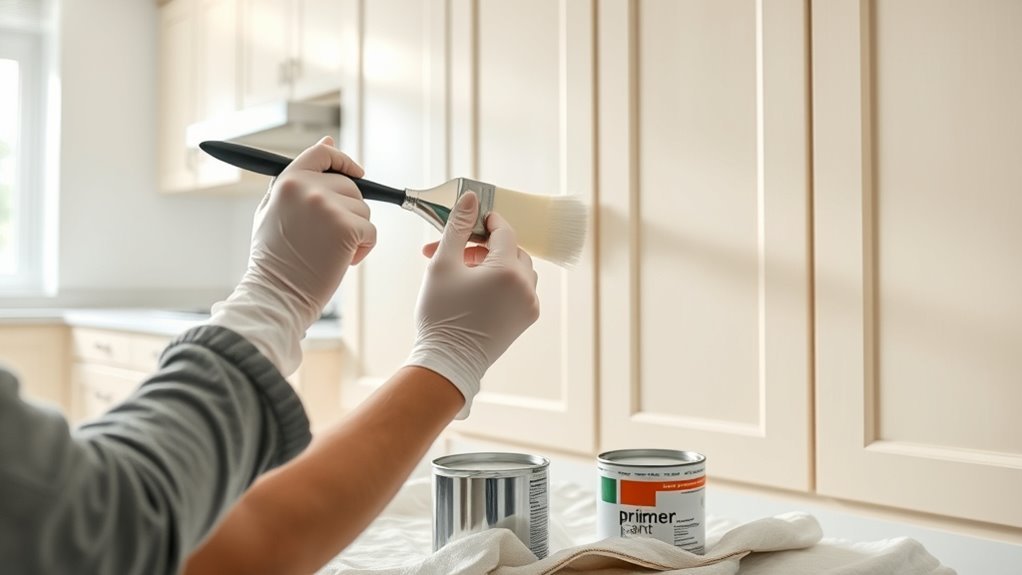
Start by thoroughly cleaning your kitchen cabinets to remove grease, dirt, and dust, making sure the primer sticks properly. Once they’re dry, lightly sand the surfaces to create a smooth base, then wipe away the sanding dust.
Choosing the right primer is key. Use a bonding primer for laminate or glossy surfaces, and an oil-based or shellac primer for wood to prevent stains and ensure durability.
When applying primer, use a good-quality brush or foam roller for smooth, even coats. Keep the layers thin to avoid drips and uneven drying.
Let the primer dry completely before lightly sanding it for a flawless finish. Proper priming helps your paint stick well and makes your cabinets last longer.
Good priming not only improves adhesion but also boosts the final look and durability of your kitchen cabinets.
Painting Cabinets Like a Pro: Best Techniques
Achieving a smooth, professional finish on your kitchen cabinets takes careful technique and the right tools. You’ll want to master both spray and brush techniques to cover different areas effectively. Spray methods give you an even, sleek coat on flat surfaces, while brushes help you control detail work and edges.
Experiment with layering methods to build rich, durable color, and try color blending for subtle depth. To add character, consider texture effects like distressing finishes or faux finishes that mimic wood grain or aged paint. Glazing techniques can also enhance details and give your cabinets a custom look.
Layer colors, blend tones, and explore textures like distressing and glazing for rich, custom cabinet finishes.
Keep these tips in mind: Use spray techniques for large, flat areas, and switch to brush techniques for corners and intricate sections. Apply layering methods for a durable finish and integrate color blending for dimension. Investigate distressing finishes and glazing techniques to create unique, professional results.
These approaches will help you paint your cabinets like a pro.
Common Painting Problems and How to Fix Them
While mastering professional techniques can improve your cabinet painting, you might still run into some common issues along the way. A streaky finish or uneven color often results from inadequate surface preparation or applying paint too thickly. To fix this, sand your cabinets smoothly and clean off dust before painting.
Use thin, even coats and maintain a clean application to avoid brush marks. If you notice peeling paint, it’s usually due to poor paint adhesion caused by skipping primer or painting over a dirty surface. Always confirm your cabinets are thoroughly cleaned and primed.
Pay attention to drying time. Rushing can cause tacky surfaces and uneven layers. To prevent these problems, apply paint in thin layers, let each coat dry completely, and sand lightly between coats if necessary.
When and How to Apply a Protective Topcoat
Applying a protective topcoat is a key final step that helps your painted kitchen cabinets stand up to daily wear and keep their finish looking great. You should only apply the topcoat once the paint has fully dried, which usually takes at least 24 hours, to ensure it adheres properly.
The topcoat creates a tough barrier that protects your cabinets from moisture, scratches, and stains. For the best results, choose a clear, water-based polyurethane or acrylic topcoat because they are easy to clean up and offer long-lasting protection.
Use a high-quality synthetic brush or a foam roller to apply thin, even coats. It’s better to do multiple light coats instead of one thick one, which can lead to drips or bubbles.
Remember to lightly sand between coats with fine-grit sandpaper. This helps the topcoat adhere well and creates a smooth finish. Allow at least 7 days for the topcoat to fully cure before heavy use to keep your cabinets looking beautiful and protected for years.
Reinstalling Cabinets and Hardware Without Damage
Start by carefully handling your freshly painted cabinets and hardware to avoid chips or scratches during reinstallation. Lay out all hardware in an organized way to keep track of screws, knobs, and hinges—this makes everything easier and prevents losing parts.
Before mounting, double-check your cabinet alignment to ensure doors and drawers fit perfectly and open smoothly. Use a level and measure twice to avoid uneven gaps and misalignment.
Double-check cabinet alignment with a level and measure twice to ensure smooth operation and even gaps.
When attaching hinges, tighten screws gradually to prevent stripping or damaging the paint finish. If possible, reinstall hardware with a hand screwdriver rather than a power drill for better control.
Take your time aligning each cabinet; rushing can cause misalignment and frustration or even damage. Finally, clean off fingerprints or dust immediately after installation to keep your cabinets looking fresh.
With careful handling, organized hardware, and precise cabinet placement, you’ll protect your paint job and enjoy a flawless kitchen update.
Frequently Asked Questions
How Long Does It Take for Painted Cabinets to Fully Cure?
You can expect painted cabinets to fully cure in about 7 to 30 days, depending on the type of paint and environmental conditions. During this time, the paint hardens and reaches its maximum adhesion.
This makes the surface more durable and resistant to scratches or chips. While the cabinets may feel dry to the touch within hours, giving them time to cure ensures your finish lasts longer and looks professional.
Can I Paint Over Laminate Kitchen Cabinets?
Yes, you can paint over laminate kitchen cabinets, but there’s a crucial step you can’t skip.
Without proper preparation, the paint won’t stick well, and you’ll end up with peeling and chipping.
You’ll need to clean the cabinets thoroughly, then lightly sand to roughen the surface.
Applying a high-quality primer made for slick surfaces is also essential.
If you nail these steps, your cabinets will look fresh and last longer.
Skip them, and your paint job probably won’t hold up as you’d like.
What Is the Best Way to Clean Painted Cabinets?
The best way to clean painted cabinets is by using gentle cleaning solutions to protect the finish and ensure they stay looking great. Avoid harsh chemicals and abrasive scrubbers that can damage the paint.
Instead, mix warm water with a few drops of mild dish soap, then wipe the cabinets with a soft cloth or sponge. For stubborn spots, a baking soda paste works well.
Always dry the surfaces thoroughly to prevent any damage and keep your cabinets looking fresh and new.
How Do I Prevent Paint From Peeling on Kitchen Cabinets?
You don’t want your paint peeling off like a sunburn in seconds, right? To prevent that disaster, make sure you nail your surface preparation—clean, sand, and prime like a pro.
Paint adhesion depends on a perfectly prepped cabinet, so don’t skip these steps. Remove grease, dust, and old finish thoroughly.
Use a high-quality primer and let it cure fully before painting. This way, your cabinets stay flawless and peel-free for years.
Are There Eco-Friendly Paints Suitable for Kitchen Cabinets?
Yes, you’ll find plenty of eco-friendly options for painting kitchen cabinets. Look for zero or low-VOC paints, like water-based acrylic or milk paint, which help reduce harmful fumes.
These paints are durable and safe for indoor use, making them perfect for your kitchen. Choosing eco-friendly options not only protects your health but also helps the environment.
Be sure to prep surfaces well to get the best results with these green paints.
Conclusion
Now that you know the steps to paint your kitchen cabinets like a pro, are you ready to transform your space? With the right prep, tools, and techniques, you’ll achieve a smooth, durable finish that breathes new life into your kitchen.
Don’t rush—take your time sanding, painting, and applying that protective topcoat. When you reinstall everything carefully, you’ll enjoy your beautifully refreshed cabinets for years to come.
Why wait to start your kitchen cabinet painting project?