How to Redo Kitchen Cabinets: A Step-by-Step Guide
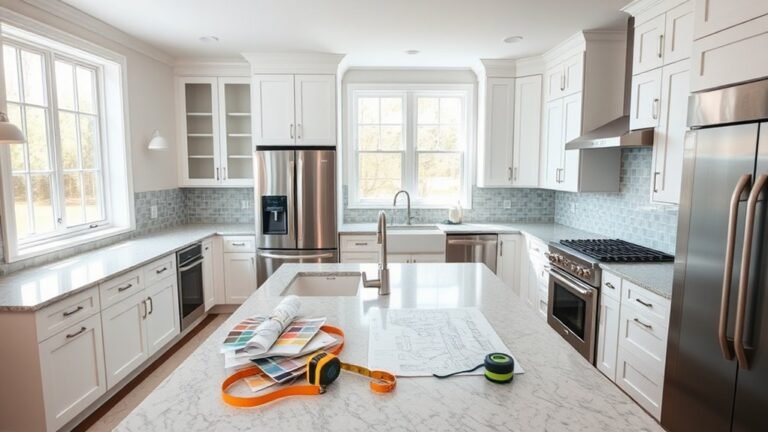
Many homeowners dream of a fresh, updated kitchen but feel overwhelmed at the idea of tackling cabinet renovations on their own. If you’ve ever wondered how to redo kitchen cabinets without breaking the bank or losing your mind, you’re not alone.
Luckily, with a little guidance, you can transform your space smoothly and confidently.
To redo your kitchen cabinets, start by evaluating their condition and style, noting any damage and your preferred look. Gather essential tools like sandpaper, primer, and paint, then clean and remove doors carefully.
Repair imperfections with fillers, sand smooth, and choose a durable paint finish that matches your kitchen’s vibe. Install new hardware or replace doors if needed, and maintain your cabinets with gentle cleaning.
Keep going to uncover detailed steps and expert tips for a flawless transformation.
Key Takeaways
- Thoroughly clean and remove cabinet doors, labeling hardware for easy reassembly.
- Sand surfaces and repair cracks or holes with appropriate fillers for a smooth finish.
- Apply primer, then paint or stain cabinets in thin, even coats using quality brushes or rollers.
- Replace or install new hardware carefully, making sure measurements are correct and attachments are secure.
- Keep cabinets looking their best with gentle cleaning and quick repairs to protect the finish and extend their life.
How to Evaluate Cabinet Condition and Style Before Starting
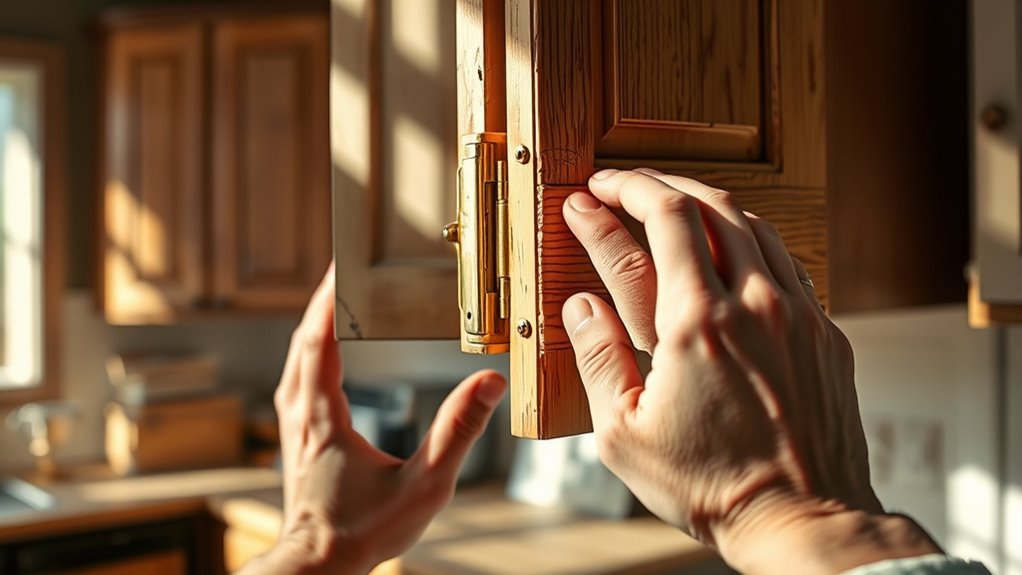
Before you start redoing your kitchen cabinets, take a close look at their current condition and style. Check for damage like warping, cracks, or loose hinges that might impact your renovation plans.
Next, think about your style preferences. Do you want a modern, rustic, or classic look? This will help you choose the right finishes and colors.
Consider your style—modern, rustic, or classic—to guide your choice of finishes and colors.
Evaluate the cabinet materials. Some, like solid wood, can be refinished easily, while others might need complete replacement. Consider what works best for your project.
Think about your functional needs too. Do you need more storage, better accessibility, or updated hardware? Balancing style and function is key.
Finally, set a realistic renovation budget. This will help you avoid surprises and keep your project on track.
Essential Materials and Tools for Redoing Kitchen Cabinets
Redoing your kitchen cabinets requires having the right materials and tools on hand to guarantee a smooth and efficient process. Start by gathering high-quality sandpaper, a paint stripper if needed, primer, and paint or stain that matches your chosen cabinet color.
If you want to follow current design trends, consider matte finishes or two-tone color schemes. Make sure you have brushes, rollers, and painter’s tape for clean edges. A screwdriver or drill is essential for removing and reattaching doors and hardware.
You’ll also want wood filler for any dents or holes and a putty knife to apply it neatly. Safety gear like gloves, goggles, and a mask will protect you during sanding and painting. Finally, having drop cloths will keep your workspace clean.
With these materials and tools ready, you’ll be set to transform your cabinets and update your kitchen’s style efficiently and effectively.
Preparing Kitchen Cabinets: Cleaning and Removing Doors
Before you dive into redoing your kitchen cabinets, it’s a good idea to gather some cleaning supplies first. You’ll want something that can cut through grease and grime easily—think of a degreasing cleaner or a mixture of warm water and dish soap. Once you’ve got everything you need, start by giving the cabinets a thorough clean to remove any dirt and buildup.
After the cabinets are nice and clean, carefully remove the doors to make the refinishing process smoother. As you take them off, don’t forget to label and store all the hardware—like hinges and handles—so nothing gets lost or mixed up. It’s just a little extra step that will save you time and headaches later on!
Cleaning Supplies Needed
Gathering the right cleaning supplies will make prepping your kitchen cabinets much easier and more effective. Start with quality cleaning solutions that cut through grease without damaging surfaces.
If you prefer, choose eco-friendly options to keep your home safe and reduce environmental impact. You’ll want tools that help you reach every corner and ensure a thorough clean before any refinishing.
Here’s what you’ll need:
- Mild all-purpose cleaner or an eco-friendly degreaser
- Soft sponges and microfiber cloths for gentle scrubbing
- A small brush or toothbrush to get into tight spots
Having these supplies ready means you can remove dirt and grime efficiently. This sets a clean foundation for the next steps in your cabinet redo.
Removing Cabinet Doors
Start by carefully removing the cabinet doors to make cleaning and refinishing easier. Begin with one door at a time, using a screwdriver to loosen the screws on the hinges.
Pay close attention to the type of hinges you have—whether they’re traditional, European-style, or another kind—as this will affect how you take the doors off.
Different cabinet styles may use different hinge mechanisms, so take your time to avoid any damage.
Once the screws are loose, gently lift the door away from the cabinet frame.
Setting the doors aside gives you full access to all surfaces for cleaning and refinishing.
Remember, handling the hinges carefully will help preserve their functionality for reinstallation later.
This will make your cabinet redo much smoother and easier.
Labeling And Storing Parts
After removing the cabinet doors, it’s important to keep track of all the screws, hinges, and other hardware. Without an organized labeling system, you risk mixing parts or losing small pieces, which can delay reassembly. Using clear labels to mark each door and its hardware will save you time and frustration later.
Here are some storage solutions to consider:
- Small containers or zip-lock bags for screws and hinges, labeled with the cabinet door number
- A magnetic tray to hold metal parts securely during the project
- A dedicated box or drawer labeled “Cabinet Hardware” to keep everything together
Repairing and Smoothing Kitchen Cabinet Surfaces
Now that your cabinets are clean and the doors are taken off, take a good look at them. Check for any cracks, holes, or damage that might need fixing. Picking the right filler for these spots is key to making sure your repairs turn out smooth and seamless.
Once you’ve filled in any imperfections, go ahead and sand the surfaces gently. This step helps create an even finish, so your cabinets look their best whether you’re painting or staining them later on.
Assess Damage Thoroughly
Before you start sanding or painting, take the time to carefully inspect each cabinet surface for dents, scratches, or peeling paint. Spotting damage early helps you plan the right repairs and prevents surprises later on.
Use a bright light to catch subtle dents and surface irregularities. Run your hand over the surfaces to feel for rough patches or peeling varnish. Check edges and corners closely, as they tend to show wear first.
Thoroughly evaluating damage ensures you know exactly what needs fixing. This saves you time and helps you achieve a smooth, professional finish for your kitchen cabinets.
Choose Appropriate Filling Materials
When you notice dents, scratches, or holes in your cabinets, choosing the right filling material is essential to get a smooth surface. There are several options available, each suited to different repair needs.
For small scratches and minor dents, wood filler or putty works well because it’s easy to apply and sands smoothly. For deeper holes or damaged edges, consider using epoxy-based fillers, which are stronger and can be shaped precisely.
If your cabinets have veneer damage, a colored wax filler stick might be the best choice to blend repairs seamlessly. Understanding these materials helps you pick the best option for lasting results.
Selecting the right filling material guarantees your cabinets will look flawless once refinished.
Sand Surfaces Smoothly
After applying your chosen filler and letting it dry, you’ll want to sand the surfaces to get a smooth, even finish. Proper sanding techniques are key for preparing the surface so paint or stain sticks well and looks professional.
Start with a medium-grit sandpaper to level out any imperfections, then switch to fine-grit for a polished feel. Use a sanding block or orbital sander to apply consistent pressure and avoid gouging the wood.
Remember to sand in the direction of the wood grain to prevent scratches. Wear a dust mask and goggles to protect yourself. Before moving on, make sure to remove all dust with a tack cloth.
Picking the Best Paint and Finish for Kitchen Cabinets
Choosing the right paint and finish can totally change your kitchen cabinets from dull to stunning. You’ll want options that balance durability with style. Think about your kitchen’s overall look and lighting when picking colors.
Light shades can brighten the space, while darker tones add depth and sophistication. Don’t hesitate to test small samples on your cabinets before making a final decision.
Light colors open up your kitchen, dark hues bring elegance—always try samples before deciding.
Next, consider the finish types. Satin and semi-gloss finishes are popular because they resist moisture and are easy to clean. Matte finishes give a modern, subtle look but might show stains more easily.
High-gloss finishes create a sleek, reflective surface but can highlight imperfections. Ultimately, pick a finish that can handle daily wear, cleaning, and cooking splatters, and that matches your kitchen’s style.
With the right color and finish, your cabinets will look refreshed and last for years.
Step-by-Step Guide to Painting Your Kitchen Cabinets
Selecting the perfect paint and finish sets the stage for a successful cabinet makeover. Once you’ve picked your cabinet color trends, it’s time to prep and paint with confidence using effective techniques.
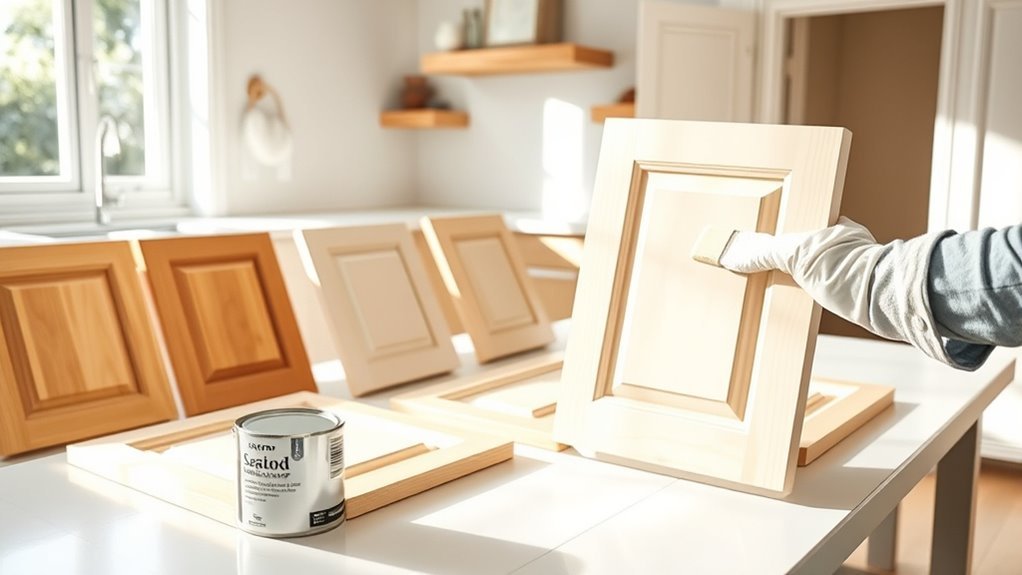
Start by thoroughly cleaning your cabinets to remove grease and dirt. Then, lightly sand the surfaces to create a smooth base for the paint to stick to. Applying a primer next helps ensure durability and vibrant color payoff.
When painting, use a high-quality brush or foam roller for a smooth finish. Work in thin, even coats to avoid drips, and let each coat dry completely before adding the next.
Here’s a quick overview:
- Clean and sand cabinets to prep surfaces
- Use primer to improve paint adhesion
- Apply thin, even coats with proper drying time
Following these steps will help you achieve a professional-looking finish that matches your kitchen’s style and stays current with cabinet color trends.
How to Install New Hardware on Kitchen Cabinets
Upgrade your kitchen’s look instantly by installing new hardware on your cabinets. Choosing the right hardware styles can dramatically change your kitchen’s vibe, whether you prefer sleek modern pulls or classic knobs. Start by removing old hardware carefully to avoid damaging cabinet surfaces.
Next, use a template or measure precisely to mark the holes for the new hardware. This ensures your handles or knobs line up perfectly, making your cabinets look professional and polished. When drilling, go slow to keep the holes clean and prevent splitting the wood.
Screw in your new hardware firmly but don’t overtighten, which can strip the screws or damage the cabinet face. Finally, wipe down your cabinets to remove any dust from drilling. Keep these tips in mind, and you’ll have a fresh, stylish kitchen update with minimal effort. New hardware is a simple way to instantly refresh your space.
Replacing Kitchen Cabinet Doors and Drawers: When and How
After revitalizing your cabinets with new hardware, you might find that replacing the doors and drawers can make an even bigger impact. You’ll want to replace them when your existing pieces are warped, outdated, or no longer match your kitchen’s style. Choosing the right door styles and drawer materials is key to enhancing both aesthetics and durability.
Before you start, consider these factors:
- Match door styles to your kitchen’s overall design, whether modern, traditional, or farmhouse.
- Opt for durable drawer materials like solid wood or plywood with a veneer finish for longevity.
- Measure carefully to guarantee new doors and drawers fit perfectly, avoiding costly mistakes.
To replace, remove old doors and drawers by unscrewing hinges and slides. Install the new pieces by attaching hinges and slides securely. With the right choices and proper installation, your kitchen will look refreshed and function smoothly.
Long-Term Care Tips for Redone Kitchen Cabinets
To keep your newly redone kitchen cabinets looking their best, it’s important to use the right cleaning methods. You want to be gentle so you don’t damage the finish — harsh cleaners or abrasive scrubbers can do more harm than good.
Also, be mindful of preventing scratches and moisture buildup, since these can shorten the life of your cabinets. Regularly checking for any small issues can help you catch problems early before they turn into expensive repairs.
Cleaning Techniques
Maintain the fresh look of your redone kitchen cabinets by adopting effective cleaning techniques. Using eco-friendly cleaners not only protects the finish but also guarantees a safe kitchen environment. Regular cleaning prevents grime buildup, while occasional deep cleaning helps maintain the cabinet’s original charm.
To keep your cabinets looking their best, follow these tips:
- Use a mild, eco-friendly cleaner with a soft cloth for routine wiping.
- Schedule deep cleaning sessions every few months to tackle stubborn grease and dirt.
- Avoid abrasive tools that can scratch or dull the cabinet surface.
Preventing Damage
While your kitchen cabinets look great right after redoing them, preventing damage over time requires consistent care and attention. Taking preventive measures helps you avoid costly repairs and keeps your cabinets looking fresh.
Focus on damage control by addressing spills immediately and using gentle cleaning products. Use coasters under drinks to prevent rings and avoid harsh chemicals that can damage surfaces.
Keep cabinets dry and clean them with soft cloths to avoid scratches. If you notice any damage, like scratches or loose hinges, repair or tighten them quickly to prevent further issues.
Protect surfaces from heat and overloading shelves to keep everything in good shape. Sand and refinish worn areas as needed to maintain your cabinets’ fresh look.
Routine Maintenance
Routine care is key to keeping your redone kitchen cabinets looking great over the years. To protect your investment, set up a maintenance schedule that includes checking hinges, handles, and surfaces regularly. This way, you can catch small issues early before they turn into costly repairs.
Here are some simple tips for routine maintenance:
- Clean your cabinets often with a mild detergent to prevent dirt and stains from building up.
- Check for any loose hardware and tighten screws when needed.
- Keep an eye out for moisture damage, especially near sinks and dishwashers, and fix leaks right away.
Common Mistakes to Avoid When Redoing Kitchen Cabinets
When you decide to redo your kitchen cabinets, overlooking key details can lead to costly mistakes and frustration. One common error is ignoring current design trends; sticking to outdated styles might make your cabinets look old-fashioned quickly. Instead, research popular finishes and hardware to keep your redo feeling fresh and timeless. Also, don’t rush your color choices. Picking a color that clashes with your kitchen’s overall palette or trends can make the space feel disjointed. Test samples in different lighting before you commit.
Another mistake is skipping proper surface preparation. Failing to clean, sand, or prime surfaces can cause paint or stain to peel prematurely. Furthermore, avoid buying cheap materials or hardware just to save money; quality matters for durability. Finally, don’t underestimate the time and effort needed. Planning thoroughly and setting realistic expectations will help you avoid frustration and create a kitchen you’ll love.
Frequently Asked Questions
How Much Does It Typically Cost to Redo Kitchen Cabinets?
Redoing kitchen cabinets usually costs between $1,000 and $5,000, depending on your budget and material choices.
If you go with paint or laminate, you’ll spend less. But choosing solid wood or custom finishes will increase your costs.
Labor also affects the total price.
By planning carefully and picking materials that match your style and budget, you can refresh your cabinets without breaking the bank.
Always compare quotes to get the best value for your money.
Can I Redo Cabinets Myself or Should I Hire a Professional?
You can definitely roll up your sleeves and redo cabinets yourself, enjoying the perks of saving money and the satisfaction of doing it yourself.
But if you want perfect results and a flawless finish, hiring a professional can make sure everything’s done right without any hidden issues.
It really depends on how comfortable you are with tools and how much time you want to spend.
If you love a hands-on challenge, go DIY. If not, hiring a pro will save you headaches and give you polished results.
How Long Does the Entire Cabinet Redo Process Usually Take?
You can expect the entire cabinet redo process to take about one to two weeks, depending on your kitchen’s size and the complexity of the finishing techniques.
Preparation steps like cleaning, sanding, and priming alone can take several days. Applying paint or stain, letting it dry, and adding hardware also add to the timeline.
If you take your time with each step, you’ll end up with a durable, beautiful result that’s worth the wait.
What Are Eco-Friendly Paint Options for Kitchen Cabinets?
You should choose eco-friendly finishes like water-based acrylic or milk paint for your kitchen cabinets. These low VOC options cut down on harmful fumes, making your space safer and healthier.
Look for paints labeled as zero or low VOC to guarantee minimal environmental impact. Natural oil-based finishes such as tung or linseed oil can also work well if you prefer a more natural look.
These choices help keep your kitchen greener and toxin-free.
How Do I Choose a Cabinet Style That Matches My Kitchen Decor?
You’ll want to pick cabinet styles that match your kitchen’s vibe. Did you know 85% of homeowners prefer modern styles for a fresh look?
If your kitchen leans contemporary, sleek cabinets with clean lines work really well. For a timeless feel, go for classic finishes like rich wood tones or soft whites.
Always think about your countertop, lighting, and hardware too. Putting everything together helps create a cohesive design that feels just right for you.
Conclusion
By redoing your kitchen cabinets, you not only refresh your space but also uncover hidden flaws that give you a chance to improve your skills.
As you clean, repair, and paint, you’ll realize that patience and attention to detail can transform both your cabinets and your confidence.
Installing new hardware is the perfect finishing touch and adds a personal, stylish detail to your revamped kitchen.
So, dive in, knowing each step brings you closer to a kitchen that’s as functional as it is beautiful—and truly all your own.
Redoing your kitchen cabinets is a rewarding project that leaves your space looking fresh and uniquely yours.