How to Decorate for a Graduation Party: Expert Tips for Stunning Results
Focus on choosing a clear theme and color scheme to guide all your decisions when figuring out how to decorate for a graduation party. Incorporate essential decor elements like balloons, banners, and personalized touches to honor the graduate and create a festive atmosphere. You’ll also learn how to design photo areas, decorate tables, and include meaningful symbols that highlight school spirit.
This advice suits parents, graduates, and party planners seeking practical tips for stunning results. The ideas combine fun, style, and sentimental value to celebrate graduation in a memorable way without overwhelming your budget or schedule. Following these expert tips can help you set up efficiently and ensure your event looks polished and inviting.
Key Takeaways
- Pick a theme and limit your palette to 2-3 complementary colors for a cohesive look.
- Use large 36-inch balloons as eye-catching decor focal points around the party area.
- Create a photo booth with props and a backdrop that matches the theme for great guest pictures.
- Personalize decorations with items like a K-12 photo garland to highlight graduate memories.
- Stack books and add DIY diplomas as simple, stylish centerpieces for tables.
- Match tablecloths and disposable tableware in theme colors to improve serving areas affordably.
Essential Graduation Party Decor Elements
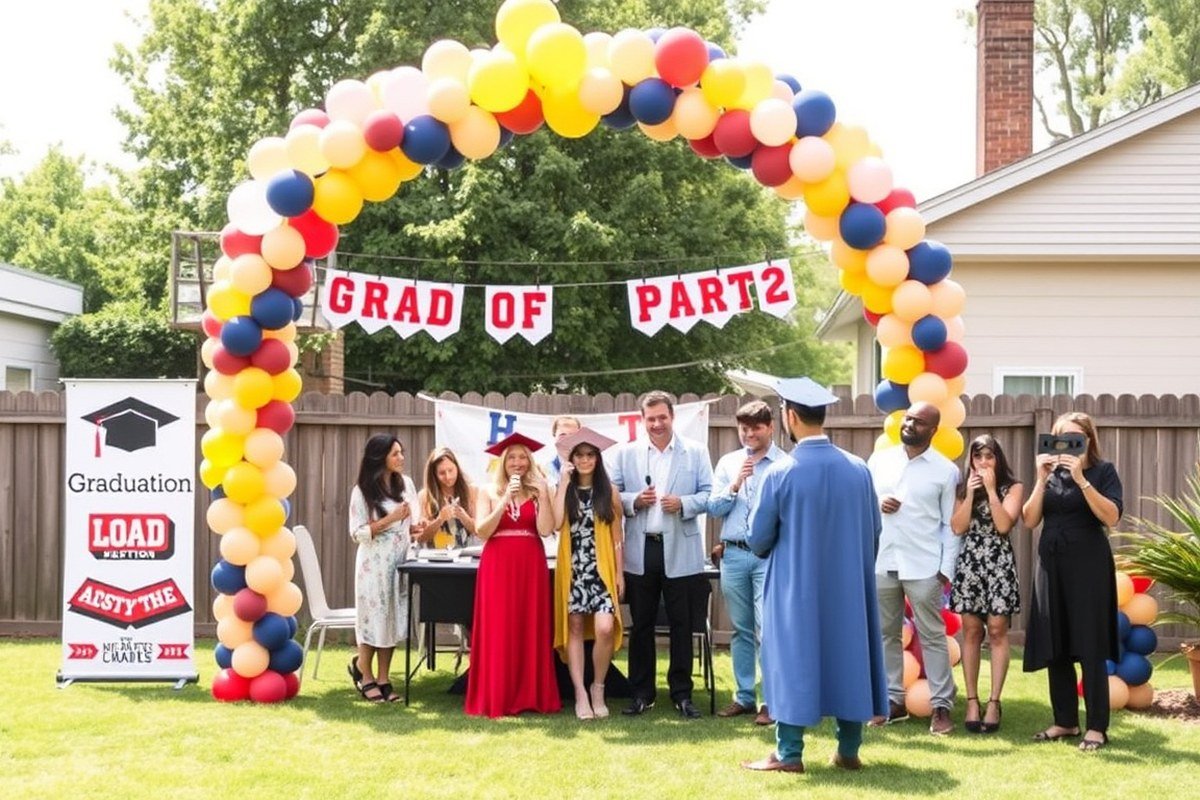
Key decoration elements for a graduation party include balloons, banners, signs, and lighting. Balloons are central to creating a festive atmosphere. Using large 36-inch balloons in the graduate’s school colors or complementary hues offers an eye-catching visual. You can scatter clusters of balloons around the party area or arrange them into arches at the entrance or over the serving table. Balloon arches will bring color and excitement, making it clear this is a celebration. For a budget-friendly option, balloon clusters tied to weights or wooden dowels stuck into the lawn also work well and keep costs low.
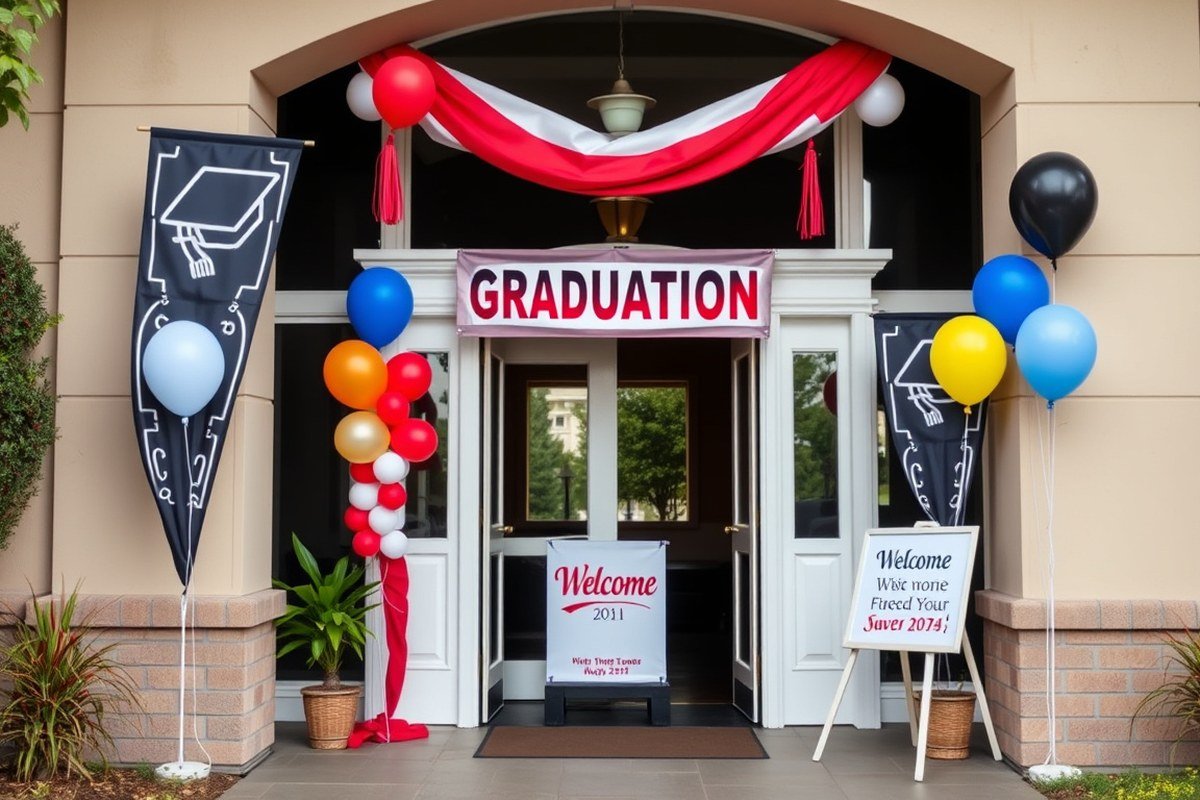
Banners and signs serve as focal points and help set the tone immediately. A “Welcome to My Graduation Party” sign placed near the entry helps guests know they are arriving at a special event. A chalkboard A-frame paired with balloons makes a simple yet attractive welcome display without the expense of printed posters and easels. You can write the graduate’s name, year, or a celebratory message on the chalkboard. Also, custom banners featuring the graduate’s name, photos, or graduation year add a personal touch and highlight achievements. Hanging these banners across doorways or on walls instantly signals the festive occasion.
Lighting plays an important supporting role, especially if the party runs into the evening. String lights or LED lanterns can provide a warm glow that improve the overall mood without overpowering the decorations. Positioning lights around the serving area, seating, or photo booth areas helps to create inviting spaces. For daytime events, natural lighting combined with reflective elements like shiny fringe garlands adds sparkle and brightness.
Simple decor items that set the tone quickly include fringe garlands and oversized numbers. Fringe garlands are easy to DIY and add movement and color when draped along tables, walls, or entranceways. Oversized numbers representing the graduation year filled with colorful balloons create a bold statement and reinforce the celebration’s focus. These numbers are often available in local party stores or online and can be reused at future celebrations.
Creating a central photo area is an essential part of the decor, doubling as entertainment and memory-making. A backdrop with a coordinated theme, balloons, banners, and props encourages guests to take festive photos. This setup doesn’t have to be expensive; a simple fabric or paper background with balloon clusters and a banner can make an attractive photo booth for less than $30.
Overall, blending these elements, balloons in strategic spots, a personalized welcome sign, thematic banners, gentle lighting, and simple yet effective accents like fringe garlands and large numbers, helps create a lively, memorable graduation party. The total cost will depend on how elaborate you want the setup to be, ranging roughly from $50 for basic DIY decorations to a few hundred dollars for professional-looking displays. Problems to avoid include overcrowding small areas with too many decorations or choosing colors that clash, which can disrupt the celebratory mood. Keeping decorations balanced and coordinated with school colors ensures a festive and visually pleasing environment your guests will enjoy.
Choosing the Perfect Theme and Color Scheme
Selecting a theme and color scheme that fits the graduate’s style and the party venue sets the tone for a memorable celebration. Focus on colors that complement each other, including the graduate’s school colors without overpowering the design. A balanced approach helps you create a polished look while showcasing the graduate’s personality.
Start with the Graduate’s Interests and Personality
Begin by thinking about what the graduate enjoys and what fits their personality. Themes inspired by hobbies, future career plans, or favorite characters make the decorations feel intentional and personal. For example, a graduate passionate about astronomy might inspire a starry night theme with deep blues, silver, and white accents. This approach ensures guests immediately recognize the party as a celebration of the individual, not just the milestone.
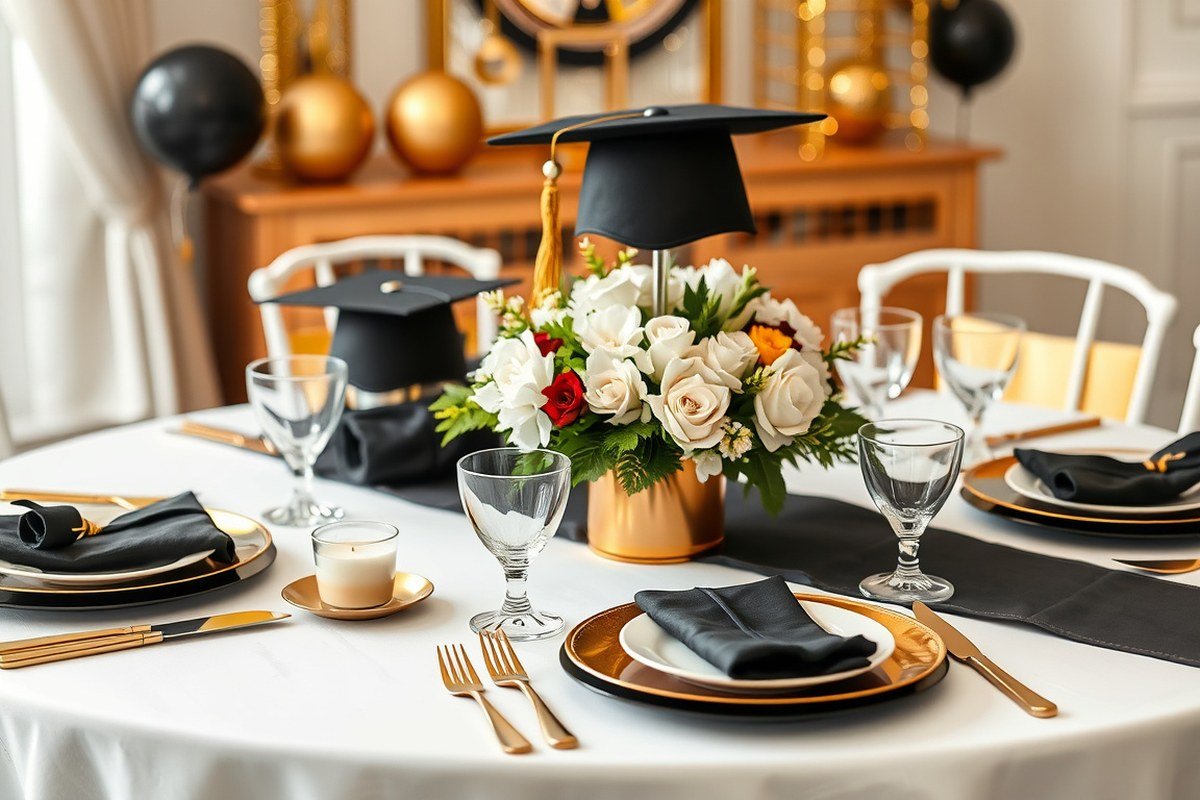
Keep in mind the venue’s style and size. A backyard party suits casual, colorful themes, while a formal hall might call for elegant palettes like black, gold, and white that add sophistication without clashing with the environment. Matching your theme to the venue’s atmosphere improves the overall experience and makes decorating easier.
Pick a Cohesive Color Palette with 2-3 Main Colors
Choose two or three complementary colors as the base of your palette. These should include the graduate’s school colors alongside one or two accent hues that either match their personality or the chosen theme. Popular graduation color combos to consider are navy blue and gold, maroon and silver, or black and metallics like rose gold. These pairs maintain a festive feel while staying visually appealing.
Use your chosen colors consistently across tablecloths, disposable tableware, balloons, and other decorations. This consistency creates a polished, professional look and makes it easier to source supplies. Avoid adding too many distracting colors, which can make the space feel cluttered or chaotic and detract from the focus on the graduate.
Integrate School Colors Without Overwhelming the Design
School colors are an important part of celebrating the graduation but should be balanced to avoid overpowering the design. Use school colors as accents in balloons, tassels, and small decorative items like banners or napkins. Complement them with neutral or softer shades, white, beige, or light gray, for larger elements such as tablecloths or backdrops.
If the school colors are bold or bright, limit their use to key pieces like centerpieces or balloon arches to keep the décor from becoming overwhelming. Another option is to combine school colors with the graduate’s future college colors or favorite tones, mixing them tastefully to keep the design fresh yet meaningful.
Customize Details to Amplify the Theme
Small personalized details like tassels, centerpieces, or even the design on disposable tableware reinforce the theme and color scheme. For example, if the theme is tropical beach for a summer backyard party, use bright coral, turquoise, and sand hues for linens and plastic plates. Add themed centerpieces such as mini palm trees or seashells to tie everything together.
Incorporate handmade decorations or DIY options that fit your budget and add a custom touch. Custom banners with the graduate’s name, age, or future college logo can bring the color scheme together while staying affordable. These small investments in decor make the party feel thoughtfully planned and unique to the graduate.
Plan the Setup to Highlight Color and Theme Coordination
Allocate enough time to arrange decorations so the theme and color scheme connect across the different areas of the venue. For example, coordinate balloons, table linens, and centerpieces in matching shades. Place color-coordinated disposable plates, napkins, and cups on serving tables to complete the look and make cleanup easier afterward.
Consider the timing and location of photo spots, food stations, and seating arrangements to maximize the impact of your chosen colors and theme. Grouping decorations by color zones can guide guests and encourage photos, which will help people remember the party as both beautiful and meaningful.
Consistently applying your chosen color scheme across all party elements, from balloons to tableware, creates a polished atmosphere that guests will notice and appreciate.
Creating Memorable Photo Areas and Booths
Creating photo areas with fun backdrops and props makes your graduation party more interactive and memorable. These spots invite guests to capture special moments with the graduate and share the celebration in a playful way. Simple setups using DIY materials and personalized touches work well indoors or outdoors.
DIY Backdrop Ideas for Different Venues
Backdrops are the centerpiece of any photo booth and set the mood for your party photos. For indoors, lightweight fabric or curtains combined with string lights or paper flowers create a festive yet easy-to-assemble background. Outdoors, consider using a sturdy frame to hang balloons, banners, or a vinyl banner printed with the graduate’s name and graduation year.
Choosing the right backdrop material depends on factors like weather, venue size, and setup time. Common options include fabric, paper, balloons, and vinyl. Each has a different cost and durability:
| Material | Best For | Cost | Durability | Notes |
|---|---|---|---|---|
| Fabric (curtains, sheets) | Indoor, reusable | $10, $30 | High | Easy to hang, wrinkle resistant if treated |
| Paper (streamers, pom-poms) | Indoor, short events | $5, $15 | Low | Inexpensive, not weatherproof |
| Balloons | Outdoor and indoor | $10, $25 per pack | Medium | Inflate onsite, may deflate after hours |
| Vinyl banners | Outdoor, personalized | $20, $50 | High | Custom print options, weather resistant |
Choose your backdrop based on location and how long the party lasts. A vinyl banner is ideal for all-weather outdoor setups, while fabric offers a professional look indoors with easy storage.
Photo Booth Prop Essentials
Props add fun and personality to your photo booth, making guests more eager to participate. Must-have items include graduation caps, oversized glasses, playful signs with congratulatory messages, and themed items like college merchandise or tassels. Lightweight props on sticks or clip-ons are easiest for guests to hold or wear.
Keep your props organized in a dedicated basket or stand near the photo area for easy access. Using props with bright colors and bold fonts ensures they show well in photos. Avoid fragile items that could break or cause discomfort. Here’s a simple step-by-step to set up your DIY photo booth:
- Choose a backdrop suitable for your venue and secure it firmly to a frame, wall, or doorway.
- Arrange lighting to brighten faces evenly, natural light works best outdoors; add string lights indoors.
- Set up a small table or stand for props next to the backdrop for easy guest access.
- Place a camera on a tripod or designate a phone with a selfie stick and remote timer near the backdrop.
- Test the setup by taking a few photos to check lighting and backdrop appearance.
- Provide instructions on a small sign encouraging guests to grab props and snap their fun photos.
Displaying Grad Photos Creatively
Showcasing past and current photos of the graduate adds a meaningful touch to your photo areas. Stringing a garland of pictures from kindergarten through senior year along the photo booth backdrop tells a story and sparks conversation. You can use clothespins or clips to hang photos on twine or ribbon.
Another idea is to create a dedicated memory corner with mason jars holding rolled-up photo scrolls, displayed college pennants, or a stack of favorite books alongside framed senior portraits. These displays personalize the space and highlight the graduate’s achievements.
Lighting marquee letters spelling “GRAD” near the photo booth creates a glowing focal point that works well both day and night. This adds a professional look and encourages guests to gather for group photos around a fun, thematic element.
Personalizing Decorations to Celebrate the Graduate
Personalizing decorations for a graduation party creates a memorable atmosphere that truly celebrates the graduate’s achievements and personality. Start by crafting custom banners and signs featuring the graduate’s name, graduation year, and school name. For example, a welcome sign reading “Class of 2024, Let’s Celebrate!” placed at the entry sets a festive tone. Use templates available online or design with software like Canva, ensuring you include school colors and logos to tie in school spirit tastefully. You can print these on sturdy cardstock or vinyl for outdoor durability, typically costing $10 to $30 depending on size and materials.
Creative ways to feature the graduate’s name and year include using a Cricut or Silhouette Cameo cutter to make glitter paper cutouts of the graduation year or the graduate’s initials. Attach these to flower vases or create a centerpiece with numbers made from cardstock. Custom cake toppers provide another personal touch, design one that includes the graduate’s name, school, and year. Local bakeries or online shops often offer custom toppers for around $20 to $50. Alternatively, simple DIY versions can be made by printing the details on cardstock and attaching toothpicks. Adding a graduation cap decoration to cupcakes along with the year is an easy way to personalize desserts and delight guests.
Integrating school logos and mascots into decorations shows pride while keeping things tasteful. Use these elements sparingly on balloons, table runners, or small signs to avoid overwhelming the space. Custom posters or yard signs featuring the mascot alongside the graduate’s photo and name can line the driveway or front yard to welcome guests. Such signs typically cost $15 to $40 each, depending on size and customization levels. Chalkboards are also a versatile option, write motivational quotes, inside jokes, or achievements related to the graduate to engage guests and highlight personality. This approach allows for quick updates and inexpensive decoration at approximately $10 to $20 for a small chalkboard.
Memorabilia such as framed photos, awards, or sports jerseys can be part of the decorating scheme. Display these on decorated tables or as part of a dedicated “memory wall.” Use lightweight frames and secure displays to prevent tipping or damage. Personalized napkin stickers are another simple addition; print the graduate’s name and year on adhesive paper and apply them to napkins for a cohesive look. These stickers cost less than $10 for sheets of 30 to 50 and can be designed at home.
Good results come from coordinating personalized pieces with the overall theme and color scheme, avoiding clutter or mismatched elements. Overuse of logos and text can make the space feel crowded. Keep personal touches balanced with simpler decorations to highlight your grad without overwhelming guests. When you combine these customized decorations thoughtfully, you create a welcoming and celebratory environment that feels unique to your graduate’s journey.
Decorating Tables and Serving Areas with Style
Decorating tables and serving areas for a graduation party sets the tone and keeps the celebration lively and organized. Using themed props and color-coordinated tableware helps tie the décor together, making the space both attractive and functional. Start by choosing a color scheme that matches your party theme, metallics like gold, silver, or rose gold offer a festive look, while school colors add a sense of spirit and pride.
Centerpieces should be eye-catching but practical. For example, simple flower arrangements in vases wrapped with a ribbon matching the theme can brighten tables without overcrowding them. Balloons in coordinating colors anchored with weights also work well and add height to your table settings. Include photos of the graduate in small frames or on table tents to add a personal touch and spark conversations.
Tableware should complement the colors and theme without breaking the budget. Disposable plates, cups, and napkins with metallic accents or patterns are cost-effective and easy to manage. For a touch of elegance, consider reusable or premium disposable flatware that matches your color theme. Use chargers under plates for a layered look that makes the setup feel more polished.
- Use printed inspirational graduation quotes framed or laminated as table decor.
- Incorporate a guestbook station that doubles as a decorative element near food areas.
- Place small favor bags or treat boxes on each table as part of the centerpiece.
- Employ themed props like graduation caps, diplomas, or miniature graduation gowns near food trays.
- Select a consistent style of serving trays and utensils to maintain visual harmony at food stations.
- Use colorful table runners that match your theme for extra layering on plain tables.
- Keep food and drink labels clear and themed, using chalkboards or printed cards.
Food and drink areas benefit from a cohesive design that makes the flow natural and inviting. For example, setting up a taco bar with colored tableware and theming props like sombreros or graduation signs creates a fun focal point. Coordinate decorations around drink stations with matching beverage dispensers, themed straws, and cups. This not only helps guests handle the party but also maintains a festive atmosphere.
Keep in mind that overcrowding tables with decorations can reduce space for food and guests’ plates, so balance style with functionality carefully.
Incorporating School Spirit and Meaningful Symbols
Incorporating school spirit into your graduation party decor boosts pride and personalizes the celebration, but it takes a careful balance to keep the look tasteful and inviting. Start with your grad’s school colors as the base for balloons, table runners, and fringe decorations. Using just one or two key colors avoids overwhelming the space and lets these elements complement the overall theme. For example, create balloon columns in the school colors that anchor the food or gift tables, giving you a polished yet spirited touch.
Displaying the school logo or mascot can be striking without dominating the design. Try incorporating smaller, handcrafted items like felt pennants with the school logo or initials. These are inexpensive to make or buy and can hang along walls, fences, or across entrances to keep the look festive but subtle. You might also use a few tasteful signage pieces, such as an elegant Graduation Signs Bundle featuring the school’s emblem combined with clean typography. This approach highlights pride while fitting into a more refined setup.
Another smart way to balance mascot themes with elegance is by mixing school symbols with neutral decor elements. Wooden display shelves, like placing pieces of wood between a ladder’s rungs, offer a natural, warm place to showcase graduation mementos and snacks. This rustic touch pairs well with more formal decor and breaks up the color-heavy school branding. Adding directional arrows that point to different areas of the party, while naming the graduate’s future university, makes the environment feel organized and meaningful.
Subtle school branding works best when sprinkled thoughtfully throughout. Instead of large banners, consider small details such as napkin rings, custom photo booth props, or even a guestbook area decorated with school colors and a mascot emblem. These elements engage guests with the spirit of the day without creating visual clutter. For outdoor parties, using lawn signs or chalkboards with the school logo can complement the fresh air setting by adding personality without being overpowering.
Costs vary, but crafting your own felt pennants or balloon columns typically runs around $20 to $50 in materials. Professional sign bundles may cost $30 to $70, depending on customization. Keep in mind that overusing logos and mascots risks making the decor feel like a sports event rather than a celebration. Aim for quality and balance by mixing themed pieces with classic accents such as white linens, clear vases, and metallic touches that echo the school colors.
Successfully integrating school spirit means amplifying the graduate’s achievements and community connections while maintaining an elegant atmosphere. With these thoughtful touches, your party will feel personal and festive, giving guests the chance to celebrate with meaningful symbols that resonate beyond just decoration.
Lighting and Ambiance for Day and Evening Celebrations
Lighting sets the tone for your graduation party and helps create a welcoming, festive atmosphere that adapts from daylight to evening. For outdoor events, string lights and solar-powered lanterns offer charming illumination without the hassle of cords. They’re easy to hang on trees or patios and often cost between $20 and $50 for a 25-foot string. Indoors, LED candles and battery-operated fairy lights add a soft glow around tables or photo areas, avoiding the fire risk of real candles.
Using lighting to highlight key decor elements draws guests’ attention and improve the celebration’s feel. Large illuminated numbers or letters that display the graduation year become glowing focal points perfect for photos. You can also place spotlights or uplights under banners or floral arrangements to emphasize those details in the evening hours. Careful layering of light sources, from overhead lights to table lamps or battery-powered picks, creates depth and warmth, making guests feel comfortable whether it’s day or night. Choosing the right lighting depends on your party’s location, timing, and size. Here are some popular options with their pros and cons:
- String Lights: Easy to install, create a warm ambiance; can be solar-powered or plug-in. Best for outdoor use but need safe hanging points.
- LED Candles: Safe indoors or outdoors, flameless, and inexpensive; give a cozy glow without fire risk.
- Spotlights/Uplights: Great for highlighting displays or banners; require power sources and careful placement.
- Large Illuminated Letters/Numbers: Make striking photo backgrounds; can be rented or purchased, often around $50 to $150.
- Solar-powered Lanterns: Environmentally friendly, no wiring; effectiveness depends on daytime sunlight.
- Portable Battery-powered Lamps: Flexibility to place anywhere; check battery life for event duration.
Setting up lighting safely ensures the party goes smoothly without accidents. Avoid running electrical cords across walkways or unsecured areas to prevent tripping. Use outdoor-rated extension cords and lighting fixtures for outside use. Keep all battery-operated lights away from water and check batteries in advance, especially for longer events. To save energy, use LED bulbs and solar-powered options that last longer and produce less heat, reducing fire risks. Position lights to avoid shining directly into guests’ eyes, which can cause discomfort.
For daytime celebrations, use lighter, more natural lighting options like solar lanterns or open seating in shaded areas, then switch to string or LED lights as the sun sets. This approach keeps your party visually appealing and comfortable throughout the event. Planning your lighting layout based on where people will gather or take photos helps focus your efforts on the most important spots.
Planning and Setting Up Decorations Efficiently
Setting up and taking down graduation party decorations efficiently saves time and lowers stress, helping you keep the focus on celebrating. Plan your setup at least a day before the event, organize tools and materials clearly, and allow enough time to fix mistakes early. Breaking the process down into steps and having a clear timeline makes the whole experience smoother.
Ideal Setup Timeline for Graduation Parties
Most graduation party decorations need about 2 to 4 hours to set up, depending on the size of the venue and the complexity of the decor. Start with large elements like banners and tables, then move on to smaller accents such as balloons or centerpieces. If the party is outdoors, consider the weather forecast and set up later to avoid wind or heat damage. Here is a practical step-by-step setup checklist to keep you on track:
- Assess the venue to plan where decorations and furniture will go.
- Unload and sort all decoration materials by category (balloons, banners, table decor, etc.).
- Install large backdrops, banners, and any hanging decorations first.
- Set up tables, chairs, and arrange tablecloths or runners.
- Place centerpieces, table numbers, and smaller decorations on tables.
- Inflate and arrange balloons or install balloon arches if part of the design.
- Prepare photo areas and booths last to avoid damage during other setup steps.
- Do a final walk-through to adjust and secure items to prevent falling or shifting.
Mistakes to Avoid When Decorating
Common decorating mistakes include starting setup too close to party time, which increases stress and reduces time to fix problems. Avoid overcrowding tables with too many small decorations, this can clutter the space and impact the flow of guests. Another issue is failing to test lighting and power options for electronic decorations ahead of time, which can leave areas looking dark or decorations inactive.
Quick fixes include allocating extra time for setup, especially if dealing with inflatables or intricate lighting. Use double-sided tape or removable hooks instead of nails to prevent wall damage and make post-party cleanup easier. Keep a repair kit handy with scissors, tape, zip ties, and extra batteries to address last-minute issues.
Don’t wait until the last minute to set up; beginning at least a day before lets you handle surprises smoothly and keeps the celebration relaxed.
Packing and Storing Decorations Post-Party
Organize decorations into labeled containers immediately after dismantling to keep them safe for future use. Group items by type, balloons and inflatables in one box, tablewear in another, and banners or signage in a flat, protected folder. Using zip-top bags for small parts like clips, cords, and batteries helps prevent loss.
Stack containers carefully in a dry, cool storage space to protect from moisture and damage. Deflating balloons and rolling banners to avoid creases saves space. Cleaning reusable items before storage prevents stains and odors.
Step-by-Step Action Plan for Graduation Party Decorations
Follow this timeline to get your graduation party decorations organized and set up smoothly, creating a festive vibe without stress.
- 3-4 Weeks Before: Choose your party theme and color scheme based on the graduate’s preferences and school colors. Confirm the selection by seeing if the graduate is excited and agrees with the choices.
- 2-3 Weeks Before: Order or gather key decoration elements like banners, balloons, and personalized items. Success means receiving or having all main pieces ready to test or try out.
- 1-2 Weeks Before: Plan and prepare the photo booth area with props matching your theme and school spirit symbols. Check that props and backdrops are ready and fit the space.
- 1 Week Before: Organize table and serving area decorations, including centerpieces and themed dishware. Confirm the table setup looks cohesive and allows easy access for guests.
- 3-4 Days Before: Arrange ambient and functional lighting for both daytime and evening use. Ensure lighting options create the mood and visibility needed for party activities.
- 2 Days Before: Set up as many decorations as possible at the venue, focusing on large items and key areas. Review that the space feels festive and reflects your intended theme.
- Day Before: Finalize smaller details like personalized signs and balloon arrangements, and do a full walkthrough to fix any issues. Confirm that all decorations are secure and the party space is inviting.
Frequently Asked Questions
What Are Some Unique DIY Decoration Ideas for a Graduation Party?
Create custom banners with the graduate’s name and accomplishments. Use photos from school years for a personal touch that your guests will appreciate. These DIY decorations add a meaningful, homemade feel to the celebration.
How Can I Decorate an Outdoor Graduation Party Effectively?
Use weather-resistant decorations like fabric banners and helium balloons. String lights help add ambiance and keep the party festive as daylight fades. Remember to secure all items against wind or rain.
What Is a Budget-Friendly Way to Decorate for a Graduation Party?
Focus on a few statement pieces like large number balloons and DIY photo booth backdrops. Repurpose materials you already have for table decor. This gives a stylish look without overspending.
Can I Use a Movie or TV Show Theme for a Graduation Party?
Yes, themed decorations like a “Friends” TV show setup can be fun and nostalgic. Incorporate quotes, props, and colors from the show to create a unique party vibe that reflects the graduate’s interests.
How Do I Decorate for a Virtual Graduation Party?
Use a themed backdrop for video calls and send guests small decor kits in advance. Also, personalize slideshows or digital banners with photos and achievements to keep the celebration festive online.
What Are Good Flower Decoration Ideas for a Graduation Party?
Incorporate school colors into bouquets or use seasonal blooms for a fresh look. Place flowers on tables or near photo areas to brighten spaces with natural decor.
Before You Go
Decorating for a graduation party becomes straightforward when you focus on meaningful details and plan your steps carefully. Start by deciding on a theme that celebrates the graduate’s unique achievements. Taking this first step opens the way for creating an inviting and memorable celebration space that you and your guests will enjoy.