How to Play Pool: A Complete Beginner’s Guide with Expert Tips
How to play pool starts with understanding the basics: setting up the table, holding the cue, aiming shots, and knowing key game rules. Learning proper technique and rules, especially for games like 8-ball, helps you play confidently and enjoy every match. This guide suits beginners and casual players wanting clear, practical steps to improve their pool skills.
You will get straightforward tips on setting up your table and balls correctly, mastering your stance and cue grip, and applying essential 8-ball rules. Plus, you’ll learn how to break effectively, avoid common fouls, and grasp core strategies to win more games.
Key Takeaways
- Use a medium to medium-soft cue tip for better control when starting out in pool.
- Rack the 15 balls in a tight triangle with the 8 ball in the center for standard 8-ball play.
- Practice a comfortable stance with your dominant foot forward and a steady bridge hand for accuracy.
- Start the game with a strong break by hitting the cue ball squarely into the rack.
- Know the key 8-ball rules: sink all solids or stripes first, then legally pocket the 8 ball to win.
- Avoid common fouls like scratching the cue ball or failing to hit your own balls first.
How Does Pool Work and What Are the Main Rules?
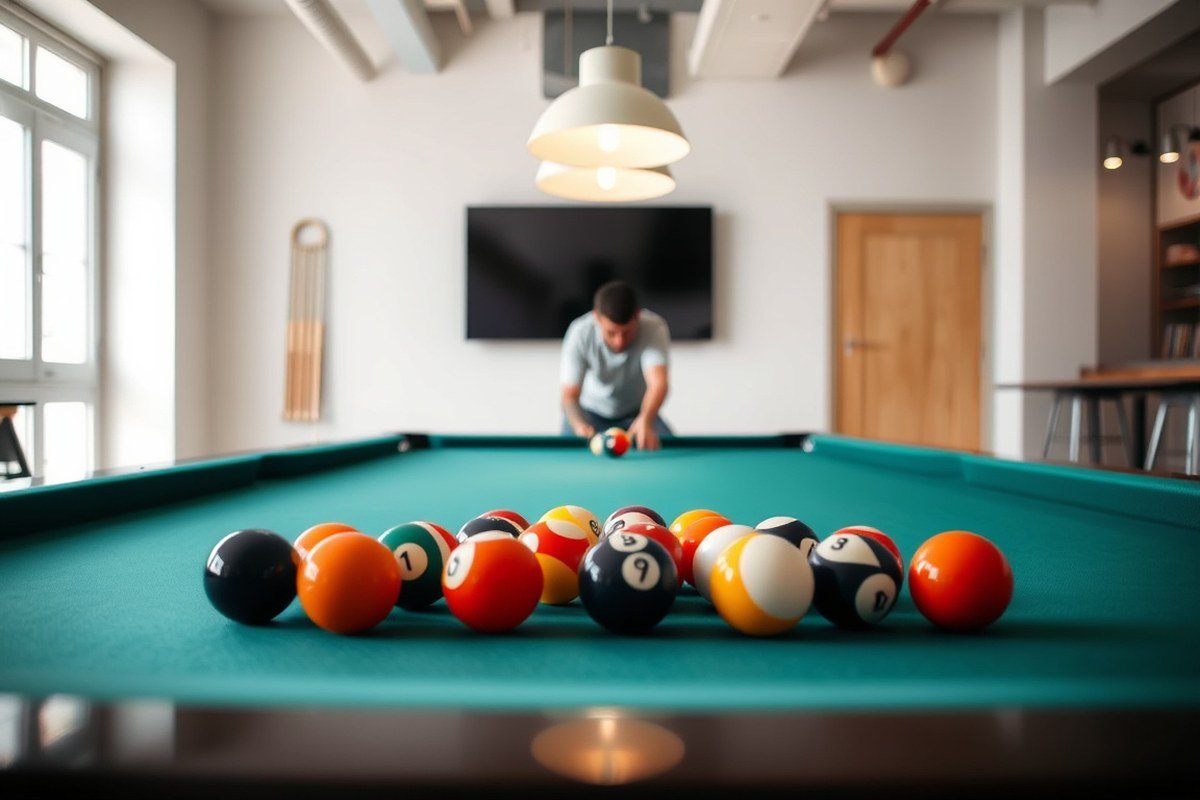
Pool is a cue sport where the main goal is to pocket a specific set of balls and then the 8-ball to win. In the standard version called Eight-Ball, one player aims to sink all the solid-colored balls numbered 1 through 7, while the other player targets the striped balls numbered 9 through 15. After pocketing all your assigned group, you must legally pocket the black 8-ball to claim victory. This clear objective helps guide your shots and strategy throughout the game.
The game begins with 15 object balls arranged tightly in a triangle, placing the 8-ball in the middle. Players alternate turns, using a cue stick to strike the white cue ball and aim to sink their designated set of balls after breaking the rack. The first player to shoot starts the game, and control passes to the other player if the shooter misses or commits a foul. Turns continue swapping as long as neither player pockets balls with a legal shot.
When you break the rack, the first ball you pocket determines your group for the entire game: solids or stripes. Pocketing a ball from one of these groups assigns that category to you, and your opponent takes the other. Your main task then becomes to pocket all balls from your group while playing defense to keep your opponent from doing the same.
A foul occurs if you fail to hit any ball, contact your opponent’s balls before your own, or pocket the cue ball, known as a “scratch.” Committing a scratch ends your turn and gives your opponent ball-in-hand, allowing them to place the cue ball anywhere on the table for their next shot. Other fouls include hitting the 8-ball before clearing your group or sinking the 8-ball too early. To avoid fouls, practice accurate aiming, maintain good cue control, and understand the rules, as fouls give your opponent an advantage.
Basic gameplay involves aiming your cue stick at the cue ball to strike your object balls into pockets. A legal shot must make the cue ball contact your chosen ball group first and then either pocket a ball or cause any ball to contact the rails. Skillful shot planning and precise execution improve your chances of sinking balls and maintaining your turn. Each shot is a mix of offense, pocketing balls, and defense, positioning the cue ball to make your next shot easier while complicating your opponent’s next move.
How to Set Up the Pool Table and Rack the Balls Correctly

Setting up the pool table and racking the balls correctly is the first step to starting an 8-ball game on the right foot. The placement of the rack and arrangement of balls affect the break shot and the flow of the game. The “foot spot” on the table serves as the anchor point for positioning the rack. Arranging the balls tightly inside the triangle ensures a clean break.
The rack goes at the foot of the table, which is opposite the side with the cue ball at the start. The foot spot is located by finding the second set of diamonds on the longer rails and drawing an imaginary line between them across the table width. That midpoint marks where the 1-ball goes, just inside the triangle rack. Here are the clear steps for racking the balls properly for 8-ball pool:
- Identify the foot spot: Locate the second diamond on each long rail near the foot of the table. Imagine a line between them. The spot is in the center of this line.
- Place the triangle rack: Set the triangle so its front tip covers the foot spot, pointing toward the head of the table.
- Put the 1-ball at the front: Place the 1-ball at the apex (front) of the triangle on the foot spot.
- Position the 8-ball in the center: Place the black 8-ball exactly in the middle of the triangle, the third row back.
- Place corner balls: Position one solid ball in one corner of the triangle and one stripe ball in the opposite corner.
- Fill in remaining balls: Arrange the other balls inside the triangle as tightly as possible in any position.
- Square the rack: Push the balls close together so there are no gaps. This helps a strong break shot spread the balls effectively.
- Remove the rack: Carefully lift straight up to keep the balls in position and begin play.
Ensure the balls are tightly grouped without gaps; a loose rack can cause an uneven break, affecting gameplay significantly.
Holding the Cue and Stance: How to Aim and Shoot Accurately
Holding the cue properly, positioning your feet correctly, using a steady bridge hand, and lining up your shot carefully all help you aim and shoot accurately in pool. Good fundamentals control the cue stick, stabilize your body, and align your shot for consistency. Following specific steps ensures each shot flows smoothly from preparation to execution.
Correct Cue Grip for Control
Grip the cue stick about 4 to 6 inches from its end with your dominant hand for the best control. Hold the cue firmly but not too tight to avoid tension in your arm, which can affect your stroke. Rest your grip primarily between your thumb and index finger, letting the cue sit comfortably on the side of your hand or between your fingers depending on what feels steadier.
Keeping the wrist relaxed prevents jerky movements during your shot. Avoid gripping too close to the cue ball, as this limits power and accuracy, or too far back, which reduces control. Your forearm should stay aligned roughly parallel to the table to promote a straight stroke.
Foot Placement and Body Alignment
Stand with your feet shoulder-width apart for balance. Position your foot opposite your dominant hand forward, aiming it roughly toward the shot target. This stance creates a stable base while lining your body for a straight, controlled stroke. Slightly bend your knees and lean forward at the hips, bringing your torso closer to the table for better sighting.
Your head should be low enough so your dominant eye looks down the line of the cue but not so low that you strain your neck. Keep your back straight to maintain a relaxed posture and prevent fatigue during longer play. Adjust stance depth based on the shot’s reach and table layout.
Forming a Steady Bridge Hand
The bridge hand anchors the cue and directs your stroke. Place your nondominant hand flat on the table about 7 to 9 inches behind the cue ball. Spread your fingers for a stable base and press your palm lightly against the surface to avoid slipping.
Form a loop or a notch between your thumb and index finger where the cue shaft will rest. This loop guides the cue in a straight line and acts as a pivot point for your stroke. Keep the bridge hand steady and relaxed; tightening fingers can cause unwanted cue movement. For shots near the table’s edge, lower the cue so it aims downward at a slight angle to avoid hitting the cushion.
Steps to Line Up and Execute a Shot
Line up your shot in a few clear steps to connect the cue ball and target ball accurately. Follow these carefully to improve your aim and shooting consistency:
- Place your non-dominant bridge hand on the table, forming a steady bridge.
- Grip the cue stick with your dominant hand about 4 to 6 inches from the end.
- Adjust your stance with feet shoulder-width, leading foot aligned toward your target.
- Lower your head to align your dominant eye over the cue stick and target line.
- Visualize the straight path from cue tip to the cue ball’s center, slightly below center for control.
- Draw the cue back smoothly and straight, maintaining your line of aim.
- Strike the cue ball with a controlled forward stroke, keeping your wrist firm but relaxed.
- Follow through slightly after contact to maintain accuracy and cue ball control.
Practicing these steps helps create muscle memory, giving you confidence and precision during the game. Shooting with consistency requires balancing control, alignment, and smooth execution. Avoid rushing or over-gripping, as either can cause misdirection or unintended spin on the cue ball.
What Are the Key 8-ball Pool Rules You Must Know to Win?
After the break in 8-ball pool, the table is “open,” which means you haven’t yet chosen between solids and stripes. You pick your group by pocketing the first ball in a called shot during your turn after the break. For example, if you pot a solid ball first, you become the solids player, and your opponent takes stripes. This choice matters because each player’s goal is to clear all their group’s balls before attempting to pocket the 8-ball.
To win, you need to clear all your assigned balls, either solids or stripes, before aiming for the 8-ball. Before shooting the 8-ball, you must clearly announce which pocket you plan to use. Saying the pocket out loud ensures everyone knows your target. Successfully pocketing the 8-ball in the called pocket without any fouls wins you the game. Calling your shot prevents misunderstandings or disagreements over whether your win was legal.
Pocketing the 8-ball too early, meaning before you’ve cleared all the balls in your group, results in an immediate loss. This rule prevents players from rushing to sink the 8-ball without properly finishing their solids or stripes. Similarly, sinking the 8-ball into a pocket other than the one you declared causes you to lose as well. Another automatic loss occurs if you accidentally sink the cue ball (a scratch) while pocketing the 8-ball. These fouls underscore why patience and deliberate play are essential during your 8-ball shot.
Some fouls lead to an automatic loss during your 8-ball shot specifically. Besides pocketing the 8-ball early or in the wrong pocket, if you foul by hitting no ball, hitting the opponent’s balls first, or scratching on the 8-ball shot, you lose the game right away. Outside of those critical fouls, standard fouls like failing to hit any ball or sending the cue ball into a pocket give your opponent ball-in-hand, but do not end the game. The exact fouls that cause automatic losses are why it’s especially important to focus and execute precise shots when you reach the final phase of the game.
Breaking the Rack: Tips and Techniques for a Strong Start
Starting strong with the break shot sets the pace of the entire pool game. Placing the cue ball legally, choosing an effective breaking technique, and managing the table layout immediately after the break are critical. Understanding how to decide who breaks first also ensures a fair start.
Cue Ball Placement Options for the Break
You must place the cue ball behind the head string, often called the “kitchen,” before breaking. The head string is an imaginary line that runs across the table near the head rail. This placement respects official rules and common play etiquette, helping avoid fouls.
One standard rule lets the breaker place the cue ball anywhere inside the kitchen. Some casual games require the cue ball to be behind the head string and between the side pockets’ dots. In others, the breaker must place it behind the same pair of dots on the side they started.
A legal break depends on placing the cue ball correctly; placing it outside the kitchen leads to an automatic foul.
Power and Control Tips for Breaking
The key to a strong break is combining power with control. Hitting the rack head-on delivers maximum spread but can increase the risk of scratching. Breaking slightly off-center can control where the cue ball and cluster go. Follow these steps for an effective break:
- Place the cue ball behind the head string with enough room to build your stance comfortably.
- Aim to hit the front ball of the rack (usually the 1-ball in 8-ball) first.
- Use a firm, smooth stroke with a powerful follow-through to maximize force.
- Avoid hitting the cue ball too low to prevent a jump shot or scratch.
- Try breaking at a slight angle if pocketing the 9-ball (in 9-ball pool) or for better cue ball control.
- Watch the cue ball to avoid it scratching by monitoring its path to avoid falling into pockets.
Understanding Open Table Layout After Break
After the break, the table is open, meaning no player owns any group of balls yet. Your main goal is to pocket a ball legally, starting your run. A legal break requires either pocketing a ball or driving at least four balls to rails. Failing to legally hit a ball results in a foul, giving your opponent ball-in-hand.
Watch how the balls scatter across the table. Pocketed balls stay down even if a foul occurs, ending your turn. Scratching on the break lets your opponent place the cue ball anywhere in the kitchen for their shot.
Always check the rules about what happens after a scratch on the break, as they differ; some allow ball-in-hand anywhere, others limit placement to the kitchen.
How a Lag Determines Who Breaks
Using a lag is the official way to decide which player breaks first. Both players shoot their cue ball from behind the head string to the foot rail and back. The ball returning closest to the head rail wins and breaks first.
This method offers fairness and eliminates any arguments about who should start. The player who loses the lag shoots second. Some informal games may decide turn order differently, but the lag is standard in tournaments.
Common Fouls, Penalties, and How to Avoid Them
A scratch in pool means pocketing the cue ball accidentally during your turn. This often happens if you hit the wrong ball first, fail to hit any ball, or send the cue ball into a pocket. Scratching hands your opponent a big advantage because they get ball-in-hand, which lets them place the cue ball anywhere behind the headstring before shooting. On the break, scratching also gives your opponent the option to re-break or take the table as it is.
Double hits arise when your cue stick strikes the cue ball twice in one stroke. This is usually a sloppy stroke or hitting the cue ball too close to the tip. It counts as a foul and gives ball-in-hand to your opponent. Jump shots can also be illegal if you hit the cue ball below center, causing it to jump over another ball unexpectedly. Such shots can be ruled a foul depending on house rules.
Fouls generally hand your opponent ball-in-hand, meaning they can place the cue ball freely on the table for their next shot. Common fouls in 8-ball include scratching, double hits, hitting an opponent’s ball before your own group, or not driving any ball to a rail after contact when no ball is pocketed. Failing to meet these conditions can shift momentum because the opponent gets easier shot options.
- Scratch: Cue ball is pocketed or hits wrong ball first
- Double hit: Cue stick strikes cue ball twice in one shot
- Illegal shot: Failing to hit your ball first or no ball hitting a rail after contact without a pot
- Jump shot (in some rules): Cue ball jumping over balls without legal contact
- Scratching on the 8-ball shot causes immediate loss of the game
Scratching on the 8-ball shot, or pocketing the 8-ball out of turn or in the wrong pocket, results in an automatic game loss. This rule raises the stakes on the final shot, requiring precise control and awareness. Other fouls simply give your opponent ball-in-hand and the chance to take over, but they don’t automatically end the game. Understanding these fouls helps you avoid costly mistakes and improves your control over when and how to take risks.
Differences Between 8-ball and 9-ball Pool Games Explained
8-ball and 9-ball are two popular pool games that differ significantly in setup, rules, objectives, and strategy. Both require potting balls into pockets with a cue stick, but the way you approach each game changes how you plan your shots and aim for victory.
In 8-ball, you have 15 balls divided into solids (1-7) and stripes (9-15), plus the black 8-ball. You rack these balls in a triangle shape with the 8-ball in the center. Your goal is to pocket either all solids or all stripes. Once you clear your set, you must call the pocket for the 8-ball and sink it properly to win. Pocketing the 8-ball early or in the wrong pocket results in an automatic loss.
The game 9-ball features balls numbered 1 to 9 arranged in a diamond formation, with the 1-ball at the front and the 9-ball positioned in the center. Players have to strike the ball with the lowest number on the table first but can pocket any ball during their shot. The objective is to legally pocket the 9-ball to claim victory. Committing fouls can lead to the 9-ball being placed back on the table and give the opponent the chance to place the cue ball anywhere before their next shot.
| Feature | 8-Ball Pool | 9-Ball Pool |
|---|---|---|
| Ball Rack Setup | Triangle with 15 balls; 8-ball in center | Diamond with 9 balls; 1-ball front, 9-ball center |
| Objective | Clear solids or stripes, then sink 8-ball in called pocket | Sink 9-ball after hitting lowest-numbered ball first |
| Winning Condition | Legally pocket 8-ball after clearing set | Legally pocket 9-ball at any point |
| Fouls | Early 8-ball pocket loses game; standard fouls apply | 9-ball respotted if pocketed during foul; ball-in-hand for opponent |
| Player Strategy | Control table to clear your group, plan 8-ball shot carefully | Plan position for next lowest ball; shot-making is sequential |
| Best For Beginners | Good for learning ball control and pattern play | Better for developing precise aiming and cue ball control |
The rack shape matters because it influences ball movement during the break. Triangle racks in 8-ball lead to a spread of both solids and stripes, requiring players to decide their group early. The diamond rack in 9-ball aligns balls to encourage sequential potting of lower numbers before the 9-ball, making positioning important.
8-ball lets you choose your group after the break, making it a bit more flexible for beginners learning to control the cue ball and plan several shots ahead. 9-ball demands precise hits on the lowest-numbered ball and excellent cue ball control to set up the next shot. Scoring in 8-ball is straightforward, pocket your group then the 8-ball; in 9-ball, sinking the 9-ball legally at any point wins, but fouls can reset rules and advantages.
Basic Pool Strategies and Tips to Improve Quickly
Improving quickly in pool means focusing on strategic shots and avoiding typical beginner mistakes. Concentrate on simple shots, plan your moves two steps ahead, correct common errors like hitting too hard, and use specific solo drills to develop consistency and control.
Prioritize Easy Shots and Position Play
Start by practicing straight shots where the cue ball hits the object ball squarely. These shots are the foundation and build confidence. Once you can make straight shots consistently, work on gentle angle shots to set up your next move. Position play is about controlling where the cue ball lands after a shot so you have a good angle for the next ball. This means shooting with purpose, not just hitting balls randomly.
Simplify your strategy by focusing on shots that keep the cue ball near the center of the table or near other balls you need to sink next. Avoid risky shots that require sharp angles or long rolls until your stroke is steady.
Planning Multiple Shots Ahead
Think about where the cue ball and object balls will end up after each shot. Planning two shots ahead is enough for most beginners. For example, if you’re shooting ball 3, think about how to leave the cue ball lined up for ball 5 next. This approach reduces scrambling and helps you clear the table smoothly. Here’s a simple way to plan your sequence:
- Identify the easiest ball to pocket first
- Look where the cue ball will stop after that shot
- Choose the next target ball that’s nearby the cue ball’s new position
- Avoid shooting balls that send the cue ball into difficult spots
- Adjust your shot strength to control cue ball speed and position
Following this sequence lets you map a route through the balls, saving time and shots.
Fixing Common Errors Like Over-Hitting
One frequent mistake is hitting the cue ball too hard. Over-hitting can cause loss of control and missed shots. It also makes positioning harder because the cue ball bounces unpredictably. Instead, focus on smooth, controlled strokes with moderate power to keep shots precise.
Another common issue is failing to line up shots properly. Make sure your body, cue, and eyes are aligned straight toward your target ball. Take time to aim rather than rushing your shot.
Avoid trying to power through every shot; speed kills accuracy and spoils position control.
Consistency beats power when you’re learning. Develop a calm and steady stroke with each shot.
Solo Practice Drills to Build Consistency
Practicing alone is a great way to improve without pressure. Here are some effective drills:
- Straight shot drill: Line up several balls in a row and practice sinking each with a straight shot, focusing on smooth contact and cue ball control.
- Stop shot drill: Hit the cue ball so it stops dead after contacting the object ball, teaching you to control cue ball speed precisely.
- Position drill: Pocket a ball and then try to position the cue ball within a certain area near the next ball using soft, controlled strokes.
- 9-ball pattern drill: Practice shooting balls in sequence to understand ball movement and improve shot planning.
Doing these drills regularly, even for 15 to 20 minutes, will build your muscle memory and shot consistency. They also sharpen focus, a key skill that transfers to real games. Take your time with each shot and track your progress to see improvement.
Step-by-Step Action Plan to Start Playing Pool Today
Follow these steps to get comfortable with the basics of pool and improve your game quickly.
- Before you start: Set up your pool table and rack the balls correctly. Make sure the apex ball is on the foot spot and the rack is tight. You’ll know it’s right if the balls don’t move when you remove the rack.
- Day 1: Practice your stance and how to hold the cue. Aim at a specific ball and try smooth, controlled shots. You’re on track when your shots start to hit where you aim more than half the time.
- Day 3: Learn and practice the basic 8-ball rules, including how to call shots and avoid fouls. Check your consistency in calling shots correctly during practice games.
- Week 1: Work on breaking the rack with a solid, legal break shot to spread the balls. Success shows when several balls move across the table after your break.
- Week 2: Start playing casual matches focusing on avoiding common fouls like scratching or hitting the wrong ball first. Notice fewer penalty shots given to your opponent.
- After 2 weeks: Try switching between 8-ball and 9-ball rules to get comfortable with both games. You’ll know you’re improving when you can explain each game’s differences and play without hesitation.
- Ongoing: Apply basic strategies like controlling cue ball position and planning shots ahead. Improvement is visible when you regularly sink multiple balls in a row during games.
Frequently Asked Questions
What Basic Rules Should I Know When Starting to Play Pool?
You need to learn the main rules like how to rack the balls, hitting the correct ball group, and knowing fouls. These basics help you play fair and enjoy common games like 8-ball or 9-ball with others.
Is Pool Difficult to Learn for Beginners?
Pool can seem tricky at first but is quite approachable once you understand rules and practice your cue shots. Regular play helps improve hand-eye coordination and aiming skills over time.
What Is the Best Tip for Improving My Pool Game Quickly?
Focus on your stance and aiming technique before power. A steady stance combined with smooth, controlled strokes improves accuracy and consistency in potting balls.
How Does Practicing Alone Help in Learning Pool?
Solo practice lets you work on your stroke, aim, and breaking skills without pressure. You can experiment by potting balls or breaking racks to build confidence at your own pace.
What Is the Difference Between 8-ball and 9-ball Pool?
8-ball uses 15 balls split into stripes and solids, while 9-ball involves just nine balls in numerical order. Each game has its own rules and strategies, offering different challenges and fun.
Can You Play Pool Without a Partner?
Yes, you can practice alone by focusing on shots and breaks, enjoying solo drill exercises to build skills for future games.
Key Points to Remember
Pool becomes easier and more enjoyable as your skills grow through practice and understanding the rules. Start by mastering your stance and cue control, then focus on consistent play without fouls. Grab a cue, set up a game with friends, and practice breaking and aiming, each shot brings you closer to playing confidently.