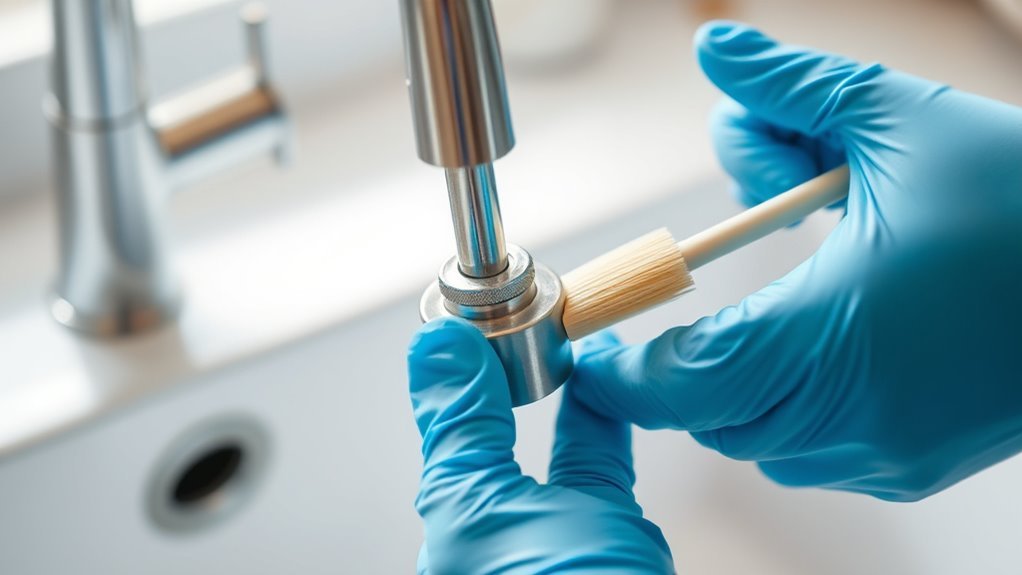
How to Clean Kitchen Faucet Head: A Step-by-Step Guide
Dealing with a clogged or weak-flowing kitchen faucet head is a common frustration many homeowners face. You’re not alone—over time, mineral buildup can turn your once-smooth spray into a trickle.
Luckily, cleaning your faucet head can restore its performance and save you a trip to replace it.
To clean your kitchen faucet head, first turn off the water supply and twist the head counterclockwise to remove it, using pliers if needed.
Soak it in equal parts white vinegar and warm water for 30-60 minutes to loosen mineral buildup. Gently scrub with a soft toothbrush, rinse well, and reattach, tightening by hand and then snugging with pliers.
Watch for reduced flow or uneven spray as signs it’s time to clean. Keep going to uncover tips for different faucet types and maintenance.
Key Takeaways
- Remove the faucet head by twisting it counterclockwise. Use a cloth and adjustable pliers to avoid scratches and loosen any tight connections.
- Soak the faucet head in equal parts white vinegar and warm water for about 30 minutes to dissolve mineral deposits.
- Gently scrub the aerator and crevices with a soft-bristle toothbrush while soaking. Focus on clogged holes to clear out any buildup.
- Rinse everything thoroughly with warm water. Reassemble and secure the faucet head, then test for leaks to make sure it’s all set.
- Clean the faucet head every 1-2 months. Keep an eye out for reduced water flow, uneven spray, discoloration, or strange odors as signs it’s time to clean.
Quick Step-by-Step Guide to Cleaning Your Kitchen Faucet Head
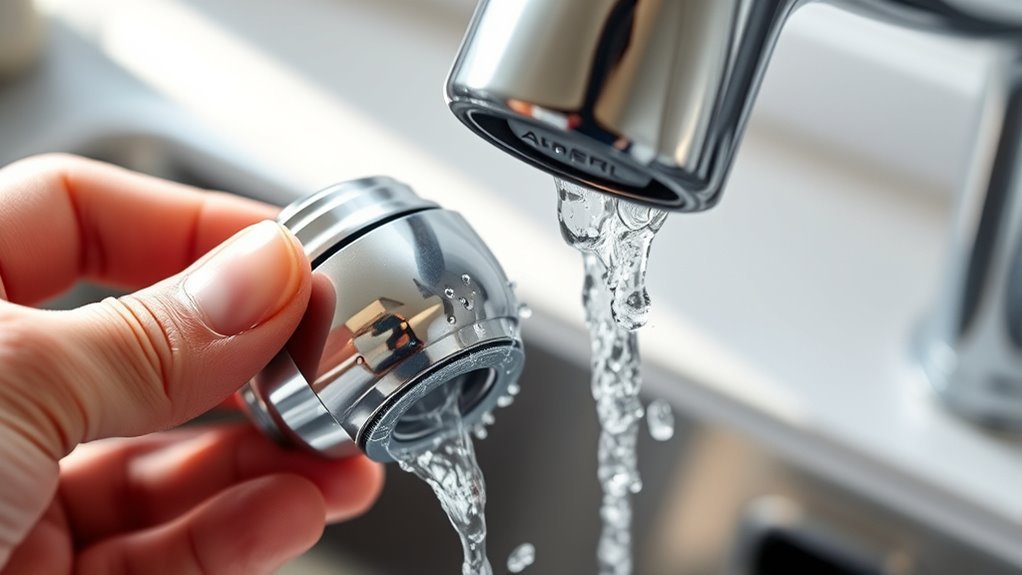
Cleaning your kitchen faucet head is easier than you might think. To start, twist it counterclockwise to remove it—most models come off easily. Soak it in a bowl of white vinegar for about 30 minutes to break down mineral buildup.
Remove your kitchen faucet head by twisting counterclockwise, then soak in white vinegar to dissolve mineral buildup.
While it soaks, gently scrub the faucet head with an old toothbrush to clear away debris. Rinse it thoroughly with water and then reattach it securely.
For effective faucet maintenance, clean your faucet head regularly—about every one to three months, depending on how hard your water is. Regular cleaning helps prevent clogs and keeps the water flowing smoothly.
Wiping the faucet head weekly also helps avoid buildup between deep cleans. Following these simple steps will keep your kitchen faucet working well and extend its lifespan. Stick to this routine, and you won’t have to worry about blockages or reduced water pressure.
How to Tell When Your Kitchen Faucet Head Needs Cleaning
How do you know when your kitchen faucet head needs a good cleaning? Look out for signs like reduced water flow or uneven spray patterns, which often mean mineral buildup. Keeping up with regular cleaning helps prevent these issues and keeps your faucet working its best.
If you notice discoloration or water spots, that’s a clear sign it’s time to give it a good clean. Staying on top of these signs ensures your faucet stays in great shape and functions properly.
Here’s a quick guide to help you recognize when your faucet head needs attention:
| Sign | What It Indicates |
|---|---|
| Reduced water flow | Mineral buildup blocking the flow |
| Uneven spray pattern | Clogged aerator holes |
| Discoloration or spots | Mineral deposits forming |
| Strange taste or odor | Bacteria or sediment buildup |
Tools Needed to Clean Your Kitchen Faucet Head
To clean your kitchen faucet head effectively, you’ll want to gather a few simple tools. A soft brush and some vinegar are great starting points. They’ll help loosen any buildup and get your faucet looking shiny again.
You might also find it helpful to have a small toothbrush or a cloth on hand for wiping away any stubborn spots. Having these items ready before you start will make the whole cleaning process quicker and much easier.
Essential Cleaning Tools
You’ll need a few essential tools to get your kitchen faucet head sparkling clean without hassle. Start with a soft-bristle toothbrush or small scrub brush to gently remove buildup without damaging the surface. A microfiber cloth will help wipe away loosened grime and give the faucet a nice polish afterward.
Have a bowl or container ready to soak parts if you plan to remove the faucet head. White vinegar is a must-have for dissolving mineral deposits, especially if you live in a hard water area.
Furthermore, keep a pair of adjustable pliers handy for loosening and tightening the faucet head during cleaning. Sticking to a regular cleaning schedule improves faucet maintenance and prevents stubborn buildup. This makes your efforts more effective and helps extend your faucet’s lifespan.
Optional Helpful Accessories
Along with the basic tools, a few optional accessories can make cleaning your kitchen faucet head even easier and more effective. Consider using a small toothbrush or a specialized faucet brush to reach tight crevices. These faucet accessories help scrub away stubborn mineral deposits without damaging the surface.
You might also find a flexible pipe cleaner handy for clearing internal buildup. In terms of cleaning solutions, having a spray bottle filled with vinegar or a mild descaling agent allows you to apply the solution evenly and soak the faucet head thoroughly.
Furthermore, rubber gloves protect your hands from harsh chemicals, while a microfiber cloth guarantees a streak-free finish. These accessories aren’t mandatory but certainly improve your cleaning process, saving you time and effort.
How to Remove Your Kitchen Faucet Head Safely
Before you start, gather the necessary tools like an adjustable wrench or pliers and a cloth to protect your faucet’s finish. These are essential for safe removal techniques that prevent damage during faucet maintenance.
First, wrap the cloth around the faucet head to avoid scratches. Then, use the wrench or pliers gently to loosen the faucet head by turning it counterclockwise. Don’t force it; if it feels stuck, try applying a bit of penetrating oil and wait a few minutes.
Wrap a cloth around the faucet head and gently loosen it counterclockwise with a wrench or pliers.
Remember to shut off the water supply before removing the faucet head to avoid leaks or water sprays. Once loosened, you can unscrew it by hand.
Keep these faucet maintenance tips in mind: avoid excessive force and always protect the finish to extend your faucet’s lifespan. Following safe removal techniques guarantees you can clean or replace the faucet head without causing damage or unnecessary repairs.
Troubleshooting Faucet Head Removal Issues
Having trouble removing your faucet head? You’re not the only one! Sometimes mineral buildup or stuck threads make it really tough to loosen. No worries—just make sure you’ve got the right tools nearby, like a wrench or a pair of pliers, to help you out.
Just be careful when you’re working on it so you don’t accidentally damage the faucet or scratch the finish. Take your time, and you’ll be able to get that faucet head off safely!
Identifying Common Removal Problems
When you try to remove your kitchen faucet head, you might run into some common issues that can slow you down or cause damage. One frequent problem is overtightened connections, which make the faucet head hard to loosen. Avoid using too much force right away, as this can strip threads or crack parts.
Another common mistake is not turning off the water supply before you start. This can lead to leaks or water spraying everywhere. Also, make sure you know what kind of connection you’re dealing with—whether it’s threaded or snap-on. Trying to pry it off without knowing can cause damage.
Finally, don’t forget to check for hidden screws or clips. Missing these can cause frustration and even breakage. Being aware of these common issues will help you avoid trouble when you’re removing your faucet head.
Tools For Stubborn Faucet Heads
Grab the right tools to tackle stubborn faucet heads that refuse to budge. When dealing with tough buildup, having the proper equipment can save you time and frustration.
Here are four essentials to help with stubborn residue solutions:
- Adjustable wrench. It provides a firm grip without damaging the faucet.
- Rubber strap wrench. It prevents scratches while loosening stuck parts.
- Old toothbrush. Perfect for scrubbing away mineral deposits and grime.
- Vinegar soak kit. It helps dissolve stubborn residue naturally.
Using these tools aligns with smart faucet maintenance tips, ensuring you remove the faucet head safely and efficiently.
With the right approach, you’ll overcome stubborn removal issues and keep your kitchen faucet in top shape.
Preventing Damage During Removal
Using the right tools from the previous section helps you tackle stubborn faucet heads effectively, but it’s just as essential to protect your faucet from damage during removal. Start by applying gentle pressure and avoid forcing the faucet head, which can strip threads or crack components.
Use proper removal techniques like turning counterclockwise with a wrench wrapped in a cloth to prevent scratches. If the faucet head resists, try soaking it in vinegar to loosen mineral buildup before attempting removal again.
Avoid using excessive heat or harsh chemicals that can damage seals and finishes. By following these careful steps and avoiding common mistakes, you’ll remove your kitchen faucet head safely, preserving its condition for easy cleaning and long-term use.
How to Soak and Remove Mineral Buildup From Your Faucet Head
Soak your faucet head in a vinegar solution to break down stubborn mineral deposits that clog the water flow. Vinegar soaking techniques are easy to do at home and effective for preventing mineral buildup.
Here’s how to do it right:
- Mix equal parts white vinegar and warm water in a bowl.
- Submerge the faucet head fully in the solution, making sure all clogged areas are covered.
- Let it soak for 30 minutes to an hour to dissolve mineral deposits.
- After soaking, rinse thoroughly with warm water to remove any loosened buildup.
This simple soak softens tough calcium and lime scale, helping your faucet flow smoothly again. Using vinegar regularly in your cleaning routine can also prevent mineral buildup before it becomes a problem.
Once you’re done soaking, you can scrub gently or reinstall the faucet head, confident it’s clean and clear.
How to Scrub Away Grime and Bacteria Without Damaging Your Faucet
To get rid of grime and bacteria without damaging your faucet, it’s best to stick with gentle cleaning methods and soft tools like a cloth or a soft-bristled brush. You want to avoid anything too harsh or abrasive that could scratch or dull the surface. Instead, choose non-abrasive cleaning solutions that can break down buildup safely and effectively.
Gentle Cleaning Techniques
A few simple tools can make all the difference when you want to scrub away grime and bacteria from your kitchen faucet head without causing damage. Start by choosing gentle solutions and eco-friendly products to protect your faucet’s finish. Follow these steps:
- Mix a mild detergent with warm water or use an eco-friendly vinegar solution.
- Dip a soft cloth or sponge into the solution, avoiding harsh abrasives.
- Gently wipe the faucet head, focusing on crevices where grime builds up.
- Rinse thoroughly with clean water and dry with a soft towel to prevent water spots.
Safe Scrubbing Tools
Three key scrubbing tools can help you remove grime and bacteria from your kitchen faucet head without causing damage. Choosing the right brush types and scrubbing pads is essential to avoid abrasive materials that can scratch or wear down the finish.
Opt for natural cleaners and eco-friendly options paired with safe acids to keep your faucet in good shape. It’s also important to think about how often you clean—regular maintenance helps prevent buildup without over-scrubbing.
| Scrubbing Tool | Best Use |
|---|---|
| Soft-bristle brush | Reaches crevices, gentle on the finish |
| Non-abrasive pad | Removes grime, safe for surfaces |
| Microfiber cloth | Polishes after scrubbing |
Using these tools properly guarantees deep cleaning while protecting your faucet’s lifespan.
Effective Non-Abrasive Solutions
Although scrubbing away grime and bacteria might seem straightforward, using harsh chemicals or abrasive tools can damage your kitchen faucet’s finish. Instead, opt for gentle, effective non-abrasive solutions that protect your faucet while cleaning thoroughly. Here’s what you can use:
Mix vinegar solutions with water for a natural cleaner that dissolves mineral buildup without scratching. Use baking soda paste combined with vinegar for tough grime — it’s powerful yet gentle.
Select mild dish soap diluted in warm water to remove grease and everyday dirt safely. Try commercial natural cleaners specifically formulated for kitchen fixtures to avoid harsh chemicals.
Cleaning Different Kitchen Faucet Head Types (Aerators, Pull-Downs, and More)
Different kitchen faucet heads need specific cleaning methods to keep them working well and looking good.
For aerator cleaning, start by unscrewing it from the faucet tip. Soak it in a vinegar solution to dissolve mineral buildup, then gently scrub with an old toothbrush. Rinse thoroughly before reattaching. This helps prevent clogs and keeps the water flowing smoothly.
Pull-down faucets require regular maintenance to avoid issues with the spray head and hose. Wipe the spray head with a mild vinegar solution to remove deposits and keep the spray holes clear. Check the hose for debris or buildup, and flush water through it occasionally. Avoid harsh chemicals that could damage the finish or internal parts.
Other faucet types like touchless or pull-out models often need similar gentle cleaning. Always disconnect or turn off the water supply when deep cleaning, and steer clear of abrasive tools that might scratch surfaces or damage seals.
How to Reassemble and Reinstall Your Kitchen Faucet Head
Start by carefully aligning the faucet head components to ensure smooth reassembly. Using proper techniques helps guarantee your faucet works perfectly after cleaning. Follow these tips for an easier installation:
- Position the internal parts: Place the filter screen and washer back into the faucet head in the exact order they were removed.
- Secure the faucet head: Screw it onto the faucet body by hand, turning clockwise to avoid cross-threading.
- Tighten with a tool: Use an adjustable wrench or pliers to snug the faucet head, but don’t overtighten to prevent damage.
- Test for leaks: Turn on the water and check for any leaks or dripping, adjusting if necessary.
How Often to Clean and Tips to Keep Your Kitchen Faucet Head Sparkling
Regularly cleaning your kitchen faucet head helps keep water flow smooth and prevents mineral buildup.
Set a cleaning schedule that matches your water type and how often you use the faucet. For most homes, cleaning every one to two months works well.
If you notice less water pressure or uneven spray, it’s a sign to clean it sooner.
To stay on top of it, use reminders on your phone or calendar as part of your routine.
Between deep cleans, wipe the faucet head with a damp cloth to remove surface grime.
Avoid harsh chemicals that could damage the finish; instead, opt for mild soap or a vinegar solution.
Flushing the faucet head with hot water now and then helps prevent buildup too.
Sticking to a simple, regular routine and watching how your water flows will keep your faucet sparkling and working efficiently for years.
Frequently Asked Questions
Can Vinegar Damage My Kitchen Faucet Finish?
Vinegar can damage your kitchen faucet finish if you use it too often or leave it on for too long. To protect your faucet, dilute vinegar and rinse thoroughly after cleaning.
Stick to recommended cleaning frequency, like wiping your faucet monthly. This helps prevent buildup without harming the finish.
Using vinegar wisely keeps your faucet looking great and working well, without risking corrosion or dullness.
Are There Eco-Friendly Cleaning Products for Faucet Heads?
Imagine sparkling faucet heads gleaming without harsh chemicals. Yes, you can use eco-friendly options like natural cleaners and homemade solutions to keep your faucet shining.
Lemon juice, baking soda, and white vinegar work wonders without harming the environment. These gentle ingredients break down mineral buildup while being safe for your plumbing and finishes.
How Do I Prevent My Faucet Head From Clogging Again?
To prevent your faucet head from clogging again, try these simple maintenance tips. Regularly wipe it down and soak the aerator in vinegar to dissolve mineral buildup.
Installing a water softener can also help, especially if you have hard water. It reduces mineral deposits and keeps your faucet flowing smoothly.
Make sure to run your faucet at full pressure occasionally. This helps flush out any debris that might be starting to clog the aerator.
Sticking to these steps will keep your faucet working well and free from clogs.
Can I Clean My Faucet Head Without Removing It?
Yes, you can clean your faucet head without removing it by soaking it in a vinegar solution while it’s still attached. This method works well with faucet maintenance tips and helps dissolve mineral buildup gently.
For the best results, follow cleaning frequency recommendations and do this every few months to keep your faucet running smoothly. Just fill a plastic bag with vinegar, secure it around the faucet head, and let it soak before rinsing thoroughly.
What Should I Do if My Faucet Leaks After Cleaning?
Did you know that leaks waste over 1 trillion gallons of water annually in the U.S.? If your faucet leaks after cleaning, don’t ignore it—start with faucet repair by checking the washers and seals for damage.
Tighten any loose parts and replace worn components to stop drips. For effective leak prevention, regularly inspect your faucet and clean mineral buildup.
Acting quickly saves water, money, and frustration in the long run.
Conclusion
Now that you know how to clean your kitchen faucet head step-by-step, why wait for grime to build up again? Regular cleaning keeps your faucet sparkling and ensures better water flow and hygiene.
With just a little effort and the right tools, you can prevent buildup and enjoy a fresh, clean kitchen every day. Making faucet maintenance a simple part of your routine will save you time and hassle.
Your kitchen will thank you for keeping your faucet in top shape. Plus, you’ll love the way it looks and functions every day!