How to Build Kitchen Cabinets: A Step-by-Step Guide
Building your own kitchen cabinets can feel overwhelming, especially if you’re not sure where to start or worried about making mistakes. You’re not alone—many people struggle with designing, measuring, and assembling cabinets that look professional.
But with a clear plan and some patience, you can create beautiful, custom storage solutions for your kitchen.
To build kitchen cabinets, start by planning your design and selecting durable materials suited to your kitchen’s style. Measure your space carefully to guarantee precise cuts for cabinet panels and components.
Assemble the cabinet boxes with strong joints, then construct and attach doors and drawers for smooth operation. Sand and finish the surfaces for a polished look, and finally, install hardware and secure cabinets to walls accurately.
Following these steps will help you create sturdy, stylish cabinets. Keep going to investigate detailed techniques and tips.
Key Takeaways
- Plan your kitchen cabinet design by thinking about the style, how functional they need to be, and how the layout will flow between appliances and storage areas. It helps to visualize the space before starting.
- Measure your kitchen space carefully using tape measures, levels, and squares. Make sure to mark where each cabinet will go and note the height to get everything just right.
- Cut the cabinet panels precisely with good quality tools. Double-check your measurements to ensure everything fits perfectly and avoid mistakes.
- Assemble the cabinet boxes by gluing, clamping, and screwing the panels together. This will give you sturdy and reliable cabinets.
- Sand, finish, and securely install your cabinets using the right hardware, leveling, and fastening methods. This ensures your cabinets are durable and look great.
Plan Your Kitchen Cabinet Design
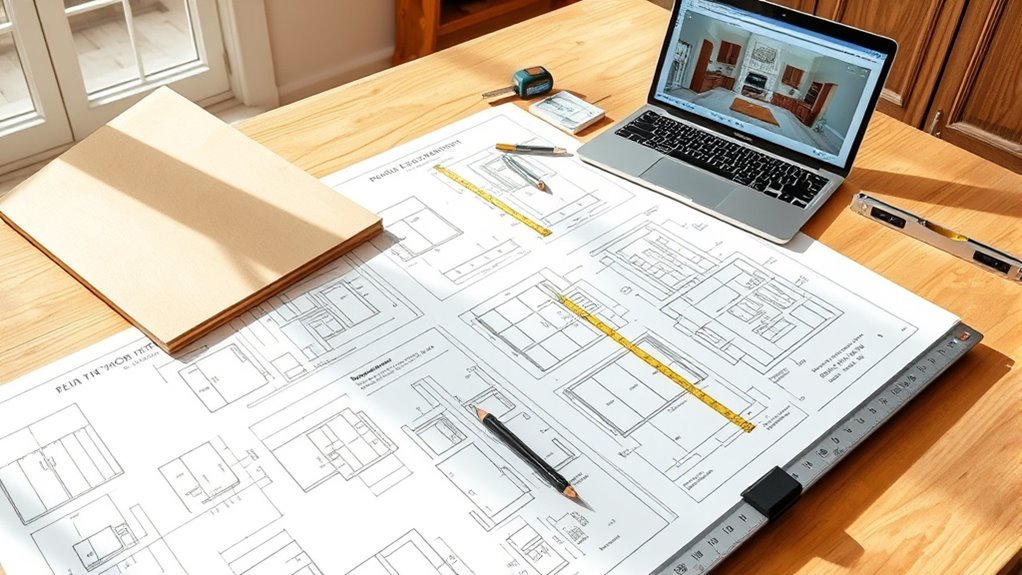
Before you start building, you need to plan your kitchen cabinet design carefully. Your kitchen style sets the tone for the entire space, so choose a design that complements your home’s overall look.
Whether you prefer a modern, minimalist vibe or a classic, rustic feel, your cabinets should match that style. Stay updated on current design trends to keep your kitchen feeling fresh and inviting.
Choose cabinet styles that reflect your kitchen’s vibe and stay current with design trends for a fresh look.
Think about how you’ll use the space daily. Consider cabinet height, depth, and storage options that fit your routine. Sketch a layout that maximizes functionality without sacrificing style.
Don’t forget to plan the flow between appliances, countertops, and cabinets. By being intentional with your planning, you’ll avoid costly mistakes and create a kitchen that’s both beautiful and practical.
This step is the foundation of your project, so take your time and be thorough before moving on to building your cabinets.
Choose the Right Materials for Kitchen Cabinets
When selecting materials for your kitchen cabinets, focus on durability and style to ensure they hold up to daily use and boost your kitchen’s appearance. Start by exploring different wood types—hardwoods like maple and oak are strong, while eco-friendly options like bamboo are sustainable.
Next, think about finish options that match your cabinet style and protect the wood from moisture and wear. Keep these three factors in mind:
- Durability factors: Pick materials resistant to scratches, stains, and humidity to make sure your cabinets last.
- Cost considerations: Find a good balance between quality and your budget by comparing prices from different suppliers.
- Maintenance tips: Choose finishes and materials that are easy to clean and maintain, saving you effort in the long run.
Measure Your Kitchen Space Accurately
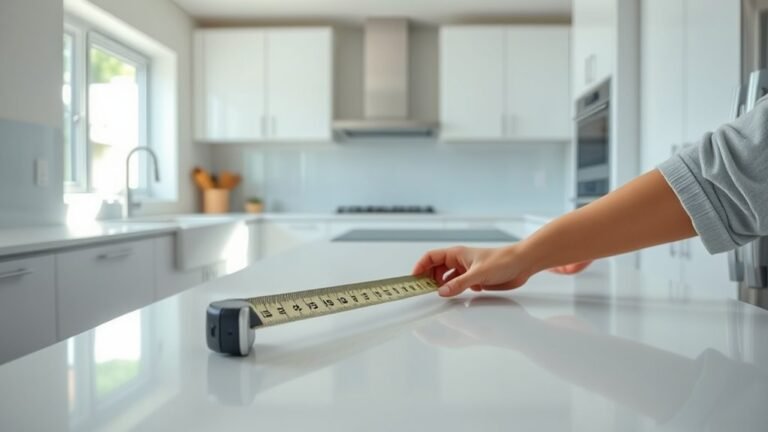
To get started, grab some basic measurement tools like a tape measure, a level, and a pencil. It’s a good idea to mark your walls and floors clearly so you know exactly where everything will go. Taking your measurements carefully right now will make the whole process much smoother and help you avoid any surprises later on.
Essential Measurement Tools
Accurate measurements are the foundation of building kitchen cabinets that fit perfectly and work well. To get precise results, you’ll need the right tools. Here are three essential measurement tools to keep handy:
- Tape Measure – Master tape measure techniques like keeping the tape taut and reading from the correct side to avoid errors. It’s your go-to for most measurements.
- Digital Measuring Tools – Devices like laser distance meters give quick, accurate readings, especially for longer distances or hard-to-reach spots.
- Combination Square – Use this for marking straight, square lines and checking angles, making sure your cabinet parts align perfectly.
Using these tools correctly helps you get the exact dimensions you need before cutting or assembling anything.
Marking Wall and Floor
Before you start building, you’ll need to carefully mark the walls and floor where your cabinets will go. Accurate wall layout and floor alignment ensure your cabinets fit perfectly.
Begin by measuring the entire kitchen space, noting corners, outlets, and vents. Use a pencil and level to draw precise lines on the wall, showing cabinet height and position.
Next, transfer these measurements to the floor, marking the base locations for your cabinets. This helps keep everything aligned and looking neat.
Use a tape measure for capturing dimensions, a pencil and level to establish the wall layout, and a chalk line to guarantee floor alignment.
Double-check your markings with a square to verify right angles. Finally, apply masking tape to protect your marks as you proceed.
Cut Cabinet Panels and Components Precisely
Now that you’ve measured your kitchen space, it’s time to cut those cabinet panels. Taking your measurements carefully is key here—no rushing! Make sure you’re using the right tools for the job, like a good saw and a straight edge, to get clean, precise cuts. When you cut accurately, everything will fit together much more smoothly during assembly, and your cabinets will look professionally done. So, take your time and double-check those measurements before making any cuts!
Accurate Measurement Techniques
Precision is crucial when cutting cabinet panels and components because even small mistakes can impact the fit and finish of your kitchen cabinets. Focus on reliable measurement techniques and steer clear of common errors. Here’s how you can master it:
- Double-check dimensions: Always measure twice and cut once. Verify your measurements from different reference points to avoid mistakes.
- Use quality tools: Pick a sturdy tape measure or a combination square for consistent readings. Steer clear of worn-out or flexible tapes.
- Mark clearly and consistently: Use a sharp pencil or marking knife to create fine, visible lines. Make sure your marks match your measurements precisely.
Choosing Proper Cutting Tools
Choosing the right cutting tools makes all the difference when working on your kitchen cabinets. To guarantee cutting accuracy, consider saw types carefully. Power tools offer speed, while hand tools provide control.
Always prioritize safety measures and keep your tools in good shape. Regular maintenance is key, especially when selecting blades to ensure they match the material you’re working with. Sharp blades cut easier and give you better precision.
Here’s a quick guide to help you pick the best tools:
| Tool Type | Strengths | Best For |
|---|---|---|
| Circular Saw | Fast and versatile | Large panels |
| Jigsaw | Good for detail cuts and curves | Irregular shapes |
| Handsaw | Precise and quiet | Small cuts and touch-ups |
| Table Saw | Accurate and repeatable cuts | Straight lines and bulk cuts |
Choosing your tools wisely and keeping them maintained will ensure your cabinet pieces fit perfectly every time.
Assemble Your Kitchen Cabinet Boxes Step-by-Step
Before you start assembling your kitchen cabinet boxes, gather all your materials and tools to make things easier. Lay out all the pre-cut panels, screws, and clamps you’ll need.
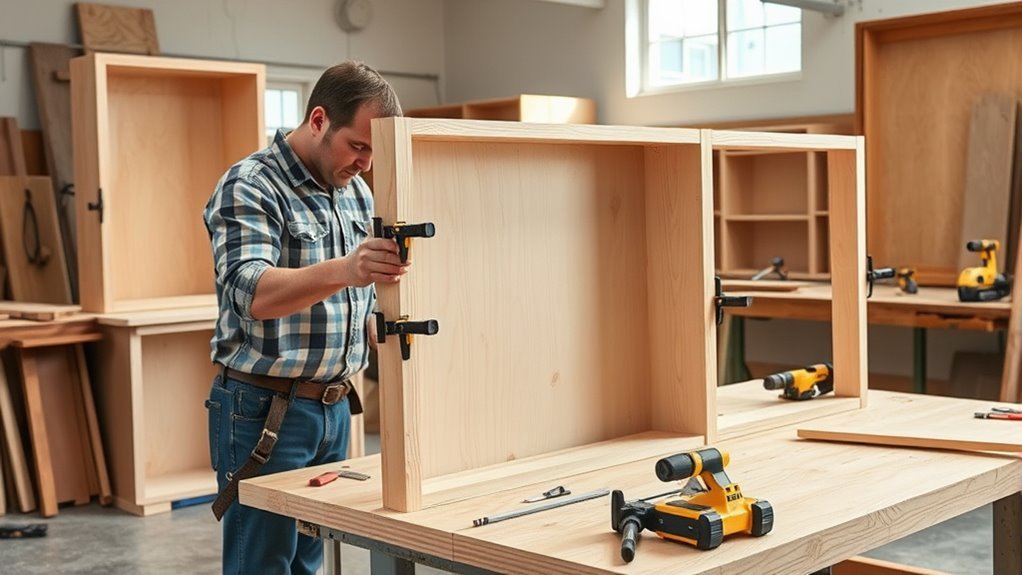
Follow these steps to ensure everything is precise and stable. First, apply glue to the edges before fastening the sides, bottom, and top panels. This adds extra strength beyond just screws.
Next, clamp the panels firmly in place. Use a carpenter’s square to check that the corners are square and everything lines up properly. This helps prevent warped boxes.
Finally, drive screws carefully into the pre-drilled holes. Make sure the panels stay flush as you tighten everything. This keeps your cabinet box sturdy and well-constructed.
Build Kitchen Cabinet Doors and Drawers
Now that you’ve got your cabinet boxes all assembled, it’s time to move on to building the doors and drawers. This part is pretty exciting — it’s where your cabinets start to really take shape! First up, you’ll want to pick the right materials, whether that’s solid wood, plywood, or some other sturdy option. Picking the right stuff makes a big difference in how your cabinets look and hold up over time.
Next, you’ll assemble the door frames. It’s important to make sure everything’s square and sturdy so your doors hang nicely and open smoothly. Once your frames are ready, you can focus on installing the drawers and attaching the slides. Using high-quality, smooth-gliding slides will make opening and closing a breeze, and it’ll keep your drawers working perfectly for years to come.
All these steps come together to give your kitchen a polished look and reliable functionality. Plus, building your own doors and drawers is pretty satisfying — you’ll love seeing your cabinets come to life!
Selecting Door and Drawer Materials
Investigate a variety of materials to find the perfect fit for your kitchen cabinet doors and drawers. Start by exploring wood types—solid hardwoods offer durability, while MDF provides a budget-friendly option.
Consider door styles that match your kitchen’s design trends, from shaker to slab, making sure they complement your overall aesthetic.
Next, evaluate finishing options like paint, stain, or veneer to improve both look and protection. Don’t forget hardware selection, which plays an essential role in functionality and style.
Here’s a quick checklist:
- Balance budget considerations with durability factors to get the best value.
- Choose materials that align with your maintenance tips to guarantee longevity.
- Match door styles and hardware to current design trends for a fresh look.
This approach ensures a smart, stylish choice.
Assembling Door Frames
Begin assembling your door frames by carefully measuring and cutting the stiles and rails to ensure a precise fit. Choose the right door frame style, like flat panel, raised panel, or shaker, to match your kitchen decor.
Lay out the pieces on a flat surface, making sure the edges align perfectly. Apply wood glue to the joints and clamp the frame securely for a strong bond.
Drill pilot holes to prevent splitting and reinforce the corners with dowels or biscuits for added strength. Once the glue is dry, sand the frame smooth for a professional finish.
Don’t forget to mark your hinge placement accurately. Proper alignment guarantees your doors open and close smoothly. Position hinges evenly along the stile, usually two per door, and pre-drill holes for the screws.
Following these steps will give you sturdy, well-fitting door frames that are ready for finishing and installation.
Installing Drawer Slides
Install drawer slides carefully to ensure your cabinet drawers operate smoothly and stay properly aligned. Picking the right type of slide is important—side-mount, under-mount, and center-mount each have their own benefits and installation needs.
Follow these techniques to make sure everything goes smoothly:
- Measure precisely: Check the drawer width and cabinet opening so the slides fit snugly without binding.
- Align slides correctly: Use a level and straight edge to keep the slides parallel to the drawer and cabinet sides.
- Secure firmly: Attach the slides with screws in the pre-drilled holes, but avoid over-tightening to prevent warping components.
Attach Doors and Drawers to Cabinets
Securely attaching doors and drawers transforms your cabinet frames into functional storage units. Start by hanging the doors using concealed hinges, which guarantees precise door alignment.
Adjust the hinges so doors sit flush, with even gaps around the edges. This helps prevent rubbing and makes sure everything opens and closes smoothly.
Next, attach the drawers to their slides, double-checking the spacing to avoid any sticking or binding. Proper spacing lets drawers glide effortlessly and keeps the look tidy.
Use clamps or a helper to hold doors and drawers in place while you tighten the screws. This keeps everything aligned as you work.
Finally, test each door and drawer multiple times to confirm they open and close smoothly without sagging or misalignment.
Taking the time to get door alignment and drawer spacing right now will save you from frustrating adjustments later and give your cabinets a polished look.
Sand and Finish Your Cabinets for a Smooth Look
Prepare your cabinets for a flawless finish by sanding every surface thoroughly. Proper sanding smooths out imperfections and helps the wood accept stain or paint evenly. Use effective techniques to get the best results without damaging the wood.
Follow these steps to perfect your cabinets:
- Start with coarse-grit sandpaper (80-120 grit) to remove rough spots and glue residue. Then, move on to finer grits (180-220 grit) to create a smooth surface.
- Always sand in the direction of the wood grain to avoid scratches and uneven texture.
- Remove all dust with a tack cloth or vacuum before applying any finish.
When it comes to finishing options, you can choose stains, paints, or clear coats like polyurethane. Each gives a different look and level of protection. Pick a finish that matches your kitchen’s style and can handle everyday wear.
Install Kitchen Cabinet Hardware and Accessories
Attach hardware and accessories to your cabinets to boost both functionality and style. Picking the right hardware, like knobs, pulls, and hinges, helps set the tone for your kitchen.
Before you start, double-check your measurements and mark drill points carefully. This helps avoid misalignment and makes the installation smoother.
Use a level and pilot holes for precise, secure fittings. Here’s a quick overview of common hardware types and tips for installing them:
| Hardware Type | Installation Tip | Recommended Use |
|---|---|---|
| Knobs | Drill pilot holes | Cabinet doors and drawers |
| Pulls | Measure center-to-center | Larger drawers and doors |
| Hinges | Attach before mounting cabinet | Doors that need to move |
| Accessories | Follow manufacturer instructions | Organizers and racks |
Safely Secure and Level Your Cabinets on Walls
Once you’ve installed your cabinet hardware, the next step is to mount your cabinets firmly on the walls. Properly securing and leveling your cabinets ensures they last longer and look professional. Follow these steps to master cabinet alignment and wall anchoring.
Secure and level your cabinets to ensure durability and professional-looking results.
First, use a stud finder to locate wall studs and mark them. Then, draw a level line where the cabinet tops will sit to make sure everything stays straight.
Next, pre-drill holes through the back of the cabinets into the studs. If studs aren’t available, use heavy-duty screws or toggle bolts for extra support.
Finally, clamp the cabinets together, insert shims underneath to fix uneven floors, and check alignment with a level. Adjust as needed before tightening all screws tight.
Following these steps will make sure your cabinets are secure and perfectly aligned for a polished, lasting kitchen setup.
Frequently Asked Questions
How Do I Maintain and Clean My Kitchen Cabinets?
To maintain and clean your kitchen cabinets, start by figuring out what type of finish they have. This helps you pick the right cleaning method.
Use a soft cloth with mild soap and water for regular cleaning. Avoid harsh chemicals that could damage the finish. Wiping spills right away helps prevent stains and moisture damage.
For stubborn grime, try a gentle vinegar solution. Regular dusting and occasional polishing will keep your cabinets looking fresh and help them last longer.
What Tools Are Essential for Cabinet Installation?
For cabinet installation, having the essential tools is like having a trusty toolkit that never lets you down. You’ll need a drill to secure screws quickly, a level to keep cabinets straight, a tape measure for precise dimensions, a stud finder to anchor cabinets safely, and a screwdriver for adjustments.
Don’t forget clamps to hold pieces in place and a saw for any last-minute cuts. With these tools, your cabinet installation will go smoothly.
Can I Customize Cabinet Interiors With Organizers?
Yes, you can customize cabinet interiors with organizers to improve your space and storage. Adding pull-out shelves, dividers, or adjustable racks helps you tailor your cabinets to fit your needs perfectly.
This not only boosts functionality but also keeps your kitchen tidy and efficient. Don’t hesitate to mix and match organizers to create a storage system that works best for your lifestyle and layout.
How Long Does It Take to Build Kitchen Cabinets?
It usually takes anywhere from a few days to a couple of weeks to build kitchen cabinets, depending on your skill level and the complexity of the styles you choose.
Using different materials can also affect your timeline. Solid wood, for example, takes longer to work with than plywood or MDF.
If you opt for simpler styles and materials, you’ll finish faster. But intricate designs and premium materials need extra time and care.
What Are Common Mistakes to Avoid When Building Cabinets?
You’ll want to avoid design errors that don’t fit your space or needs, and double-check your measurements to prevent costly mistakes.
Don’t skimp on material choices—opt for durable wood to guarantee longevity.
Be careful with finish options; picking the wrong type can lead to peeling or discoloration over time.
Planning thoroughly and paying attention to these common pitfalls will help you build sturdy, beautiful cabinets you’ll love.
Conclusion
Now, imagine your kitchen coming alive with perfectly crafted cabinets, each door swinging smoothly and drawers gliding easily. You’ve planned, measured, cut, and assembled every piece with care, transforming raw wood into a warm, welcoming space.
As you secure the final screw and step back, the gleam of your finished cabinets reflects your hard work and pride. With every detail in place, your kitchen is ready to inspire countless meals and memories.
Building kitchen cabinets might seem challenging, but with patience, you can create a beautiful, functional space. Your new custom cabinets will be a testament to your effort and craftsmanship.