How to Carve a Turkey: Step-by-Step Guide for Perfect Slices
Carving a turkey efficiently starts with letting it rest and using the right technique to slice clean, juicy pieces. Begin by placing the turkey on a stable board, removing the legs and wings, then carefully slicing the breast meat against the grain for tenderness. This first step on how to carve a turkey ensures you get well-portioned servings that are visually appealing and easy to eat.
Knowing how to carve a turkey properly can transform the way you serve this classic meal. It matters because uneven or rushed carving can dry out the meat or leave awkward chunks on the bone. Plus, presentation plays a big role in the enjoyment of the meal, making careful carving just as essential as cooking.
This article will walk you through the tools you need, the step-by-step carving process, tips for carving different parts, and common mistakes to avoid. Whether you’re a beginner or need a refresher before the holidays, these guidelines will help you carve like a pro.
Essential Tools for How to Carve a Turkey

Choosing the Right Knife
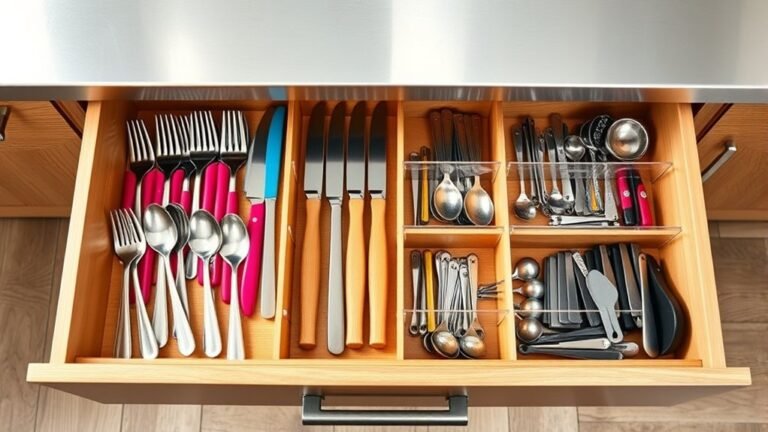
Selecting the best knife for carving turkey is key to smooth, precise cuts. A long, sharp carving knife with a thin blade allows you to glide through the meat without tearing, while a serrated blade can help with crisp skin.
Look for ergonomic handles that offer a secure grip, especially when dealing with a slippery surface. Keeping your knife sharp is also vital, as a dull blade requires more force and can ruin the texture of the turkey slices.
- Sharp carving knife
- Serrated blade option
- Ergonomic handle
- Regular sharpening
Additional Tools for Efficiency
A sturdy carving fork keeps the turkey stable while you cut, preventing slips that could cause uneven slices or injuries. A large cutting board with grooves can catch juices, keeping your workspace tidy and preserving flavor.
Some cooks prefer electric carving knives for quicker slicing, especially when serving large crowds. However, electric knives can be less precise and may shred delicate white meat if not handled carefully.
- Carving fork for stability
- Grooved cutting board
- Optional electric knife
Preparation Steps Before Carving Your Turkey

Resting the Turkey
Letting the turkey rest after roasting is one of the most important steps in how to carve a turkey. Resting for at least 20 minutes allows juices to redistribute, making the meat juicier and easier to carve cleanly.
Cover the bird loosely with foil during this time to retain warmth. If carving too soon, juices will flood out, leaving dry slices and a messier cutting experience.
- Rest at room temperature for 20+ minutes
- Loosely cover with foil
Positioning the Turkey for Carving
Place the turkey breast-side up on a large, steady cutting board. Position the legs closest to you for easier access. Secure the bird with your carving fork before making any cuts.
Proper placement improves control and helps you follow clean, even lines—key factors in producing neat slices and preventing accidents.
- Breast side up
- Legs facing you
- Use a carving fork for stability
Step-by-Step How to Carve a Turkey Process

Removing the Legs and Thighs
Start by carving between the body and leg where the joint connects. Pull the leg gently away and cut through the joint to separate the leg and thigh from the carcass cleanly.
Once removed, separate the drumstick from the thigh by cutting through the visible joint. This allows for serving more manageable portions.
- Cut at joint between leg and body
- Separate drumstick and thigh
For more on this, see our related guide: What Restaurants Are Open on Thanksgiving: Complete Guide to Dining & Takeout.
Carving the Breast Meat
Slice along one side of the breastbone with long, smooth strokes, following the curve of the breast. Keep your cuts thin and even, slicing against the grain for optimal tenderness.
Use a steady hand to maintain uniform slices, which will look appealing on the serving platter and make portioning easier.
- Slice against the grain
- Use long smooth strokes
- Keep slices thin and even
Tips for Carving Different Turkey Parts

Carving the Wings
Wings are best removed whole by cutting through the joint closest to the body. They can be served on the bone for a casual presentation or sliced if preferred.
Because wings have less meat, handle them delicately to avoid breaking the skin or wasting any edible parts.
- Cut through wing joint
- Remove whole for serving
- Handle gently
Serving Suggestions for Carved Meat
Arrange carved breast slices on one side of the platter with legs and thighs on the other for an organized look. Drizzle some pan juices over the meat to enhance flavor and moisture.
Including a carving board with grooves ensures leftover juices don’t pool messily, keeping your table clean while allowing guests to serve themselves easily.
- Arranged by meat type
- Drizzle with pan juices
- Use grooved carving board
Common Mistakes to Avoid When Carving a Turkey

Carving Too Early or Too Fast
Cutting into your turkey immediately after roasting can cause the juices to run out, leaving dry meat. Take time to rest the bird to allow moisture to redistribute evenly.
Rushing the carving process can result in uneven, ragged slices and increase the risk of injury from a slipping knife.
- Wait 20 minutes before carving
- Use controlled, steady cuts
Using the Wrong Tools
A dull or short knife makes carving harder and more dangerous, while improper tools like a chef’s knife can’t produce clean cuts. Choose tools specifically designed for carving turkey.
Skipping a carving fork to stabilize the bird also increases difficulty and safety risks during slicing.
- Use sharp carving knife
- Utilize carving fork for stability
Cleaning and Maintaining Carving Tools

Proper Cleaning Techniques
Wash knives and forks by hand immediately after use with warm, soapy water to prevent corrosion and maintain sharpness. Avoid the dishwasher, which can dull blades and damage handles.
Dry tools thoroughly before storing to prevent rust and prolong their lifespan.
- Hand wash promptly
- Avoid dishwasher
- Dry thoroughly
For additional tips and background on turkey preparation, you can explore detailed Turkey carving techniques on Wikipedia. Turkey carving techniques.
Sharpening and Storage
Regular sharpening with a honing steel or whetstone keeps your carving knife ready for smooth cuts. Store knives in a block or on a magnetic strip to preserve blade quality.
Proper care extends the life of your tools, meaning better carving results over many holiday seasons.
- Sharpen regularly
- Store in knife block or magnetic strip
Turkey Carving Knife Types Comparison
Review the main kinds of knives commonly used for carving turkey, with pros and cons for each to help find the best fit for your needs.
| Knife Type | Blade Length | Pros | Cons |
|---|---|---|---|
| Traditional Carving Knife | 8-10 inches | Long, sharp blade; precise slicing | Requires regular sharpening; can be pricey |
| Serrated Carving Knife | 8-10 inches | Good for crispy skin; less sharpening needed | Can tear meat if not used carefully |
| Electric Carving Knife | 10-12 inches | Fast slicing; good for big birds | Less control; can shred tender meat |
| Chef's Knife | 8-10 inches | Multipurpose use; readily available | Less efficient at thin, even turkey slices |
Frequently Asked Questions
How long should I let my turkey rest before carving?
Let the turkey rest for at least 20 minutes after roasting. This restful period allows juices to redistribute, ensuring moist and tender meat when carved.
Can I use a regular kitchen knife to carve a turkey?
While possible, a regular kitchen knife often lacks the length and sharpness needed for clean slices. Using a dedicated carving knife improves ease and results.
What is the best way to slice turkey breast?
Slice turkey breast against the grain using long, smooth strokes. This technique yields tender, easy-to-eat slices that hold moisture better.
Should I carve the wings before the breast?
It's usually easier to remove and carve legs and wings first, then carve the breast meat separately. This method helps manage portions more effectively.
How can I keep carved turkey meat moist?
Drizzling pan juices over carved slices and carving after the resting period helps retain moisture. Avoid over-slicing tiny pieces that dry out quickly.
Key Takeaways
- Rest the turkey before carving to preserve moisture
- Use a sharp carving knife and stable cutting board
- Remove legs and wings before slicing the breast
- Cut breast meat against the grain for tenderness
Conclusion
Mastering how to carve a turkey involves preparation, the right tools, and a calm, methodical approach. Taking the time to rest the bird and using specialized carving knives ensures clean cuts that elevate your meal’s presentation and enjoyment. Thoughtful positioning and attention to detail while carving mean guests receive juicy, perfectly portioned slices every time.
Depending on your needs, traditional carving knives offer the best precision, while serrated blades are helpful when dealing with crispy skin. Electric carving knives can speed up the process for large gatherings but are best used cautiously due to the potential for shredding delicate meat. For most home cooks, combining a sharp carving knife with a carving fork and a grooved cutting board creates an ideal setup for carving any turkey.
Before your next holiday feast, prepare by sharpening your tools, letting the turkey rest fully, and practicing the sequence of carving legs, wings, then breast. With these steps and a bit of confidence, carving your turkey will be a straightforward task producing impressive results, making your meal both delicious and visually pleasing.