How to Make Cheesy Bread: A Complete Guide with Perfect Baking Tips
To make cheesy bread, start with fresh bread or dough, top it generously with your choice of cheese, and bake at a high temperature until bubbly and golden. Aim for about 25 to 30 minutes in a preheated oven at 375°F to 425°F, adjusting time and temperature for your specific bread type and desired crust. Finish with a brief broil to achieve browned, melted cheese on top.
This guide is designed for home bakers who want practical, straightforward instructions for making cheesy bread, whether from scratch or using shortcuts. You’ll learn how to choose the best cheeses and breads, get timing and baking tips for perfect results, plus ways to store and customize your cheesy bread for every occasion.
Key Takeaways
- Use a 425°F oven for about 15 minutes when baking cheesy bread topped with garlic butter and cheese.
- Put cheesy bread on the oven’s middle rack to ensure it heats evenly and bake at 375°F for 25 to 30 minutes.
- When bread browns too fast on top but is undercooked inside, tent it loosely with foil for 5, 10 minutes.
- Keep any leftover cheesy bread fresh by sealing it in an airtight container and storing it at room temperature, where it will last for up to 4 days.
- Freeze sliced bread between parchment sheets for up to 3 months to maintain freshness.
- Use a Dutch oven preheated to 450°F and bake with the lid on for 30 minutes, then uncovered for 15, 20 minutes.
How to Make Cheesy Bread from Scratch

Making cheesy bread from scratch involves preparing a soft, chewy dough, allowing it to rise properly for texture, then assembling the cheese and garlic butter evenly before baking. Careful attention to each step ensures a golden crust and gooey, flavorful interior.
Preparing and Kneading Dough
In a large bowl, combine bread flour, salt, active dry yeast, garlic powder, and optional Italian seasoning. Using bread flour contributes to a chewier texture and a crust with more crunch. Activate the yeast by dissolving it in warm water between 105°F and 110°F until it froths. Next, mix melted butter, half of the shredded cheese, minced garlic, and salt into the yeast mixture to form your dough.
Mix ingredients until they start to come together. Add 2 to 4 tablespoons of flour only to bring the dough into a ball without kneading out the air pockets formed by yeast activity.
- In a large bowl, mix 3 ½ cups bread flour, 1 teaspoon salt, 2 teaspoons garlic powder, and 1 teaspoon active dry yeast.
- Add 1 ¼ cups warm water (105°F to 110°F) with melted butter and half of 1 ½ cups grated fontina or mozzarella cheese into the yeast mixture.
- Stir ingredients gently until a sticky dough forms.
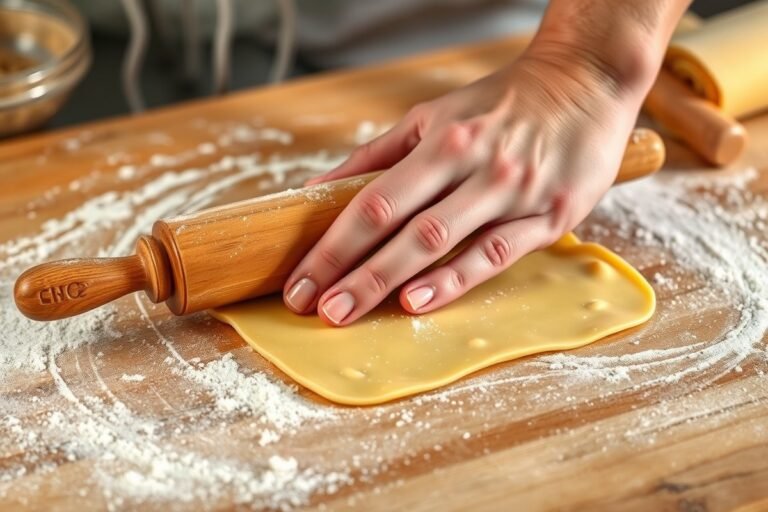
- Fold dough onto a lightly floured surface and shape it into a rough ball by adding up to 4 tablespoons flour, avoid kneading to keep air pockets.
Letting the Dough Rise Properly
Cover the dough with plastic wrap or a clean kitchen towel to keep moisture in. Let it rise at room temperature until it doubles in size, about 1 to 1 ½ hours depending on your kitchen’s warmth.
Test readiness by gently pressing your finger into the dough; it should leave an indentation that slowly fills back. This ensures a soft, airy crumb in your cheesy bread after baking.
Assembling the Cheese and Toppings
After punching down the risen dough, create small slits or pockets to tuck in the remaining grated cheese. This helps distribute cheese inside for melty pockets that burst while baking.
Next, prepare a garlic herb butter mixture by combining melted butter, Parmesan cheese, garlic powder, and chopped parsley. Evenly brush this mixture on the cut or top sides of the dough to add flavor and help the cheese melt perfectly.
- Punch down the risen dough gently to release air.
- Use a small knife to make slits and tuck the remaining cheese into these pockets.
- Mix ¼ cup melted butter with 2 tablespoons grated Parmesan, 1 teaspoon garlic powder, and 1 tablespoon chopped parsley.
- Brush the garlic butter evenly over the dough’s surface, making sure all cut sides are coated.
- Sprinkle extra grated cheese evenly across the top of the dough for a golden cheesy crust.
Choosing the Best Cheese and Bread Types

Picking the right combination of cheese and bread makes all the difference in your cheesy bread’s texture and flavor. You want cheeses that melt smoothly and offer a strong taste without overpowering, balanced with breads that have a crusty exterior and soft crumb. This combination ensures each bite has the perfect blend of gooey cheese and crunchy bread. Softer cheeses like mozzarella melt beautifully, while sharper cheeses like cheddar add bold flavor. Bread choices like ciabatta, Italian, and French each bring different textures from airy to dense crust.
Here’s a table comparing some popular cheese and bread types for cheesy bread, including notes on texture, flavor, and melt quality. Use this to decide which suits your taste and cooking method best.
| Type | Texture | Flavor Notes | Melt Quality (Cheese) | Crust Characteristics (Bread) |
|---|---|---|---|---|
| Sharp Cheddar (Cheese) | Firm, slightly crumbly | Bold, tangy | Melts well when freshly shredded | N/A |
| Mozzarella (Cheese) | Soft, stretchy | Creamy, mild | Excellent melt, creamy texture | N/A |
| Ciabatta (Bread) | Light and airy crumb | Mild wheat flavor | N/A | Slightly crispy crust |
| Italian Bread | Light, airy crumb | Subtle flavor | N/A | Soft but crusty edges |
| French Bread | Dense crumb | Rich, wheaty | N/A | Thick, crunchy crust |
Cheese blends work well when you mix a mild melting cheese like mozzarella with a sharper, flavorful cheese such as sharp cheddar. A good starting point is a ratio of 2 parts mozzarella to 1 part cheddar to balance melt and taste. Shred the cheese fresh for better melting and avoid pre-shredded brands with anti-caking agents that can affect texture.
Bread selection depends on the crust and crumb you prefer. Ciabatta offers a lighter loaf with a crispy crust, great for a softer bite with a crunchy outer layer. Italian bread provides airy softness with some crustiness, while French bread delivers a dense crumb and thicker crust for those who want more crunch. You can use store-bought versions of these breads; just toast the bread lightly before adding cheese to prevent sogginess. Gluten-free breads often don’t brown or crisp as well but can still work if you prefer or need to avoid gluten.
Always place your cheesy bread on the middle rack of your oven to ensure even heat and a golden crust without burning.
Choosing the proper cheese and bread shapes the success of your cheesy bread. Use fresh, flavorful cheeses that melt evenly and breads with the crust and crumb that suit your texture preference. For gluten-free needs, expect less browning and adjust your bake time slightly. When in doubt, blend cheeses and test breads to find your ideal combination.
Oven Temperature and Baking Time for Perfect Results
To bake cheesy bread perfectly, preheat your oven to 375°F to 425°F depending on your recipe’s crust preference. Bake the bread for 15 to 30 minutes until the crust is golden and the interior is cooked through, then use the broiler for 2 to 5 minutes to achieve a bubbly, golden cheese topping. Position the baking rack in the oven’s middle to ensure even heat distribution while watching closely to avoid burning the cheese.
Preheating the Oven Correctly
Preheating your oven to the right temperature is critical for consistent baking results. Start by setting your oven to between 375°F and 425°F, based on whether you want a softer or crisper crust. It’s essential to allow the oven to reach the target temperature before placing your bread inside to avoid underbaking or uneven cooking.
Using an oven thermometer helps verify the actual temperature, as some ovens can run hotter or cooler than their settings indicate. Position your cheesy bread on the middle rack so heat surrounds it evenly, helping the crust form without too much browning on top or bottom.
Baking and Broiling Cheese Bread
Baking cheesy bread typically involves two key stages: baking the dough and finishing with a broil for the cheese topping. Bake the bread at 375°F for about 15 to 20 minutes or at 425°F for a shorter time, until the bread is golden and cooked through. Use a timer to track these stages carefully.
Once the bread has baked through, switch the oven to broil on high for 2 to 5 minutes to melt and brown the cheese topping. Keep the oven rack in the middle or slightly higher to get even heat on the cheese without burning. Watch the bread constantly during broiling, as cheese can burn quickly.
Tips to Prevent Burning or Undercooking
To avoid burning the cheese while ensuring the bread is fully baked, use foil tenting and adjust rack position as needed. To prevent the top from browning too quickly while the inside stays undercooked, cover the cheesy bread loosely with aluminum foil for the last 5 to 10 minutes of baking.
Using the middle rack balances the heat, allowing the bread to cook through without burning the top. Moving the bread down one rack in the oven reduces direct heat on top if a middle rack isn’t available. Always check the bread’s color and texture in the final minutes to decide if it needs more time or cover. Follow this step-by-step baking and broiling process for reliable cheesy bread results:
- Set your oven to 375°F and allow it to preheat for at least 15 minutes.
- Position the oven rack in the middle to provide even air circulation.
- Place your cheesy bread on a baking sheet or inside a Dutch oven and bake for 15 to 20 minutes until the crust turns golden brown.
- Check if the bread’s interior feels cooked by gently tapping the bottom; it should sound hollow.
- Switch the oven to broil and move the bread rack up one level if possible.
- Broil the bread for 2 to 5 minutes, watching closely, until the cheese melts and bubbles with golden brown spots.
- When the cheese or bread starts to brown too fast, tent it with loose foil to shield it while it finishes baking.
- Remove from oven and let the bread cool for a few minutes before slicing and serving.
Quick Methods Using Store-Bought Bread or No-Knead Dough
Using store-bought bread or no-knead dough can cut your cheesy bread preparation time dramatically without sacrificing much on taste and texture. Store-bought loaves provide immediate base bread, while no-knead dough requires minimal effort and wait time compared to traditional kneaded dough, making both excellent shortcuts for busy bakers.
Using Store-Bought Bread for Speed
Store-bought French or Italian bread works well as a quick cheat for cheesy bread. Choose a loaf with a sturdy crust and dense crumb to hold up under cheese and toppings. Slice the bread lengthwise or into thick slices for easy assembly and baking.
Butter the bread generously before layering cheese and other toppings. Butter adds flavor and helps the bread crisp in the oven. Aim for 2-3 layers of cheese depending on the size of your loaf and how cheesy you want the result to be. You can also mix toppings like diced ham or garlic aioli right on the assembled bread.
Preparing Quick No-Knead Dough
No-knead dough offers a nearly hands-off way to make bread from scratch in less time than traditional kneading methods. You mix flour, water, yeast, and salt, combine them loosely, and let the dough ferment for several hours at room temperature. This dough can then be shaped and baked with cheese and toppings.
The dough’s long fermentation develops flavor and structure without active kneading. You can leave the dough out for a whole day, then bake it for dinner, cutting down active work to about 10 minutes versus 30 to 45 minutes typical of kneaded dough. No-knead focaccia with rosemary is a popular and flavorful option for cheesy bread.
Cheesy Bread Assembly Variations
Whether using store-bought bread or no-knead dough, assembly follows similar steps but varies slightly depending on the base used. Buttering is key either way for flavor and to help the bread crisp up. Add toppings in layers as follows:
- Spread softened butter evenly over the bread or dough surface
- Layer shredded cheeses like mozzarella, cheddar, or your preferred blend
- Add optional extras such as herbs, diced meats, or sauces like ranch or garlic aioli
- Finish with a sprinkle of Parmesan or a dash of cracked black pepper
For no-knead dough, pre-bake the dough briefly (about 10 minutes at 450°F) before adding cheese to prevent sogginess. With store-bought bread, you can assemble fully and bake immediately.
Timing: No-Knead vs. Traditional Dough
Traditional cheesy bread dough needs 1 to 2 hours rise time plus kneading. No-knead dough requires longer fermenting at room temperature, usually 8 to 24 hours, but no hands-on kneading, drastically cutting your active work.
Quick baking times differ too: pre-baking no-knead dough takes about 10 minutes at 450°F before adding cheese and toppings. Then bake another 10 to 15 minutes until bubbly and golden. Store-bought bread assembly requires only a single bake of approximately 12 to 15 minutes at 375°F, since the bread is already cooked.
Benefits and Pitfalls of Quick Methods
Store-bought bread saves hours but can lead to soggier results if the bread isn’t sturdy or butter isn’t applied well. No-knead dough provides fresher bread with improve flavor and rustic crust but requires planning ahead for fermentation time.
Both methods let you enjoy cheesy bread faster than starting from scratch, great for weeknight meals or sudden cravings. The key is balancing ingredients and bake times to get the best texture and flavor possible from your shortcut. Avoid adding too many wet toppings too early to prevent sogginess, and watch your oven closely to avoid burning cheese.
Common Mistakes and How to Fix Them
Soggy or dense cheesy bread often comes from dough that hasn’t risen enough or from using pre-shredded cheese with anti-caking agents that hold extra moisture. Your bread turning out too dense usually means the yeast was inactive or the dough didn’t have enough time to rise. To fix this, ensure your yeast is fresh and your dough rises in a warm, greased bowl covered with a damp towel for about 60 to 90 minutes until it doubles in size. For an even lighter texture, try a longer initial rise of up to 12 hours, followed by punching down the dough and a second rise for 6 hours.
Burnt or uneven cheese topping often happens when the oven temperature is too high or cheese is spread too thick in some areas. Using shredded cheese you grate yourself helps because it melts more evenly without releasing excess water. To prevent burning, bake your cheesy bread at a moderate temperature and add the cheese halfway through baking if the bread needs more time to cook through. This approach helps the cheese brown without burning while the bread finishes baking.
Your dough not rising calls for checking the yeast’s expiration date; expired yeast can’t create the carbon dioxide bubbles needed to lighten the bread. Also make sure the water you use to activate the yeast is warm, not hot or cold, ideally around 100 to 110 degrees Fahrenheit. Covering the dough with a damp towel and placing it in a slightly warm spot (like near your oven or on top of the fridge) fosters proper rising conditions.
- Always shred your own cheese to avoid sogginess from anti-caking agents
- Let dough rise in a warm, greased bowl covered with a damp towel
- Check yeast freshness and water temperature (100°F to 110°F) for activation
- For dense bread, try a two-rise method: 12 hours then 6 hours
- Add cheese partway through baking to avoid burning
- Tap the bottom of the bread, hollow sound means it’s done
Make sure the dough doubles in size before baking; rushing this step often leads to dense, chewy bread.
Following these tips can save your cheesy bread from being soggy, dense, or burnt. Proper rising times, cheese choice, and oven management ensure a better bake every time without extra cost or complicated equipment. Paying attention to these details helps you avoid common pitfalls and achieve that perfect balance of fluffy bread with melted, golden cheese on top.
Storing, Freezing, and Reheating Cheesy Bread
Cheesy bread lasts about 2 days at room temperature when stored in an airtight container. Refrigerating it extends freshness to 5 days, while freezing preserves it up to 3 months. Proper storage prevents the bread from drying out and keeps the cheese flavorful and evenly spread.
| Storage Method | Duration | Storage Tips |
|---|---|---|
| Room Temperature | Up to 2 days | Use an airtight container, avoid heat and direct sunlight |
| Refrigerator | Up to 5 days | Wrap in foil or place in airtight container |
| Freezer | Up to 3 months | Slice, separate with parchment paper, seal airtight |
To freeze cheesy bread, slice it into portions between 1 to 2 inches thick. Place parchment paper between each slice to prevent them from sticking. Seal tightly in a freezer-safe bag or container. Freezing slows moisture loss and maintains texture, but freezing uncut whole loafs can lead to clumps of cheese and uneven thawing.
Reheating requires balancing warmth to melt the cheese again without drying the bread or losing crispness. Using an oven at 350°F works well for slices straight from the freezer or fridge, restoring a chewy yet crisp crust. Follow these steps for best reheating results:
- Preheat your oven to 350°F (175°C) to ensure even baking.
- Arrange frozen or refrigerated cheesy bread slices on a baking sheet lined with parchment paper to avoid sticking.
- Cover the bread loosely with aluminum foil to keep moisture in and prevent excessive browning during reheating.
- Bake for 10 to 15 minutes if frozen; reduce to 5 to 8 minutes if refrigerated.
- Remove the foil during the last 2 minutes of baking to crisp the crust without drying the cheese.
- Take the bread out carefully and let it cool for a few minutes on a wire rack to set texture and flavor.
- Serve warm to enjoy melted cheese and crisp texture similar to freshly baked cheesy bread.
Avoid microwaving cheesy bread as it often makes crusts soggy and cheeses rubbery. Reheating in the oven keeps the texture balanced. Storing bread uncovered or in loosely sealed bags dries it out, making reheating less satisfying. Correct preparation and storage preserve flavor and moistness, ensuring you can enjoy cheesy bread leftovers with near-fresh taste.
Flavor Variations and Add-Ons for Custom Cheesy Bread
Adding herbs, spices, meats, and different cheese blends to cheesy bread lets you customize its flavor to match your taste perfectly. Herbs like rosemary, thyme, and basil bring fresh, aromatic notes without overpowering the cheese. Sprinkling garlic powder or crushed red pepper flakes boosts the savory touch and adds depth without overwhelming the main cheesy flavor.
You can add cooked bacon, diced vegetables like bell peppers or caramelized onions, and even small bits of sautéed mushrooms for texture and extra taste. When layering, start with a base of bread, then spread a garlic butter mix, add a layer of cheese, and scatter your add-ons before adding another cheese layer and bread slice. This method ensures each bite balances cheese with your chosen flavors.
- Mozzarella and sharp cheddar blended for a pizza-style, melty yet tangy cheese base
- Fresh or dried rosemary and thyme for an herbal aroma
- Crispy cooked bacon pieces for smoky saltiness
- Minced garlic or garlic powder in the butter spread for a garlic punch
- Thinly sliced bell peppers or caramelized onions for sweetness and crunch
- Crushed red pepper flakes or smoked paprika for mild heat and smokiness
- Sautéed mushrooms for earthiness and moisture balance
It’s essential to keep add-ons in moderate amounts to avoid soggy bread or overwhelming the cheese. For example, using about 1/2 cup of bacon or vegetables per loaf helps maintain structure and flavor balance. Proper layering, that is, cheese both below and above add-ons, also locks in moisture and keeps the bread from drying out. Using a sturdy bread type helps support heavier toppings.
Adjusting herbs and spices allows you to tailor cheesy bread to suit different meals. For example, rosemary and garlic fit well with dinner sides, while bell pepper and red pepper flakes add a bit of pizzazz for party snacks. Experiment with combinations, but maintain a base of quality cheeses and garlic butter to anchor the flavors and ensure a rich, cheesy bite every time.
Essential Equipment and Tools for Baking Cheesy Bread
Baking cheesy bread requires some key tools to get that ideal crust and melty interior. A Dutch oven is highly recommended if you want an artisan-style crust. It traps steam while the bread bakes, which keeps the crust crisp on the outside and tender inside. Heat the Dutch oven in your oven at 425°F before placing your dough inside with the lid on for most of the bake time. Remove the lid toward the end to brown the crust evenly. This method usually takes around 30, 40 minutes in total. Expect to pay between $30 and $100 for a quality Dutch oven, depending on size and brand.
Alternatively, a baking stone can help achieve a crispy bottom crust. Place the stone on the oven rack and preheat it along with the oven to 425°F. Slide your bread directly on the heated stone using a peel or rimless baking sheet. The stone retains and radiates heat, which promotes an evenly baked loaf. However, it won’t trap steam the way a Dutch oven does. That means your bread’s crust might be crisp but less chewy compared to the Dutch oven method.
For slicing your cheesy bread, a serrated bread knife is essential. It cuts through the crust and soft interior cleanly without squashing the loaf or dragging the cheese. Look for a knife with a blade about 8 to 10 inches long and a comfortable handle to provide good control. A good serrated knife costs around $15 to $40. Make sure to slice gently in a sawing motion for the cleanest cuts.
To spread cheese and other toppings evenly over your bread, use a flexible offset spatula or a small silicone spatula. These tools help you lift and smooth soft cheeses, garlic butter mixtures, or herbs without tearing the bread. A medium-sized spatula around 6 to 8 inches in length works well and typically costs under $10.
- Preheat a Dutch oven or baking stone at 425°F for even baking
- Use a serrated bread knife, 8, 10 inches long, for clean slicing
- Flexible offset or silicone spatulas aid in smooth topping application
- Wire cooling rack prevents sogginess by allowing air circulation
- Mixing bowls for dough preparation and topping mixes
- Oven mitts for safe handling of hot cookware
A wire cooling rack is another important tool. Once baked, place your cheesy bread on the rack to cool. This prevents condensation on the bottom, which can make the crust soggy. Let it rest for at least 15 minutes before slicing. Good oven mitts are also necessary when handling hot Dutch ovens or baking stones to avoid burns.
Always preheat your Dutch oven or baking stone for at least 30 minutes to ensure the best crust texture and even cooking.
Step-by-Step Action Plan for Making Cheesy Bread
Follow these steps to make cheesy bread that bakes evenly, tastes great, and stores well for later enjoyment.
- Before you start: Choose your cheese and bread type based on flavor and texture preferences. Pick a cheese that melts well like mozzarella or cheddar, and a bread like a sturdy baguette or homemade dough that holds toppings.
- Day 1, dough preparation: If making dough from scratch, mix ingredients and knead until smooth. Let it rise for 1 to 2 hours until it doubles in size to ensure proper texture.
- After dough rise: Shape the dough into your preferred form and prepare your cheese and add-ons. Proper shaping helps baking evenly and allows space for cheese to melt without spilling.
- Bake: Preheat your oven to 375°F to 400°F, then bake the bread for 15 to 20 minutes until the crust is golden and cheese is bubbling. This temperature and timing balance crust crispiness and cheese melt.
- Cooling phase: Let the bread cool for 5 minutes before slicing. Cooling helps the cheese set slightly and makes slicing easier without losing topping.
- Storage option: Wrap leftover bread tightly in foil or plastic wrap before refrigerating for up to 3 days or freezing for up to 2 months. Proper wrapping preserves freshness and flavor.
- Reheating: Warm the bread in a 350°F oven for 10 minutes to re-melt the cheese and refresh the crust. Avoid microwaving to prevent soggy texture.
- Next time: Experiment with different cheeses or herbs added before baking to customize flavor. Note what worked best so you can replicate your favorite version.
Frequently Asked Questions
What Is the Best Way to Layer Cheese for Cheesy Bread?
Aim for 2-3 layers depending on your bread size and how cheesy you want it. This ensures even melting without overwhelming the bread.
Can I Make Cheesy Bread Without Using Butter?
Yes, but butter adds flavor and moisture, so consider brushing with olive oil as a substitute for similar richness.
How Do I Prevent Cheesy Bread from Becoming Soggy?
Use slightly toasted bread, and spread cheese evenly to avoid puddling. Baking at 375°F helps crisp the crust while melting cheese.
What Is a Good Way to Add Herbs to Cheesy Bread?
Mix fresh or dried herbs into the butter or sprinkle them over cheese before baking. This boosts aroma and flavor without extra effort.
Can Cheesy Bread Be Made in a Toaster Oven?
Yes, but monitor closely as smaller ovens cook faster. Rotate the bread for even crispness and melt.
How Do I Know When Cheesy Bread Is Perfectly Baked?
Look for golden, bubbly cheese and a crispy crust. Usually, 25-30 minutes at 375°F hits the sweet spot.
Wrapping Up
Cheesy bread is straightforward to make once you understand the dough handling, cheese choices, and baking details. Start by picking your favorite cheese and bread, then follow through on timing and temperature. The next step is baking your first loaf and enjoying fresh homemade cheesy bread within an hour.