How to Make Kitchen Cabinets: A Step-by-Step Guide
Are you dreaming of beautiful, custom kitchen cabinets but feeling overwhelmed by where to start? You’re not alone—many people struggle with turning their ideas into a reality.
The good news is, making your own kitchen cabinets is doable with some basic steps and a little patience.
To make kitchen cabinets, start by choosing durable materials like oak or plywood and matching hardware that fits your style. Measure your kitchen space accurately and design a layout that maximizes storage and workflow.
Gather essential tools for cutting and assembly, then carefully build and align cabinet boxes with strong joints.
Sand and finish your cabinets smoothly, and install handles and hinges precisely for easy use.
Keep these steps in mind, and you’ll be ready to investigate detailed techniques for a flawless finish.
Key Takeaways
- Choose durable materials like oak or plywood, and pick hardware that matches your kitchen style and budget.
- Measure your kitchen accurately and plan a layout that optimizes workflow and storage space.
- Gather essential tools like saws, drills, and clamps, and use precise joinery techniques when assembling your cabinets.
- Sand the cabinets smoothly, apply your finish or stain evenly, and install handles and hinges with proper alignment.
- Avoid common mistakes by double-checking measurements, taking your time during assembly, and selecting quality materials.
How to Choose the Right Materials for Kitchen Cabinets
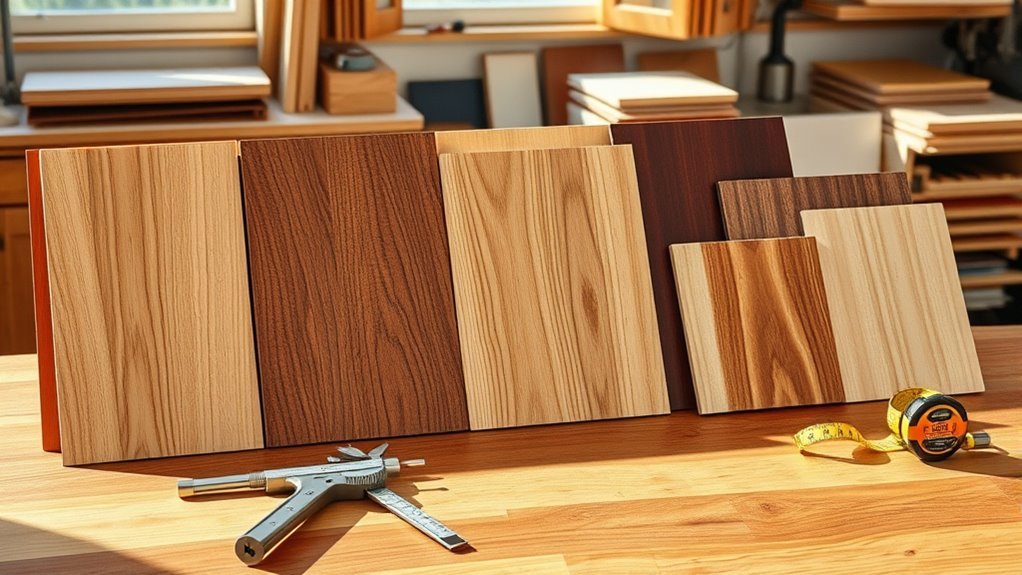
When choosing materials for your kitchen cabinets, think about durability, style, and budget to make sure your choices meet both practical and aesthetic needs. Start by exploring wood types like oak, maple, or cherry, each offering unique durability and visual appeal.
Consider durability, style, and budget when selecting wood types like oak, maple, or cherry for your kitchen cabinets.
If you’re on a budget, plywood or MDF with veneer can mimic the look of wood without the high cost. Next, consider finish options—paint, stain, or laminate—that protect your cabinets and match your kitchen’s design trends.
Don’t forget to keep your budget in mind; high-end woods and finishes cost more but tend to last longer. Cheaper materials might need replacing sooner, so weigh the long-term value.
Also, think about the environmental impact by choosing sustainably sourced wood or recycled materials. This helps reduce your carbon footprint and makes your kitchen more eco-friendly.
Balancing these factors ensures your cabinets are both stylish and durable enough for daily use. With careful material choices, you’ll create a kitchen that looks great and stands the test of time.
Measure Your Kitchen Space Accurately for Cabinets
Accurately measuring your kitchen space is key to having cabinets that fit well and look great. Grab a reliable tape measure, a notepad, and a pencil to get started.
Start by measuring the overall dimensions—length, width, and height—and record each one carefully. Don’t forget to note down the positions of doors, windows, vents, and electrical outlets, as these will affect where your cabinets can go.
Measure wall lengths multiple times to make sure your measurements are accurate. Check for any ceiling height differences that might influence cabinet height. Getting precise measurements helps you avoid costly mistakes and makes the best use of your space.
Taking your time and double-checking everything will give you confidence in your measurements. This careful approach ensures your cabinets will fit perfectly without gaps or awkward spaces.
Design Your Kitchen Cabinet Layout and Style
Choosing the right layout and style for your kitchen cabinets sets the foundation for both functionality and aesthetics. You want your cabinets to complement your kitchen’s design while maximizing space and storage solutions. Start by exploring modern styles and current cabinet trends to find a look that suits your taste and lifestyle. Then, focus on functional layouts that improve space optimization.
Here are four key steps to guide your design process:
- Assess your kitchen’s workflow to create a layout that supports efficiency.
- Choose color combinations that balance your kitchen’s overall palette and lighting.
- Incorporate storage solutions like pull-out shelves or deep drawers for better organization.
- Select cabinet styles that reflect modern trends while fitting your space’s size and shape.
Essential Tools You Need for Cabinet Making
To build quality kitchen cabinets, you’ll need a set of essential tools that guarantee precision and efficiency throughout the process. Start with a reliable measuring tape and a carpenter’s square to confirm accurate dimensions.
Building quality kitchen cabinets starts with essential tools like a measuring tape and carpenter’s square for precise dimensions.
A circular saw and a jigsaw will help you cut wood precisely, while a drill and screwdriver set are essential for assembling parts securely. For smooth joints and edges, sanding tools like a power sander or sanding blocks are necessary, especially for quality wood finishing.
Don’t forget clamps to hold pieces steady while glue sets. Safety equipment is imperative—wear safety glasses, gloves, and a dust mask to protect yourself during cutting and sanding.
Using push sticks and feather boards can improve cabinet safety by keeping your hands clear of blades. With these tools, you’ll work efficiently and create durable cabinets that look professional and last for years.
Cut and Prepare Wood Pieces for Kitchen Cabinets
With your tools ready, the next step is cutting and preparing the wood pieces for your kitchen cabinets. Choosing the right wood is key; hardwoods like maple or oak are great for durability and a nice finish.
Once you’ve picked your wood, use precise cutting techniques to get clean edges and accurate sizes. Measure twice, mark once—this helps avoid costly mistakes.
Use a table saw or circular saw with a fine-tooth blade for smooth cuts. Cut all pieces based on your cabinet plan, including panels, shelves, and face frames.
Finally, sand the edges and surfaces to remove splinters and make everything ready for assembly.
Assemble Kitchen Cabinet Boxes Step-by-Step
Now that you’ve got your wood pieces all set, it’s time to start preparing the cabinet panels for assembly. Just take your time and make sure everything lines up nicely—that way, your cabinet will come out looking great.
Once the panels are ready, you’ll want to carefully join the components together. Don’t rush this part; a strong, snug fit is key to making sure your cabinet is sturdy and long-lasting.
Finally, you’ll secure the cabinet box to keep everything held together firmly. Using the right fasteners and making sure everything is tightly in place will give your cabinet the solid, professional look you’re aiming for.
Preparing Cabinet Panels
Start by organizing your cabinet panels on a clean, flat surface to ensure accurate assembly. Knowing your panel types—like plywood, MDF, or particleboard—helps you handle each one properly. Pay close attention to surface finishes because they affect how the cabinets look and last.
Follow these steps to get your panels ready:
- Check each panel for any defects or warping.
- Lightly sand the edges for a smooth fit.
- Mark the panel orientation based on grain direction and finish.
- Pre-drill holes for hardware and joinery to avoid splitting.
Doing these steps ensures your panels fit perfectly and stay in great shape during assembly. Proper prep gives you sturdy, professional-looking cabinets that last.
Joining Cabinet Components
Once your panels are prepped and ready, you can start joining the cabinet components to form the box. Begin by carefully aligning the edges of your panels.
Use dowel joints for strong, precise connections. Drill holes into matching edges, then insert dowels to secure everything in place. Alternatively, biscuit joinery is quick and reliable—cut matching slots, insert compressed biscuits, and clamp until the glue dries.
Both methods offer great strength and help with alignment, so pick the one that suits your tools and style. Be sure to apply wood glue to all joints before assembly for extra durability.
Take your time checking that corners are square and panels are flush. This will help ensure your cabinet box is sturdy and well-formed, ready for the next step.
Securing Cabinet Box
Secure the cabinet box by firmly clamping the joined panels together, making sure all edges are flush and the corners are square. This step is really important for the cabinet’s stability and to prevent misalignment during assembly.
Use effective methods like screws, dowels, or pocket holes to strengthen the joints. Follow these steps: first, drill pilot holes to avoid splitting the wood.
Next, apply wood glue evenly on the joint surfaces. Then, insert screws or dowels to lock the panels in place. Finally, recheck that everything is square and adjust the clamps if needed.
Build and Attach Cabinet Doors and Drawers
Craft your cabinet doors and drawers with careful measurements to guarantee a perfect fit. Choose door styles that match your kitchen’s design, whether shaker, raised panel, or flat. Select hinge types—concealed or surface-mounted—that suit your cabinet construction and allow smooth opening.
For drawers, pick high-quality drawer slides to ensure durability and easy movement. Before attaching, double-check the cabinet alignment; misaligned doors can cause gaps or rubbing. Use tips like pre-drilling hinge holes and testing door swings to avoid mistakes.
Secure doors and drawers firmly but be careful not to overtighten screws, which can damage the wood. While finishing techniques will be covered later, make sure surfaces are clean and smooth before assembly. Attaching your doors and drawers properly not only improves appearance but also enhances functionality, making your custom kitchen cabinets both beautiful and practical.
Sand and Finish Kitchen Cabinets Professionally
Start by thoroughly sanding your kitchen cabinets to create a smooth surface that’s ready for finishing. Proper sanding techniques are key to achieving a flawless finish and making sure paint or stain sticks evenly. Use fine-grit sandpaper and work with the grain to avoid scratches.
Next, pick the right finishing options based on the look you want and how durable you need it to be. Here’s a simple process to follow:
- Wipe down the cabinets to remove dust after sanding.
- Apply a wood conditioner if you’re staining, to ensure even absorption.
- Use a high-quality brush or spray to apply stain or paint smoothly.
- Finish with a clear protective coat like polyurethane for extra durability.
How to Install Cabinet Hardware Like Handles and Hinges
Now that your cabinets are all sanded and finished, it’s the perfect moment to choose the hardware that really brings everything together. Picking the right handles and hinges isn’t just about style; it also affects how well your cabinets work day to day. So, take some time to find pieces that match your vibe and fit your needs.
When it’s time to install, careful placement is key. Make sure your handles are aligned evenly and at the right height for comfort. For hinges, double-check their placement so your doors open smoothly without any sticking or misalignment. A little patience during installation can make a big difference in giving your cabinets that professional, polished look.
Choosing The Right Hardware
Selecting the right hardware sets the tone for your kitchen cabinets and affects both function and style. Before you pick handles and hinges, think about the overall look you want. Explore different hardware styles—from sleek modern pulls to classic knobs—that match your cabinet design.
Don’t forget about finish options like brushed nickel, matte black, and antique brass. These can really change the vibe of your cabinets. To choose wisely, follow these simple steps:
- Match hardware styles with your kitchen’s theme for a cohesive look.
- Pick finish options that contrast or blend with your cabinet colors.
- Think about durability and how easy they are to maintain for daily use.
- Consider ergonomic comfort for handling frequently.
These tips help your hardware look great and work well without making installation more complicated.
Installing Handles And Hinges
With your hardware chosen to match both style and function, it’s time to install handles and hinges accurately for smooth operation and a polished look.
Start by carefully marking hinge placement, making sure doors line up perfectly when closed. Using a template helps keep spacing consistent and avoids misalignment.
For handles, decide between knobs, pulls, or bar handles, as each needs specific screw hole placements. Pre-drill holes to prevent splitting, then attach handles securely.
When installing hinges, check they sit flush with the cabinet edge and that the door swings freely without binding. Test each door after installation and make small adjustments to hinge screws if needed.
Proper hinge placement and handle installation not only improve how everything works but also boost your cabinet’s overall appearance.
Common Mistakes to Avoid When Making Kitchen Cabinets
Avoiding common mistakes can save you time and frustration when making kitchen cabinets. Paying close attention to details helps ensure your project looks professional and lasts long.
Here are four pitfalls to watch out for:
- Design Errors and Planning Mistakes: Take your time with the design phase. Rushing can cause sizing problems and alignment issues that are tough to fix later.
- Material Selection and Finish Choices: Pick quality materials that are meant for kitchen use. Avoid finishes that might peel or discolor over time.
- Tool Mishaps and Assembly Blunders: Use the right tools and double-check your measurements before cutting. Many assembly errors happen because of haste or incorrect tool use.
- Sizing Problems and Alignment Issues: Measure twice, cut once. Misaligned doors or drawers can ruin both the look and function of your cabinets.
Frequently Asked Questions
How Long Does It Typically Take to Make Kitchen Cabinets?
It usually takes about one to three weeks to make kitchen cabinets, depending on the materials and design styles you pick.
If you’re using solid wood, it might take longer because of cutting, assembling, and finishing.
Simple, modern designs tend to be faster to make than intricate, custom styles.
Your experience level and the tools you have can also speed things up or slow you down.
Planning ahead is key to keeping the process on track.
Can I Use Reclaimed Wood for Kitchen Cabinets?
Yes, you can use reclaimed wood for kitchen cabinets, and it’s a smart choice. About 50% of homeowners prefer eco-friendly materials like reclaimed wood.
Reclaimed wood offers unique character, durability, and sustainability. When sourcing it, look for reputable suppliers or salvage from old barns and factories to ensure quality and safety.
Using reclaimed wood not only adds charm but also reduces environmental impact, making your kitchen both stylish and eco-conscious.
What Is the Best Type of Paint for Kitchen Cabinets?
The best type of paint for kitchen cabinets is usually a durable, semi-gloss or satin finish. These finishes resist moisture and are easy to wipe clean, making them perfect for busy kitchens.
When choosing a color, think about your kitchen’s overall style and lighting. This helps you pick a shade that either stands out or blends in seamlessly.
You want paint that not only looks great but also holds up well to daily use and frequent cleaning in your kitchen.
How Do I Maintain and Clean Finished Kitchen Cabinets?
Don’t let your cabinets gather dust like it’s going out of style! For effective maintenance, start by wiping them down regularly with a soft cloth and mild soap mixed with water.
Avoid harsh chemicals that can damage the finish. Use gentle cleaning techniques, like a microfiber cloth for stubborn spots, and dry surfaces promptly to prevent moisture damage.
Consistent care keeps your cabinets looking fresh and helps them last longer.
Are There Eco-Friendly Options for Cabinet Finishes?
Yes, you can definitely choose eco-friendly stains and natural sealants for your cabinets. These options help reduce harmful chemicals and keep your kitchen safer.
Look for water-based, low-VOC stains or ones made from plant-based ingredients. Natural sealants like beeswax or tung oil protect wood and enhance its beauty without toxic fumes.
Using these finishes helps create a healthier home while also caring for the environment.
Conclusion
Now that you’ve got the blueprint for crafting your own kitchen cabinets, it’s time to roll up your sleeves and bring your vision to life. Like a maestro conducting a symphony, your careful measurements, precise cuts, and thoughtful finishes will transform raw wood into stunning storage.
Remember, every step counts. Stay patient, avoid common pitfalls, and keep your focus on the details. Your hard work will pay off when you see your kitchen become the heart of your home.
With your own hands, you’ll create beautiful kitchen cabinets that are both functional and personalized. Enjoy the process—you’re building more than just cabinets, you’re building a space you’ll love.