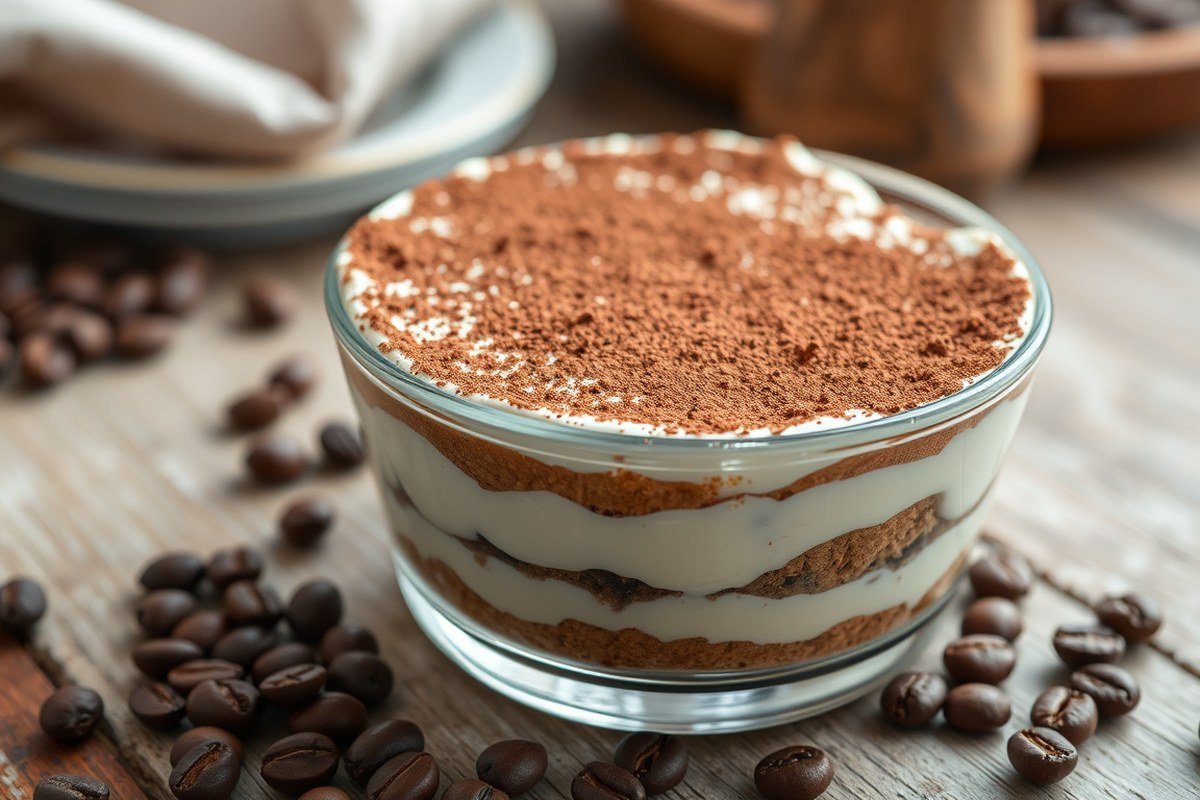
How to Make Tiramisu: Complete Steps and Tips for Perfect Results
To make tiramisu, start by preparing fresh mascarpone cream and zabaglione, then soak ladyfingers quickly in cold coffee and layer everything before chilling. Chill the assembled dessert for at least 6 hours, preferably overnight, to develop the perfect texture and flavor. You can store tiramisu covered in the fridge for up to 4 days and serve it cold, letting it soften slightly at room temperature first.
This guide is for home cooks and dessert enthusiasts aiming to make classic tiramisu from scratch. You’ll get clear steps for ingredient prep, assembling layers, chilling time, and tips for storage and serving to enjoy authentic results every time.
Key Takeaways
- Make mascarpone cream by beating mascarpone, vanilla, and a bit of rum until smooth for the ideal flavor and texture.
- Soak ladyfingers briefly in cold coffee to avoid sogginess while imparting rich taste to the dessert.
- Use an 8×5-inch serving dish 2 inches deep for proper layering and portion size of tiramisu.
- Repeat ladyfinger and mascarpone cream layers twice for four total layers of classic tiramisu structure.
- Cover tiramisu tightly with plastic wrap touching the surface before refrigerating to keep it moist and fresh.
- Chill tiramisu at least 6 hours, but overnight chilling improves texture and flavour depth significantly.
What Ingredients You Need for Classic Tiramisu
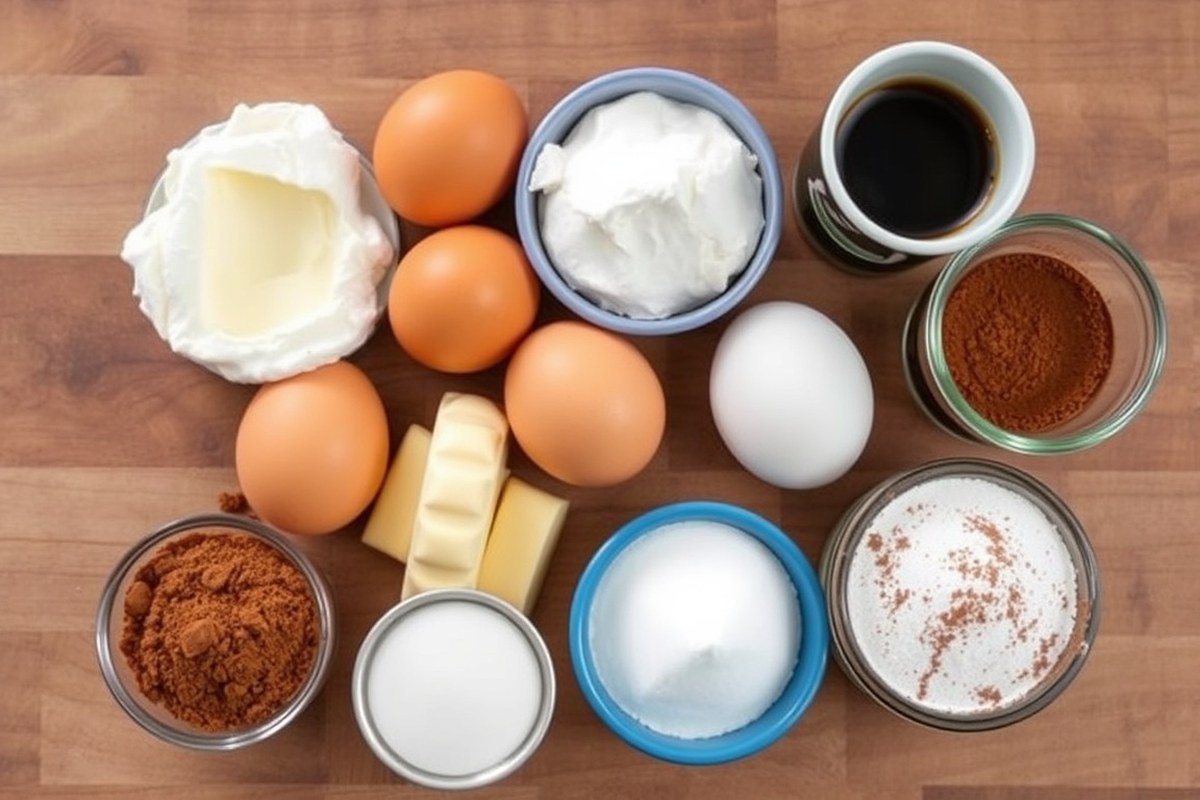
A classic tiramisu relies on just a few essential ingredients, each playing an important role in creating its distinct flavor and texture. The main components you need include mascarpone cheese, fresh eggs, ladyfingers, strong coffee, and a touch of alcohol, though the latter can be optional depending on your preference or dietary needs.
Mascarpone cheese is the key to that creamy, rich texture that defines tiramisu. It provides a smooth, velvety base for the custard layer. Fresh eggs, traditionally used raw, give the dessert its custard-like consistency and help bind the mascarpone cream. Using very fresh eggs is important for both flavor and safety, and tempering can reduce risk if you’re concerned about consuming raw eggs.
Ladyfingers, or Savoiardi, form the sponge cake-like layer of the tiramisu. These should be dry, crisp, and able to soak up liquid without falling apart immediately. Homemade ladyfingers yield the freshest result, but good-quality store-bought ones work well too. For the coffee soak, a strong espresso is best, as it infuses strong chocolate and roasted flavors into the ladyfingers. Cold coffee is used to prevent softening the ladyfingers too quickly during dipping.
The classic alcohol traditionally used is Marsala wine, which adds a subtle sweetness and depth. Other popular options include dark rum, brandy, or coffee liqueur. Omitting alcohol is fine, especially for kids or those avoiding alcohol; you can still achieve a flavorful tiramisu by focusing on good espresso and quality mascarpone.
- Mascarpone cheese provides creamy richness and authentic flavor
- Fresh eggs create the custard texture but require handling raw, use pasteurized eggs if preferred
- Dry, crisp ladyfingers soak up coffee without falling apart
- Strong, cold espresso delivers signature coffee flavor
- Marsala wine is traditional, with rum or brandy as optional substitutes
- Alcohol can be skipped for an alcohol-free version
When soaking ladyfingers, dip them briefly in cold espresso combined with your chosen alcohol, about 1 to 2 seconds per side, so they absorb flavor but hold their structure. Using classic raw eggs means you’ll want to use extremely fresh eggs and consider tempering the eggs with warm sugar syrup or use pasteurized eggs for safety. The careful balance and quality of these ingredients result in tiramisu’s signature layers of rich custard and coffee-soaked sponge.
How to Prepare the Mascarpone Cream and Zabaglione Safely
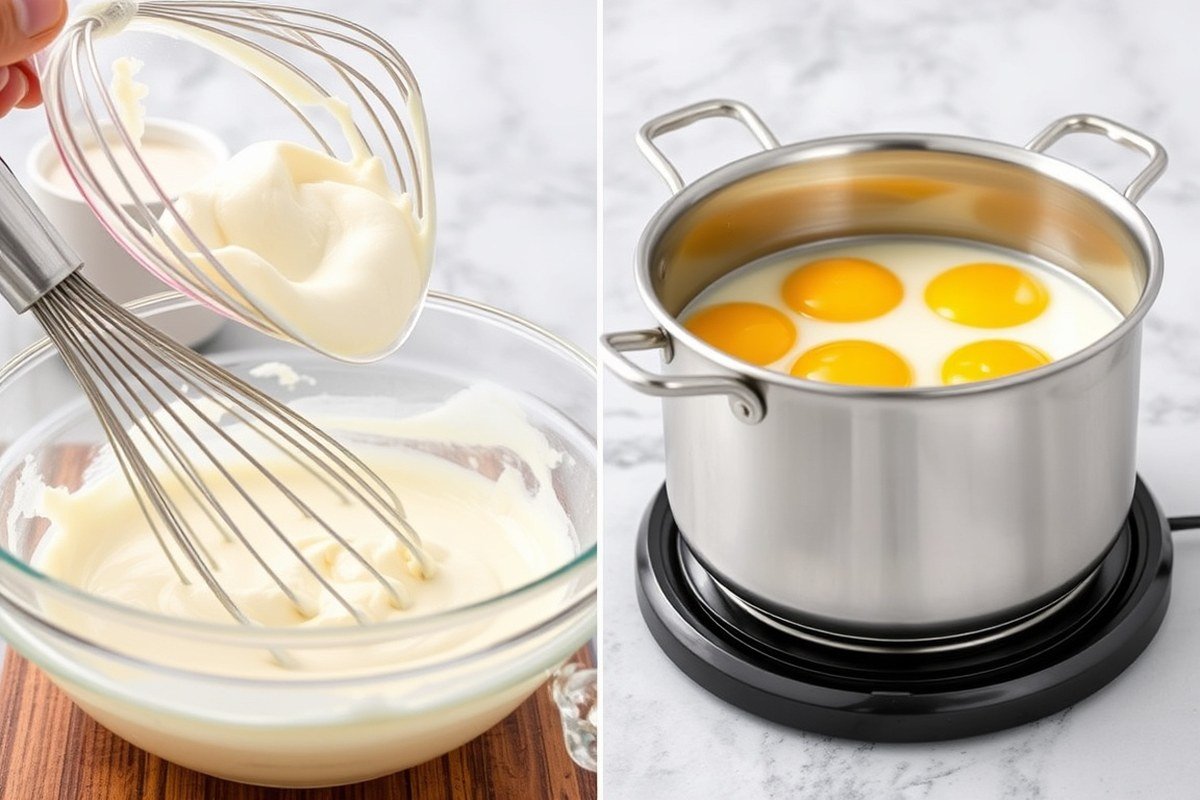
Preparing mascarpone cream and cooking eggs safely for tiramisu involves gently cooking the egg yolks with sugar to kill bacteria, then folding them with mascarpone and whipped cream for a smooth texture. Tempering the eggs over a double boiler ensures food safety without cooking the yolks too much, while careful whipping and folding yields the perfect light yet rich cream. Using room temperature ingredients and gentle methods prevents curdling and maintains the ideal texture.
Cooking Zabaglione over Double Boiler
Cooking the egg yolks and sugar over a double boiler (or bain-marie) safely heats the mixture to reduce the risk of salmonella while preserving the creamy texture needed for tiramisu. The temperature should reach about 160°F (71°C) for at least 3 minutes to effectively cook the eggs without scrambling them. This step dissolves the sugar fully and thickens the cream to a custard-like consistency known as zabaglione.
- Whisk 6 large egg yolks and ¾ cup sugar together in a medium heatproof bowl until blended.
- Set the bowl over a saucepan containing simmering water, ensuring the bowl’s bottom remains over the steam without coming into direct contact with the water.
- Whisk continuously for about 3 to 5 minutes until the mixture thickens, doubles in volume, and reaches 160°F.
- Remove the bowl from heat immediately to avoid overcooking or curdling.
- Let the mixture cool slightly while stirring occasionally before combining it with mascarpone.
Use an instant-read thermometer to ensure the egg yolk mixture reaches at least 160°F for food safety and creamy texture.
Whipping Mascarpone and Cream to Soft Peaks
Using room temperature mascarpone cheese and heavy cream helps achieve the smooth, airy cream desired in tiramisu. Heavy cream is whipped until soft peaks form, while mascarpone is gently loosened to avoid lumps before folding. This technique adds volume and lightness to the rich mascarpone mixture without breaking it down.
- Bring mascarpone out of the fridge 30 minutes before use to reach room temperature.
- In a chilled bowl, whip 1 cup of heavy cream with an electric mixer on medium speed until soft peaks form.
- Loosen the mascarpone by gently stirring with a spatula when necessary, taking care not to whip it to avoid curdling.
- Reserve the whipped cream for folding into the zabaglione and mascarpone mixture.
Overbeating mascarpone can cause it to become grainy or separate, so fold gently and avoid high speeds.
Combining Ingredients Without Overmixing
After cooking the zabaglione and whipping the cream and mascarpone, combine them carefully to keep the texture light and creamy. Folding rather than stirring helps retain air in the mixture and prevents the mascarpone from breaking down or curdling. Gradually mixing the components allows for even distribution of flavor and consistency in the finished tiramisu cream.
- Fold the cooked egg yolk mixture into the mascarpone gently until smooth and fully combined.
- Carefully incorporate one-third of the whipped cream into the mascarpone blend using a spatula, folding it in to lighten the texture.
- Carefully fold in the remaining whipped cream in two additions without over-stirring.
- Set the combined mascarpone cream aside in the refrigerator until ready to assemble the tiramisu.
Folding gently maintains the mixture’s volume and prevents it from becoming runny or dense.
Preparing and Soaking Ladyfingers for Best Results
To prevent soggy tiramisu, dip ladyfingers quickly, just 1 to 3 seconds, in a cooled coffee and alcohol mixture. Use a strong espresso or coffee concentrate for bold flavor, and always work with one cookie at a time to control absorption. Proper soaking lets ladyfingers soften enough to blend with mascarpone layers without falling apart.
Choosing Between Store-Bought and Homemade Ladyfingers
Store-bought ladyfingers are crisp and porous, designed to absorb liquid evenly without becoming mushy. That’s why classic tiramisu almost always uses these. They come ready to dip, which simplifies preparation and provides consistent texture. However, homemade ladyfingers can be made with basic ingredients like eggs, sugar, flour, and cornstarch.
Homemade ladyfingers are lighter and airier but tend to soak up liquids more rapidly, requiring a shorter dip time. Expect to spend about 20 to 30 minutes to prepare and bake them. To make your own, pipe a simple batter into finger-shaped strips and bake at 350°F (175°C) for 8 to 10 minutes until lightly golden. Let them cool thoroughly before soaking to avoid excessive sogginess.
Coffee and Alcohol Mixture Ratios
The coffee base works best when it’s strong and cooled completely, usually brewed as espresso or double-strength coffee. For a bold flavor, use about 1 to 1¼ cups of espresso. Alcohol adds depth; Marsala wine, dark rum, or coffee liqueurs like Kahlúa blend well. A good ratio for soaking liquid is about 1 part alcohol to 3 or 4 parts coffee.
This means if you have 1 cup of coffee, add about 2 to 3 tablespoons of alcohol. Adjust the alcohol amount based on your taste and the strength of the spirit. For no alcohol, just use coffee and a teaspoon of vanilla extract to mimic the complexity. Always cool the mixture completely before dipping to prevent breaking down the ladyfingers prematurely.
Dipping Techniques to Avoid Soggy Layers
Quick dipping keeps ladyfingers from falling apart and becoming soggy. Dipping one at a time lets you control how much liquid the cookie absorbs. Generally, 2 to 3 seconds is enough for store-bought ladyfingers. Homemade versions take closer to 1 to 2 seconds due to their lighter texture. Here’s an efficient way to soak ladyfingers properly:
- Pour the cooled coffee and alcohol mixture into a shallow dish wide enough for ladyfingers.
- Hold each ladyfinger with your fingers or a fork.
- Dip quickly, immerse the cookie briefly and flip it once or twice.
- Remove immediately, letting excess drip off for 1 to 2 seconds.
- Place the dipped ladyfinger in the baking dish with the rounded side facing up.
- Avoid stacking dipped ladyfingers; soak and layer them immediately.
- Repeat until you have one complete layer ready for mascarpone topping.
Over-dipping leads to soggy, falling-apart layers that ruin tiramisu’s texture. If you notice cookie edges softening too much before assembly, shorten soaking time or use a firmer brand. After assembling layers, the tiramisu chills and finishes soaking slowly, which further softens but maintains structure.
Step-by-Step Assembly of Tiramisu Layers
Assembling tiramisu is about building distinct, even layers of espresso-soaked ladyfingers and mascarpone cream, then finishing with a good dusting of cocoa powder. Each mascarpone layer should be about 3/4 inch thick to ensure a balanced bite that isn’t too creamy or too dry. Typically, two layers of ladyfingers and mascarpone are ideal; it keeps the dessert from being overly tall or unstable. Proper order and gentle handling maintain the integrity of each layer. Avoid mixing or pressing too hard to keep the dessert light and airy.
- Arrange the soaked ladyfingers: Spread a single layer of espresso-soaked ladyfingers evenly across the bottom of your serving dish. Make sure the fingers are snug but not overlapping excessively to create a solid base.
- Spread half the mascarpone cream: Spoon about half of your mascarpone mixture onto the ladyfingers. Use a spatula to gently spread it out to an even layer about 3/4 inch thick. Move the spatula smoothly in one direction to avoid disturbing the soaked ladyfingers below.
- Add a second ladyfinger layer: Place another even layer of soaked ladyfingers on top of the mascarpone cream. Be gentle and avoid pressing down too much to keep the layers distinct and prevent mixing.
- Spread the remaining mascarpone cream: Cover the second ladyfinger layer with the remaining mascarpone filling, again spreading it to roughly 3/4 inch thickness. Aim for an even, smooth surface without digging into the ladyfingers beneath.
- Finish with cocoa powder: Using a small sieve or fine mesh sifter, dust a generous and even layer of unsweetened cocoa powder over the top mascarpone layer. This adds flavor, a hint of bitterness, and a slightly dry barrier to protect the cream beneath. Do this just before chilling for best results.
Adding cocoa too early can cause it to dissolve into the cream and lose its distinctive dry texture. Keeping layers even ensures each bite has both creamy and coffee-soaked cookie elements. Proper layering, spreading carefully, and finishing with cocoa guard against smearing and mixing, helping your tiramisu look and taste its best.
How Long to Chill Tiramisu for Perfect Texture and Flavor
Chilling tiramisu for at least 6 hours in the refrigerator is critical for achieving the right texture and flavor. The minimum chilling time allows the mascarpone cream to set properly and the ladyfingers to soften from the coffee soak. Serving tiramisu immediately after assembly usually results in a dessert that feels too runny or overly firm in some spots because the layers haven’t had time to meld.
The ideal chilling period is overnight, about 8 to 12 hours, which gives the flavors time to marry and deepen. Overnight refrigeration improve the mascarpone’s creamy texture and lets the coffee and cocoa infuse the ladyfingers evenly. A longer chill also helps with slicing, reducing crumbling and keeping the tiramisu intact when served.
To avoid drying out the top layer during this extended cooling, cover the tiramisu tightly with plastic wrap. It’s best to press the wrap directly onto the surface of the dessert to minimize air exposure. This preserves moisture and protects the delicate cream. Alternatively, you can use an airtight container sized for the tiramisu, but make sure the lid seals well.
Though tiramisu can safely stay refrigerated for up to 3 to 4 days, excessive chilling beyond 2 days may make the texture less appealing. The ladyfingers tend to become overly saturated and mushy, and the cream may separate slightly, which affects the visual appeal and mouthfeel. For the best eating experience, try to enjoy tiramisu within 1 to 2 days after assembly, keeping it covered and cold until serving.
Tiramisu sings at the perfect balance of firm yet creamy after sufficient chilling. The coffee-soaked cookies absorb moisture just enough to soften without turning soggy, while the mascarpone sets into a luscious, smooth layer. Chilling is not just a resting period, but an active step that transforms assembled ingredients into a classic Italian dessert with its signature melt-in-your-mouth quality.
Press plastic wrap directly onto the tiramisu surface before refrigerating to prevent drying and preserve its creamy texture.
Storing, Freezing, and Serving Tips for Tiramisu
Store tiramisu covered in the refrigerator to keep it fresh and prevent it from absorbing other food odors. Use an airtight container or tightly wrap it with plastic wrap. This dessert typically lasts 2 to 3 days when refrigerated properly, with some sources suggesting up to 4 days, but it’s best eaten within the first 24 to 36 hours to avoid the layers breaking down and becoming soggy.
You can freeze tiramisu to extend its shelf life up to 1 month. Freeze it by wrapping several layers of plastic wrap around the dessert to seal it well and prevent freezer burn. Place the wrapped tiramisu in a sealed container or a heavy-duty freezer bag for extra protection. Frozen tiramisu should be thawed slowly in the refrigerator overnight, roughly 8 to 12 hours, before serving to maintain its texture and flavor.
Serving tiramisu at the right temperature improve its creamy texture and flavor. Remove the dessert from the fridge about 45 to 60 minutes before serving to allow it to come closer to room temperature. This softens the mascarpone cream and brings out the espresso and cocoa notes without letting it get warm enough to lose structure.
- Cover tiramisu tightly with plastic wrap or store in an airtight container before refrigerating.
- Consume refrigerated tiramisu within 2 to 3 days for best quality.
- To freeze, wrap tiramisu in multiple plastic wrap layers and place in a sealed container or freezer bag.
- Freeze tiramisu for up to 1 month only to avoid texture loss.
- Thaw frozen tiramisu in the fridge overnight before serving.
- Remove from fridge 45-60 minutes before serving to reach ideal temperature.
Leaving tiramisu uncovered while storing causes the delicate mascarpone cream to dry out and absorb unwanted smells, which diminishes flavor. Also, consuming tiramisu past the recommended storage time risks spoilage and an unpleasant, soggy texture. Proper freezing and thawing preserve its smooth and silky feel, keeping your dessert enjoyable even days after making it.
Ingredient Substitutions and Dietary Variations
Tiramisu can be adapted for various diets and ingredient availability by selecting appropriate substitutes that preserve texture and flavor. Key ingredient swaps address eggs, alcohol, dairy, and gluten to meet allergies, dietary preferences, or missing items without compromising the dessert’s essential qualities.
Egg Replacements and Safety Considerations
Eggs, especially yolks, traditionally create tiramisu’s rich custard base but can be replaced for safety or dietary reasons. Whipped heavy cream serves as the best egg substitute, providing a light texture and creamy mouthfeel similar to the traditional filling.
Using whole eggs rather than just yolks lightens the filling and is considered safer if properly pasteurized, but egg-free versions completely avoid risk with raw eggs. Whipped cream eliminates concerns about salmonella while preserving moisture and volume. Avoid raw eggs unless using pasteurized products and follow food safety guidelines strictly.
Alcohol Substitutes and Effects on Flavor
Alcohol like Marsala wine or rum is often used to flavor the soaking liquid for ladyfingers, but it can be omitted or replaced for an alcohol-free version. Coffee alone or coffee mixed with vanilla extract are good choices. Non-alcoholic vanilla or almond extracts deliver some aroma and taste without the bite of booze.
Choosing non-alcoholic options reduces complexity but can slightly alter the classic flavor profile, making tiramisu less boozy but still enjoyable. Adjust the liquid ratios to prevent overly wet or dry ladyfingers when skipping alcohol.
Dairy Alternatives for Mascarpone and Cream
Mascarpone is critical to tiramisu’s creamy texture, but dairy-free substitutes enable vegan or lactose-free versions. Use plant-based mascarpone alternatives available in some stores or make a homemade version from blended soaked cashews, coconut cream, and lemon juice for tang.
Swapping heavy cream with vegan whipping cream made from coconut or soy also works well. These options can slightly change texture and richness but still produce a smooth, mousse-like filling with the right techniques.
Gluten-Free Ladyfinger Options
Traditional ladyfingers contain gluten, but gluten-free versions are widely available or can be baked at home using gluten-free flour blends. When baking, use a combination of rice flour, almond flour, and tapioca starch to mimic the light, airy texture of classic ladyfingers.
Store-bought gluten-free ladyfingers work well for convenience but check ingredients for added sugars or starches that may affect soaking and firmness. Homemade versions give control over sweetness and texture but require careful folding to maintain airiness. To help decide on substitutions based on dietary needs and ingredient availability, the table below compares options for the main components of tiramisu and their impact on texture and flavor.
| Ingredient | Traditional | Substitution | Effect on Texture | Effect on Flavor |
|---|---|---|---|---|
| Eggs (Yolks or Whole) | 6 egg yolks or whole eggs | Whipped heavy cream | Lighter, fluffy (whipped cream); Rich custardy (eggs) | Less dense custard flavor with cream; Traditional with eggs |
| Alcohol (Marsala, Rum) | 1/4 to 1/3 cup added to soaking liquid | Non-alcoholic vanilla/almond extract or coffee only | No change on texture | Milder, less boozy aroma and taste |
| Mascarpone Cheese | 1 pound fresh mascarpone | Plant-based mascarpone or cashew-coconut cream blend | Close, slightly softer with vegan | Different subtle flavor, less dairy tang |
| Heavy Cream | 1 cup fresh heavy cream | Vegan whipping cream (coconut/soy) | Comparable mousse-like texture | Some coconut/soy note depending on brand |
| Ladyfingers (Gluten) | Standard wheat ladyfingers | Gluten-free store-bought or made with gluten-free flours | Light but can be more crumbly or dense | Mildly different, depending on flours used |
| Sugar | 5 ounces (about 2/3 cup) granulated sugar | Reduced sugar or sugar alternatives | Less sweetness may reduce fluffiness slightly | Less sweet but still creamy if carefully reduced |
Reducing sugar by up to 25% is possible without major texture loss, but greater cuts may compromise the cream’s stability and sweetness balance. Using sugar alternatives can work but requires testing for taste and consistency.
Common Tiramisu Mistakes and How to Fix Them
Runny or overly soft tiramisu usually stems from too much liquid soaking into the ladyfingers or from cream mixtures that didn’t set properly. Using soggy ladyfingers washes out the coffee flavor and ruins texture. To fix this, dip ladyfingers quickly in coffee, no longer than 1 second per side, and use firm, fresh ladyfingers. The mascarpone cream also needs to hold shape; whipping eggs and sugar until thick and folding mascarpone into whipped cream separately helps prevent separation and maintain structure.
Curdled eggs happen when the egg yolks are heated too rapidly or directly over high heat. Whisk the yolks and sugar continuously over a gentle water bath at medium heat, keeping temperature below 160°F (71°C). This slow heating is called tempering and will produce a smooth zabaglione custard that thickens without curdling.
Soggy ladyfingers are a classic problem. To avoid this, ensure that coffee or espresso is cooled completely and lightly brush or dip ladyfingers rather than soaking them. You can chill tiramisu for longer to help set the cream and absorb moisture when it turns out too wet. Plus, serving tiramisu slightly chilled rather than room temperature reduces mushiness.
Cream separation or failure to thicken often means overmixing or mixing mascarpone directly into warm custard. Instead, whip cold heavy cream with sugar to medium-stiff peaks separately. Then gently fold the mascarpone in before combining with the zabaglione. This layering of air and fat creates a rich but stable texture that slices cleanly.
Alcohol or coffee bitterness is usually caused by steeping ladyfingers too long or using very strong espresso without balancing sweetness. Use a sweetened coffee mixture or reduce alcohol content to balance flavors. Serving tiramisu chilled for several hours or overnight can mellow the sharpness if it tastes too alcoholic after assembling.
- Dip ladyfingers quickly, 1 second per side in coffee or they become soggy.
- Temper eggs over a warm water bath, stirring constantly below 160°F.
- Whip cold heavy cream to medium-stiff peaks separately before folding in mascarpone.
- Use room temperature mascarpone for smooth mixing and avoid direct stirring into custard.
- Chill tiramisu at least 4, 6 hours for proper setting and flavor melding.
- Adjust alcohol and coffee strength for balance, adding sugar to offset bitterness.
Always use fresh eggs and keep tiramisu refrigerated to ensure safety and prevent runny texture.
By following these steps carefully, you can avoid the common pitfalls that make tiramisu too soft, runny, or bitter. The key is timing, temperature control, and gentle handling of delicate mixtures to create that classic smooth, layered dessert experience.
Step-by-Step Action Plan to Make Classic Tiramisu
Follow this plan to prepare and enjoy an authentic tiramisu with the right texture and flavor.
- Before You Start: Gather all fresh ingredients including mascarpone, eggs, strong coffee, ladyfingers, sugar, and cocoa powder. Having everything ready ensures smooth preparation.
- Preparation Phase: Whisk the mascarpone cream and zabaglione carefully with egg yolks and sugar, making sure the mixture is smooth and well combined for a creamy texture.
- Soaking Phase: Quickly dip ladyfingers into cooled espresso or coffee mixture to keep them moist but not soggy; the ladyfingers should feel damp yet hold their shape.
- Assembly Phase: Layer soaked ladyfingers and mascarpone cream evenly in a dish, ending with a thick cream layer to achieve balanced flavor and structure.
- Chilling Phase: Refrigerate the tiramisu for at least 6 hours, ideally overnight, so it firms up and flavors meld together properly.
- Serving Phase: Dust the top with cocoa powder just before serving to retain the fresh appearance and avoid moisture weakening the cocoa.
- Storage Tip: Store leftovers covered in the fridge for up to 3 days to maintain quality but avoid freezing if you prefer the classic texture.
Frequently Asked Questions
Can I Make Tiramisu Without Raw Eggs?
Use pasteurized eggs or cook the zabaglione mixture to avoid raw eggs for food safety. This prevents risks associated with consuming raw eggs in tiramisu.
How Do I Prevent Tiramisu from Becoming Soggy?
Quickly dip ladyfingers in coffee to avoid soaking them too long, maintaining texture. Over-soaking makes tiramisu soggy and less enjoyable.
Is It Necessary to Use Espresso in Tiramisu?
Espresso gives the best rich coffee flavor, but strong brewed coffee works as a substitute. The key is a strong coffee flavor to balance the sweetness.
Can I Prepare Tiramisu Layers in Advance?
Yes, assemble and cover tiramisu, then refrigerate for up to 24 hours before serving. This helps flavors meld and makes serving easier.
How Thick Should the Mascarpone Cream Layer Be?
Aim for about 1 to 1.5 inches of mascarpone cream per layer to balance flavor and texture. Too thin or too thick layers impact mouthfeel and balance.
What’s the Best Way to Dust Cocoa Powder on Tiramisu?
Use a fine-mesh sieve for an even, light layer of cocoa powder on top. This prevents clumps and improves the dessert’s presentation.
Key Points to Remember
Tiramisu’s simplicity depends on proper timing and handling of key ingredients like mascarpone and coffee-soaked ladyfingers. Experiencing the rich, creamy texture paired with the subtle coffee flavor comes down to patience during chilling and attentive preparation. Try your first batch now and adjust soaking times or sweetness based on your taste to perfect your version.




3 Comments