How to Remove Aerator From Kitchen Faucet: A Step-by-Step Guide
If you’ve ever noticed your kitchen faucet water flow slowing down or sputtering, you’re not alone. Many people struggle with clogged aerators, which can be frustrating to deal with. Luckily, removing and cleaning your faucet aerator is easier than you might think.
To remove your kitchen faucet aerator, first turn off the water supply under the sink and confirm it’s off by running the faucet. Protect the aerator with a cloth or tape to avoid scratches.
Then, try loosening it by hand; if stuck, use an adjustable wrench or pliers wrapped with cloth for grip. Soak the aerator in vinegar to dissolve deposits before cleaning or replacing it.
Keep going to uncover easy steps for cleaning, maintenance, and proper reinstallation.
Key Takeaways
- Turn off the water supply by closing the shutoff valves under the sink, then confirm it’s off by running the faucet.
- Wrap a cloth or painter’s tape around the aerator to protect the faucet finish before you start removing it.
- Use an adjustable wrench or rubber strap wrench to gently loosen the aerator. Apply steady pressure so you don’t damage it.
- If it’s stuck, soak the aerator in vinegar to dissolve mineral buildup. Then try removing it again.
- Once you’ve taken it out, clean any debris with warm water and a brush. Check for cracks or corrosion, and replace if needed.
How to Identify If Your Kitchen Faucet Aerator Needs Removal
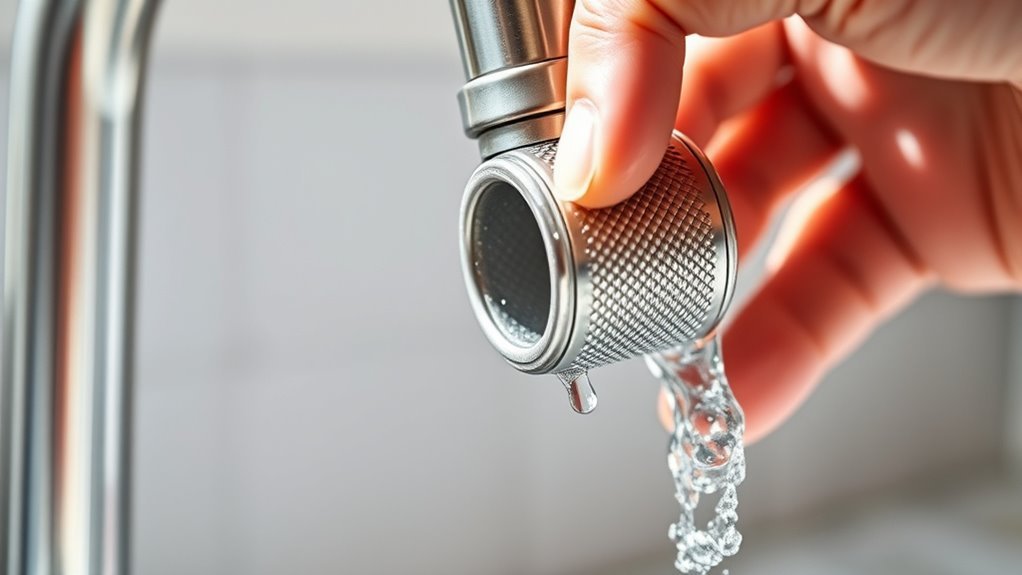
How do you know when it’s time to remove your kitchen faucet aerator? If your water flow has gotten weaker or started to come out irregularly, it’s a good sign. Aerators help conserve water and cut down on splashing, but sediment buildup can clog them and reduce their effectiveness.
Another clue is if the water starts spraying unevenly or dribbles instead of flowing smoothly. These issues can make your daily kitchen tasks more frustrating and waste water.
Uneven spraying or dribbling water can disrupt your kitchen tasks and lead to unnecessary water waste.
It’s a good idea to check your aerator every few months. Removing and cleaning it can restore proper flow and help your faucet last longer. If you see mineral deposits or debris on the screen, it’s definitely time to give it a good clean.
Addressing these signs quickly means you can keep enjoying the benefits of your aerator without any interruptions. Keeping an eye on your water performance helps you know when it’s time to remove and maintain your kitchen faucet aerator.
Tools Needed to Remove a Kitchen Faucet Aerator
To take out your kitchen faucet aerator, you’ll want a few basic tools on hand—things like an adjustable wrench or some pliers. Don’t worry if you don’t have those; sometimes, a simple cloth or a rubber band can do the trick to help protect the finish and give you a better grip.
Let’s go over these tools so you can feel confident and ready to get the job done without any hassle.
Essential Tools Overview
Although removing a kitchen faucet aerator might seem straightforward, having the right tools on hand makes the process much smoother. Different aerator types may need specific tools, and how often you clean depends on how easily you can remove the aerator.
Here’s a quick overview of essential tools to have:
| Tool | Purpose |
|---|---|
| Adjustable Wrench | Loosens tight aerators |
| Needle-Nose Pliers | Grips small or stuck aerators |
| Cloth or Rag | Protects faucet finish during removal |
| Flathead Screwdriver | Helps pry off stubborn aerators |
Having these tools ready helps you handle various aerator types confidently. It also makes maintaining your faucet easier.
Keep them nearby to simplify your cleaning routine and help extend your faucet’s lifespan.
Optional Tool Alternatives
You don’t always need specialized tools to remove a kitchen faucet aerator; common household items can often do the trick. Depending on the aerator types, you might find these alternatives handy when cleaning or replacing parts with cleaning solutions.
- Rubber Gloves provide grip to twist off stubborn aerators without scratching the finish. They make the process easier and safer.
- Soft Cloth or Rubber Band can be wrapped around the aerator for extra traction, protecting delicate surfaces during removal.
- Adjustable Pliers with Tape are useful if you wrap tape around the jaws to avoid damage while loosening tight aerators.
These options work well, especially if you don’t have a wrench or aerator key on hand. Using them carefully helps you remove various aerator types safely and get your cleaning solutions in for effective maintenance.
Turn Off Water Supply to Your Kitchen Faucet
Before you begin removing the aerator, take a moment to find the water shutoff valves under your sink. Once you’ve found them, turn both the hot and cold water valves clockwise to shut off the water supply. It’s a good idea to double-check that the water is completely off by turning on the faucet briefly and making sure no water comes out.
Locate Water Shutoff Valves
Locating the water shutoff valves is an important first step to safely remove the aerator from your kitchen faucet. Before you start, you need to identify the types of valves controlling the water flow to your faucet. These valves help prevent leaks or flooding while you’re working.
Here’s how to find them:
- Check underneath the sink for small, round or lever-style valves connected to the water pipes.
- Look near the main water supply line entering your home; sometimes the shutoff valves are located there.
- If you can’t find valves nearby, check your home’s plumbing schematic or ask your property manager.
Knowing exactly where the valves are and what type they are ensures you can control the water flow effectively when removing the aerator.
Turn Off Under-Sink Valves
Once you’ve found the shutoff valves under your sink, turn them off to stop the water flow to your kitchen faucet. Most sinks have two types: compression valves with round handles and quarter-turn valves with lever handles.
To shut off the water, turn compression valves clockwise until tight, or rotate quarter-turn valves perpendicular to the pipe. This cuts off water pressure and helps prevent leaks or sprays when you remove the aerator.
If the valves feel stuck, use gentle force or a wrench, but avoid over-tightening to prevent damage. Turning off these valves ensures the water supply to the faucet is fully stopped, making it safer and easier to remove the aerator without unexpected water flow.
Verify Water Is Off
After turning off the shutoff valves, you need to verify that the water supply to your kitchen faucet is completely off. This step is essential because different aerator types may respond differently if water flow isn’t fully stopped, which could cause leaks or damage.
Here’s how to check:
- Turn on the kitchen faucet slowly and see if any water comes out.
- If water still trickles, double-check the shutoff valves and tighten them if needed.
- For faucets with separate hot and cold valves, test both to make sure no water escapes.
Once you confirm the water flow is fully stopped, you can safely remove the aerator without worrying about sprays or drips.
Protect Your Faucet to Prevent Scratches During Removal
Before you start removing the aerator, take steps to protect your faucet from scratches. Faucet protection is important because the metal surface can easily get scratched when you use tools or your hands to unscrew the aerator.
To prevent damage, wrap a soft cloth or a piece of painter’s tape around the aerator and the faucet’s threading. This simple barrier cushions the contact points between the tool or your fingers and the faucet.
Wrap a soft cloth or painter’s tape around the aerator to cushion contact and prevent faucet damage.
Avoid using abrasive materials that might worsen the surface. If you plan to use pliers or a wrench later, place a rubber band or tape around the tool’s gripping area for extra protection.
Taking these precautions helps keep your faucet in pristine condition during removal. It saves you from potential costly repairs or unsightly marks.
Faucet protection might seem minor but it plays a big role in maintaining your kitchen’s appearance.
How to Unscrew the Kitchen Faucet Aerator by Hand or Tool
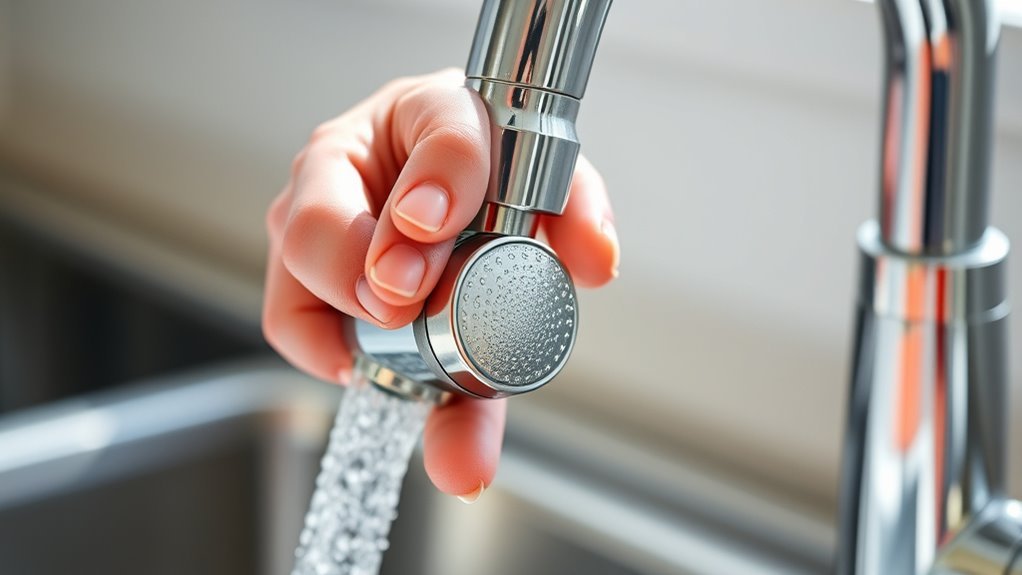
Grip the aerator firmly and start turning it counterclockwise to loosen it. Depending on the type, you might be able to unscrew it easily by hand. If it feels tight, use a tool to avoid damaging your faucet during maintenance.
Here’s how to do it:
- Hand removal: Use your fingers to twist the aerator counterclockwise. This works best with plastic or easily accessible aerators.
- Using pliers: Wrap a cloth around the aerator to prevent scratches, then gently turn it with adjustable pliers.
- Aerator key or wrench: Some models need a specific key or wrench for removal. Insert it and turn counterclockwise.
How to Remove a Stuck Kitchen Faucet Aerator
If your kitchen faucet aerator is stuck, don’t worry — you just need the right tools to loosen it up without damaging anything. A rubber strap wrench or even some pliers wrapped in tape can be really helpful here. They’ll give you a good grip and help protect the finish of your faucet as you work.
Now, let’s look at some easy techniques that can make removing a stubborn aerator a lot simpler, all while keeping your faucet looking great.
Tools For Loosening Aerator
Several essential tools can help you loosen a stuck kitchen faucet aerator quickly and safely. Depending on the aerator types and installation techniques used, you might need specific tools to avoid damage and ensure smooth removal.
Here are three common tools to have on hand:
- Adjustable Wrench – Great for gripping various aerator sizes, especially if the aerator has flat edges.
- Rubber Strap Wrench – Offers extra grip without scratching the faucet’s finish. It’s perfect for delicate aerator types.
- Pliers with Tape – Wrap tape around the jaws to protect the aerator or faucet surface while giving you firm control.
Using these tools correctly will make loosening stuck aerators much easier, no matter how they were installed.
Techniques To Avoid Damage
When using tools like an adjustable wrench or rubber strap wrench to loosen your kitchen faucet aerator, proceed carefully to avoid damage. Start by wrapping the aerator with a soft cloth or masking tape to protect the finish from scratches during gripping.
Apply steady, gentle pressure instead of forceful twisting to prevent stripping threads or cracking the aerator housing. If it’s stuck, soak the aerator in vinegar for a few minutes to dissolve mineral build-up before trying again.
Avoid using metal tools directly on the aerator to minimize surface damage. These gentle techniques focus on preventing damage, ensuring your faucet stays intact and functional after removal.
Taking your time and using the right approach will save you from costly repairs or replacements.
Cleaning and Inspecting Your Kitchen Faucet Aerator
Although removing the aerator is an important step, cleaning and inspecting it ensures your faucet delivers a steady, clean flow of water. Understanding the benefits of the aerator helps you see why regular maintenance is so important; it prevents mineral buildup and keeps water flowing efficiently.
Regularly cleaning and inspecting your faucet aerator prevents buildup and ensures a steady, efficient water flow.
How often you clean it depends on your water hardness and how much you use your faucet, but every few months is usually enough. Follow these simple steps for effective cleaning and inspection:
- Rinse the aerator under warm water to wash away loose debris.
- Soak it in vinegar for 30 minutes to dissolve mineral deposits.
- Use a small brush or toothpick to clear out any remaining particles inside the screen and housing.
After cleaning, take a close look at the aerator for cracks, corrosion, or worn parts. This quick routine keeps your faucet working well and preserves the benefits of the aerator, like reducing splashing and saving water.
When to Replace Your Kitchen Faucet Aerator and How
If you notice reduced water flow, persistent mineral buildup, or physical damage to your kitchen faucet aerator, it’s time to replace it. These signs usually mean your aerator has reached the end of its lifespan, which typically lasts from one to three years depending on water quality and usage.
Over time, minerals and debris can clog the aerator, making cleaning ineffective and reducing water efficiency. To replace your aerator, start by removing the old one with a wrench or just your hands if it’s loose. Be careful not to damage the faucet threads.
Next, choose a new aerator that matches your faucet’s size and thread type. Screw it on by hand, then tighten gently with a wrench to avoid overtightening. Regularly checking your aerator for these signs helps keep your water flow smooth and your faucet working well.
How to Reinstall the Kitchen Faucet Aerator After Cleaning or Replacement
Start by aligning the cleaned or new aerator with the faucet’s threads to ensure it fits properly. Proper alignment is key to preventing leaks and allowing smooth water flow. Once aligned, gently screw the aerator onto the faucet by hand.
Follow these steps to reinstall it securely:
- Hand-tighten the aerator: Turn it clockwise until it’s snug. Be careful not to over-tighten, as this can damage the threads.
- Apply sealing techniques: If needed, wrap plumber’s tape around the faucet threads before screwing on the aerator. This helps create a better seal.
- Check for leaks: Turn the water on slowly and watch for drips around the aerator. If you see any, tighten it a bit more by hand.
Maintenance Tips for Long-Lasting Kitchen Faucet Aerators
To keep your kitchen faucet aerator working smoothly, it’s important to do regular maintenance that prevents buildup and helps it last longer. A good rule of thumb is to check and clean your aerator every three to six months. This routine helps stop mineral deposits and debris from clogging the aerator and reducing water flow.
When cleaning, soak the aerator in vinegar to dissolve any buildup, then rinse it well before putting it back. Avoid harsh chemicals, as they can damage the aerator and shorten its lifespan. During each check, look for cracks or worn parts and replace the aerator if needed.
Sticking to this regular schedule keeps your aerator functioning properly, saves water, and extends its life. Regular upkeep isn’t just about efficiency; it also helps protect your faucet from damage, saving you time and money in the long run.
Frequently Asked Questions
What Causes a Kitchen Faucet Aerator to Clog Frequently?
Your kitchen faucet aerator clogs frequently because of mineral deposits and debris buildup from poor water quality. Hard water, which has high levels of calcium and magnesium, speeds up clogging, especially if you skip regular aerator maintenance.
Sediment and rust particles can also build up, restricting water flow. To keep things flowing smoothly, make sure to clean the aerator regularly. Installing a water filter can also help improve water quality and reduce clogging issues.
Can a Damaged Aerator Affect Water Pressure?
Yes, a damaged aerator can reduce water flow by up to 30%. When your aerator gets cracked or clogged, it disrupts the smooth water flow, causing low pressure.
If you notice weak water flow, consider replacing the aerator to restore proper function. Replacing it is a simple fix that can greatly improve your kitchen faucet’s performance and save you from more extensive plumbing issues down the line.
Are All Kitchen Faucet Aerators Universal in Size?
No, not all kitchen faucet aerators are universal in size. You’ll find different types like standard, male, and female threads, which can affect compatibility.
When choosing one, pay close attention to measurements and thread types to make sure it fits properly. For easier installation, start by cleaning the faucet threads.
Use a cloth to avoid scratches and don’t overtighten to prevent damage. This way, you’ll get a snug fit without any issues.
How Often Should I Clean My Kitchen Faucet Aerator?
Think of your kitchen faucet aerator like a garden that needs regular tending. You should clean it every three to six months to keep water flowing smoothly.
This cleaning schedule helps prevent mineral buildup and ensures your water stays fresh. It’s like watering plants regularly to keep them healthy.
To clean, gently remove the aerator, soak it in vinegar, and scrub off any debris. Staying consistent with this routine keeps your faucet working at its best.
Can I Use Vinegar to Dissolve Mineral Buildup in an Aerator?
Yes, you can use vinegar to dissolve mineral buildup in your aerator. Vinegar works because of its natural acidity, which breaks down hard water deposits without harsh chemicals.
For maintenance, soak the aerator parts in vinegar for about 30 minutes. Then, gently scrub with a brush to remove any remaining deposits.
This simple method helps keep your faucet running smoothly and prevents clogs. Regular vinegar cleaning is an eco-friendly way to maintain your aerator easily.
Conclusion
Removing your kitchen faucet aerator is easier than you might think, and keeping it clean can boost water flow by up to 30%. Regular maintenance helps prevent clogs and keeps your faucet working smoothly.
Follow these simple steps to remove the aerator safely. Protect your faucet during removal and check the aerator regularly for buildup. This quick care can extend your faucet’s lifespan.
With just a little upkeep, you’ll enjoy more efficient water use and avoid costly repairs. Giving your kitchen faucet the care it deserves makes a big difference.