How to Unclog a Kitchen Drain: A Step-by-Step Guide
Dealing with a clogged kitchen drain is one of those frustrating home problems many of us face. You’re not alone—lots of people struggle with slow or backed-up sinks that disrupt everyday routines.
Luckily, fixing a clogged drain doesn’t always mean calling in a plumber; sometimes, simple at-home methods do the trick.
To unclog your kitchen drain, start by identifying if the clog is due to grease, food particles, or soap buildup. Use gloves and safety goggles, then try plunging with water covering the cup to create suction.
If that fails, pour a mix of baking soda and vinegar, let it fizz, then flush with hot water. You can also remove and clean the drain trap or use a drain snake for deeper blockages.
Keep following these steps to uncover effective tips and prevention methods.
Key Takeaways
- Identify the cause of the clog by watching for signs like slow draining, bad odors, or gurgling sounds.
- Use a plunger with some water to create pressure. It can help loosen minor clogs pretty effectively.
- Mix baking soda and vinegar to make a homemade cleaner. Let it fizz for 15-30 minutes, then rinse with hot water.
- Take out the drain trap by loosening the slip nuts, clean out any gunk, and then put it back securely.
- For deeper blockages, try using a drain snake or a wet/dry vacuum to reach and clear the clog.
How to Identify the Cause of Your Kitchen Drain Clog
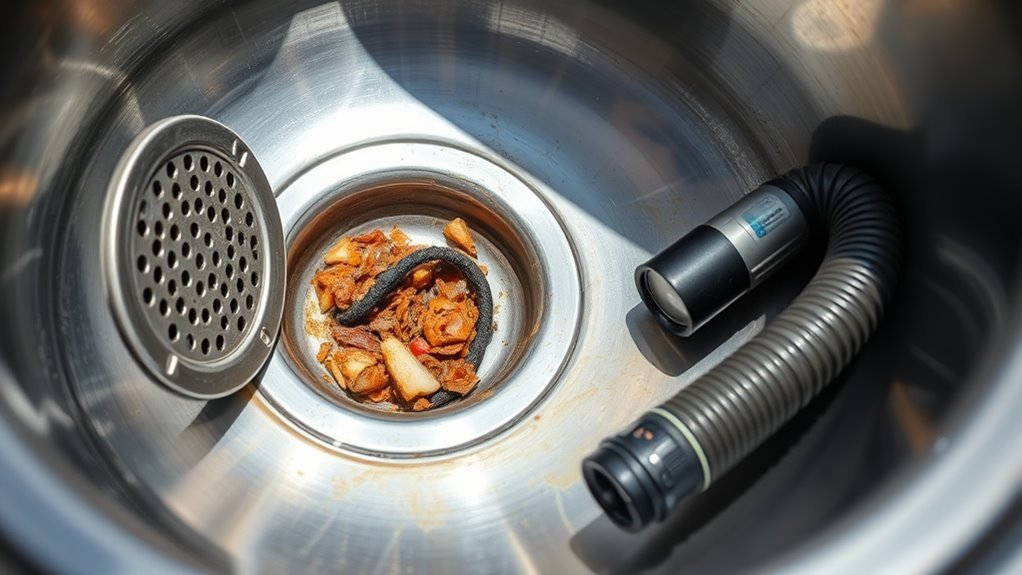
Before you can fix a clogged kitchen drain, you need to figure out what’s causing it. Start by observing clog symptoms like slow draining water or water backing up into the sink. These signs often point to a buildup of grease, food particles, or soap scum blocking the pipes.
Pay attention to any unusual drain odors as well. A foul smell can indicate trapped debris or even mold growth inside the drain. You might also hear gurgling sounds when water drains, which suggests air is trapped due to a blockage.
Unusual drain odors and gurgling sounds often signal trapped debris or air from a clog.
Check if the clog happens only in one sink basin or across multiple drains. If it’s isolated, the problem is likely near that drain. But if several drains are affected, the issue might be deeper in your plumbing system.
Identifying these key symptoms and drain odors helps you target the source more effectively before moving on to cleaning methods.
Essential Tools and Supplies for Kitchen Drain Cleaning
Gathering the right tools and supplies is essential for tackling a clogged kitchen drain effectively. To start, you’ll want a sturdy pair of rubber gloves to protect your hands and safety goggles to shield your eyes—plumbing safety tips you shouldn’t overlook.
Next, keep a bucket handy to catch any water or debris that might spill during the process. A drain snake or auger is a versatile tool that can reach deep clogs, while a pipe wrench helps if you need to loosen traps.
Moreover, having a bottle of biodegradable drain cleaner can help soften stubborn grease or buildup, but always use it cautiously. Paper towels or rags are useful for cleanup afterward.
These tools cover most common drain cleaning techniques, letting you approach the clog confidently and safely. They help minimize damage to your pipes and avoid unnecessary plumbing calls.
With these essentials ready, you’ll be set to clear your kitchen drain efficiently.
How to Use a Plunger to Clear Your Kitchen Drain
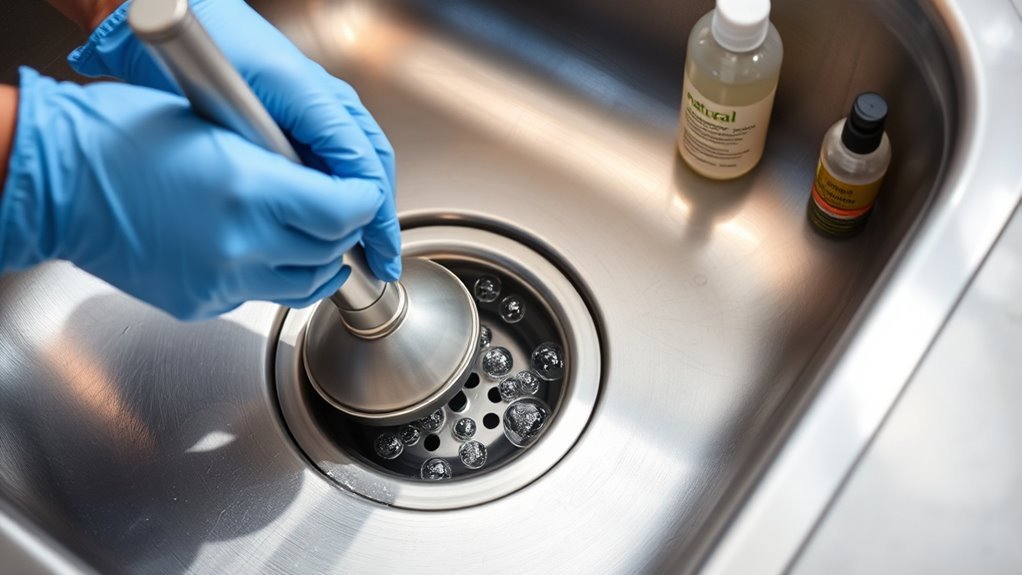
Start by filling your sink with enough water to cover the plunger’s cup. This helps create a tight seal over the drain.
Place the plunger directly over the drain opening, making sure no air can escape from beneath the cup. Use steady, forceful plunges and hold a firm grip to generate pressure that loosens the clog.
Effective plunging involves both pushing down and pulling up sharply, but avoid lifting the plunger too far off the drain to keep the seal intact.
One common mistake is using a dry plunger or plunging too lightly, which wastes effort and doesn’t clear the blockage. Also, don’t use excessive force that could damage pipes or fittings.
After about 15 to 20 plunges, check if the water drains freely. Repeat if needed, but if the clog sticks around, it’s best to try a different method or call a professional.
How to Make and Use a Homemade Kitchen Drain Cleaner
Want to keep your kitchen drain clear without reaching for harsh chemicals? You can easily make a homemade drain cleaner with just a few simple ingredients like baking soda, vinegar, and hot water. It’s a natural and budget-friendly way to tackle minor clogs and odors.
Here’s how it works: start by pouring about half a cup of baking soda directly into your drain. Then, add a cup of vinegar — you’ll see it fizz and bubble, which is exactly what helps break down the gunk blocking your pipes. After the fizzing subsides, follow up with hot water to flush everything through.
To get the best results, try to let the mixture sit in the drain for 15 to 30 minutes before rinsing with hot water. This gives the baking soda and vinegar time to do their magic. It’s a simple, safe, and effective way to keep your kitchen drain flowing smoothly!
Ingredients Needed
Three simple ingredients make an effective homemade kitchen drain cleaner: baking soda, white vinegar, and hot water. These items work together to tackle kitchen drain odors and break down grease buildup, keeping your pipes clear and fresh.
Here’s what you’ll need:
- Baking Soda – Neutralizes odors and helps loosen grime.
- White Vinegar – Reacts with baking soda to dissolve grease and debris.
- Hot Water – Flushes away loosened buildup and residue.
With these ingredients on hand, you’re ready to create a natural solution that’s safe and effective for maintaining your kitchen drain.
No harsh chemicals needed—just everyday pantry staples that combat clogs and odors efficiently.
Mixing Instructions
Although it might seem simple, mixing the homemade kitchen drain cleaner correctly guarantees maximum effectiveness. Start by combining half a cup of baking soda with one cup of white vinegar in a heat-safe container.
The fizzing reaction helps break down buildup inside your drain. Stir gently to mix the two ingredients without reducing the fizz, which is key for tackling clogs and eliminating drain odors.
Avoid adding water at this stage, as it can dilute the solution’s power. Homemade cleaners like this rely on the chemical reaction between baking soda and vinegar, so precise measurements matter.
Once mixed, use the cleaner promptly for the best results. Proper mixing ensures your homemade cleaner works efficiently, helping restore your kitchen drain’s flow and freshness without harsh chemicals.
Application Tips
Once your homemade cleaner is mixed, applying it correctly makes all the difference in clearing your kitchen drain. Follow these drain cleaning techniques for the best results:
- Pour Slowly: Pour the cleaner directly into the drain, avoiding splashes. This helps the solution target the clog more effectively.
- Let It Sit: Allow the mixture to work for at least 15-30 minutes. This soaking time breaks down grease and debris thoroughly.
- Flush with Hot Water: Finish by flushing the drain with hot water to wash away loosened buildup and clear the pipe.
Incorporate these kitchen maintenance tips regularly to prevent future clogs and keep your drains flowing smoothly. Proper application speeds up unclogging and extends your homemade cleaner’s effectiveness.
Removing and Cleaning Your Kitchen Drain Trap
First, you’ll want to loosen those slip nuts and carefully detach the drain trap from under your sink. It’s usually not too tricky—just turn them counterclockwise. Once you’ve got it out, take a good look inside and clean out any gunk, debris, or buildup you find. Clearing out any blockages will really help your drain flow smoothly again.
After you’ve cleaned the trap thoroughly, put it back together and make sure everything is tightened securely. This way, you’ll avoid any leaks and help ensure your drain is working properly again.
Detaching The Drain Trap
Loosen the slip nuts holding the drain trap under your sink to detach it easily. First, identify whether you have a P-trap or S-trap, since that can affect how you remove it.
Remember, how often you clean depends on usage, but aim for at least twice a year to keep clogs away.
Here’s how to detach the drain trap:
- Place a bucket underneath to catch any water.
- Turn the slip nuts counterclockwise by hand or using pliers.
- Gently remove the trap, checking for stubborn debris or buildup inside.
Once it’s detached, you’re ready to clean and reassemble. Taking care when removing the drain trap helps prevent damage and makes cleaning easier.
Cleaning And Reassembling
Scrub the drain trap thoroughly to remove grease, grime, and debris that cause clogs. Use a stiff brush and warm, soapy water to clean every nook, preventing buildup that leads to drain odor. Rinse it well to avoid any leftover residue.
While cleaning, inspect the trap for cracks or damage that could compromise plumbing safety. If you notice any issues, it’s best to replace it. When reassembling, align the trap properly with the pipes and tighten the slip nuts by hand. Then give them a slight turn with pliers—just don’t overtighten, as that can cause leaks or damage.
Finally, run water through the drain to check for leaks and ensure proper flow. Keeping your trap clean and secure helps your kitchen drain stay free of odors and function smoothly.
How to Use a Drain Snake to Clear Kitchen Clogs
Grab your drain snake and carefully feed it into the kitchen drain until you feel resistance. That usually means you’ve hit the clog. Use proper snake techniques and rotate it clockwise to break through or latch onto the blockage. Don’t force it, as kinking or getting stuck can happen.
Here’s how to move forward:
- Push and Rotate: Gently push the snake while turning to dislodge the clog.
- Retrieve and Clean: Slowly pull the snake out, removing debris caught on the coil.
- Test Drain Flow: Run water to see if the clog is gone; repeat if needed.
If the snake hits stubborn resistance, don’t push harder. Pull it back slightly and try rotating again. Mastering these steps helps you clear kitchen clogs effectively without damaging your pipes.
Using a Wet/Dry Vacuum to Clear a Kitchen Drain
One effective way to clear a kitchen drain is by using a wet/dry vacuum. It can quickly suck out debris causing the clog. First, set your vacuum to liquid mode if it has one, and then seal the hose tightly around the drain opening.
Use wet/dry vacuum techniques like creating a strong suction seal and alternating power on and off to loosen debris. Remember to follow vacuum safety tips: always wear gloves, avoid electrical hazards near water, and check the vacuum’s filter before use.
| Step | Action | Tip |
|---|---|---|
| 1 | Set vacuum to liquid mode | Prevents damage |
| 2 | Seal hose around drain opening | Maximizes suction |
| 3 | Turn on vacuum, alternate power | Helps dislodge debris |
| 4 | Remove vacuum, check drain | See if clog is cleared |
| 5 | Repeat if necessary | Avoids repeated clogs |
This method is efficient and safe when you follow wet/dry vacuum techniques and vacuum safety tips closely.
How to Prevent Kitchen Drain Clogs From Coming Back
To keep your kitchen drain from clogging up again, it’s all about staying on top of regular maintenance and being mindful of what you toss down the sink. For starters, try to avoid putting food scraps directly into the drain — it’s just asking for trouble.
Using a drain strainer each time you use the sink can really make a difference. It catches all those pesky bits of food and debris before they have a chance to cause a blockage.
Regular Drain Maintenance
Although occasional clogs are almost inevitable, you can keep your kitchen drain flowing smoothly by adopting regular maintenance habits. Consistent drain cleaning helps prevent buildup and saves you from costly plumbing issues.
Here are three essential plumbing tips for regular drain care:
- Use a drain strainer to catch food debris and prevent it from entering your pipes.
- Flush with hot water weekly to help dissolve grease and keep the drain clear.
- Apply a baking soda and vinegar mix monthly to naturally break down buildup without harsh chemicals.
Proper Food Waste Disposal
Since food waste is the main culprit behind kitchen drain clogs, managing how you dispose of it is crucial for preventing blockages. Instead of rinsing scraps down the drain, consider separating food waste for composting.
Composting benefits your garden and reduces the amount of organic matter entering your plumbing. You can also switch to biodegradable options like compostable bags to make disposal easier and eco-friendly.
Avoid pouring grease or oily residues down the drain, as they solidify and trap food particles. By adopting these habits, you’ll keep your drains clearer and prevent recurring clogs, saving time and costly repairs.
Proper food waste disposal is a simple yet effective step toward maintaining a healthy kitchen drain system.
Use Drain Strainers Consistently
One simple tool can save you from frequent kitchen drain clogs: a drain strainer. The benefits are clear—it catches food particles and debris before they can enter your pipes.
To get the most from this tool, consistent use is key. Here’s how to make sure you’re using it effectively:
- Place the strainer securely over your drain every time you wash dishes or rinse food.
- Empty the collected debris into the trash after each use to prevent buildup.
- Clean the strainer regularly with soap and water to keep it functioning properly.
When to Call a Professional Plumber for Kitchen Drain Issues
How do you know when a kitchen drain problem is beyond a simple DIY fix? If your sink drains slowly even after trying to clear it, or if foul odors just won’t go away, it’s time to consider calling a professional. Water backing up into your sink or dishwasher is another clear sign something’s wrong.
Slow draining, persistent odors, or water backup signal it’s time to call a professional plumber.
Be cautious if your DIY efforts cause leaks or make the clog worse. Plumbing emergencies like water flooding under your sink or sewage smells need urgent attention. Ignoring these signs can lead to bigger, more costly problems.
Don’t wait too long—plumber experts watch for these signs because they can turn into serious issues. A professional has the right tools and experience to diagnose and fix tricky blockages or damaged pipes safely.
Calling a plumber early saves you time, stress, and money in the long run. It also helps keep your kitchen drain working smoothly without risking further damage to your plumbing system.
Tips for Maintaining a Clear and Healthy Kitchen Drain
Even if you don’t face frequent clogs, maintaining your kitchen drain regularly can prevent many common problems. Good drain hygiene keeps your pipes clear and reduces the chance of nasty odors or slow drainage. One major issue to watch out for is grease buildup, which can harden and block your pipes over time.
Here are three essential tips to keep your kitchen drain clear and healthy:
- Avoid pouring grease down the drain. Instead, collect it in a container and dispose of it in the trash to prevent buildup.
- Flush drains weekly with hot water and a bit of dish soap. This helps dissolve grease and keeps the pipes clean.
- Use a drain strainer. It catches food particles and debris, stopping clogs before they start.
Frequently Asked Questions
Can Chemical Drain Cleaners Damage My Pipes?
Yes, chemical drain cleaners can damage your pipes, especially if you use them often. They usually contain harsh chemicals that can corrode metal and weaken plastic pipes over time.
Besides harming your plumbing, they also have a big environmental impact by polluting water sources. Instead, try using a plunger, a drain snake, or natural remedies like baking soda and vinegar.
These options are safer for your pipes and the planet.
Is It Safe to Use Boiling Water on All Types of Pipes?
Of course, you can pour boiling water down every pipe without worry—if you enjoy costly repairs. Boiling water works well with metal pipes like copper or steel, but it can warp or soften PVC and plastic pipes.
So, unless you want to gamble with your plumbing, check the pipe materials first. Using boiling water blindly might turn your simple clog fix into a bigger headache.
Choose wisely!
How Often Should I Schedule Professional Drain Inspections?
You should schedule professional drain inspections at least once a year to keep your plumbing in top shape. Regular maintenance helps prevent costly clogs and backups by catching issues early.
If your home has older pipes or you experience frequent drainage problems, consider getting inspections every six months. Staying proactive with this can save you time and money in the long run.
Keeping up with inspections ensures your drains work smoothly and reduces the risk of unexpected plumbing emergencies. It’s a simple step towards maintaining a healthy plumbing system.
What Are the Health Risks of a Clogged Kitchen Drain?
You face health risks like bacterial growth when your kitchen drain’s clogged. Stagnant water and food debris create a breeding ground for harmful bacteria that can cause infections or allergies.
Plus, foul odors from the clog can affect your indoor air quality, making your home unpleasant and potentially triggering respiratory issues. Cleaning your drain promptly helps you avoid these problems and keeps your kitchen safe and fresh.
Can Food Waste Disposals Cause or Worsen Clogs?
Yes, food waste disposals can cause or worsen clogs if you’re not careful. To avoid problems, you need proper food disposal maintenance.
Don’t put fibrous, starchy, or greasy foods down the disposal, and always run cold water while using it. Following clog prevention tips like grinding small amounts at a time and regularly cleaning the disposal will keep your drain flowing smoothly and prevent annoying blockages.
Conclusion
With these simple steps, you’ll turn your clogged kitchen drain from a stubborn, sluggish stream into a free-flowing river.
A little regular care keeps the water dancing happily down the pipes and prevents future blockages.
If the problem persists, don’t hesitate to call a professional—sometimes even the strongest currents need expert help.
Keep your kitchen drain clear, and enjoy the smooth flow of clean water every day.