How to Replace Kitchen Sink Drain: A Step-by-Step Guide
Replacing a kitchen sink drain might seem intimidating, especially if you’re not sure where to start. Many people struggle with leaky or clogged drains and feel overwhelmed trying to fix them on their own.
But don’t worry—you’re not alone, and with a little guidance, you can handle this project confidently.
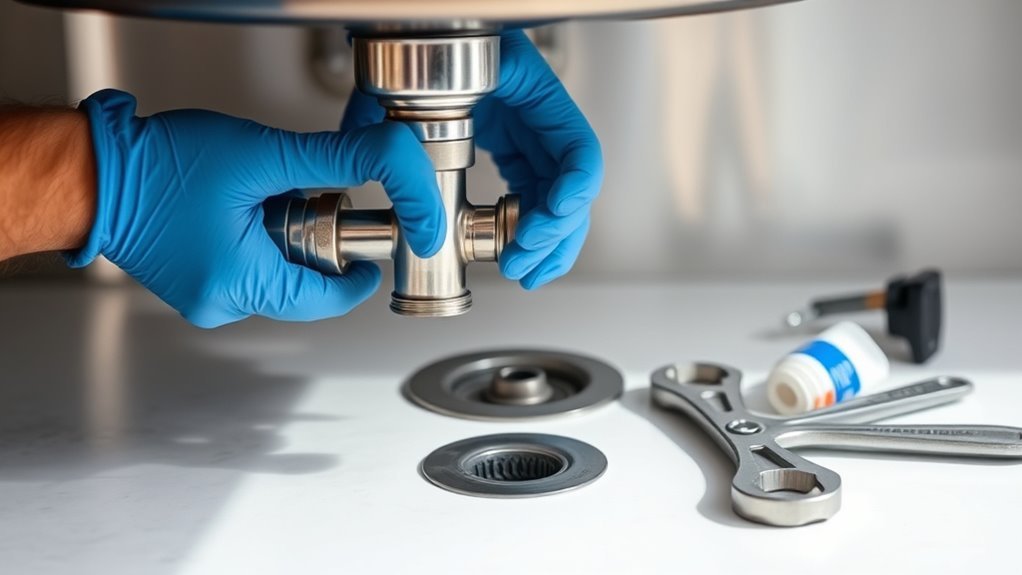
To replace your kitchen sink drain, first gather tools like a wrench, plumber’s putty, and a bucket.
Turn off the water supply and clear under the sink.
Remove the old drain by loosening slip nuts and unscrewing the flange.
Clean the area, apply putty around the new drain flange, and secure it tightly.
Test for leaks by running water, tightening connections if needed.
Follow these steps carefully, and you’ll soon handle every part of the process with confidence.
Key Takeaways
- Gather the tools you need and pick a replacement drain that fits your sink’s size and material for a proper and durable fit.
- Turn off the water supply, clear out the space under the sink, and set up your workspace with tools and a bucket to catch any water.
- Remove the old drain by loosening the slip nuts and unscrewing the flange. Use penetrating lubricant if any parts are stuck.
- Clean around the drain area, apply plumber’s putty on the flange, and then install the new drain assembly securely with the gasket in the right place.
- Finally, run water to check for leaks, inspect all connections closely, and make sure the drain flows smoothly without pooling or being slow.
Gather Tools and Materials You’ll Need

Before you start replacing your kitchen sink drain, gather the necessary tools and materials to make the process smoother. Start with a tools checklist: adjustable wrench, plumber’s putty, bucket, slip-joint pliers, screwdriver, and a utility knife.
These tools will help you loosen old fittings, remove debris, and securely install the new drain. Next, think about the material types for your replacement parts. Drains usually come in PVC, stainless steel, or brass—each has its own benefits and challenges for durability and installation.
Make sure you have the right gaskets and washers that match your drain type to prevent leaks. Also, stock up on plumber’s tape and sealant to ensure a watertight fit.
Use matching gaskets, washers, plumber’s tape, and sealant to ensure a secure, leak-free drain installation.
Having everything ready before you begin saves time and keeps frustration at bay. Use your tools checklist to double-check so you’re fully prepared to do the job confidently and efficiently.
Choose the Right Replacement Drain
When you’re choosing a replacement drain, it’s important to pick one that matches the size and material of your old drain. This way, you’ll ensure it fits properly without any hassle. You’ll typically find options like stainless steel, plastic, and brass—each has its own benefits when it comes to durability and price.
Before you buy, it’s a good idea to double-check your sink’s compatibility. That way, you can avoid any surprises or installation issues down the line. Taking a little extra time now will save you headaches later!
Drain Material Options
Although many drain materials serve the same function, choosing the right one for your kitchen sink can impact durability, ease of installation, and resistance to corrosion. You’ll find several options, each with its pros and cons:
Stainless steel offers excellent durability and resists rust, making it a popular choice.
Plastic options, like PVC choices, are lightweight, affordable, and flexible, which can make installation easier.
Copper drains provide a sturdy, corrosion-resistant option but can be pricier.
Brass fittings combine strength with resistance to corrosion and are often used with other materials.
Consider how each material fits your needs for longevity, budget, and ease of handling. Picking the right drain material helps ensure your replacement lasts and performs well.
Size and Compatibility
Selecting the right drain material is important, but making sure the size and compatibility are correct guarantees it fits and works properly. First, measure the drain size carefully—check both the diameter of the drain opening and the tailpiece.
Most kitchen sinks use a standard 1.5-inch drain, but it’s best to verify yours to avoid leaks or installation problems. Then, think about whether the drain is compatible with your sink type and plumbing connections.
Some drains are made for specific materials like stainless steel or porcelain. Also, double-check that the replacement drain fits your existing plumbing fittings so you don’t need costly adjustments.
Taking the time to check drain size and compatibility before buying saves frustration and ensures a secure, watertight fit.
Turn Off Water and Prep Your Workspace
Start by shutting off the water supply valves beneath your sink to prevent any leaks or spills while you work. This simple step is essential for safety and avoiding water damage. Once the water is off, clear out everything stored under the sink to give yourself enough workspace.
Organizing your area helps you move efficiently and reduces the risk of accidents. Next, gather all the tools and materials you’ll need for the project and place them within easy reach. Lay down a towel or bucket to catch any leftover water when disconnecting pipes.
Keep these tips in mind for effective preparation: double-check that the water is completely off by turning on the faucet. Wear gloves to protect your hands from sharp edges or debris. Use a flashlight if the space under your sink is dim. And keep a rag handy for wiping up small spills immediately.
Remove the Old Kitchen Sink Drain
With the water off and your workspace ready, you’re set to remove the old kitchen sink drain. Place a bucket underneath to catch any leftover water.
Use a wrench or plumber’s pliers to loosen the slip nuts connecting the drain pipes. Carefully unscrew the drain flange from the sink bottom, usually by twisting counterclockwise.
Loosen slip nuts with a wrench, then unscrew the drain flange by twisting counterclockwise.
If it feels stuck, try applying some penetrating lubricant and wait a few minutes. Remember to wear gloves to protect your hands from sharp edges and debris.
Avoid forcing parts to prevent damaging the pipes. Once the drain assembly is loose, gently pull it out and check for corrosion or buildup that might cause leaks.
Keep all the parts organized in case you need them later. Following these steps will help you remove the old drain quickly and safely, ready for the next part of your project.
Clean and Check the Drain Area
Thoroughly clean the drain area to remove any grime, old putty, or debris that could interfere with the new installation. Proper drain cleaning not only guarantees a tight seal but also helps prevent leaks and clogs later.
Use a scrub brush and a mild cleaner to eliminate buildup around the flange and surrounding sink surface. After cleaning, inspect the area carefully for damage or corrosion that could compromise plumbing safety.
Here’s what to focus on during this step:
- Remove all old plumber’s putty or sealant residue.
- Check the sink’s drain hole for cracks or rust.
- Inspect the drainpipe’s connection point for wear or damage.
- Verify the surface is dry and smooth before proceeding.
Taking time for a thorough clean and check sets a solid foundation for a secure, leak-free drain replacement.
Install the New Kitchen Sink Drain
Now that the drain area is all cleaned up, it’s time to get the new drain components ready. Just make sure to tighten everything well so there are no leaks later on. Once you’ve installed the drain, give it a quick test by running some water and watching carefully for any drips or leaks.
Prepare Drain Components
Before installing the new kitchen sink drain, gather all the necessary components and check them for any defects. Proper preparation helps ensure a smooth installation and prevents leaks or misalignment.
Familiarize yourself with the drain assembly parts and basic plumbing techniques so you can work efficiently. Make sure you have:
- Drain flange and rubber gasket
- Locknut and washer
- Tailpiece and slip joint nuts
- Plumber’s putty or silicone sealant
Inspect each item for cracks, warping, or damage. Clean the sink drain opening to guarantee a tight seal. Positioning these components correctly before you start will save you time and help you avoid common plumbing mistakes.
This preparation sets a solid foundation for a successful kitchen sink drain replacement.
Secure Drain Assembly
With your drain components ready and inspected, you can start securing the drain assembly into the sink. Begin by applying plumber’s putty around the underside of the drain flange to create a watertight seal.
Insert the drain assembly through the sink’s drain hole, pressing firmly to ensure it seats evenly. From underneath, slide the rubber gasket and mounting nut onto the drain tailpiece, then tighten the nut by hand. Follow up with a wrench for a snug fit—just don’t overtighten.
Here are some installation tips: double-check the alignment before fully tightening. Clean any excess putty that squeezes out to ensure a proper seal and prevent leaks later.
Once the drain assembly is securely fastened, you’re all set for the next step in your kitchen sink drain replacement.
Test For Leaks
Turn on the water and carefully inspect all connections around your newly installed drain for any signs of leaks. Proper leak detection is essential to avoid water damage and costly repairs. Pay attention to how the system holds up under normal water pressure.
Here’s how to effectively check for leaks:
- Watch each joint closely for drips or moisture.
- Feel around seals and fittings for wetness.
- Use a dry cloth to wipe connections, then check again after a few minutes.
- Increase water pressure by running hot water to simulate real use.
If you notice any leaks, tighten connections or reseat gaskets immediately. Catching leaks early guarantees your kitchen sink drain remains secure and functional.
Seal and Tighten Drain Connections
Start by applying plumber’s putty or a silicone sealant around the drain flange to create a watertight barrier. This step helps prevent water from leaking underneath your sink. Press the flange firmly into place, wiping away any excess putty or sealant for a clean finish.
Next, focus on connection tightening. Use a wrench or your hands to snugly tighten the slip nuts on the drain pipes, but don’t overtighten, as that can crack plastic fittings. Tighten each connection evenly to keep everything secure and prevent leaks.
Double-check that all washers and gaskets are properly seated before finalizing the connections. Proper drain sealing and careful tightening ensure a leak-free drain assembly. Taking these steps seriously saves you from future water damage and costly repairs.
Once everything feels secure and sealed, you’re ready to move on to the next part of your kitchen sink drain replacement.
Test Your New Kitchen Sink Drain
Now that you’ve sealed everything up and tightened the connections, go ahead and turn on the water to test it out. Keep an eye underneath the sink to make sure there are no drips or leaks coming from any of the connections.
While you’re at it, check how the water drains. It should flow quickly and smoothly without any backups or slow drainage. If you notice anything unusual, you might want to double-check the fittings or clear out any blockages.
Check For Leaks
Tighten all connections and run water through your sink to check for leaks. Detecting leaks early is key to avoiding water damage and ensuring your new drain works properly. As you inspect, focus on:
- Look for any water pooling or dripping around connections.
- Use a dry cloth to wipe joints and watch for moisture signs.
- Test both hot and cold water to catch hidden leaks.
- Tighten fittings gently if you spot a slow drip.
If you find leaks, try resealing joints with plumber’s putty or tightening nuts carefully. Don’t overtighten, as it could cause damage. By checking for leaks now, you save time and prevent costly repairs later. This step completes your installation and makes sure your kitchen sink drain is secure and leak-free.
Ensure Proper Drainage
After confirming there are no leaks, the next step is to make sure your new kitchen sink drain allows water to flow smoothly and quickly. Run water at full force for several minutes, keeping an eye out for any slow drainage or pooling.
If you notice water backing up or draining sluggishly, you might have drainage issues that need fixing right away. Check for obstructions in the trap or pipes, make sure all connections are tight, and verify the drain’s slope is enough to promote proper flow.
Don’t ignore small drainage problems—they can get worse over time and cause costly damage. Testing your new drain thoroughly now will save you headaches later and ensure your kitchen sink works perfectly every day.
Fix Common Drain Replacement Problems
Several common issues can happen when you’re replacing a kitchen sink drain, but with a few simple tweaks, you can fix them. Clogged drains often happen because of debris buildup, so make sure to clear out any blockages before putting the parts back together.
Leaking connections usually happen when seals aren’t tight or pipes aren’t lined up properly. Double-check your seals and alignment to prevent leaks. If you notice poor drainage or leaks after installation, go back and review each step to catch any mistakes.
Rust stains are a sign of corrosion. If you see rust, it’s best to replace those sections to avoid bigger problems down the line. Keep an eye out for these signs so your drain stays clear and leak-free.
Maintain Your Kitchen Sink Drain
Keep your kitchen sink drain running smoothly by doing regular maintenance. Proper care helps prevent clogs, leaks, and bad odors.
Start by cleaning the drain regularly to remove debris, hair, and food particles that can cause blockages. Avoid pouring grease or oil down the drain because they solidify and can slow water flow.
Once a month, use a mixture of baking soda and vinegar. It naturally breaks down buildup and freshens the drain.
Check for leaks or loose fittings under the sink during your routine. Tighten any connections and replace worn-out washers to prevent water damage.
Installing a drain strainer also helps catch debris before it gets into the pipes. Staying on top of sink care extends your plumbing’s life and saves you money on repairs.
With a little effort, your kitchen sink will stay functional and hassle-free for years.
Frequently Asked Questions
Can I Replace a Kitchen Sink Drain Without Professional Help?
Yes, you can replace a kitchen sink drain without professional help if you’re comfortable with DIY plumbing. It’s a manageable task that saves money and helps you learn more about kitchen maintenance.
Just make sure you have the right tools, turn off the water supply, and carefully follow instructions. Taking your time and being cautious will help avoid leaks or damage.
This will make the process smoother and more successful.
How Long Does a Typical Kitchen Sink Drain Replacement Take?
A typical kitchen sink drain replacement takes about 1 to 2 hours if you follow drain installation tips carefully. You’ll want to avoid common mistakes like overtightening fittings or neglecting to apply plumber’s putty properly.
Taking your time guarantees a leak-free seal and smooth water flow. If you’re organized and prepared, you can finish the job efficiently without rushing or causing damage to your pipes or sink.
Are There Eco-Friendly Drain Replacement Options Available?
Yes, you can choose eco-friendly drain replacement options that use sustainable materials like bamboo or recycled metals. These options help reduce environmental impact and often last just as long as traditional ones.
You’ll also find biodegradable sealants and cleaners that support a greener plumbing system. Picking these alternatives means you’re supporting eco-friendly practices and cutting down on waste.
Making these choices helps keep your kitchen upgrade both practical and environmentally responsible.
What Are Signs That My Kitchen Sink Drain Needs Replacement?
You’ll know your kitchen sink drain needs replacement if you notice frequent clogged pipes or persistent drainage issues.
Slow draining water, unpleasant odors, or water pooling around the sink are clear signs.
If you’ve tried clearing the pipes and the problem keeps returning, it’s a strong indicator that the drain is damaged or corroded.
Don’t ignore these signs, or you might face more serious plumbing problems down the line.
Can I Use Drain Cleaners After Installing a New Drain?
You can use drain cleaners after installing a new drain, but be cautious. Studies show that 60% of plumbing issues come from improper chemical use.
Choose enzyme-based or mild drain cleaners to avoid damaging seals and pipes. For post-installation care, steer clear of harsh chemicals and don’t overuse them.
Regularly flushing your drains with hot water and using gentle cleaners helps keep your new drain in good shape without risking corrosion or leaks.
Conclusion
Now that you’ve replaced your kitchen sink drain, imagine water flowing smoothly down without a hitch, no leaks or clogs to worry about. You’ve turned your sink into a reliable, hassle-free zone.
With just a little care and regular maintenance, your kitchen will stay fresh and functional, ready for every meal prep and cleanup.
You’ve got this. Enjoy the satisfaction of a job well done and a drain that works like new with your new kitchen sink drain.