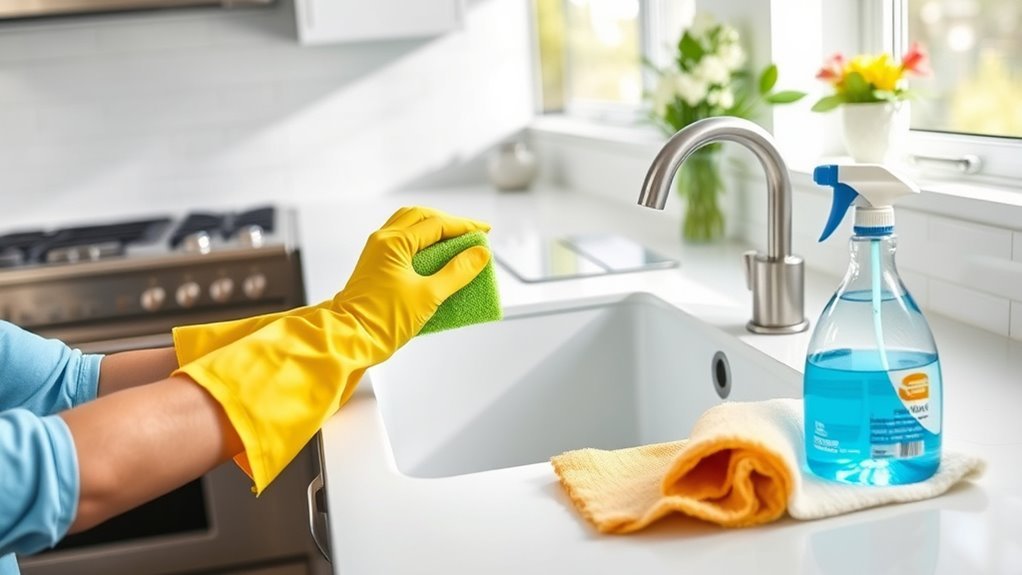
How to Clean Kitchen: A Step-by-Step Guide
Cleaning your kitchen can often feel like a never-ending chore, especially with busy schedules and daily messes piling up. You’re not alone—many people struggle to keep their kitchens spotless and fresh.
Luckily, with a few simple steps and some eco-friendly supplies, you can easily maintain a clean and inviting space.
To clean your kitchen effectively, start by gathering eco-friendly supplies like biodegradable soaps and microfiber cloths. Clear countertops and organize items to create space.
Wipe down all surfaces, focusing on countertops, sink, and appliances such as the oven and fridge. Don’t forget to sweep and mop the floor, and regularly empty trash to avoid odors.
Keeping up with daily and weekly cleaning helps maintain that fresh, spotless kitchen. Stick around to uncover easy tips for each step.
Key Takeaways
- Gather eco-friendly cleaning supplies and essential tools before you start. This saves time and helps make sure your cleaning is effective.
- Clear off your kitchen surfaces and declutter by organizing and removing unnecessary items. It makes your space more functional and easier to clean.
- Clean and sanitize countertops, sinks, appliances, and backsplashes with appropriate cleaners and disinfectants. This keeps your kitchen hygienic.
- Regularly perform specialized tasks like stove maintenance, cabinet cleaning, floor mopping, and trash management. Consistency is key to a clean kitchen.
- Make it a habit to wipe high-touch areas daily. Schedule a deep cleaning every week to keep your kitchen fresh and sanitary.
Gather Essential Kitchen Cleaning Supplies
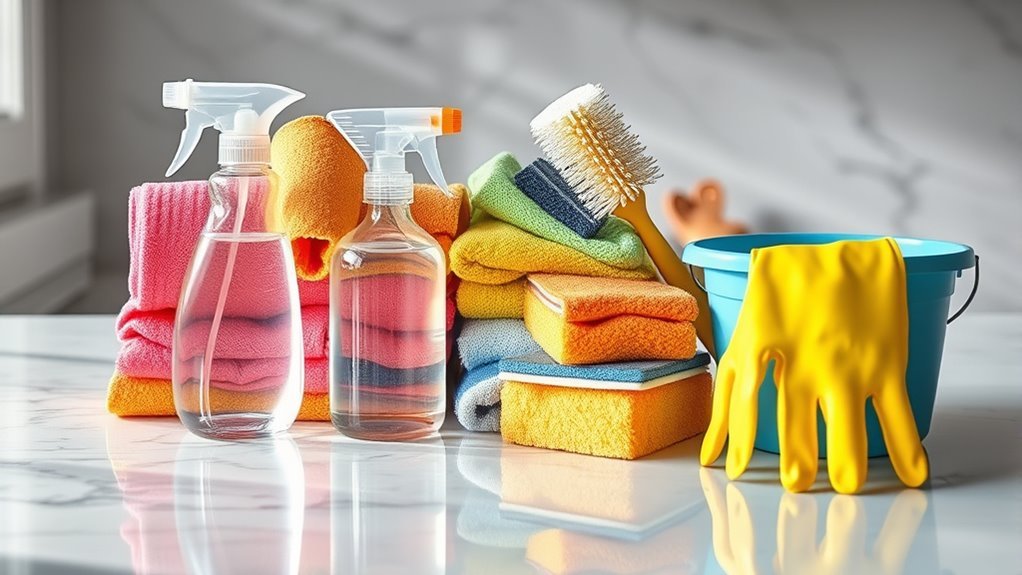
To get your kitchen spotless, you’ll need to gather a few essential cleaning supplies first. Start by choosing eco-friendly options that are safe for your family and the environment. Look for biodegradable dish soaps, all-purpose cleaners, and natural scrubbing brushes. These not only clean well but also cut down on harmful chemicals.
Next, collect the essential tools that make cleaning easier. A sturdy sponge, microfiber cloths, a scrub brush, and a mop are must-haves. Don’t forget rubber gloves to protect your hands and a spray bottle for homemade solutions like vinegar and water.
Having these eco-friendly supplies and tools ready will save you time and effort. You won’t have to stop midway searching for items, and you’ll feel good knowing your cleaning routine is green. Once everything’s gathered, you’re all set to tackle your kitchen with confidence.
Clear and Declutter Kitchen Surfaces First
First things first, clear off your kitchen surfaces and get rid of anything you don’t really need there. This instantly makes the space look more open and inviting. Then, give your countertops a good wipe down to remove any dirt or grime—you’ll be surprised how much fresher everything looks!
Once everything’s clean, take a moment to organize your kitchen tools. Find a designated spot for each item so things stay neat and easy to find when you need them. Keeping your surfaces clear and organized really helps your kitchen feel more welcoming and functional.
Remove Unnecessary Items
Clear away any unnecessary items from your kitchen surfaces to create a clean and functional workspace. Start by sorting through everything on your counters, tables, and shelves. Identify what you rarely use or no longer need.
Consider donating items that are still in good condition instead of tossing them. This helps others and also frees up valuable space. Next, organize the essentials by finding smart storage solutions.
Use bins, drawer dividers, or shelf risers to keep things tidy and easy to access. By removing clutter and storing items efficiently, you’ll make your kitchen easier to clean and more enjoyable to work in. Taking this step first sets a solid foundation for the rest of your kitchen cleaning process.
Wipe Down Countertops
Grab a clean cloth and your favorite all-purpose cleaner to wipe down your countertops thoroughly. Before you start, make sure your kitchen surfaces are clear and decluttered. Different countertop materials need specific care, so pick a cleaner suited for yours, whether it’s granite, laminate, or quartz.
Follow these steps for a spotless finish:
- Spray the cleaner evenly across the countertop, avoiding over-saturation.
- Wipe in gentle circular motions to remove crumbs, spills, and stains.
- Rinse the cloth and wipe again to remove any residue and leave a streak-free shine.
Organize Kitchen Tools
Before organizing your kitchen tools, make sure all surfaces are free of clutter. This gives you enough space to work efficiently.
Start by sorting your tools into categories—utensils, gadgets, and frequently used items. This helps streamline your organization and makes finding what you need quicker.
Use drawer dividers, utensil holders, or wall-mounted racks for effective storage that maximizes space. Store rarely used tools in cabinets or higher shelves to keep counters clear.
Labeling containers or sections can also improve accessibility. Remember, keeping your kitchen tools organized saves time and maintains a tidy, functional space.
Wipe Down Counters and Backsplashes Thoroughly
Start by wiping down your counters and backsplashes with a damp cloth or sponge. This helps remove crumbs, spills, and stains, clearing away debris and prepping the surfaces for a deeper clean.
Using effective cleaning techniques is key. Don’t just move dirt around—actually clean and sanitize the surfaces to keep your kitchen safe.
Next, focus on sanitizing to kill germs and bacteria. Spray a kitchen-safe disinfectant or a vinegar-water solution evenly on the surfaces. Let it sit for a few minutes before wiping it off.
Follow these steps for a thorough clean: Use a microfiber cloth or sponge for better dirt removal. Work in sections, starting from one corner and moving systematically. Rinse your cloth regularly to avoid spreading grime.
Clean the Sink and Faucet to Remove Residue
To keep your sink and faucet looking their best and working properly, it’s a good idea to clean off any mineral deposits. These deposits can build up over time and make your fixtures look dull or feel rough. You can use a gentle cleaner to help break down that buildup without hurting the surfaces.
After you’ve scrubbed away the deposits, don’t forget to disinfect the sink. This step helps eliminate germs and keeps your kitchen hygienic and fresh. Just a quick wipe with a disinfectant should do the trick!
Removing Mineral Deposits
Mineral deposits can quickly build up on your sink and faucet, leaving unsightly residue that’s tough to remove. Hard water causes this mineral buildup, but you can tackle it effectively with natural remedies. Here’s how to remove deposits:
- Apply a vinegar solution to the affected areas and let the acidic cleaner dissolve the minerals for 10–15 minutes.
- Sprinkle baking soda on stubborn spots, then scrub gently with a soft brush to lift residue without scratching surfaces.
- Rinse thoroughly and dry to prevent water spots.
For long-term results, incorporate prevention tips into your routine. Wipe down surfaces regularly and use water softeners if possible. These simple steps keep your kitchen sink and faucet looking clean and mineral-free.
Disinfecting Sink Surfaces
After removing mineral deposits, it’s important to disinfect your sink and faucet to eliminate bacteria and germs hiding on the surfaces.
Start by rinsing the area with warm water. Then, spray a disinfectant or mix equal parts water and white vinegar. Let it sit for a few minutes to break down residue and kill microbes.
Use a clean cloth or sponge to scrub the sink and faucet thoroughly, especially handles and crevices where germs tend to gather.
Finally, rinse everything well with hot water and dry with a microfiber cloth to prevent water spots.
These disinfecting steps help keep your sink hygienic and safe for daily use. Repeat regularly to maintain cleanliness and health.
Clean Kitchen Appliances: Oven, Microwave, and Fridge
Three key appliances—your oven, microwave, and fridge—are essential for your kitchen’s functionality and hygiene. Keeping them clean helps ensure food safety and makes them last longer. Here’s how to do it efficiently:
- Oven cleaning techniques: Remove racks and soak them in warm, soapy water. Use a baking soda paste on the oven interior to break down grease, then spray vinegar to lift residue. Wipe everything thoroughly with a damp cloth.
- Microwave maintenance tips: Place a bowl with water and lemon slices inside and run it for 3-5 minutes. The steam loosens grime, making it easier to wipe clean. Don’t forget to regularly wipe the door seals and turntable.
- Fridge organization strategies: Remove expired items and clean the shelves with a mild detergent. Group similar items to prevent spills and improve airflow. Use disinfecting methods on handles and seals to reduce bacteria.
Scrub Stove Tops and Range Hoods Effectively
Although stove tops and range hoods tend to collect stubborn grease and food residue, you can keep them looking great with a simple approach. Start by removing burner grates and wiping away loose debris.
Use a degreaser or a mixture of baking soda and water to scrub away tough stains. For the range hood, detach the filters and soak them in hot, soapy water, then gently scrub. Regularly wiping the exterior helps prevent buildup.
Here’s a quick guide for effective stove maintenance and range hood cleaning:
| Task | Method |
|---|---|
| Remove burner grates | Soak in warm, soapy water |
| Scrub stove surface | Use baking soda paste |
| Clean range hood filters | Soak then scrub with a brush |
| Wipe exterior surfaces | Use a microfiber cloth |
Stick to these steps weekly to keep your cooking area clean and efficient.
Clean Cabinets and Drawer Fronts Safely
Keeping your stove tops and range hoods spotless sets a strong foundation for overall kitchen cleanliness. Next, focus on cleaning your cabinets and drawer fronts safely to maintain their appearance and functionality. Use eco-friendly products to protect both your surfaces and the environment. Avoid harsh chemicals that could damage finishes or affect cabinet safety.
Spotless stove tops and range hoods lay the groundwork for clean kitchens; prioritize safe, eco-friendly cabinet care next.
Follow these steps:
- Mix a gentle, eco-friendly cleaner with warm water. Dampen a soft cloth—avoid soaking it to prevent water damage.
- Wipe down all cabinet and drawer fronts, paying attention to handles and edges where grime builds up.
- Dry surfaces immediately with a clean, dry cloth to prevent moisture from warping or weakening cabinet materials.
Sweep and Mop Kitchen Floors for a Clean Kitchen
Start by sweeping the kitchen floors thoroughly to remove crumbs, dust, and debris that accumulate throughout the day. Use a broom or vacuum designed for hard floors to guarantee you catch every particle.
Once the floor is clear, prepare your mop and cleaning solution. When applying floor cleaning techniques, work in small sections so you don’t miss spots. Use warm water mixed with a suitable floor cleaner, avoiding excess water that can damage some flooring types.
Mopping tips include rinsing your mop frequently and changing the water when it becomes dirty to prevent spreading grime. For a streak-free finish, mop in a figure-eight motion and dry the floor with a clean cloth or allow it to air dry completely before walking on it.
Following these steps helps keep your kitchen floors spotless, hygienic, and fresh. It makes your kitchen a cleaner and more inviting space.
Take Out Trash and Recycling to Keep Odors Away
Empty your kitchen trash and recycling bins regularly to prevent unpleasant odors from building up. Proper trash management is key to keeping your kitchen smelling fresh. Here’s how you can stay on top of it:
Regularly emptying your kitchen trash and recycling bins is essential to maintaining a fresh, odor-free kitchen environment.
- Take Out Trash Daily: Don’t let garbage sit too long, especially food scraps that can quickly produce bad smells. Empty your trash every day or as soon as it’s full.
- Rinse Recyclables: Before tossing recyclables in the bin, rinse containers like bottles and cans. This helps avoid sticky residues that attract odors and pests.
- Use Odor-Control Bags or Liners: Invest in trash bags with built-in odor control or add baking soda at the bottom of your bin to neutralize smells.
Maintain Kitchen Cleanliness Daily and Weekly
It’s a good idea to wipe down your kitchen surfaces every day. That way, you can keep germs and grime from building up and make your space feel fresh.
And once a week, it’s helpful to do a deep clean of the entire kitchen. This is when you can really get into those spots that usually get overlooked during your daily tidy-up.
Don’t forget to organize your storage spaces regularly, too. Keeping everything in order makes cleaning easier and your kitchen way more enjoyable to use.
Daily Surface Wipe-Down
Although it might seem like a small task, wiping down your kitchen surfaces daily helps prevent grime and bacteria from building up. This makes deep cleaning later on much easier. Sticking to a daily routine keeps your kitchen fresh and hygienic without extra effort.
Choose effective cleaning products designed for kitchens to tackle grease and germs efficiently. Here’s a simple daily surface wipe-down routine:
- Use a damp microfiber cloth with an all-purpose cleaner to wipe down countertops and tables.
- Pay special attention to high-touch areas like cabinet handles and light switches.
- Quickly clean spills and crumbs on the stovetop and sink after each use.
Weekly Deep Cleaning
Keeping up with daily surface wipe-downs lays a strong foundation for your kitchen’s cleanliness. But tackling deeper grime and buildup once a week makes sure everything stays spotless and sanitary.
Pick a specific day in your cleaning schedule for this deep clean so you can stay consistent. Focus on scrubbing appliances thoroughly, cleaning inside the microwave and oven, and wiping down cabinet exteriors.
Don’t forget to clean behind your fridge and under the sink where dirt can hide unnoticed. Use kitchen organization tips like decluttering countertops and sorting pantry items while you clean—this makes future upkeep easier.
Weekly deep cleaning prevents stubborn stains and keeps your kitchen hygienic. It also saves you time and effort in the long run. Stick to your schedule, and your kitchen will always look its best.
Organize Storage Spaces
While daily and weekly cleaning tackle dirt and grime, organizing your storage spaces helps keep your kitchen clutter-free and efficient. Start with your pantry to make ingredients easy to find and cut down on food waste.
Next, use shelf labeling to clearly mark where items belong. This makes maintaining order simple and helps everyone know where things go. Regularly declutter to remove expired or unused items that take up space.
Here’s how to get started:
- Group similar items together in your pantry for quick access.
- Label shelves and containers so everyone can follow the system.
- Schedule monthly checks to keep storage neat and discard anything unnecessary.
Frequently Asked Questions
How Often Should I Deep Clean My Kitchen Appliances?
You should deep clean your kitchen appliances every three to six months to keep them in good shape and make sure your kitchen stays organized. Regular cleaning helps prevent buildup and can extend the life of your appliances.
If you use them a lot or notice grime building up, it’s a good idea to clean them more often. Staying consistent with this routine keeps your kitchen tidy, functional, and safe.
This way, your cooking space remains more enjoyable and well-organized, making your time in the kitchen better overall.
What Natural Cleaners Are Best for Kitchen Surfaces?
You’ll be surprised to learn that 90% of households use natural cleaners for safety and effectiveness.
The best natural cleaners for kitchen surfaces are a vinegar solution and baking soda.
Vinegar solution works wonders on grease and grime, while baking soda acts as a gentle abrasive to remove stains.
Together, they tackle dirt without harsh chemicals, keeping your kitchen fresh and eco-friendly.
You’ll love how easy and safe they are to use!
How Do I Prevent Mold in Kitchen Cabinets?
To prevent mold in kitchen cabinets, focus on keeping them dry and well-ventilated. Wipe down spills immediately and avoid storing damp items inside.
Regularly check for leaks under the sink and fix them quickly. Using moisture absorbers or dehumidifiers can help if your kitchen tends to be humid.
Staying proactive is key to keeping mold at bay. This way, you’ll maintain a fresh, clean kitchen environment.
Can I Use Bleach on Kitchen Countertops?
You can use bleach on some kitchen countertops, but it really depends on the material.
Avoid bleach on natural stone like granite or marble since it can cause damage.
For laminate or tile, diluted bleach is usually safe, but it’s best to use it sparingly.
If you prefer gentler options, try vinegar, baking soda, or hydrogen peroxide.
They clean well without risking harm to your countertops.
Always test a small area first to make sure it’s safe.
What Is the Safest Way to Clean Wooden Cutting Boards?
You wouldn’t want to ruin your wooden cutting board, but neglecting wood care can do just that.
The safest way to clean wooden cutting boards is to wash them with mild soap and warm water right after use. Never soak them, as that can cause damage.
After washing, dry thoroughly to prevent warping. For maintenance, regularly rub mineral oil into the surface to keep the wood hydrated and prevent cracks.
This helps preserve both its beauty and function over time.
Conclusion
Now that you’ve got the cleaning routine down, your kitchen will sparkle like a diamond in no time. Keeping it spotless doesn’t have to be a Herculean task—just tackle a little each day and week.
With your counters gleaming, appliances shining, and floors spotless, cooking will feel way more enjoyable. Stick to these simple steps, and you’ll always love spending time in your kitchen.
A clean kitchen starts with regular maintenance. When you stay consistent, it becomes easier to keep everything looking fresh and inviting.
Remember, a tidy kitchen makes meal prep more enjoyable and cooking more efficient. Plus, it’s a great way to keep germs and bacteria at bay.
By following these simple tips, your kitchen will always be clean and welcoming. And with a spotless kitchen, every meal begins with a clean slate.