How to Install Kitchen Countertops: A Step-by-Step Guide
Are you dreaming of a stylish, functional kitchen but feeling overwhelmed about installing new countertops? You’re not alone—many people struggle with tackling this project on their own. The good news is, with some guidance, you can transform your space without hiring a pro.
To install kitchen countertops, start by measuring your existing surfaces accurately and prepare your workspace by clearing and cleaning cabinets. Safely remove old countertops by disconnecting plumbing and removing fasteners.
Choose a countertop material that fits your style and durability needs, then cut pieces to fit your kitchen layout precisely. Secure with adhesives and fasteners, seal the surface, and finish by installing backsplashes and edge trims.
With proper planning, you’ll handle common issues smoothly and get a professional result. Keep exploring to master every step.
Key Takeaways
- Measure existing countertops accurately, including length, width, angles, and cutouts, to ensure a precise fit. Take your time to get these measurements right.
- Remove old countertops safely by disconnecting plumbing, removing fasteners, and protecting yourself with gloves and goggles. Safety first!
- Choose a suitable countertop material based on durability, looks, how much maintenance it needs, and your budget. Pick what works best for your space.
- Cut countertop pieces carefully using the right tools. Mark the cut lines clearly and check the fit before you install. Take your time here.
- Secure the countertops with proper adhesives and fasteners. Make sure they are level, seal the edges, and install backsplashes and trims properly for a neat finish.
Measure Your Existing Countertops Accurately
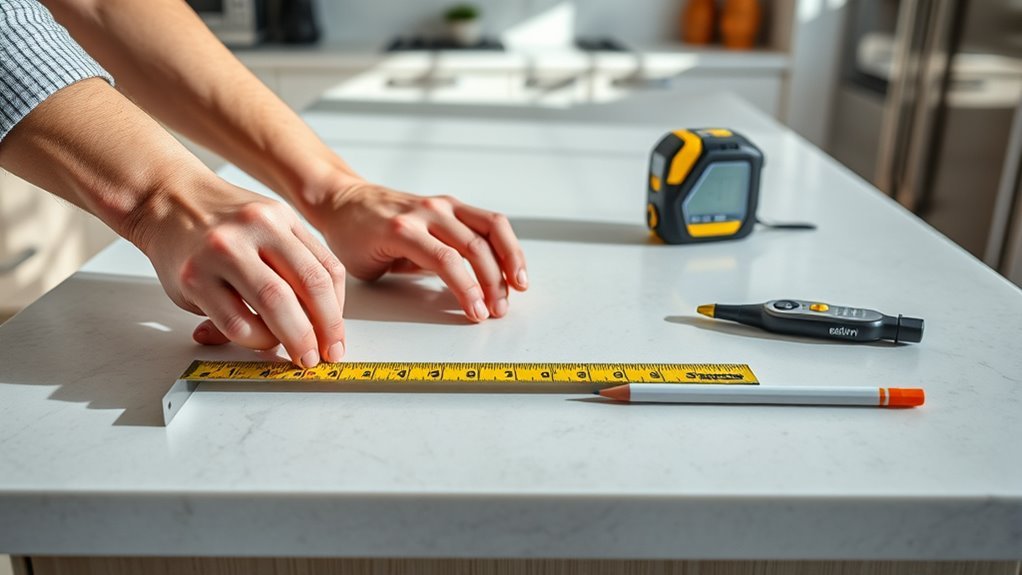
Before installing your new kitchen countertops, take precise measurements of your existing surfaces. Accurate measurements ensure your new countertop fits perfectly and help you avoid costly mistakes.
Start by gathering the tools you need: a tape measure, pencil, graph paper, and a level. Measure the length and width at multiple points, noting any irregularities or angles.
Gather essential tools and measure length and width carefully, noting any irregularities or angles.
Draw a detailed sketch of your countertop layout, marking sink and appliance cutouts. If applicable, measure the backsplash height too. Double-check your measurements to catch errors early on.
For countertops with curved or angled edges, use a flexible measuring tape for better accuracy. Remember, precision saves you time and frustration later.
Master these measurement techniques and use the right tools to set a solid foundation for a smooth installation. Take your time and measure thoroughly before moving forward.
Remove Old Countertops Safely and Efficiently
Before you begin taking out your old countertops, it’s a good idea to clear the work area first. You’ll also want to disconnect any plumbing or appliances that are attached to them. Don’t forget to turn off the water supply and power to keep things safe and avoid any accidents.
Once everything’s shut off and disconnected, carefully remove all the fasteners holding the countertops in place. Take your time so you don’t accidentally damage your cabinets or the surfaces around them.
Prepare Work Area
Start by clearing your kitchen workspace completely to give yourself room to maneuver. A well-prepared work area makes removing old countertops safer and easier.
Before you begin, take some safety precautions to protect yourself and your kitchen. Wear gloves and safety goggles to guard against sharp edges and debris.
Lay down a drop cloth or plastic sheeting to catch dust and small fragments. Remove any loose items or appliances near the countertop to prevent damage.
Disconnect Plumbing And Appliances
Turn off the water supply and unplug any appliances connected to your countertops to ensure safety during removal.
Next, carefully disconnect the plumbing connections under the sink, including the water lines and drain pipes. Use a wrench to loosen fittings, and keep a bucket handy to catch any residual water.
For appliance disconnection, gently pull out units like dishwashers or built-in microwaves. Make sure cords and hoses are fully detached.
Label or note each plumbing and electrical connection to make reinstallation easier later. Taking these precautions helps prevent leaks, electrical hazards, and damage to your appliances.
Remove Fasteners Carefully
Loosen and remove all fasteners securing your old countertops to the cabinets and walls. First, identify the fastener types to help you choose the right removal techniques and avoid damage. Most countertops are held in place with screws, brackets, or nails.
Use a screwdriver or drill for screws. Carefully back them out without stripping the heads. For brackets, gently pry them off with a putty knife or pry bar, making sure not to damage the cabinets.
Remove nails by sliding a claw hammer or pry bar underneath and lifting slowly. Work patiently and wear gloves to protect your hands from sharp edges. Proper removal of fasteners ensures a smooth countertop removal and prepares the workspace for the new installation.
Prepare Cabinets and Workspace for Countertop Installation
Before you get started with installing your new countertops, it’s a good idea to clear out and give the cabinets below a good cleaning. This way, everything’s tidy and ready for the next steps.
Next, take your measurements carefully and mark the surfaces where the countertops will go. Double-checking your measurements helps ensure everything fits just right.
Finally, gather all your tools and materials, and organize them so they’re easy to reach. Having everything within arm’s reach will make the installation process smoother and less stressful.
Clear And Clean Cabinets
Start by removing everything from your cabinets to create a clear workspace for the countertop installation. This helps prevent any damage and gives you full access to clean and prep the surfaces properly.
Use effective cleaning techniques to wipe down your cabinets inside and out, removing dust, grease, and residues that could interfere with the installation. A mild detergent and warm water work well for cleaning.
Avoid harsh chemicals that could damage your cabinet finishes. Instead, opt for gentle cleaning solutions to keep everything in good shape.
Protect your cabinets by placing painter’s tape along the edges. This prevents scratches or stains during the process and keeps your cabinets looking their best.
Remember these key points: use mild detergent and warm water, avoid harsh chemicals, and apply protective tape. Taking these steps guarantees your cabinets stay pristine and ready for a smooth countertop installation.
Measure And Mark Surfaces
With your cabinets clean and protected, you can now focus on measuring and marking the surfaces accurately. Use reliable tools like a tape measure and a carpenter’s square to get precise dimensions.
Pay close attention to cabinet edges, corners, and cutouts for sinks or appliances. If you’re using a template, trace it carefully onto the surface to ensure accuracy.
Mark all critical points clearly with a pencil so you don’t lose track during installation. Double-check your measurements before moving forward.
Taking your time with this step creates a solid foundation for a smooth countertop fit. It helps minimize adjustments and gives you a professional-looking finish.
Organize Tools And Materials
Gather all the tools and materials you’ll need before starting. This makes the installation go more smoothly and quickly.
Start by clearing your workspace and emptying the cabinets so you’re ready for the countertop installation. Organize your tools to avoid wasting time searching for items in the middle of the project.
Lay out everything you’ll need, like saws, drills, screws, and measuring tapes. Group similar items together and keep them within easy reach to work efficiently and avoid mistakes.
Arrange your tools by function and how often you use them. Store countertop materials safely to prevent damage. Keep screws, brackets, and adhesives in labeled containers for quick access.
How to Choose the Best Countertop Material for Your Kitchen
Although choosing the right countertop material can feel overwhelming, knowing your kitchen’s needs and style will help you find the best option. Start by thinking about durability—if you cook often, pick a material that resists scratches and heat.
Choosing the right countertop starts with understanding your kitchen’s style and prioritizing durability for frequent cooking.
Aesthetic appeal is also important; consider color schemes and surface textures that match your kitchen’s vibe. Balance cost considerations with quality—some materials are budget-friendly but may need more maintenance.
Think about maintenance requirements too. Choose something you’re comfortable caring for regularly. Installation complexity varies among materials—granite might need professional help, while laminate could be a DIY project.
If you care about eco-friendliness, look into options like recycled glass or sustainable wood. By weighing these factors against your personal preferences, you’ll find a countertop that’s both functional and beautiful.
This way, your kitchen becomes a space you love to use every day.
Cut Countertop Pieces to Fit Your Kitchen Layout
Measure your kitchen layout carefully before you start cutting any countertop pieces. Accurate measurements ensure your countertops will fit perfectly without gaps or overlaps. Double-check all dimensions, especially around corners and appliances, before you begin cutting.
To make precise cuts and handle layout adjustments easily, keep these tips in mind:
- Use a straightedge or guide to keep your cuts clean and straight.
- Clearly mark cut lines with a pencil or masking tape for accuracy.
- Cut slightly larger pieces if you think you might need to adjust the layout later; you can always trim them down for a perfect fit.
Secure Countertops With the Right Adhesives and Fasteners
To securely attach your countertops, you’ll need the right adhesives and fasteners designed for durability and stability. Start by choosing adhesive types suitable for your countertop material. Construction adhesive works well for laminate, while epoxy or silicone-based adhesives suit stone or solid surfaces. Apply the adhesive evenly along the base cabinets to guarantee a strong bond.
Next, evaluate your fastener options. Screws and brackets are common for extra support, especially when joining seams or securing heavy stone countertops. Use screws with washers to prevent damage and countersink them slightly below the surface. For delicate materials, opt for specialty fasteners designed to minimize cracking.
Before you finalize, double-check alignment and levelness. Tack down the countertop temporarily with clamps, then secure it permanently with your chosen adhesive and fasteners. This combination guarantees your countertops stay firmly in place, resisting movement and wear over time.
Seal and Finish Your New Countertops Properly
Protect your investment by sealing and finishing your countertops properly. This step is key to making sure they’re durable, stain-resistant, and look great.
First, pick the right sealant for your material. Natural stone usually needs penetrating sealers, while laminate can use surface sealants.
Next, apply the finish carefully to boost both protection and appearance. Use a soft cloth or brush to spread a high-quality sealant evenly, avoiding streaks.
Allow plenty of drying time between coats, and add more layers if needed. Once done, gently buff the surface for a smooth, polished look.
Be sure to follow the manufacturer’s instructions for your sealant and finishing techniques. This helps prevent damage and ensures long-lasting results.
Proper sealing keeps moisture and stains out, helping your countertops stay looking new for years. By following these steps, you’ll enjoy a beautiful, functional kitchen surface that can handle daily use.
Install Backsplashes and Edge Trims
Improve your kitchen’s style and functionality by installing backsplashes and edge trims after your countertops are in place.
Start by choosing backsplash materials that match your countertop and overall kitchen design. Options like ceramic tiles, glass, or natural stone are popular choices.
Measure the area carefully and apply a quality adhesive to fix the backsplash securely against the wall. Use spacers to keep even gaps if you’re tiling, then grout once the adhesive sets.
Next, pick edge trim styles that complement your countertop’s material and shape. Metal trims give a sleek, modern look, while wood or PVC trims offer a softer finish.
Cut the trim precisely to fit all exposed edges, then attach it with construction adhesive or screws, depending on the material.
Finish by sealing any joints or gaps to prevent moisture damage. Installing backsplashes and edge trims not only enhances your kitchen’s look but also protects surfaces and ensures durability.
Troubleshoot Common Installation Issues Like Gaps and Adhesive Problems
If you see gaps or adhesive issues while installing, don’t panic. It’s a good idea to figure out what’s causing those problems right away. Catching these issues early on can save you a lot of trouble later on.
Making sure the adhesive bonds properly is key to keeping your countertop secure, so address any failures as soon as possible. By paying attention to common mistakes now, you can avoid bigger headaches down the road.
Identifying Gap Causes
When you notice gaps forming between your kitchen countertops or see adhesive issues, it’s important to find out what’s causing them quickly. Doing a thorough gap analysis helps you understand why these problems happen and makes sure your installation techniques are on point. Common causes include:
Improper measurement: If measurements aren’t accurate, it can lead to misfits and visible gaps.
Uneven substrate: When the base isn’t level, countertops won’t align properly, causing spacing issues.
Thermal expansion: Materials expand or contract with temperature changes, which can create or widen gaps over time.
Fixing Adhesive Failures
Gaps caused by adhesive failures often come from issues like using the wrong adhesive or applying it incorrectly. To fix this, start by carefully removing any old adhesive residue without damaging the countertop or cabinet surfaces.
Next, check the surface prep. Both surfaces need to be clean, dry, and free from dust or grease so the adhesive bonds properly. Choose the right adhesive for your countertop material—whether it’s silicone, epoxy, or construction adhesive.
Apply the adhesive evenly, avoiding excess that might squeeze out or too little that could weaken the bond. Press the countertop firmly in place, using clamps or weights if needed. Let the adhesive cure fully according to the manufacturer’s instructions for a solid, gap-free install.
Preventing Installation Mistakes
Although installing kitchen countertops might seem simple, small mistakes can cause gaps, adhesive issues, or misalignments that ruin the look. To avoid these problems, focus on careful planning and choosing the right tools before you start.
Make sure your workspace is clean, and double-check measurements to prevent costly errors. Taking your time during layout planning helps ensure a perfect fit.
Use the appropriate tools for cutting, leveling, and securing your countertops. This helps prevent damage and ensures everything stays in place.
Apply adhesive evenly and give it enough time to cure. This step is key to avoiding bonding failures and getting a strong, lasting hold.
Maintain Your Countertops to Keep Them Looking New
To keep your countertops looking new, clean them regularly and deal with spills right away. Preventive care is key—wiping down surfaces daily helps stop stains and buildup. Use gentle cleaners recommended for your countertop material to avoid damage.
For stain removal, act quickly and steer clear of abrasive tools that can scratch the surface. Protect your countertops by using cutting boards and trivets to keep heat resistance intact and prevent scratches. Stick to a maintenance schedule by inspecting surfaces monthly and resealing if needed.
| Concern | Recommended Action |
|---|---|
| Daily Cleaning | Use mild soap and water |
| Stain Removal | Apply baking soda paste gently |
| Surface Protection | Use cutting boards & trivets |
| Heat Resistance | Avoid placing hot pans directly |
Following these steps helps ensure your countertops stay beautiful and durable for years.
Frequently Asked Questions
Can I Install Countertops Myself Without Professional Help?
Yes, you can install countertops yourself, but be prepared for some challenges along the way.
With the right DIY tips, like measuring carefully and securing the surface properly, you’ll save money and pick up new skills.
That said, working with heavy materials or making complex cuts can get tricky.
Take your time, use good tools, and don’t hesitate to ask for help if things feel overwhelming.
You’ve got this!
What Tools Are Essential for Countertop Installation?
You’ll need a tape measure and a level to master measuring techniques. Accurate measurements can reduce errors by 80%.
A circular saw or jigsaw is essential for cutting the countertops precisely. Don’t forget countertop adhesives to securely bond surfaces.
Clamps help keep everything tight while the adhesive dries. You’ll also want a drill with screws and a putty knife for applying adhesives.
Safety gear like goggles is a must. With these tools, you’re all set for a smooth and successful countertop installation.
How Long Does a Typical Countertop Installation Take?
A typical countertop installation takes anywhere from a few hours to a full day. How long it takes depends on factors like the material type, countertop size, and how complex the cuts or seams are.
If you’re replacing old countertops, removing them first will add some time to the process. Custom finishes or intricate edge profiles can also make the installation take longer.
Planning ahead is key. It helps you set expectations and ensures a smooth installation experience.
Are There Eco-Friendly Countertop Material Options?
You can definitely kill two birds with one stone by choosing eco-friendly options for your kitchen. Sustainable materials like bamboo, recycled glass, and reclaimed wood not only reduce environmental impact but also offer unique countertop designs.
These choices blend style with responsibility, letting you enjoy a beautiful kitchen while supporting the planet. So, when picking your new countertops, consider these green alternatives to make your space both stunning and sustainable.
How Do I Dispose of Old Countertops Responsibly?
You can dispose of old countertops responsibly by exploring recycling options first. Many materials like granite, quartz, and wood can be recycled or repurposed.
Check with local recycling centers to see if they accept countertop materials. If the countertops are still in good condition, consider donating them to donation centers or Habitat for Humanity ReStores.
This way, you reduce waste and help others while keeping your kitchen upgrade eco-friendly.
Conclusion
By measuring carefully, removing old surfaces, and choosing the right materials, you’re not just installing countertops—you’re creating the centerpiece of your kitchen. It’s about more than just fitting a surface; it’s about transforming your space with care.
As you cut, seal, and perfect every edge, you’ll see that the effort reflects the love you put into your home. Attention to detail makes all the difference in a successful countertop installation.
When gaps close and finishes shine, it’s clear that a well-installed countertop does more than hold your meals. It holds your memories and your pride in a job well done.
And when it’s all finished, you’ll know that precision and patience truly pay off, especially when installing your kitchen countertops.