How to Unclog Kitchen Sink With Garbage Disposal: a Step-By-Step Guide
Dealing with a clogged kitchen sink can be incredibly frustrating, especially when you rely on your disposal daily. Many people struggle with stubborn blockages that disrupt their routines and turn simple tasks into a hassle.
But don’t worry—you’re not alone, and there are effective ways to clear it up without calling a plumber.
To unclog your kitchen sink with a garbage disposal, first turn off and unplug the unit for safety, then press the reset button to clear minor jams. Clear visible debris from the disposal and drain using gloves.
Next, use a plunger with water to loosen clogs. If that doesn’t work, manually free the blades with a hex wrench. For tougher blockages, carefully use a drain snake.
Keep avoiding fibrous or greasy waste to prevent future clogs.
Keep exploring for more detailed tips and techniques.
Key Takeaways
- Turn off and unplug the garbage disposal, then press the red reset button to clear minor jams safely.
- Remove visible debris around the drain using gloves or tongs to prevent further clogging.
- Use a sink plunger over the drain with water to create pressure and loosen minor blockages.
- Insert and rotate a plumber’s snake carefully into the drain to break up deeper clogs.
- Avoid putting fibrous, greasy, or hard materials into the disposal to prevent future clogs.
How Your Garbage Disposal Works
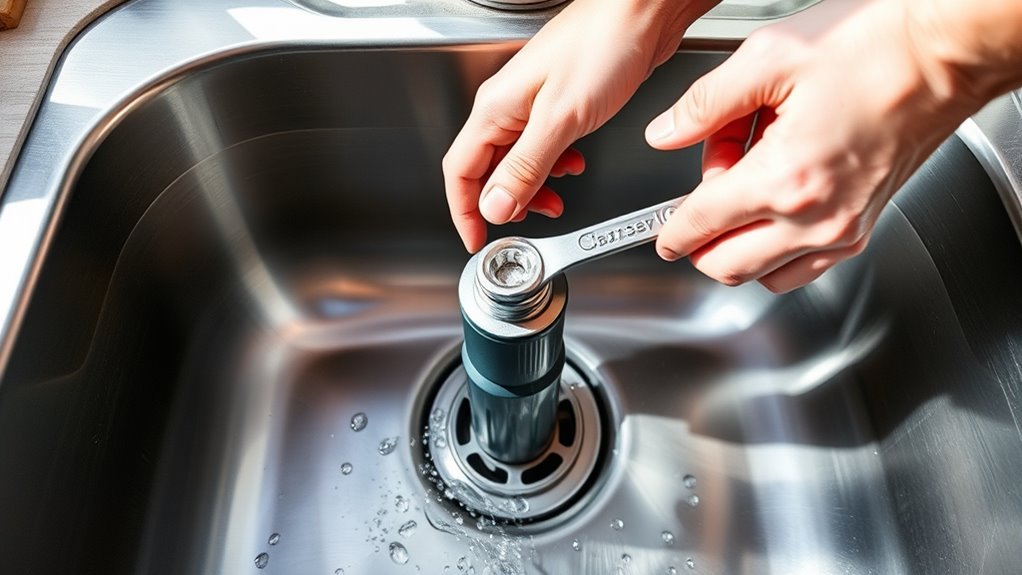
Your garbage disposal uses a spinning impeller to break down food waste into tiny particles that wash away through your plumbing.
There are different disposal types, including continuous feed and batch feed models. Continuous feed disposals run as long as you hold the switch, while batch feed units only operate when the cover is in place, which adds safety.
Knowing your disposal type helps you troubleshoot issues and prevent clogs more effectively.
To keep your disposal running smoothly, follow some basic maintenance tips. Avoid putting fibrous materials, grease, or large bones down the drain, as these can jam or damage the impeller.
Regularly run cold water during and after use to flush debris. You can also grind small amounts of citrus peels to freshen the unit and clear buildup.
Essential Tools to Safely Unclog Your Kitchen Sink
While proper use and maintenance of your garbage disposal can prevent many clogs, occasional blockages still happen. To tackle these safely, you’ll need a few essential tools. Start with a sink plunger—it helps dislodge minor clogs without damaging your pipes.
A plumber’s snake or auger is perfect for breaking up tougher blockages deep in the drain. Keep a flashlight handy so you can clearly inspect the area under your sink. Rubber gloves protect your hands from grime and sharp objects.
A bucket is useful to catch any water or debris when you disconnect pipes. Finally, having a wrench or adjustable pliers allows you to loosen fittings when necessary. Using these tools correctly supports clog prevention and maintenance for your garbage disposal’s longevity.
With the right gear, you can handle blockages efficiently and avoid costly repairs.
Turn Off and Reset Your Garbage Disposal
Before you start unclogging, make sure to turn off the garbage disposal to prevent accidents. This step is really important for your safety and helps avoid damage during maintenance. Locate the power switch or unplug the unit under the sink to cut off the electricity completely. Once it’s off, you can safely move on to troubleshooting.
Always turn off and unplug your garbage disposal before starting any unclogging or maintenance work for safety.
If your disposal has stopped working, resetting it often fixes the issue. Look for a small red reset button, usually at the bottom of the unit. Press it firmly; this will reboot the motor and clear minor jams.
Remember these key points:
- Always disconnect power before doing any maintenance.
- Use the reset button to fix common disposal stalls.
- Keep the reset button accessible for quick troubleshooting.
Following these precautions makes unclogging safer and more effective. It also helps extend your disposal’s lifespan.
Step 1: Clear Visible Debris From Disposal and Drain
Start by removing any visible debris from the disposal and the drain opening. Use tongs or gloves to pull out food scraps, grease buildup, or other blockages you can easily reach. Avoid putting your hand directly into the disposal to prevent injury. Clearing these materials is essential for effective disposal maintenance and helps prevent future clogs.
Even small bits can cause drainage issues over time, so thoroughness matters. Next, wipe around the drain opening to remove any residual grime or buildup. This step not only improves flow but also reduces odor.
Regularly clearing debris like this is a simple, proactive way to keep your sink running smoothly and avoid more serious blockages. By addressing visible blockages first, you set a solid foundation for the next steps in unclogging your kitchen sink efficiently.
This initial cleanup is a vital part of clog prevention and helps maintain your garbage disposal’s performance.
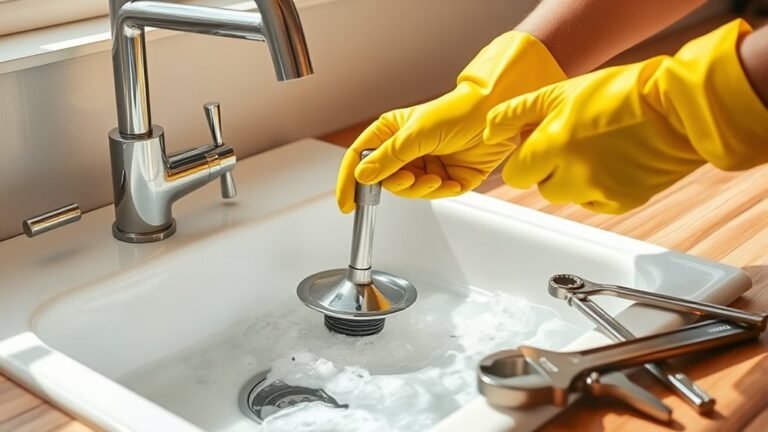
Step 2: Use a Plunger to Clear Kitchen Sink Clogs
Grab a plunger and position it firmly over the sink drain to create a tight seal. Effective plunging techniques can quickly dislodge clogs without damaging your pipes or disposal.
Before you start, make sure the garbage disposal is off and there’s enough water in the sink to cover the plunger’s cup for a better seal.
Use steady, controlled plunges to build pressure and loosen the blockage. Avoid using too much force or lifting the plunger too quickly, as this can make the clog worse or splash dirty water.
Keep these tips in mind: Use a sink plunger, not a toilet plunger, for a better fit. Block the secondary drain if you have a double sink with a wet cloth to maximize pressure.
Maintain a consistent rhythm, plunging about 10 to 15 times before checking your progress.
If the clog doesn’t clear, don’t force it. Move on to the next step for a deeper clean.
Step 3: Clean the Disposal With Baking Soda and Vinegar
Sure! Here’s a more conversational version of the text:
—
To clean your disposal, you’ll want to grab some baking soda and vinegar. They work great together to break down any buildup and get rid of those stubborn odors. Baking soda is fantastic for breaking down grime, and vinegar gives it a natural cleaning boost.
Here’s a simple way to do it: just sprinkle some baking soda into your disposal, then pour in some vinegar. Let it fizz and work its magic for a few minutes. After that, run some hot water through it to flush everything out. It’s a quick and easy way to keep your disposal fresh and clear!
Benefits of Baking Soda
A simple household ingredient like baking soda can work wonders when cleaning your kitchen disposal. Its benefits make it an effective, natural cleaning agent that deodorizes and breaks down grime without harsh chemicals.
When you use baking soda, you’re choosing an eco-friendly option that’s safe for your pipes and the environment. Here’s why baking soda stands out:
- It neutralizes odors to keep your disposal smelling fresh
- Gently scrubs away buildup without scratching surfaces
- Reacts with other natural ingredients to boost cleaning power
Vinegar’s Cleaning Power
Pairing baking soda with vinegar boosts your kitchen disposal’s cleaning power. Vinegar’s natural acidity tackles grime and neutralizes odors, making it a key player in many effective cleaning recipes. When combined with baking soda, it creates a fizzing reaction that loosens debris, helping you maintain a fresh, clog-free sink.
Plus, vinegar benefits include being eco-friendly and non-toxic, safe for your pipes and family.
Here’s a quick look at the emotional impact of using vinegar in your cleaning routine:
| Feeling | Why It Happens | Result |
|---|---|---|
| Satisfaction | Seeing grime dissolve | Motivated to clean more |
| Relief | Odors vanish quickly | Kitchen feels fresh |
| Confidence | Using natural, safe products | Peace of mind while cleaning |
Step-by-Step Cleaning Process
Step three involves using baking soda and vinegar to clean your disposal effectively. This natural combo tackles odors and buildup, boosting both plumbing maintenance and kitchen hygiene. Here’s how to do it:
Pour half a cup of baking soda into the disposal.
Slowly add one cup of vinegar; you’ll see fizzing as it works.
Let the mixture sit for 10-15 minutes, then flush with hot water.
This process breaks down grime and neutralizes unpleasant smells, keeping your disposal running smoothly. Regularly doing this helps prevent clogs and extends your sink’s lifespan. It’s an eco-friendly way to keep your kitchen fresh and hygienic without harsh chemicals.
Make this simple cleaning part of your routine to enjoy a clog-free, odorless disposal every time.
Step 4: Manually Free Disposal Blades With a Hex Wrench
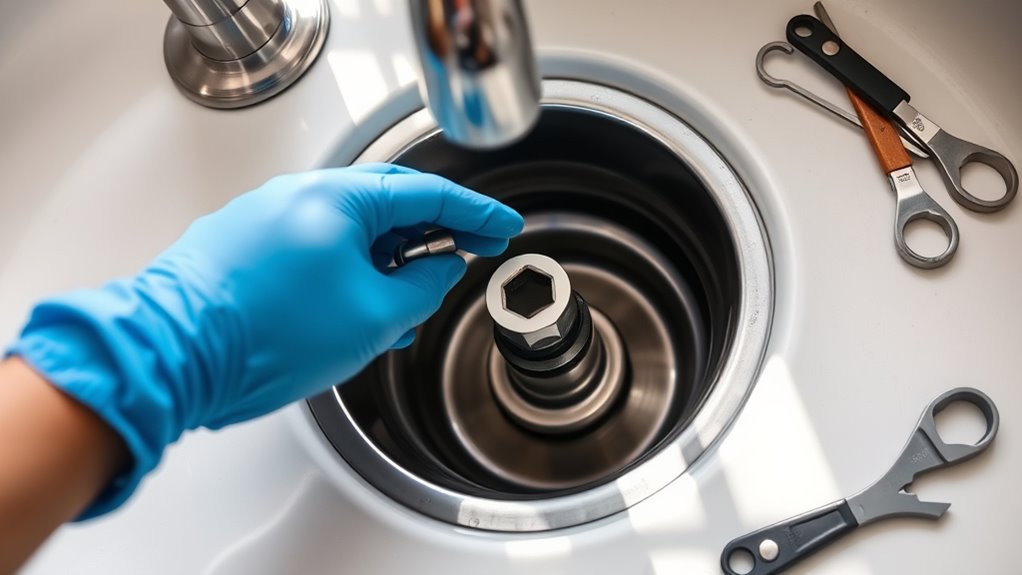
Grab a hex wrench to manually free the disposal blades when they’re jammed. First, find the hex-shaped hole at the bottom center of your garbage disposal unit. Insert the wrench into this hole and turn it gently back and forth.
This helps dislodge any stuck debris, freeing the blades. Regular maintenance like this can prevent future jams and extend your unit’s lifespan.
While you’re at it, take the chance to clean the blades. Once they move smoothly, run cold water and grind small ice cubes to remove leftover residue.
This keeps the blades sharp and helps reduce odors. Avoid using your hands to clear jams to stay safe. Manually freeing the blades with a hex wrench quickly restores your disposal’s function and ensures your sink runs smoothly again.
Step 5: Use a Drain Snake for Tougher Clogs
When you’re dealing with stubborn clogs that just won’t loosen up, it’s time to grab a drain snake. Make sure to choose one that’s the right size and type for your sink.
Gently insert the snake into the drain and twist it around. This helps break up the clog or catch it so you can pull it out. When you feel like you’ve reached the blockage, pull the snake out slowly. That way, you can remove the debris without risking any damage to your pipes.
Choosing The Right Snake
Although a drain snake might seem straightforward, choosing the right one can make all the difference in clearing tougher clogs effectively. You want a tool that fits your sink’s pipes and helps with long-term drain maintenance and clog prevention.
Consider these factors when selecting a snake:
- Length and flexibility: Make sure the snake can reach deep clogs without damaging your pipes.
- Cable thickness: Thicker cables handle stubborn blockages better, while thinner ones work well in narrow pipes.
- Type of tip: Some tips are designed to grab debris, while others break up grease or hair.
Picking the right snake not only unclogs your sink faster but also helps keep your drains smooth and reduces future clogs. This way, your kitchen sink stays efficient with minimal hassle.
Inserting The Drain Snake
Selecting the right drain snake sets you up for success as you begin inserting it into your kitchen sink. Start by feeding the snake’s end slowly into the drain, keeping a firm grip on the handle.
Use steady pressure to avoid kinking or damaging the cable. Apply proper snake techniques by rotating the handle clockwise; this helps the snake navigate bends and break through stubborn clogs.
If you meet resistance, don’t force it. Gently work the snake back and forth to loosen debris. Consistent drain maintenance like this prevents buildup and keeps your pipes clear longer.
Removing The Clog Safely
Since tougher clogs won’t budge with basic methods, you’ll need to use a drain snake carefully to remove them safely. Accurate clog identification helps you target the blockage without damaging pipes or your disposal.
Before you start, follow these safety precautions:
- Wear gloves and eye protection to shield against debris and splashes.
- Disconnect the garbage disposal’s power to prevent accidental activation.
- Insert the drain snake slowly, turning it clockwise to catch the clog.
Once you feel resistance, gently pull the snake back, bringing the clog with it. Repeat the process if necessary, avoiding excessive force that could harm your plumbing.
Common Causes of Kitchen Sink Clogs With Garbage Disposal
When you run your garbage disposal, bits of food and grease can build up and cause blockages in your kitchen sink. Common causes include food particles that don’t break down easily, grease that solidifies in pipes, and fibrous vegetables that tangle inside the disposal.
Hard objects like bones or utensils can jam the blades, and improper use like overloading or running the disposal without water can also lead to clogs. Sometimes, plumbing issues beyond the disposal can cause slow drainage or blockages.
| Cause | Description | Impact |
|---|---|---|
| Food Particles | Small bits that build up | Slow drainage, partial clog |
| Grease Buildup | Fats that solidify in pipes | Complete blockage |
| Fibrous Vegetables | Stringy bits like celery or onion | Tangled blades, jams |
| Hard Objects | Non-food items or tough scraps | Damage or jamming |
Knowing these causes can help you fix clogs effectively without damaging your sink or disposal.
Prevention Tips to Keep Your Kitchen Sink and Disposal Running Smoothly
To keep your kitchen sink and garbage disposal running smoothly, follow five essential prevention tips. Proper preventive maintenance and smart food waste management can save you from frequent clogs and costly repairs.
Keep your kitchen sink and disposal clog-free with simple preventive tips and smart waste management.
First, avoid putting fibrous, starchy, or greasy materials down the disposal since they tend to build up and cause blockages. Next, always run cold water while operating the disposal to help food waste flow easily through the pipes.
Finally, clean the disposal regularly using a mixture of ice cubes and coarse salt. This helps remove debris and sharpens the blades.
Here are three key tips to remember:
- Don’t overload the disposal; feed waste gradually.
- Avoid pouring grease or oil down the drain.
- Use a sink strainer to catch large particles before they enter the disposal.
Frequently Asked Questions
Can I Use Chemical Drain Cleaners With a Garbage Disposal?
You shouldn’t use chemical drain cleaners with a garbage disposal because they can damage the blades and pipes.
Instead, try chemical alternatives like enzymatic cleaners that are safer for your disposal.
For better drain maintenance, regularly flush your disposal with hot water and grind citrus peels to keep it fresh.
These methods protect your system while effectively preventing clogs without risking harm from harsh chemicals.
How Often Should I Replace My Garbage Disposal?
You should replace your garbage disposal every 10 to 15 years, depending on usage and condition. Regular maintenance tips, like avoiding hard or fibrous foods and running cold water during use, can help extend its lifespan.
Keep an eye out for common issues like frequent clogs, strange noises, or leaks. If these problems keep happening even after proper maintenance, it might be time to replace the unit to keep your kitchen running smoothly.
What Sounds Indicate a Serious Garbage Disposal Problem?
If you hear loud grinding, buzzing without spinning, or a humming noise, these sounds indicate a serious garbage disposal problem. They often mean clogged pipes or a jam inside the unit.
You shouldn’t ignore these noises because they signal that your disposal needs immediate attention to avoid further damage. Regular disposal maintenance helps prevent these issues and keeps your kitchen running smoothly.
Don’t delay fixing these sounds to save costly repairs later. Addressing them early can help you avoid bigger problems down the line.
Is It Safe to Put Bones or Fibrous Vegetables in the Disposal?
Think of your garbage disposal as a delicate dance partner. Bones and fibrous vegetables can step on its toes.
It’s not safe to toss hard bones or stringy veggies like celery or corn husks down there. They can jam or dull the blades, turning your kitchen waste symphony into a noisy disaster.
Stick to softer scraps to keep your disposal humming smoothly and avoid costly repairs.
Can a Garbage Disposal Be Repaired or Should It Be Replaced?
You can often fix a garbage disposal if the problem is small, like a jam or a faulty switch.
But if it keeps having issues, it might be better to replace it.
Regular maintenance can help your disposal last longer, so don’t ignore leaks or strange noises.
When you do replace it, make sure to follow installation tips carefully to avoid future problems.
If you’re unsure, it’s a good idea to call in a professional.
That way, your kitchen sink works smoothly without costly mistakes.
Conclusion
Unclogging your kitchen sink with a garbage disposal doesn’t have to be a hassle. Did you know that nearly 30% of kitchen sink clogs are caused by improper disposal of fats and fibrous foods?
By following these simple steps, you can easily clear blockages and keep your disposal running smoothly. Regular maintenance and mindful use can save you time and costly repairs down the road.
Remember, taking care of your garbage disposal and knowing how to unclog your kitchen sink with it will keep everything flowing smoothly. You’ve got this!