How to Pack Kitchen for Moving: A Step-by-Step Guide
Moving your kitchen can feel overwhelming, especially when you think about packing up all those dishes, utensils, and food. You’re not alone—many people struggle with organizing everything efficiently while trying to avoid breakage. But don’t worry, with the right approach, you can make the process smoother and less stressful.
To pack your kitchen for moving, start by sorting items into keep, donate, and discard piles to lighten your load. Gather sturdy boxes, bubble wrap, and dividers to protect fragile dishes and glassware.
Bundle utensils, nest pots, and wrap knives carefully. Label boxes clearly, especially fragile ones, and pack cleaning supplies tightly sealed. Organize food containers with airtight seals and check expiration dates.
If you follow these steps, you’ll save time and avoid damage—there’s even more helpful guidance to make your move smoother.
Key Takeaways
- Sort kitchen items into keep, donate, and discard piles to declutter before packing. This makes the process easier and less overwhelming.
- Use bubble wrap, sturdy boxes, and dividers to protect fragile dishes and glassware. It’s worth taking the extra time to prevent breakage.
- Wrap knives individually with blade guards and pack them blade-down in labeled boxes. This keeps them safe and easy to find later.
- Pack appliances by disassembling parts, cushioning with towels, and using sturdy boxes. Breaking down appliances saves space and reduces damage risk.
- Label all boxes clearly with contents and fragility for organized unpacking. This helps you know what’s inside without opening every box.
Sort and Declutter Your Kitchen Before Packing
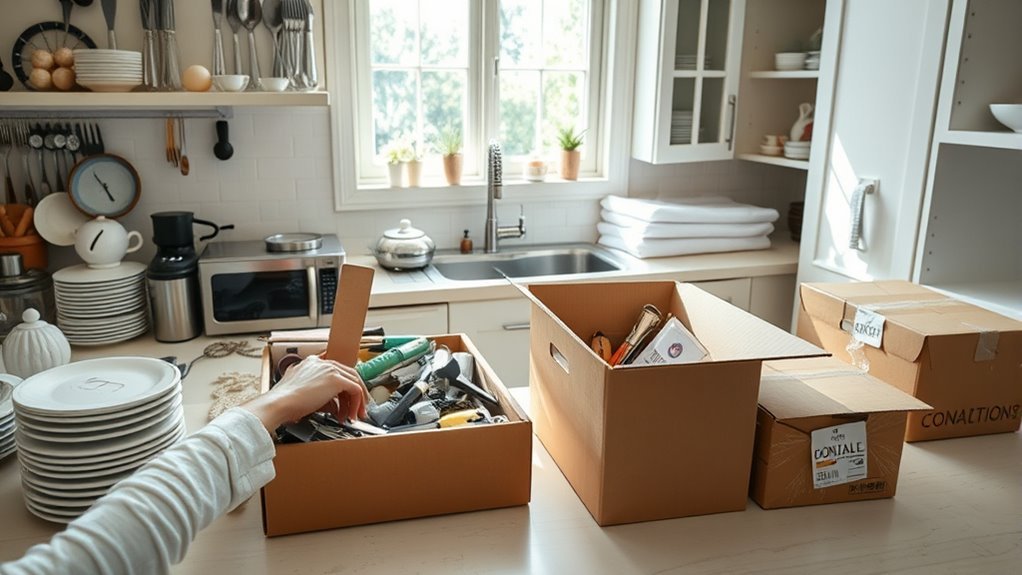
Begin by sorting through your kitchen items to decide what you really need to keep. Create a detailed kitchen inventory to track what you have and spot duplicates or unused items. This will help you avoid packing unnecessary clutter and make unpacking easier.
As you go through your cabinets, drawers, and pantry, separate everything into three piles: keep, donate, and discard. Be honest about what you actually use and what’s just taking up space.
For items in good condition but no longer needed, look into donation options like local shelters, food banks, or charity shops. Donating not only lightens your load but also helps others in need.
Essential Packing Supplies for Your Kitchen Move
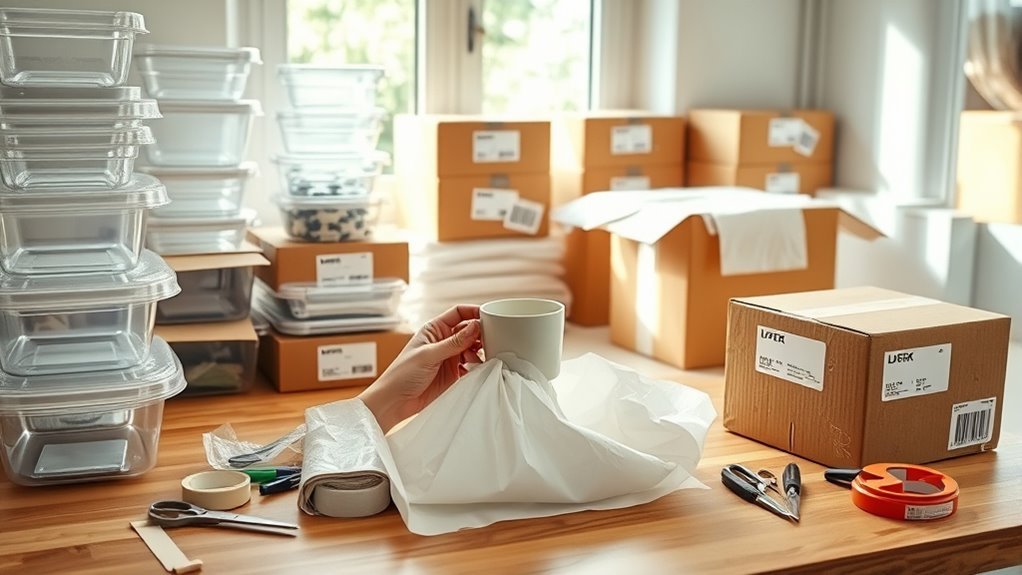
Moving your kitchen? Make sure you’ve got the right packing supplies to keep everything safe and sound. Grab some bubble wrap or packing paper to cushion those delicate dishes and glassware—no one wants broken favorites!
And hey, don’t forget to label your boxes clearly. It’ll save you loads of time and frustration when you’re unpacking and trying to find that one saucepan or your favorite mug. Staying organized makes the whole move way smoother!
Must-Have Packing Materials
Gathering the right packing materials makes your kitchen move smoother and helps protect your items from damage. Start by creating a kitchen inventory and a packing checklist so you can keep track of everything.
Use sturdy moving boxes in various sizes, and don’t forget dish dividers and cardboard dividers to keep fragile plates and glasses separate. Bubble wrap and foam peanuts add extra cushioning for delicate items, preventing chips and cracks during transit.
Secure your boxes tightly with high-quality packing tape to avoid spills or shifting. These essential supplies help you pack efficiently and keep your kitchenware safe.
With the right materials, you’ll arrive at your new home ready to cook without any hassle. Being organized with your packing supplies guarantees a stress-free move and protects your valuable kitchen items.
Protective Wrapping Options
Several protective wrapping options can safeguard your kitchenware during a move, making sure fragile items arrive intact. Start by wrapping delicate dishes and glassware in bubble wrap or packing paper for cushioning.
Foam sheets and dish towels also work great as padding without adding bulk. Use cardboard dividers inside boxes to separate plates and prevent shifting during transit.
For extra protection, line boxes with newspaper layers or air pillows to fill any gaps. Wrap larger items like pots and pans with moving blankets or plastic wrap to avoid scratches.
Choose padded boxes for especially fragile items to add a sturdy layer of defense. By mixing these materials thoughtfully, you’ll protect your kitchen essentials effectively and reduce the risk of damage during your move.
Labeling and Organization Tips
Once your kitchen items are securely wrapped, keeping everything organized and clearly labeled makes unpacking much easier. Start by choosing a consistent labeling system—use large, color-coded markers or stickers to identify boxes by category, like “Pots” or “Glassware.”
Number your boxes and keep a master list of contents so you can find what you need quickly. For fragile items, write “Fragile” clearly on multiple sides to make sure they’re handled carefully.
Use smart organization hacks like packing similar items together and placing heavier items at the bottom to avoid damage. Label drawers or containers inside boxes to save time when unpacking.
These labeling tips combined with clever organization tricks will help you stay efficient during your move and settle into your new kitchen without hunting for essentials.
Pack Small Utensils and Cutlery Safely
Start by sorting your small utensils and cutlery into groups to make packing easier and more organized. Separate forks, knives, spoons, and specialty utensils so you can find what you need quickly later. Use cutlery storage trays or small containers to keep everything neatly arranged during the move. This helps prevent items from shifting or getting damaged.
Next, bundle similar utensils with rubber bands or twist ties to hold them securely. Place these bundles inside sturdy boxes or reusable plastic bins with dividers for extra protection. Be sure to line the bottom with packing paper or bubble wrap to cushion the contents.
Label the boxes clearly with “Cutlery” or “Small Utensils” so unpacking is simple. Keeping your utensils organized and secure with proper storage solutions will save you time and frustration when setting up your new kitchen.
Wrap and Protect Fragile Dishes and Glassware
Anyone handling fragile dishes and glassware knows how easily they can break during a move. To make sure your dish packing goes smoothly, start by wrapping each item individually with bubble wrap or packing paper.
Fragile dishes and glassware need individual wrapping to prevent breakage during your move.
For plates, put padding between each one to prevent scratches and cracks. When packing glassware, use techniques like stuffing the inside with tissue paper or bubble wrap to strengthen it.
Always pack dishes vertically, like records, to reduce pressure on them. Use sturdy boxes labeled “Fragile” and line the bottom with cushioning materials.
Fill any gaps with crumpled paper or packing peanuts so nothing shifts during transit. Seal the boxes securely and mark the top sides clearly.
Taking these steps will protect your fragile kitchenware and keep your dishes and glassware intact for your new home.
Pack Pots, Pans, and Cookware Efficiently
When you’re packing up your pots, pans, and cookware, it’s a good idea to protect any fragile pieces with some padding or bubble wrap. That way, you can prevent any chips or cracks during the move.
To save space and keep things secure, try nesting smaller pans inside larger ones. It’s a simple trick that makes packing much more efficient.
Taking a little time to organize everything carefully will also make unpacking easier and help ensure nothing gets damaged along the way.
Protecting Fragile Cookware
To protect fragile cookware like pots and pans during your move, wrap each piece carefully and pack them securely to prevent scratches and dents. Use techniques like wrapping each pot or pan in bubble wrap or packing paper.
For lids and delicate handles, add extra padding to avoid damage. Stack cookware with softer items like towels or cloths between them to cushion and prevent shifting.
Choose sturdy storage solutions like reinforced boxes or containers designed for kitchen items. Label boxes clearly as “Fragile” so movers handle them with care.
Taking these steps helps ensure your fragile cookware arrives intact and ready to use in your new kitchen without costly repairs or replacements.
Organizing Pots and Pans
Organizing your pots and pans efficiently starts with grouping similar items together. Nest smaller pieces inside larger ones to save space. For effective pans organization and pot storage, follow these steps:
- Clean and dry all cookware to prevent rust or mold during transit.
- Nest pots and pans by size, placing lids separately wrapped in bubble wrap to avoid scratches.
- Use sturdy boxes lined with packing paper, placing heavier pots at the bottom and lighter pans on top to maintain balance.
Pack Kitchen Appliances the Right Way
Packing kitchen appliances requires careful attention to protect your valuable items during the move. Start by unplugging and defrosting appliances like the fridge or freezer.
Use appliance disassembly tips—remove detachable parts and wrap them separately. For example, take out blades from blenders or the crumb tray from toasters.
When packing fragile appliances like blenders or coffee makers, cushion them with bubble wrap or towels to prevent damage. Use sturdy boxes and avoid overpacking to reduce pressure on delicate components.
Here’s a quick guide to packing common kitchen appliances:
| Appliance | Disassembly Tips | Packing Fragile Appliances Tips |
|---|---|---|
| Blender | Remove blades and jar | Wrap jar in bubble wrap |
| Toaster | Remove crumb tray | Use padding inside and outside |
| Coffee Maker | Detach carafe | Wrap glass parts carefully with towels |
| Microwave | Secure turntable inside | Use original box or a comparable sized box |
Following these steps guarantees your appliances arrive safely and are ready to use.
Safely Pack Knives and Cleaning Supplies
When you’re packing knives, it’s a good idea to protect the blades with blade guards or wrap them up securely in thick paper. This way, you can prevent any accidental cuts or injuries during the move.
For cleaning supplies, make sure all liquids are sealed tightly and stored upright in a separate box. This helps avoid spills and keeps chemicals from mixing, which can be messy or dangerous.
Taking these simple steps will help make your move safer and keep everything organized along the way.
Knife Safety Tips
A few simple steps can keep your knives safe and prevent accidents during your move. First, focus on proper storage to avoid damage and injury. Use blade covers or sheaths to protect the sharp edges.
Next, follow these key tips: Wrap each knife individually with bubble wrap or a thick cloth before placing it in a box. Use a sturdy box labeled “Knives” and place the knives blade-down to reduce risk.
Finally, fill any empty spaces with packing paper so the knives don’t shift around during transport. These small precautions can make a big difference in keeping everyone safe.
Storing Cleaning Supplies
Three key steps can help you safely store your cleaning supplies during a move. First, sort your cleaning supply types—separate liquids, sprays, and powders to prevent leaks or spills.
Next, tightly seal all containers and place them upright in a sturdy box lined with absorbent material like old towels. Label the box clearly as “Cleaning Supplies” for easy identification.
Finally, consider eco-friendly options by packing biodegradable cleaners separately or disposing of hazardous items before moving. This reduces risk and environmental impact.
Remember to keep sharp items like knives away from cleaning supplies, wrapping blades securely. By following these steps, you’ll protect your belongings and guarantee a safer, more organized move.
Pack and Label Food Containers for Your Move
Start by sorting through your food containers and deciding which ones you’ll keep for the move. Focus on sturdy containers suitable for food storage, and throw away any that are cracked or missing lids. Next, check your pantry items for expiration dates and group similar bulk purchases together to make unpacking easier.
Begin by sorting food containers, keeping only sturdy ones, and organizing pantry items by expiration and type for easier unpacking.
When packing and labeling your containers, follow these steps:
- Use different container types—airtight for meal prep leftovers, resealable bags for dry pantry items, and sturdy tubs for bulk goods.
- Label each container clearly with contents and expiration dates using a consistent system. This way, you’ll quickly see what you need without opening everything.
- Prioritize food safety by sealing containers tightly and avoiding overpacking to prevent spills or contamination during transit.
Load Boxes Strategically to Prevent Damage
After packing and labeling your food containers carefully, focus on how you load your boxes to keep everything safe during the move. Proper box weight distribution is key: place heavier items at the bottom and lighter ones on top to avoid crushing fragile contents. Use stacking techniques that guarantee stability, like stacking boxes of similar sizes together and avoiding overly tall piles that could topple.
Here’s a quick guide to help you load your boxes strategically:
| Box Weight Distribution | Stacking Techniques |
|---|---|
| Heavy items on the bottom | Stack similar-sized boxes |
| Medium-weight items in the middle | Avoid stacking boxes too high |
| Light items on top | Use cushions between boxes |
| Fragile items secured with padding | Keep boxes stable and balanced |
Following these tips will reduce damage risks and make your move smoother.
Tips for Unpacking and Setting Up Your Kitchen Quickly
Once you arrive at your new home, unpack your kitchen essentials first to make meal prep easier from day one. Prioritize items like pots, pans, utensils, and frequently used appliances. Here are three unpacking tips to help you set up your kitchen quickly:
- Designate zones: Organize your kitchen into zones—cooking, prepping, cleaning, and storage. Place your essentials where they’re most convenient to streamline daily tasks.
- Unpack systematically: Start with larger appliances and cookware, then move to smaller items like utensils and dishware. This keeps counters clear and prevents clutter.
- Use labeled boxes: Since you packed with labels, unpack boxes in order of importance. This saves time and reduces frustration.
Following these tips will help you set up your kitchen fast, making your move smoother and less stressful. Focus on the essentials first, then add less-used items gradually.
Frequently Asked Questions
How Early Should I Start Packing My Kitchen Before Moving Day?
You should start packing your kitchen about 3 to 4 weeks before moving day.
Begin by gathering packing supplies like sturdy boxes, bubble wrap, and tape.
Pack non-essential items first, leaving only your kitchen essentials for last.
This way, you won’t disrupt your daily cooking too much.
Label each box clearly, and keep a separate kit with the essentials you’ll need right up until the move.
This will make the shift smoother and less stressful.
Can I Pack Food That Requires Refrigeration During the Move?
You can’t treat refrigerated items like Dorothy’s ruby slippers—keep them close, or they won’t survive the journey. During moving logistics, it’s best to eat or donate perishables before you move.
If you need to transport refrigerated items, use a cooler with ice packs. Move them last to minimize the time they’re out of the fridge.
This way, you protect your food and avoid ending up with a soggy, spoiled surprise at your new place.
What Should I Do With Perishable Items on Moving Day?
On moving day, focus on disposing of perishable items that won’t survive the move. Use up or toss out food that’s expired or unlikely to stay fresh during transit.
If you have unopened, non-expired food, consider donating it to reduce waste and help others in need.
Only pack essential refrigerated items in a cooler with ice packs to keep them fresh during the move.
This way, you avoid spoilage, save money, and support your community while making your move smoother.
How Do I Handle Packing Large Kitchen Furniture Like Islands or Cabinets?
When Sarah moved, she wrapped her kitchen island with moving blankets and secured drawers with tape to prevent sliding. You should use similar packing techniques: disassemble removable parts, wrap surfaces with furniture protection like blankets or bubble wrap, and secure everything tightly.
For cabinets, empty the contents and protect doors from swinging open. This careful approach guarantees your large kitchen furniture stays safe and scratch-free during transit.
Are There Specific Moving Insurance Options for Kitchen Items?
Yes, you can get specific moving insurance options for kitchen items. Before packing, make a detailed kitchen inventory to keep track of your valuables.
Use high-quality packing materials to protect fragile items like glassware and ceramics. When choosing insurance, look for coverage that includes accidental damage and loss during transit.
Some movers offer specialized policies for kitchenware, so ask about those options to ensure your items are fully protected throughout the move.
Conclusion
Moving your kitchen can feel overwhelming, but with careful packing, it doesn’t have to be. Did you know that over 30% of moving-related injuries happen in the kitchen area because of improperly packed items?
By sorting, protecting fragile dishes, and labeling boxes clearly, you’ll keep your belongings safe and make unpacking a breeze. Staying organized and taking it step by step will help you get your kitchen set up and ready to cook in no time.
Remember, proper kitchen packing is key to a smooth move. With a little planning, you’ll be settled in and cooking happily in your new home before you know it!