How to Aim in Pool: 8 Essential Strategies That Actually Work
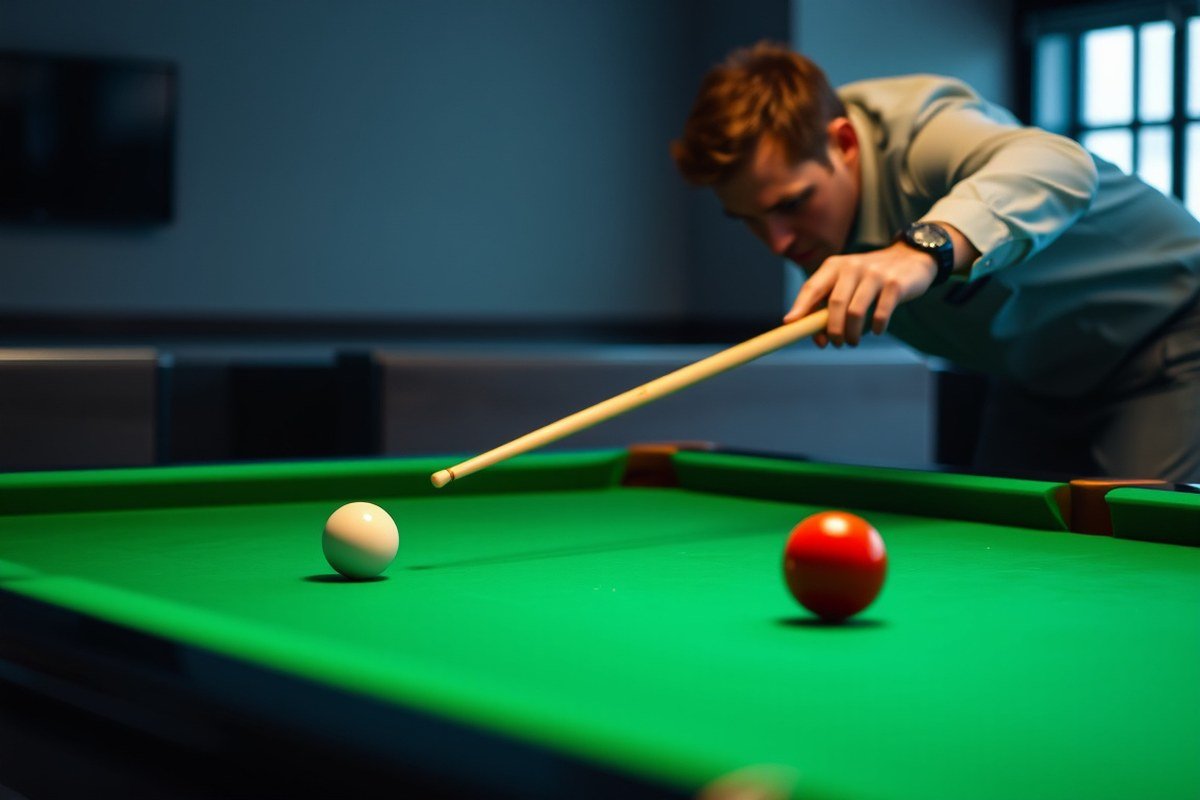
Learning how to aim in pool starts with understanding the key contact points between the cue ball and object ball. The most effective aiming methods rely on visualizing these points accurately, with the ghost ball method leading the way for beginners and intermediate players. This article is for pool players aiming to improve their shot accuracy by mastering practical and proven aiming techniques.
You’ll find clear explanations of different aiming systems, the role of eye dominance, and how to handle challenging cut angles and spin. The focus is on simple, actionable strategies that work during real games, helping you take better shots consistently and build confidence at the table.
Key Takeaways
- Use the ghost ball method by visualizing an imaginary ball touching the object ball at the contact point for straight and moderate cuts.
- Switch to contact point or fractional aiming for shots with steep cut angles where ghost ball visualization becomes unreliable.
- Identify your dominant eye by pointing at an object with both eyes open, then closing each eye to see which keeps alignment.
- Understand that a 30° cut requires aiming where the ghost ball is placed just one ball-radius behind the object ball.
- Know that cut angles over 60° reduce depth perception, making pure ghost ball aiming less accurate.
- Remember that pool aiming depends entirely on hitting the correct contact point; all other setup elements support that goal.
1. How to Aim in Pool Using the Ghost Ball Method

The ghost ball aiming method relies on imagining an invisible cue ball (“ghost ball”) touching the object ball in the exact spot needed to send it into the pocket. You visualize where this ghost ball should be placed behind the object ball along the line from the object ball to the target pocket. The cue ball must then be struck so it would “occupy” that ghost ball position at impact.
To visualize the ghost ball, first find the line from the center of the object ball to the center of the intended pocket. This defines the “contact point” on the object ball where it should be hit. Next, imagine another ball the size of the cue ball placed directly behind the object ball touching it at that contact point. This ghost ball position represents where the cue ball needs to be at impact. Align your cue so the tip aims squarely at this ghost ball spot to make the desired shot.
Walk around the table and view your shot from different angles to identify the ghost ball’s position. Temporarily placing a coin or a chalk mark on the table can help mark this spot. The cue ball must hit the object ball where the ghost ball would touch, usually slightly off the center. For instance, a 30° cut requires the ghost ball to be around the 3 o’clock spot on the object ball compared to the point where the cue ball strikes it.
Using the ghost ball method works best on shots with cut angles under 60 degrees, when the ghost ball is easy to visualize behind the object ball. At very steep angles above 60 degrees, the method can get difficult to apply because the ghost ball position becomes harder to estimate accurately. In these cases, other methods like contact point aiming or fractional aiming may provide better precision.
For consistent alignment, focus on placing your cue tip so that it would strike the cue ball and send it directly to the ghost ball’s location. This visual anchor helps break down complex geometry into a practical aiming step. The main risk is instinctively aiming at the pocket itself and missing the subtle ghost ball position, especially on thin cuts. Practicing shots with common cut angles can reinforce the ghost ball “feel” and speed up aiming.
Mastering this system requires time to develop the ability to instantly see the ghost ball line and place your aim accordingly. Once you internalize it, you’ll find your cue alignment improves and shot accuracy increases dramatically. It is the foundation for most beginner and intermediate aiming instruction because it makes clear the exact spot to hit the object ball without complicated calculations.
2. Other Aiming Systems: Contact Point and Fractional Aim
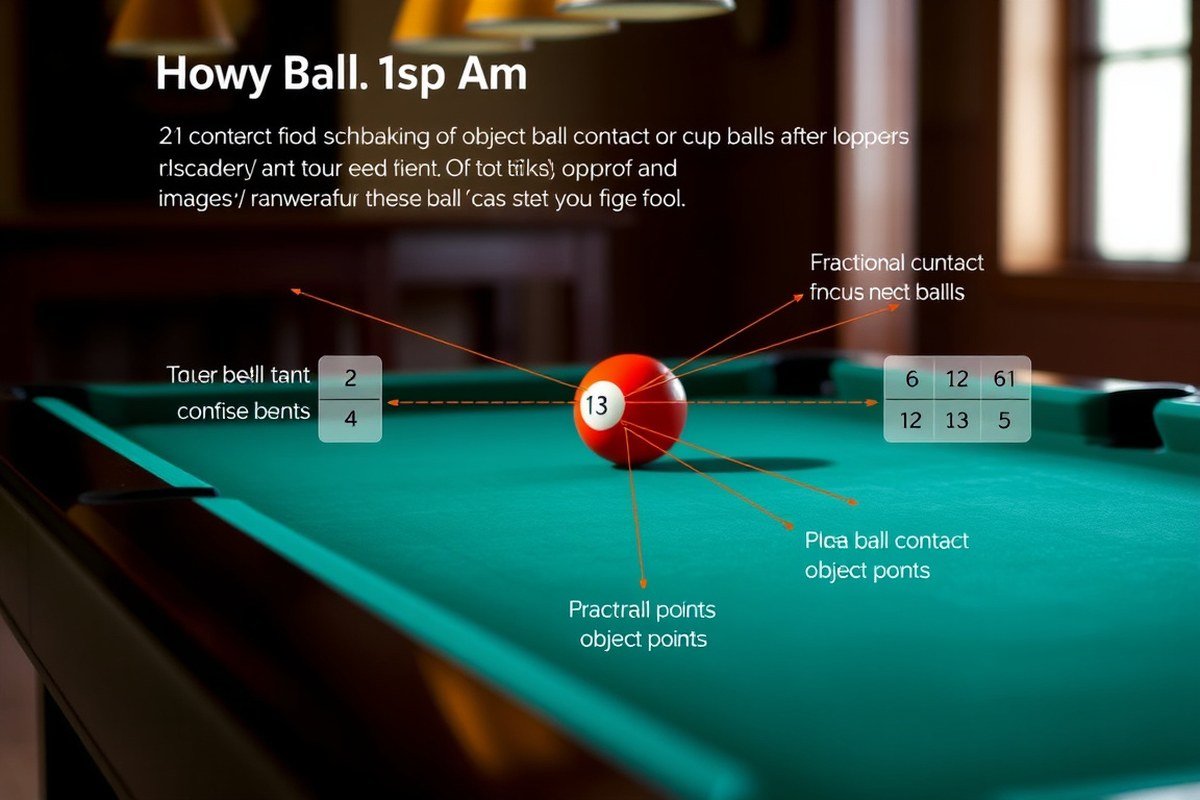
You can use the Contact Point aiming system as an alternative to the Ghost Ball method by focusing directly on where the cue ball must hit the object ball, rather than imagining a ghost ball behind it. You identify the exact spot on the object ball’s surface that, when struck by the center of the cue ball, sends the object ball into the pocket. This system avoids mentally placing an imaginary ball and provides a sharper, geometrically precise target, especially helpful for medium to sharp cut shots.
Fractional aiming differs from Ghost Ball by breaking the hit into fractions of ball overlap rather than visualizing the whole ghost ball. Instead of picturing an entire cue ball aligned behind the object ball, you focus on how much of the cue ball’s edge will contact the object ball. For instance, a 1/2 ball hit means the edge of your cue ball will meet the center of the object ball at around a 30-degree cut angle. Fractional aiming works well for a range of cut angles and can simplify your alignment during sharper cuts.
Choosing between these methods depends on the shot difficulty and angle. Ghost Ball is easier for beginners on straight or mild cut shots because it visually represents where the cue ball must go. Contact Point offers more accuracy on moderate to sharp angles by providing a precise point on the object ball. Fractional aim works best when you’re comfortable estimating ball overlap and need a scalable system for different cuts.
| Ball Overlap | Cut Angle | Aim Point on Object Ball | Shot Type |
|---|---|---|---|
| Full Ball (100%) | 0° | Dead center of object ball | Straight-in shot |
| 3/4 Ball (75%) | 14.5° | Halfway between center and edge | Gentle cut angle |
| 1/2 Ball (50%) | 30.0° | Edge of cue ball aligns to center | Standard 30° natural roll angle |
| 1/4 Ball (25%) | 48.6° | The cue ball must make contact on the edge, striking a quarter of the way into the object ball. | Sharp acute cut |
| Thin Cut (<15%) | 60.0°, 75.0° | Outer edge clips outer edge | Extreme rail cut |
For a practical example using Contact Point, picture the object ball aimed into a corner pocket with a 30-degree cut. Instead of imagining where the ghost ball would sit behind the object ball, find the exact spot on the object ball’s surface closest to the pocket line. Aim your cue ball’s center at this point by adjusting your stance and cue alignment until you feel lined up.
Using Fractional Aim on the same shot, calculate the ball overlap, 1/2 ball in this case. Visualize your cue ball’s edge touching the center of the object ball. Align yourself so that the cue ball’s center will strike the object ball at this fractional point. Over time, you’ll get faster at judging these fractions by eye, which helps when working with quick layouts and tighter cuts.
Practical Tip: After aiming using Contact Point or Fractional Aim, step back and double-check the visual fullness of the object ball to confirm alignment before shooting.
For sharper cuts above 30 degrees or complex position play, Contact Point tends to stay more consistent without fuzziness in aiming. Fractional Aim helps when you want a simple, repeatable system to approximate various cut angles without relying on an imaginary ghost ball. With practice, switching between these methods depending on the shot improve accuracy and confidence on the table.
3. Why Eye Dominance Matters and How to Find Yours
Eye dominance plays a key role in aiming accuracy because it determines which eye’s perspective you primarily rely on when lining up shots. Your dominant eye should be positioned directly over the cue stick to establish a straight line of sight toward the object ball. Identifying which eye is dominant helps you adjust your stance and cue alignment for more consistent and precise aiming.
Performing the Triangle Hand Eye Dominance Test
The simplest way to find your dominant eye is with the triangle hand test. This test creates a clear visual target that reveals which eye controls your aim better.
- Stretch your arms forward so that your thumbs and index fingers create a small triangle between them.
- With both eyes open, center a distant object within this triangle.
- Slowly bring your hands back toward your face, keeping the object centered within the triangle.
- Stop when your hands are close to your face, and note which eye the object aligns with.
The eye that keeps the object centered through the triangle is your dominant eye. This test is quick, requires only your hands, and can be done anywhere. Align your cue stick directly below the eye you rely on most, such as the right eye for right-dominant players. For some players, the dominant eye differs from their dominant hand, which is a normal variation.
Adjusting Cue Position for Dominant Eye
Once you know your dominant eye, adjust your stance and cue position to bring that eye directly over the cue stick. This positioning improves your line of sight and helps you aim more precisely along the shot line.
- Set up in your normal stance with your cue stick aimed at the shot.
- Position the cue so it aligns directly beneath your dominant eye, not centered under your chin.
- Slightly shift your head and body sideways if needed to maintain this alignment without discomfort or tension.
- Keep your dominant eye focused on the cue ball and target ball line as you prepare to shoot.
Right-eye dominant players usually place the cue slightly to the right, while left-eye dominant players shift it left. This adjustment helps keep your dominant eye over the cue, creating a clear “line of sight” from your eye, through the cue, to the object ball. Over time, this stance becomes natural and improves shot consistency.
Troubleshooting Aim Issues Linked to Eye Dominance
A common mistake is using a stance that places your non-dominant eye over the cue, which can distort your perspective and cause aiming errors. This often results in shots that miss left or right because your visual alignment is off.
Players sometimes try to compensate by moving their head or cue without fixing the underlying eye dominance alignment. This creates an unstable aiming process where your aim shifts during pre-shot strokes. To avoid this, lock in the proper stance based on your dominant eye before practice strokes.
Some players discover they shoot better with the opposite eye aligned, and it’s fine to use whichever eye gives the most reliable line of sight. Always keep the chosen eye directly over the cue stick and stay consistent. This attention to eye dominance can reduce common aiming problems and improve accuracy without relying heavily on complicated aiming methods.
4. How Cut Angles and Contact Points Determine Your Aim
The relationship between cut angle and aim in pool centers on the exact contact point between the cue ball and the object ball. Each cut angle corresponds to a specific ball overlap ratio that determines where you must strike the object ball to send it toward the pocket. Understanding this geometry helps you locate the correct contact point and predict shot direction. For example, a full ball hit with 100% overlap means the cue ball is aimed directly at the center of the object ball, resulting in a 0° cut or a straight shot. In contrast, a half-ball hit with about 50% overlap creates roughly a 30° cut angle, requiring you to aim at the edge of the object ball rather than its center.
Visualizing the line of centers is essential. This line connects the centers of the cue ball and object ball at the moment of contact and determines the angle the object ball will travel. Your aim revolves around positioning the cue ball so its center aligns with this contact normal line, which is the true direction the object ball will move after impact. The cue ball’s center-target location changes with the cut angle, from directly towards the object ball at 0° to striking its side at larger angles.
Here’s a rough guide to overlap ratios and cut angles to help identify contact points under pressure: a three-quarter ball hit (about 75% overlap) has a cut angle near 14.5°, a half-ball hit roughly 30°, a quarter-ball hit about 48.6°, and a very thin hit or “razor thin” cut at approximately 61°. Larger cut angles beyond 60° are challenging because the ghost ball, or the imaginary cue ball position used for aiming, is very far to the side of the object ball. At these steep angles, the human eye struggles with depth perception, making it harder to judge the exact alignment needed.
Friction and collision physics add complexity. Even a perfect center hit on the cue ball can cause the object ball to deflect slightly off the intended line by a few degrees, often due to a phenomenon called “cue ball deflection” or “squirt.” The brain tends to compensate by aiming slightly under the target contact point on the object ball, but this can backfire if the compensation is off. In practice, aiming precisely at the object ball’s intended contact point, rather than the pocket, improves shot success.
Under pressure, it’s important to lock in on the contact point between the cue ball and object ball. Focus on the edge of the object ball where you want the cue ball’s center to strike. Visualize the contact normal line extending through the object ball’s surface to the pocket. Avoid aiming at the center of the pocket as a reference since this often leads to misses. Instead, train your eye to see the correct contact point on the object ball itself. This adjustment takes practice and sometimes slowing down your pre-shot routine to ensure you truly see the angle and contact location.
A common mistake is overcutting or undercutting because the brain attempts to simplify the visual challenge by aiming too close to the center line or pocket. Practicing with known cut angles and ball overlaps will help you calibrate what each angle looks like. Use drills that challenge you to hit half-ball, quarter-ball, and three-quarter ball hits consistently. Over time, your eye will become better at judging these contact points reliably, even in shots with awkward or steep cut angles.
5. How Spin and English Influence Your Aim
Applying spin to the cue ball changes its path both before and after it hits the object ball, so you need to adjust your aim accordingly. Side spin, commonly called English, causes the cue ball to “squirt” or deflect off the line you expect right after the hit. This deflection shifts the cue ball’s initial trajectory by a small but important amount, often a few degrees, which will affect where it strikes the object ball and where it ends up after contact.
Aside from deflection, English also creates a “throw” effect on the object ball. Throw happens because friction between the spinning cue ball and the object ball at the moment of contact nudges the object ball sideways. For example, if you apply right English, the object ball will be thrown slightly to the left. This throw can alter your shot by a few degrees as well, which matters the most on tight cut shots or when precision is key.
When you use draw, or bottom spin, the cue ball will pull back after hitting the object ball instead of rolling forward. The opposite happens with follow, or top spin, where the cue ball pushes through and travels forward after contact. This backward or forward motion means you must plan where you want the cue ball to end up after the shot, not just focus on sinking the object ball. If your aim doesn’t account for this, you might pocket the ball but fail to position the cue ball well for your next shot.
To compensate for English and throw, adjust your aim point on the object ball slightly opposite to the direction of the spin. For right English, aim a bit to the right of the normal contact point to counteract the throw moving the object ball left. With draw or follow, visualize the cue ball’s path after contact to plan a natural ending position, then aim your shot to accommodate that cue ball trajectory. You may need to make small trial-and-error adjustments during practice to get a feel for how your spin affects the shot outcomes on your table.
Another common mistake is not accounting for unintentional side English caused by cue tip misalignment. Even a small off-center hit changes the cue ball’s path unexpectedly, messing up your aim and position play. Practicing consistent, straight cueing reduces unwanted deflection and makes your spin intentions more reliable.
Always plan both where the object ball should go and where the cue ball will end up after spin to avoid losing position or missing follow-up shots.
6. Common Aiming Mistakes and How to Fix Them
Beginners often cut too thick or thin because they focus on the cue stick instead of the cue ball. The cue ball is what makes contact with the object ball, so start by standing behind the shot and looking straight at the cue ball’s center to find the correct contact point. Misaligning the cue stick by aiming like a rifle usually leads to missing the shot on the inside or outside edges. Proper body and cue stick alignment directly influences aim, so square your stance to the aiming line and keep your stroke smooth and steady to avoid errors.
Ignoring the effects of spin and throw can cause shots to veer off target. Throw happens when the spun cue ball affects the object ball’s direction, and the induced cut can change the intended line of the shot. To fix this, first aim the shot clean without spin. Then, adjust your aim slightly past or before the ghost ball center depending on the spin you use. This compensation can take some trial and error, but with practice, you’ll better predict how spin alters your aim.
- Rely on cue ball contact, not cue stick alignment.
- Keep your body and cue aligned toward the shot line.
- Maintain a steady stroke by using a stable bridge and smooth follow-through.
- Practice standing behind the shot to reassess the aim point, especially under pressure.
- Start by aiming without spin; add adjustments to counter throw effects afterward.
- Use slow, controlled strokes to reduce miscue risks and maintain accuracy.
- Avoid rushing the shot; take a moment to verify your aim and stance before shooting.
A steady stroke combined with a solid bridge keeps your aim steady by reducing unwanted movements. Keep your bridge hand firm but relaxed so it supports the cue reliably. A shaky or jerky stroke makes it harder to hit your target precisely, especially on angled shots. Before you shoot, take a moment to picture the path from the cue ball to where you need to strike the object ball, then check your stance and aim carefully.
7. A Consistent Pre-Shot Routine to Improve Aim
Developing a consistent pre-shot routine helps you focus and execute your aims with greater accuracy. A simple 4-step routine that includes alignment, visualization, dominant eye check, and a smooth stroke can keep your mind clear and body steady. Using mental cues and controlled breathing during this routine also reduces pressure-related mistakes.
Cue Ball and Object Ball Alignment Check
Begin by confirming where the cue ball and object ball must meet. The key is to identify the exact contact point on the object ball’s surface that will send it toward the pocket. Align the cue ball so that your shot line runs through the cue ball’s surface point matching the object ball’s target contact point.
This alignment sets the direction of the shot before you even raise the cue. Check the angle by imagining a line from the center of the cue ball to the chosen contact point on the object ball. A clear, stable alignment at this stage improves shooting accuracy.
Visualizing the Target Contact Point
Once aligned, mentally picture the cue ball’s path as it strikes the object ball, then the object ball moving into the pocket. Visualization serves as a mental rehearsal and focus aid to reduce doubts or second-guessing during the shot. It helps you confirm your aim is where you intend. Try this simple visualization routine before every shot:
- Spot the exact surface point on the object ball to hit.
- Visualize the cue ball rolling straight toward that point.
- See the object ball rolling smoothly into the target pocket.
Repeating these steps creates a consistent mental image and stabilizes your focus, especially useful under competitive pressure.
Confirming Dominant Eye Line and Stance
Your dominant eye should align directly over the cue stick, forming a straight visual line through the cue ball to the target point. This line ensures your aim corresponds accurately with what you see. Standing correctly so your eye, cue, and target ball are in line helps prevent aiming errors.
Before you strike, take a moment to check your stance. Make small adjustments so your head stays steady with the dominant eye square above the cue. This promotes consistent sightlines and prevents unwanted shifts in aim caused by head movement.
Executing a Smooth and Controlled Stroke
The final step is delivering a smooth stroke that follows through the aimed line. Firmly grip the cue but keep muscles relaxed to avoid tension that can cause wobbles or jerky shots. Breathe slowly and evenly as you stroke, using your mental cue to “stay smooth and steady.”
Your head should remain still through the shot, maintaining eye alignment. A fluid stroke combined with the earlier alignment and visualization locks in shot accuracy. Rushing or tensing can throw off your cue ball path and reduce the effectiveness of your pre-shot routine. A simple 4-step pre-shot routine you can follow every time:
- Align the cue ball surface point with the object ball’s target contact point.
- Visualize the cue ball’s path and object ball’s roll into the pocket.
- Check your dominant eye is directly over the cue and stance is balanced.
- Execute a smooth, controlled stroke with steady head and calm breathing.
8. Practice Drills to Master Your Aiming Skills
Improving your aiming skills in pool requires focused, structured practice with drills designed to build your ability to visualize contact points and the ghost ball. Consistent repetitions paired with gradually increasing challenge levels help internalize aiming principles and improve shot accuracy and confidence.
Long Rail Alignment Drill
Position the object ball on the foot spot and place the cue ball anywhere behind the head string. Use the ghost ball method to aim for the corner pocket along the long rail. First, identify the exact contact point on the object ball that will direct it into the pocket. Then, visualize a ghost ball touching that point and aim your shot at the center of this imagined ball.
Repeat this drill aiming to sink the ball in a row of at least 20 shots without misses. Track your success rate to maintain 80% or better before increasing difficulty by moving the cue ball slightly off the head string or switching pockets.
30-Degree Half-Ball Cut Drill
Place the object ball two diamonds away from a side pocket, then position the cue ball to practice half-ball contact shots with approximately a 30-degree cut angle. This drill focuses on refining your fractional aiming system and helps develop an instinct for the correct angle and contact point.
Shoot 15 balls per session, noting how many you pocket. Aim to improve your makes to 70% or higher. After achieving this, increase difficulty by changing the target pocket or the distance between balls to simulate more challenging angles.
Full Table Contact Point Drill
This drill emphasizes recognizing and executing various contact points across the entire table. Scatter several object balls at different spots and pockets to practice aiming consistently regardless of position. Visualize the ghost ball and contact point for each shot as you take it.
Track successful shots from random positions aiming for a success rate of 75%. Perform at least 30 shots per practice, gradually increasing the number of balls and shot difficulty as your confidence improves.
- Set up consistent shot positions to measure progress
- Mark contact points visually during practice
- Record your success rate after each set
- Challenge yourself with different pockets and angles
- Focus on steady pre-shot routine to maintain consistency
Focus on the quality of each shot rather than rushing through drills; deliberate practice builds muscle memory faster.
Progressive Shot Difficulty Challenge
Start with simple straight shots to build a baseline success rate around 90%. As you improve, introduce more cut shots, long shots, and thin hit shots. Gradually increasing the shot difficulty trains your aiming under varied, realistic conditions.
Set goals to advance to the next level only after reaching about 80% accuracy for 20 shots at the current level. This progressive approach prevents frustration and ensures your skills solidify before moving on to tougher shots. Regular practice sessions of 30 to 60 minutes, three to five times per week, support steady improvement and help you internalize aiming skills needed for better consistency in games.
Step-by-Step Action Plan to Improve Your Pool Aiming
Start building your aiming skills with focused steps that bring progressive improvement. Track your progress by checking shot accuracy and confidence at each phase.
- Before You Shoot: Identify your eye dominance by doing the pointing test. Knowing which eye leads your aim helps you position your head correctly for better alignment.
- Day 1: Practice the ghost ball method on simple shots only. Visualize the cue ball’s contact spot and aim to hit it consistently. Success means balls pocket cleanly with minimal adjustments.
- Week 1: Add contact point aiming drills. Place object balls along the rail and focus on aligning the cue tip to the exact contact point per shot. Accuracy improves when balls consistently follow the target line.
- Week 2: Experiment with spin application on straight shots to see how english affects the cue ball path. Measure improvement by controlling cue ball position after impact.
- Week 3: Record yourself to detect common aiming mistakes like misaligned head or inconsistent stroke. Make focused corrections on one error at a time. Notice better shot precision and fewer misses.
- Week 4: Develop a consistent pre-shot routine, including stance, cue alignment, and visualization. A routine that feels natural and repeatable leads to smoother execution and steadier aim.
- Week 5 and Beyond: Use advanced drills combining cut angles, contact points, and english. Track your shot success percentage to quantify improvement and set new aiming goals.
Frequently Asked Questions
What Should I Focus on First When Learning to Aim in Pool?
Start by understanding basic contact points between balls. This foundation simplifies aiming and helps you build accuracy before adding spin or cut angles.
How Can I Tell If My Aim Is Consistent During Practice?
Track your shot outcomes and note which angles you miss most frequently. Consistency shows progress and highlights areas needing improvement during drills.
Does the Lighting in a Pool Room Affect Aiming Accuracy?
Yes, poor lighting can create shadows and distort depth perception. Ensure even lighting above the table to help you see ball positions clearly.
Can Aiming Be Improved Without a Proper Pool Cue?
Using a suitable cue helps with stroke control and accuracy. A poorly balanced or damaged cue can interfere with consistent aiming.
Is Focusing on the Cue Ball or Object Ball Better When Aiming?
Aim primarily by visualizing the contact point on the object ball. Watching the cue ball’s path aids stroke alignment but rely on the object’s target spot first.
How Long Does It Usually Take to Improve Aiming Skills in Pool?
Improvement often requires 20 to 50 hours of deliberate practice, emphasizing repetition of basic shots and aiming drills.
Before You Go
Proper aiming involves understanding sight dominance, using proven aiming methods, and practicing deliberately with feedback. Begin today by identifying your dominant eye and applying the ghost ball method in your next session. Making incremental adjustments and building a steady routine will improve your shot accuracy over time, helping you lower your scores and enjoy the game more. Keep focusing on precise contact points and learn from every shot to steadily refine your aim.