How to Build a Mud Kitchen: A Step-by-Step Guide
Many parents and caregivers want to encourage outdoor play and creativity, but finding fun and engaging activities can be a challenge. You’re not alone—building a mud kitchen is a fantastic way to inspire imaginative play while keeping kids happily busy outside.
To build a mud kitchen, start by choosing a sunny, well-drained spot away from large trees. Gather sturdy materials like wooden pallets, natural wood, and containers for mixing and pretend cooking.
Use essential tools—hammer, drill, measuring tape—to assemble a solid frame with a smooth, easy-to-clean surface.
Add shelves, a basin for water play, and storage to keep supplies organized. Keep it safe and clean, then encourage creative play and learning.
You’ll uncover plenty more tips to customize and improve your mud kitchen experience.
Key Takeaways
- Pick a safe, level outdoor spot with plenty of sunlight and good drainage for your mud kitchen.
- Build a sturdy wooden frame and work surface using durable wood, making sure joints are securely fastened for stability.
- Add features like shelves, a basin for water, and storage areas for utensils and play items to make the space functional.
- Use natural materials and child-friendly tools to encourage sensory play and spark creativity in the kitchen.
- Keep everything clean by wiping surfaces regularly, rinsing utensils, and fixing any damage as soon as you notice it.
Materials Needed to Build a Mud Kitchen
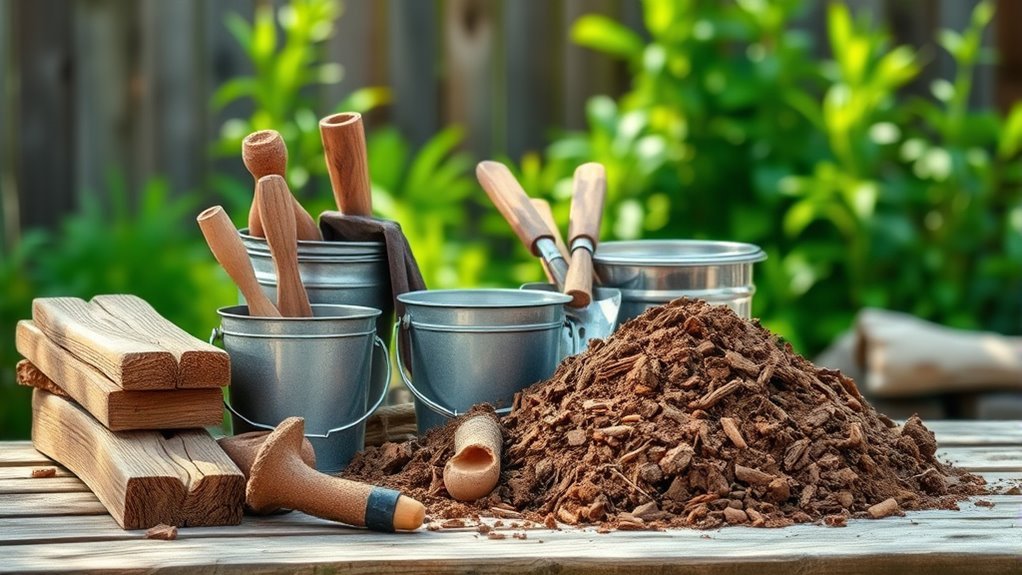
To build a mud kitchen, you’ll need a few basic materials that are easy to find and affordable. Start with some sturdy wooden pallets or old tables to create the base and work surface.
Using natural materials like untreated wood and stones not only boosts durability but also helps kids connect with nature. You’ll want containers or old pots and pans for mixing and pretend cooking.
Natural, untreated wood and stones enhance durability and encourage imaginative outdoor play with pots and pans for mixing.
Adding a few metal bowls, spoons, and buckets will round out the setup nicely. Don’t forget a basin or large tray to hold water, which is essential for muddy mixing fun.
You can incorporate scrap wood or bricks to build shelves for storage. Choosing natural, recycled, or upcycled materials keeps costs low and supports eco-friendly play.
With these simple materials, you’ll create a mud kitchen that sparks creativity and outdoor learning.
Picking the Perfect Spot for Your Mud Kitchen
Once you have gathered your materials, the next step is choosing the best spot for your mud kitchen. Start by considering factors like sunlight, drainage, and how close it is to water sources. You want a spot that gets enough natural light but isn’t in harsh midday sun so your little chefs stay comfortable.
Also, pick an area with good drainage to prevent puddles from forming around the kitchen. Think about how the outdoor environment affects its durability and usability. Avoid placing it under big trees that drop leaves, sap, or branches, which can make a mess.
Consider accessibility too—choose a spot that’s easy for kids to reach but away from busy areas so play stays safe. Lastly, make sure the ground is level to keep your structure stable. By carefully thinking about these location factors, you’ll create a fun, functional mud kitchen that fits perfectly into your outdoor space.
Tools for Easy and Safe Mud Kitchen Assembly
Building your mud kitchen is a fun project, and having the right tools makes it so much easier. Just a heads-up—make sure to wear safety gear like gloves and goggles. It’s always better to be safe while working on your build!
Now, let’s talk about the key tools you’ll need. A good hammer, screwdriver, and some nails or screws will be your best friends during assembly. If you’re working with larger pieces, a saw might come in handy too. Having these tools ready beforehand will help everything go smoothly and quickly.
Essential Tools Overview
Gathering a few essential tools will make building your mud kitchen both easier and safer. Before you start, look for design inspiration to decide the layout and features that suit your space. Opt for eco-friendly options whenever possible, like recycled wood or non-toxic finishes, to keep your project sustainable.
Here are three key tools you’ll need:
- Cordless drill: Speeds up assembly and handles various screw sizes.
- Measuring tape: Guarantees precise cuts and proper fitting.
- Handsaw or jigsaw: Lets you shape wood pieces accurately.
With these tools on hand, you’ll efficiently follow your design inspiration and create a mud kitchen that’s both functional and environmentally friendly. Keep everything organized and ready for smooth progress.
Safety Gear Recommendations
Although having the right tools is essential, wearing proper safety gear guarantees your mud kitchen assembly goes smoothly without accidents. Before you start, gather these safety gear essentials to protect yourself from splinters, dust, and sharp edges.
Protective equipment like gloves, goggles, and sturdy shoes will keep you safe and comfortable. Wear your safety gear throughout the build to ensure a safe and enjoyable project.
| Safety Gear | Purpose |
|---|---|
| Work Gloves | Shield hands from cuts and dirt |
| Safety Goggles | Protect eyes from debris |
| Dust Mask | Prevent inhaling sawdust |
| Closed-Toe Shoes | Guard feet from falling objects |
Taking these precautions helps you focus on creating a fantastic mud kitchen without injury.
Building the Frame and Work Surface
Before assembling the frame, decide on the size and height that will be comfortable for the children using the mud kitchen. This helps ensure the structure is both functional and safe.
Use sturdy wood like cedar or pine to secure frame stability, and fasten joints tightly with screws or brackets. Reinforcing corners can help prevent wobbling during play.
Next, choose surface materials that are durable and easy to clean. Waterproof plywood or laminated boards work well to withstand mud and water exposure. Make sure edges are smooth to avoid splinters and injuries.
Keep these tips in mind: use treated wood to resist weather damage, confirm legs are evenly cut for balance, and pick non-toxic, child-safe finishes.
Building a solid frame with the right surface materials sets the foundation for a long-lasting, enjoyable mud kitchen that kids will love.
Adding Shelves, Sinks, and Storage Areas
Once you have a sturdy frame and work surface, you can start adding shelves, sinks, and storage to keep your mud kitchen organized and functional. Choose shelf designs that fit your space and needs. Open shelves let kids easily access tools, while cubbies help store smaller items neatly. Consider adding hooks or baskets to maximize storage.
For sinks, you don’t need a real plumbing system. A simple basin or plastic tub works well and can be easily removed for cleaning. You might also use a recycled container with a hand pump for added fun. Position the sink at a comfortable height so kids can enjoy water play safely.
Finally, add storage areas beneath the work surface to hold pots, pans, and mud supplies. This keeps everything within reach and helps keep the space tidy. It makes your mud kitchen practical and inviting.
Making Your Mud Kitchen Sturdy and Weatherproof
To make sure your mud kitchen stands up to all kinds of weather, focus on making it sturdy and weatherproof. Start by choosing materials like treated wood or composite boards that can handle rain and sun without warping or rotting.
Ensure your mud kitchen lasts by using treated wood or composite boards that resist warping and rotting.
Next, build it solidly by reinforcing joints and using corrosion-resistant screws or bolts to keep everything secure.
Here are three simple tips to boost its durability:
- Use exterior-grade sealants or waterproof paint to protect surfaces from moisture.
- Raise the base a bit off the ground to prevent water damage and help with drainage.
- Add a sloped roof or cover to shield the kitchen from rain and snow.
Easy and Creative Mud Kitchen Decoration Ideas
Wondering how to make your mud kitchen as fun and inviting as it is functional? Start by embracing nature-inspired themes. Use elements like twigs, leaves, and stones to decorate surfaces or hang from the roof.
Upcycled materials are perfect for adding charm without extra cost. Old pots, broken tiles, and colorful fabric scraps can turn your kitchen into a creative haven.
Here’s a quick guide to easy decoration ideas:
| Decoration Idea | Materials Needed | Tip |
|---|---|---|
| Leaf Garland | Leaves, string | Hang across the front |
| Painted Rocks | Rocks, non-toxic paint | Use as “ingredients” |
| Fabric Bunting | Scrap fabric, thread | Adds color and movement |
| Twig Utensil Holders | Twigs, glue | Bundle and glue into holders |
| Upcycled Containers | Old cans, jars | Store tools or play food |
Try these ideas to make your mud kitchen inviting and imaginative!
Keeping Your Mud Kitchen Clean and Ready to Play
Adding creative decorations can make your mud kitchen a magical space, but keeping it clean helps ensure it stays safe and fun. Regular maintenance is key to preventing dirt and bacteria from building up.
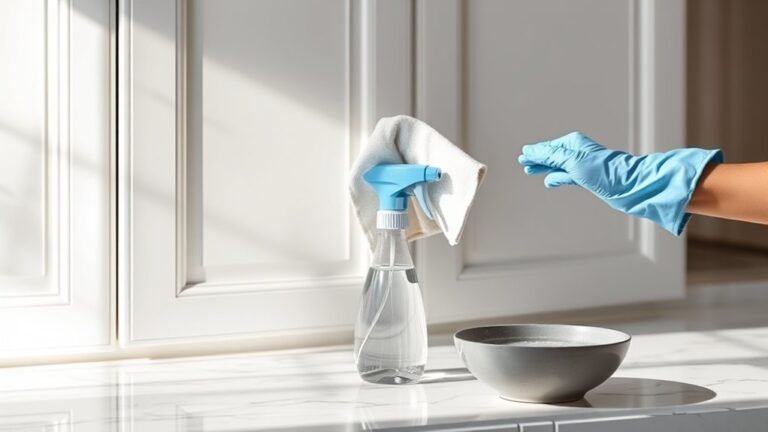
Gather some basic cleaning supplies like a soft brush, mild soap, and a spray bottle with water for quick cleanups.
To keep your mud kitchen ready to play, wipe down surfaces daily to remove mud and debris. Rinsing utensils and pots after each use helps avoid stains and odors.
Check for any broken parts or sharp edges and fix them promptly to keep everything safe and enjoyable.
Helping Kids Have Fun and Learn With Their Mud Kitchen
Want to spark your child’s imagination? Just encourage them to get creative in their mud kitchen! They can explore different textures and smells, which is such a fun way to boost their sensory learning. It’s like a little adventure right in your backyard.
And guess what? It’s also a perfect opportunity to introduce some basic science concepts. You can do simple, hands-on experiments together—like mixing ingredients or observing how things change. It’s a great way to have fun while learning at the same time!
Encouraging Creative Play
While kids naturally love to get messy, you can boost their creativity by offering simple tools and open-ended prompts that inspire imaginative play. Encourage them to invent stories and scenarios, turning the mud kitchen into a space for endless adventures. Sensory experiences from squishing mud and mixing natural materials make play more engaging and meaningful.
Try these ideas to spark creativity:
- Provide different containers, spoons, and natural items like leaves or pebbles for mixing and decorating.
- Ask questions like, “What are you cooking today?” or “Can you make a mud cake?”
- Suggest role-playing scenarios such as running a café or hosting a garden party.
Enhancing Sensory Exploration
Because sensory experiences deepen learning, a mud kitchen offers a rich environment for kids to examine textures, smells, and temperatures. You can improve sensory investigation by encouraging children to feel different sensory textures like wet mud, dry leaves, and rough bark.
Adding natural elements such as herbs, flowers, or pinecones invites kids to engage in varied nature interactions, stimulating their senses and curiosity. Let them mix water and soil, noticing temperature changes and the transformation of materials.
Providing tools like spoons, sieves, and bowls helps them manipulate ingredients, boosting tactile experiences. By guiding your child to investigate these sensory textures and nature interactions, you’re helping them develop fine motor skills and sensory awareness while having fun in a hands-on, creative way.
Teaching Basic Science Concepts
Engaging with sensory textures naturally leads to uncovering basic science concepts through play. With your mud kitchen, you’ll create a perfect space for hands-on learning, blending mud play and science experiments that spark curiosity.
Kids immerse themselves in nature exploration while developing sensory skills and environmental awareness. Encourage them to observe changes in materials, mix substances, and experiment with water flow to understand simple physics and chemistry.
Try these ideas to boost learning:
- Measure and mix different soil types to explore texture and consistency.
- Experiment with water absorption and evaporation using mud and leaves.
- Observe plant growth by adding natural elements from outdoor education.
This approach promotes creative expression and sensory development, making science fun and accessible in a natural setting.
Customizing Your Mud Kitchen for Different Ages and Spaces
When designing your mud kitchen, think about the ages of the kids who’ll use it and the space you have.
For younger children, include features like lower counters and easy-to-grip utensils to keep things safe and accessible.
Older kids might enjoy more complex elements, such as multiple workstations or built-in storage for tools and ingredients.
To make the most of limited space, go for space-efficient designs like foldable tables or vertical shelving. These save room without losing functionality.
You can also customize the layout to fit your outdoor space, whether it’s a small balcony or a big backyard.
Adjustable components help the mud kitchen grow with your kids, changing as their needs evolve.
Frequently Asked Questions
Can a Mud Kitchen Be Built Indoors?
Yes, you can build a mud kitchen indoors, but you’ll want to choose materials that handle moisture and mess well. Think waterproof surfaces and easy-to-clean fabrics.
Make sure to consider space carefully. It’s important to have good ventilation and enough room for play without risking damage to your home.
Using trays or shallow bins can help contain the mud. That way, you can enjoy the fun of a mud kitchen inside while keeping things tidy.
What Safety Precautions Should Kids Follow While Playing?
Of course, kids absolutely don’t need safety gear or adult supervision while playing—said no responsible adult ever.
You should make sure they wear gloves and closed shoes to avoid cuts or scrapes. Keep an eye on them at all times to prevent any unexpected mud disasters.
It’s fun, but safety comes first, so don’t skip the basics like washing hands afterward and checking the play area for sharp objects.
How Do You Encourage Sharing During Mud Kitchen Play?
You encourage sharing during mud kitchen play by modeling sharing techniques and praising cooperative play. Set clear expectations that everyone gets a turn and remind kids to ask before taking materials.
Create group tasks that require teamwork to help kids see the value in working together. If conflicts come up, gently prompt them to negotiate and share tools or ingredients.
Making the experience fun and inclusive keeps everyone engaged and happy. Encourage kids to take turns and support each other, fostering a positive play environment.
Are There Eco-Friendly Materials Suitable for Mud Kitchens?
Imagine the smell of fresh earth and the rough texture of bark beneath your fingers. You can definitely use eco-friendly materials for your mud kitchen!
Recycled materials like wooden pallets or old crates work perfectly as sturdy bases. Incorporate natural elements such as bamboo, stones, and untreated wood to keep things safe and green.
These choices not only protect the environment but also add charm and authenticity to your mud kitchen experience.
How to Store Mud Kitchen Accessories During Winter?
To keep your mud kitchen accessories safe during winter, focus on proper storage and protection.
Make sure to clean all tools thoroughly and let them dry completely. Store them in airtight containers or plastic bins to keep out moisture.
If possible, bring smaller items indoors or into a shed. Cover larger items with waterproof tarps to shield them from moisture and freezing temperatures.
This way, you’ll protect your accessories and have them ready for fun next season.
Conclusion
Building a mud kitchen might seem messy or complicated, but it’s actually easier than you think—and totally worth it! You don’t need fancy tools or a lot of space. Just a little creativity and some basic materials will do.
It’s a fantastic way to get kids outside, learning, and having fun. Don’t worry about the mess—mud washes away. The memories and skills your kids gain will last a lifetime.
So, get started today and create a fun, educational space with a homemade mud kitchen!