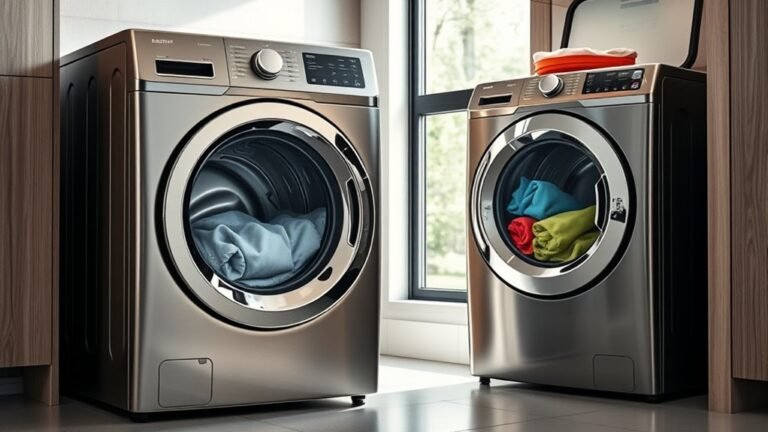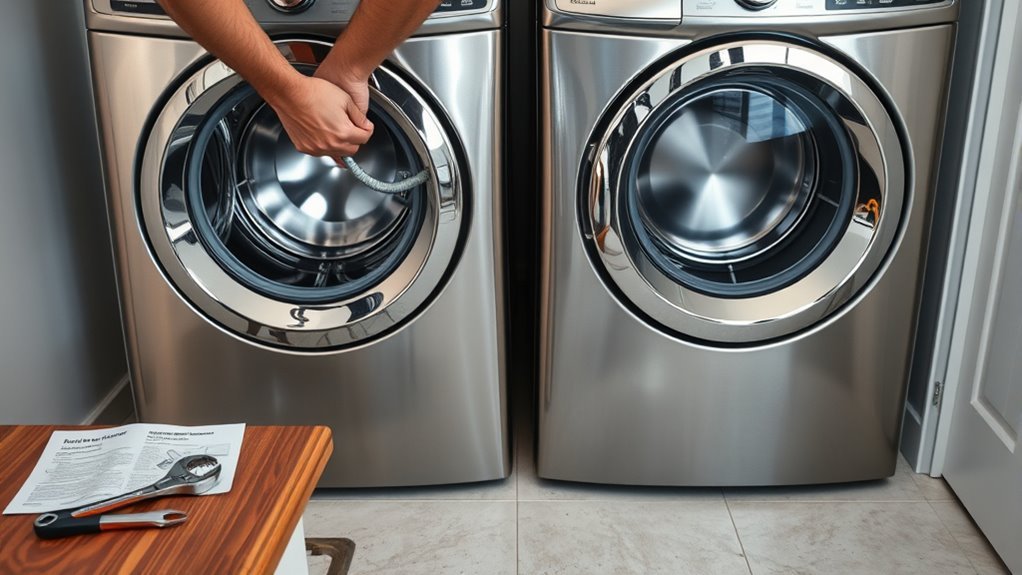
How to Install a Washer and Dryer: A Step-by-Step Guide
Are you tired of the hassle and confusion that comes with installing a washer and dryer? Many people struggle with setting up these essential appliances safely and correctly. But don’t worry—you’re not alone, and with a little guidance, you can do it yourself confidently.
To install your washer and dryer, first gather essential tools and guarantee safety by unplugging power and shutting off water. Clear and prepare your laundry space, then connect the washer’s water supply using durable hoses.
Secure the drain hose properly, and plug in the power. Attach the dryer vent with a metal duct, avoiding plastic, and check for proper airflow.
Run test cycles to confirm everything works. Following these steps will help you set up efficiently and troubleshoot common issues.
Key Takeaways
- Prepare the laundry area by clearing out clutter, making sure the floor is stable, and checking that ventilation and lighting are good. This makes the whole process smoother.
- Connect the washer hoses to the correct hot and cold water inlets. Hand-tighten them first, then use pliers to secure them so there are no leaks.
- Attach the washer drain hose properly in a standpipe or laundry tub. Make sure it’s secured well to avoid spills or siphoning.
- Connect the dryer vent using a metal duct with clamps. Keep the path short and straight, and make sure the exterior vent cover is secured.
- Finally, test both appliances by running a cycle. Check the electrical connections, water supply, and look for any leaks or airflow issues.
Tools and Materials for Washer and Dryer Installation
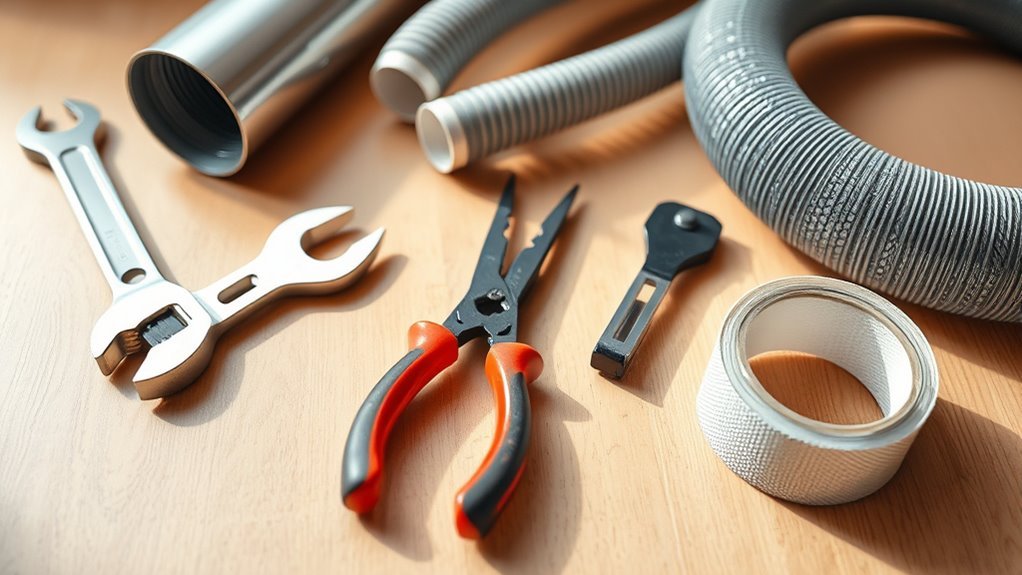
To install your washer and dryer properly, you’ll need to gather a specific set of tools and materials before you start. Get a wrench, pliers, a screwdriver, a level, and a hose kit made for washers. You’ll also want a venting kit for the dryer and maybe a power outlet tester.
Prioritizing safety means unplugging power sources and turning off water supplies to avoid hazards. Using the right tools helps prevent damage and ensures everything fits securely.
Keep a bucket and towels nearby to catch any water drips during hose connections. Having a user manual close by can guide you through device-specific steps. Don’t forget to wear gloves to protect your hands and avoid sharp edges during installation.
Preparing these tools and materials ahead of time makes the process smoother. It also helps keep your appliances running efficiently and safely. This way, you can confidently move forward without unnecessary interruptions.
Preparing Your Laundry Space for Installation
Once you have your tools and materials ready, focus on preparing the laundry space for your washer and dryer installation. A well-prepared laundry space makes the process smoother and helps avoid problems later on.
Start by clearing the area completely—remove any clutter that could block access or create hazards. Next, check the floor to make sure it’s stable and flat. An uneven surface can impact how well your machines work.
Finally, verify you have enough ventilation and lighting so you can work safely and comfortably.
Use this simple installation checklist to stay organized:
- Clear out the laundry space to create a clean, accessible area.
- Inspect the floor for levelness and strength to support the machines.
- Confirm proper lighting and ventilation for safety and ease.
Taking these steps will help you feel confident and ready to move forward with your washer and dryer installation.
How to Connect the Washer’s Water Supply Safely
Before you connect the washer’s water supply, make sure the main water valve is turned off to prevent leaks or flooding.
Next, check the hose types available—rubber and braided stainless steel are common. Braided stainless steel hoses are more durable and resistant to bursting under high water pressure, so they’re usually the safer choice.
Attach the hoses to the washer’s water inlet valves, making sure to match hot and cold connections correctly. Hand-tighten the fittings, then use pliers to secure them firmly, but avoid overtightening to prevent damage.
Once everything’s connected, slowly turn the main water valve back on and look for leaks at both ends of the hoses. If you see drips, tighten the connections a bit more.
Always ensure your water pressure stays within the washer manufacturer’s recommended range. This helps prevent hose damage or leaks during operation.
Taking these steps keeps your washer’s water supply safe and reliable.
How to Set Up the Washer Drain Hose
Connect the washer drain hose securely to ensure proper water flow and prevent leaks or backups. Setting it up correctly means you won’t have to worry about flooding or clogs interrupting your laundry routine.
Here’s how to handle common drain hose setups while keeping siphoning prevention in mind:
- Attach the hose firmly to the washer’s drain outlet, using a clamp if you have one. This helps prevent leaks and keeps the hose in place during cycles.
- Position the hose in a standpipe or laundry tub, making sure it’s inserted at least 6 inches deep but not too far. The hose end should be higher than the washer’s water level to avoid siphoning.
- Use brackets or hooks to secure the hose and stop it from moving around. This prevents dislodging that could cause spills or drainage problems.
How to Connect the Washer’s Power Supply
You’ll need to plug the washer’s power supply into a properly grounded outlet to guarantee safe and efficient operation. Before you start, check that the power cord is in good condition with no frays or damage.
Always turn off the circuit breaker to the laundry area before connecting the washer to ensure safety. Find a dedicated grounded outlet near where your washer will sit.
Turn off the circuit breaker before plugging in your washer and use a dedicated grounded outlet nearby for safety.
Avoid using extension cords or adapters, as they can cause electrical hazards. Plug the power cord firmly into the outlet, making sure the connection is secure.
Once connected, switch the circuit breaker back on. Turn on the washer briefly to confirm it’s receiving power and working properly.
How to Position and Level Your Washer and Dryer
Positioning and leveling your washer and dryer correctly ensures they work smoothly and helps prevent unwanted vibrations or damage.
Start by placing the washer where you can easily access water hookups and electrical outlets. Then, position the dryer close enough to the vent but with enough space to avoid feeling cramped.
Follow these simple steps for the perfect setup:
- Put your washer and dryer on a flat, stable surface so they don’t rock or shift during cycles.
- Adjust the leveling feet by turning them clockwise or counterclockwise until the appliances are balanced. Use a carpenter’s level on top to check.
- Make sure both units have a little space around them for ventilation and easy use.
Taking these steps seriously will protect your appliances and give you peace of mind knowing your laundry setup is solid and efficient.
How to Connect the Dryer Vent and Exhaust
Before you start using your dryer, it’s important to properly attach the vent and exhaust to ensure efficient airflow and prevent lint buildup or moisture problems.
Begin by connecting the dryer’s vent outlet to a rigid or semi-rigid metal duct using a clamp or foil tape. Avoid plastic or vinyl ducts because they can trap lint and pose fire risks.
Connect the dryer vent to a metal duct with clamps or foil tape; avoid plastic to prevent fire hazards.
Make sure the duct runs straight and short to the exterior vent to maximize efficiency. Secure the exterior vent cover to prevent pests and blockages.
To keep your system running smoothly, clean the duct at least once a year using recommended techniques like a vent brush or vacuum attachment. This helps remove lint buildup that can reduce airflow and cause overheating.
Regular checks will improve drying performance, extend your dryer’s lifespan, and promote safety.
How to Wire Electric and Gas Dryers
Start by figuring out if your dryer is electric or gas, since each one needs different wiring and safety steps. Electric dryers need a 240-volt outlet wired properly, while gas dryers only need a standard 120-volt outlet plus a gas line connection.
To make sure your dryer is safe and up to code:
- Turn off the power at the breaker before working on any wiring to avoid shocks.
- Use a UL-listed dryer cord that matches your dryer’s voltage and amperage needs.
- Double-check all connections are tight and that grounding is secure to prevent fire hazards.
Electric dryers usually have a four-prong plug, while gas dryers use a three-prong cord. If you’re unsure, it’s best to check wiring codes or call a professional electrician.
Following these steps helps keep your home safe and makes sure your dryer runs smoothly. Always prioritize safety over speed when handling electrical or gas connections.
How to Test Your Washer and Dryer Installation
Now that your washer and dryer are all set up, it’s a good idea to double-check your water connections. Just take a quick peek to make sure there are no leaks and that everything’s attached snugly. It’s better to catch any issues early on rather than dealing with messy leaks later.
Next, you’ll want to test that the electrical parts are working properly. Run a quick test cycle on your washer and dryer to see if they start up smoothly and run as they should. This way, you can be confident that everything’s functioning safely and correctly before you get into regular use.
Checking Water Connections
To guarantee your washer and dryer installation works correctly, you’ll want to check all water connections carefully. Ensuring proper water pressure and hose compatibility is essential to avoid leaks or damage.
Follow these steps:
1. Inspect Hose Compatibility
Make sure your hoses match the washer’s inlet valves and the water supply. This helps prevent mismatched fittings that could cause issues.
2. Check Water Pressure
Turn on the water supply and observe the pressure. Too high or low pressure can affect washing performance and hose durability.
3. Look for Leaks
After connecting everything, run a short water cycle while closely monitoring all joints and hoses. Watch for any drips or moisture.
Verifying Electrical Functionality
Once you’ve confirmed the water connections are secure and leak-free, it’s time to check that your washer and dryer’s electrical components work properly. First, make sure the appliances are plugged into the right outlets with the correct voltage.
Next, inspect your circuit breakers to see if they’ve tripped during installation. Turn on the washer and watch to see if it powers up and runs through a test cycle. For the dryer, set it to a short cycle and check if it heats and spins correctly.
Always follow electrical safety rules by keeping the area dry and using insulated tools if needed. If any issues come up, switch off the circuit breakers immediately and troubleshoot or call a professional to avoid hazards.
This step helps ensure your installation is both safe and working properly.
Troubleshooting Water, Power, and Venting Problems
If your washer or dryer isn’t working quite right, the first thing to do is check the water supply. Look for any leaks or blockages that might be stopping the water from getting where it needs to go. Sometimes, a simple kink in the hose or a clogged filter can cause big problems.
Next up, take a quick look at the power connections. Make sure everything’s plugged in securely and that the circuit breaker hasn’t tripped. If the breaker has flipped, resetting it might do the trick and get your appliance running again.
Finally, don’t forget to check the dryer vent. Over time, lint and debris can build up and block airflow, which can make the dryer less efficient or even cause it to stop working. Clear out any clogs or damage you see, and your dryer should be back to working smoothly.
Common Water Supply Issues
Though installing your washer and dryer might seem straightforward, you can run into common water supply issues that disrupt their operation. Low water pressure, hose leaks, and valve problems are the usual suspects causing frustration. To keep things running smoothly, follow these installation tips:
- Check water pressure before connecting hoses. Inadequate pressure can affect wash cycles.
- Inspect hoses carefully for leaks or cracks and replace them if needed to avoid water damage.
- Make sure valves are fully open and close easily, preventing supply interruptions.
Drain blockages can also cause backups, so ensure the drain hose is properly positioned and clear of obstructions. Addressing these problems early saves you headaches and keeps your laundry routine hassle-free.
Power Connection Troubleshooting
Three key areas often cause power connection issues when installing your washer and dryer: faulty outlets, improper wiring, and tripped circuit breakers.
First, check that the outlet matches your appliance’s ratings and voltage requirements. Using an extension cord isn’t recommended because it can cause voltage drops or power surges, which might damage your appliance.
Next, look at the wiring for any loose connections or incorrect setups that could prevent proper operation.
If your circuit breaker trips often, it might be due to overloads or a short circuit. Reset it, but if it trips again, it’s best to call a professional.
Always make sure your washer and dryer’s voltage requirements match your home’s electrical system to avoid power issues and keep everything running safely and efficiently.
Dryer Vent Problems
When your dryer isn’t working properly, vent problems often cause water buildup, power issues, or inefficient drying.
To fix these, focus on clearing vent blockages and regularly removing lint from the dryer.
Here’s what you should do:
Check the vent for blockages since lint buildup can restrict airflow, leading to moisture and overheating.
Clean the dryer lint trap after every load to prevent lint from entering the vent system.
Also, inspect the vent hose for kinks or damage that might limit airflow or cause power problems.
Frequently Asked Questions
Can I Install a Washer and Dryer on a Second-Story Laundry Room?
Yes, you can install a washer and dryer on a second-story laundry room, but you should consider some important factors.
Make sure the floor can handle the weight of both appliances to avoid any structural problems. Reinforce the floor if needed to support the load.
Check for proper drainage and venting options as well. It’s a good idea to consult a professional to ensure your setup is safe and efficient.
Doing so can help prevent damage or costly repairs in the future.
What Are the Best Energy-Efficient Washer and Dryer Models?
Think of choosing an energy-efficient washer and dryer like picking the best travel companions for a long journey. They save your energy and resources.
You’ll want top-rated models like the LG TurboWash and Samsung FlexDry, known for their energy-efficient features like eco-friendly cycles and smart sensors.
These machines cut water and electricity use while delivering great performance. So, you’ll save money and help the planet without sacrificing clean clothes.
How Do I Maintain My Washer and Dryer After Installation?
To keep your washer and dryer in good shape, focus on preventive maintenance like cleaning lint traps regularly, checking hoses for leaks, and running cleaning cycles once a month.
Make sure to level your machines to prevent vibrations and inspect the vents periodically to keep everything running smoothly.
If you notice strange noises or drainage problems, these could be signs of issues. It’s also a good idea to check your manual for error codes to troubleshoot effectively.
Staying proactive with these simple steps will help your appliances work efficiently and last longer.
Are There Any Safety Tips for Moving a Washer and Dryer?
Yes, you should always follow safety precautions when moving a washer and dryer. Start by unplugging both appliances and turning off the water supplies.
Use proper moving techniques like lifting with your legs, not your back, and getting help to avoid injury. Secure the drum inside the washer to prevent damage.
Use a dolly or furniture straps for easier transport. Taking these steps keeps you safe and protects your appliances during the move.
Can I Install a Washer and Dryer Without Professional Help?
Installing a washer and dryer yourself is like navigating a maze—you can do it, but you need a clear map. Yes, you can handle a DIY setup if you understand plumbing and electrical needs.
Make sure your water supply lines, drainage, and power outlets meet the proper specifications. If you’re comfortable with tools and following instructions, go ahead. Otherwise, calling a pro might save you headaches and costly mistakes.
Conclusion
Now that you’ve connected every hose and wire, your washer and dryer are ready to work together. With everything in place, water flows smoothly, power hums softly, and vents breathe freely.
Remember, a well-installed laundry setup saves you time and trouble down the road. Take a moment to test each step carefully—your laundry room will thank you with every clean, fresh load.
You’ve built the foundation for effortless washing days ahead!