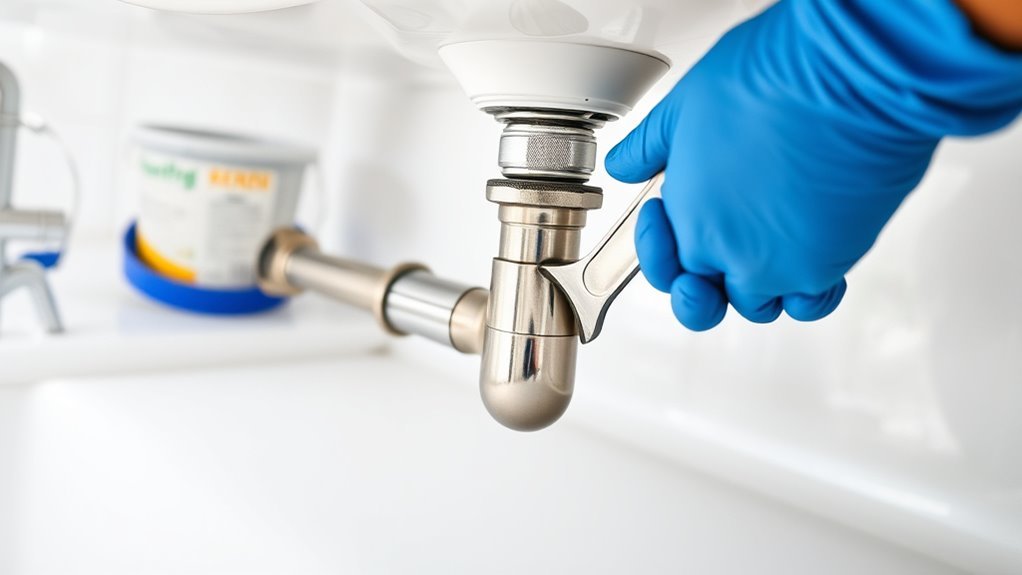
How to Install Kitchen Sink Drain: A Step-by-Step Guide
Many homeowners find installing a kitchen sink drain to be a frustrating and messy task.
If you’ve ever struggled with leaks or weren’t sure where to start, you’re not alone.
To install a kitchen sink drain, start by clearing and cleaning the workspace under your sink.
Remove the old drain assembly by loosening slip nuts and scraping off old sealant.
Apply plumber’s putty under the new drain flange and secure it tightly.
Attach the drain tailpiece and connect the P-trap, tightening all slip nuts by hand.
Finally, run water to check for leaks and ensure proper drainage.
Keep following for detailed tips on fixing leaks and maintaining your drain.
Key Takeaways
Clear and clean the workspace under the sink for easy access and installation. This makes the whole process smoother and less frustrating.
Next, remove the old drain assembly by loosening the slip nuts and scraping off any old sealant. Take your time to avoid damaging the sink or pipes.
Apply plumber’s putty under the new drain flange, then tighten it securely with a mounting nut. This helps create a good seal and prevents leaks.
Connect the drain tailpiece and P-trap, making sure all slip nuts are tightened by hand and properly aligned. Check that everything fits snugly without forcing.
Finally, test for leaks and proper drainage by running water and carefully inspecting all joints. Look for any moisture or drips and tighten connections if needed.
Gather Tools and Materials for Kitchen Sink Drain Installation
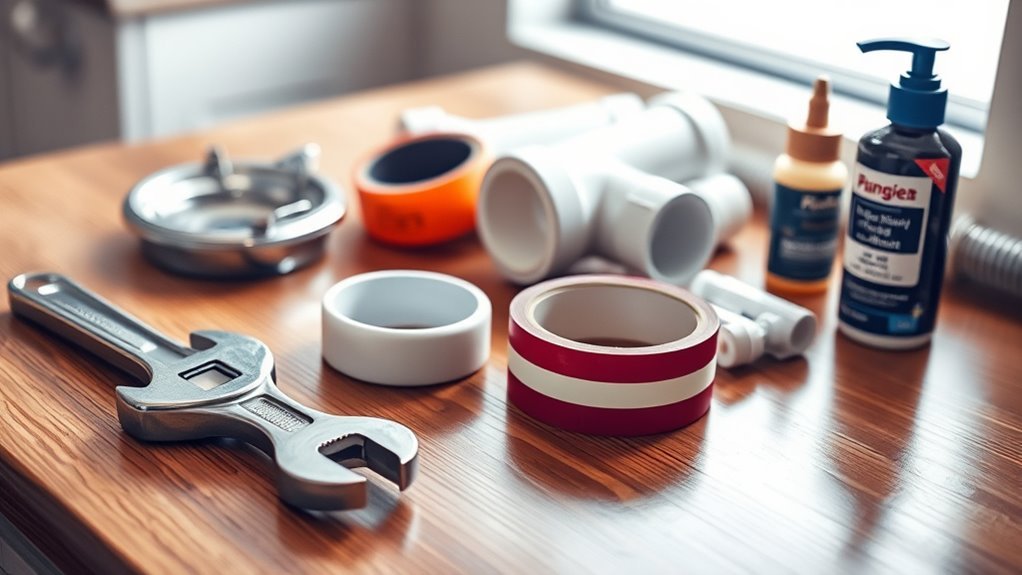
Before you start installing your kitchen sink drain, gather all the tools and materials you’ll need. Having everything ready makes the process much smoother. Proper tools are key to a quick and easy installation.
You’ll want a pipe wrench to tighten fittings securely, along with plumber’s putty or silicone sealant to create watertight seals. Keep a bucket nearby to catch any leftover water. A hacksaw might be handy if you need to cut pipes to size.
Don’t forget a flashlight to help you see in tight spaces, and a tape measure to check fitting sizes accurately. Make sure you have the drain flange, tailpiece, slip nuts, and washers ready as well.
Having these tools and parts prepared beforehand helps avoid delays and frustration. It’ll make your sink drain installation more confident, efficient, and leak-free.
Prepare Your Sink by Clearing and Cleaning the Area
Start by clearing out everything under and around your sink to create an open workspace. Removing items ensures you won’t accidentally damage anything and gives you easy access to the plumbing. This step is key for a smooth installation.
Clear out the area under and around your sink for easy access and to prevent accidental damage during installation.
Take this chance to organize your sink area. Sort and store cleaning supplies, tools, or other items neatly elsewhere before you begin.
Next, give the sink cabinet and the sink itself a thorough cleaning. Wipe down all surfaces to remove dust, grime, and old water stains. A clean space helps you spot leaks or damage and keeps debris from contaminating new parts.
Pay special attention to corners and crevices where buildup tends to gather.
Safely Remove the Old Kitchen Sink Drain Assembly
Loosen the slip nuts and disconnect the drain pipes beneath your sink to start removing the old drain assembly. Place a bucket under the pipes to catch any water that may spill during removal.
Use proper removal techniques by gently twisting and pulling the drain parts apart, avoiding excessive force that could damage the surrounding plumbing. Always wear gloves to protect your hands from sharp edges and debris.
Before you detach the drain flange, check for any remaining sealant or plumber’s putty and carefully scrape it off with a putty knife. Keep a flashlight handy to see tight spaces clearly, which helps prevent accidental injury.
Work slowly and follow safety precautions to avoid slips or cuts. Once all components are loose, lift the old drain assembly out from the sink basin carefully.
Properly dispose of the old parts and clean the area before moving on to installing the new drain.
Install the New Kitchen Sink Drain Flange and Seal
After removing the old drain assembly and cleaning the sink area thoroughly, you can install the new drain flange and seal. Choose flange types and drain materials that best suit your sink. Common options include stainless steel and PVC.
Place the rubber gasket or plumber’s putty under the flange to create a watertight seal. Then press the flange firmly into the drain opening. From beneath the sink, secure the flange with the mounting nut. Tighten it by hand first, then with a wrench. Just be careful not to overtighten.
Here’s a quick comparison of popular flange types and drain materials:
| Flange Type | Drain Material | Best Use |
|---|---|---|
| Stainless Steel | Metal or Composite | Durable, rust-resistant |
| Plastic | PVC or ABS | Lightweight, budget-friendly |
| Brass | Metal | Corrosion-resistant, sturdy |
| Rubber Gasket | All | Creates watertight seal |
| Plumber’s Putty | All | Easy to mold, seals gaps |
This will ensure a secure, leak-free connection ready for the next step.
Connect the Drain Tailpiece to the Sink Drain
Attach the drain tailpiece directly to the sink drain flange to create a secure pathway for wastewater. First, check the tailpiece alignment to make sure it fits straight without any gaps or misalignment that could cause leaks.
Slide the slip nut and washer onto the tailpiece before connecting it to the drain flange. Tighten the slip nut by hand until snug, then give it a slight turn with pliers—just avoid overtightening.
Next, think about the drain height. The tailpiece should be long enough to reach the P-trap without forcing or bending. If it’s too long, carefully trim it to the right height, making sure the connection is smooth and straight.
Getting the tailpiece aligned properly and ensuring the correct drain height are key to preventing leaks and making sure everything drains well. Once you’ve connected everything, double-check the seal around the flange and tailpiece to make sure it’s tight so water doesn’t escape during use.
Assemble and Attach the P-Trap Correctly
Start by gathering the P-trap components and positioning them beneath the drain tailpiece.
Begin your P-trap installation by fitting the curved trap arm to the tailpiece, making sure the slip nuts and washers are in place.
Slide the washers onto the pipes before connecting them to prevent leaks.
Next, align the trap arm with the drain assembly pipe coming from the wall.
Adjust the pieces so they sit flush without forcing, then hand-tighten the slip nuts to hold the assembly loosely in place.
Make sure the P-trap is properly oriented with the curved section facing downward to catch debris and prevent sewer gases from entering your kitchen.
This step is essential for a functional drain system.
Avoid overtightening now; you’ll secure everything firmly in the next step.
Tighten Drain Connections to Prevent Leaks
Now that you’ve got the P-trap in place, it’s important to use the right sealant to keep everything watertight. First, tighten the fittings by hand to get a good grip. Once they’re snug, give them a firm turn, but be careful not to over-tighten—that could damage the fittings or cause leaks. After everything’s connected, turn on the water and watch closely for any leaks. If you see any drips, tighten the connections a little more until they’re leak-free.
Choose Proper Sealant Type
Although tightening drain connections is important to prevent leaks, choosing the right sealant is just as crucial for a watertight fit. Different sealants have unique benefits, so picking one based on your sink material and plumbing setup is key.
Pay attention to how you apply it because using it improperly can lead to leaks, even if you have the best sealant. Proper technique makes all the difference.
Here are some common sealant options and tips for applying them:
- Silicone sealant is flexible and waterproof, making it great for most sinks.
- Plumber’s putty is easy to mold and works well for sealing drain flanges.
- Pipe thread sealant is perfect for threaded connections.
- Teflon tape wraps around threads to prevent leaks.
Apply each evenly and avoid excess to ensure a tight, effective seal. Choosing and using the right sealant helps prevent costly water damage down the road.
Hand Tighten Then Secure
Hand tighten the drain connections first to make sure everything lines up and fits snugly. This helps prevent cross-threading and makes sure you get a good seal.
Once it’s hand tight, use a wrench or pliers to gently tighten the connections. Just be careful not to overtighten, as that can damage the pipes or washers.
Check that all parts feel secure before moving on. Tighten until snug, but avoid forcing it too much to prevent cracks or leaks.
Finally, do a quick final check to confirm all connections are tight and secure before completing your work.
Check For Visible Leaks
After securing all the drain connections snugly, it’s important to check your work for any visible leaks. This step ensures effective drain maintenance and helps prevent leaks before you finish.
Turn on the water and watch closely around each joint. Look for water dripping or pooling under the sink, and inspect all connection points for moisture.
Use a dry cloth to spot slow leaks and run water for a few minutes to test pressure resistance. If you see any leaks, tighten the fittings immediately.
Catching leaks early saves you from costly repairs later. Regular drain maintenance keeps your kitchen sink working properly and prevents damage caused by unnoticed leaks.
Test Your Kitchen Sink Drain for Proper Water Flow
Now that you’ve tightened everything up, go ahead and turn on the water to see how fast it drains. Keep an eye out for any leaks along the way. Make sure to check all the connections to see if they’re sealed properly. If the water drains slowly or you notice any drips, it’s a good idea to make some adjustments before you finish up.
Checking Water Drainage Speed
How quickly does water drain from your kitchen sink? Checking water drainage speed helps ensure good drainage and smooth water flow.
After installation, run water at full tap pressure and see how fast it empties. Ideally, water should drain quickly without pooling or hesitation.
To properly check drainage speed, fill the sink with water and then release it all at once. Watch how long it takes for the water to fully clear.
Pay attention to whether the water drains evenly without hesitating. Listen for any gurgling sounds, which might mean flow problems.
Repeat the test a few times to get an accurate idea of the drainage performance. If water drains sluggishly or unevenly, it could indicate a clog or installation issue affecting flow.
Inspecting For Leaks
To ensure your kitchen sink drain works properly, carefully inspect it for leaks. Start by running water through the drain and watching all joints and connections for any moisture.
Early leak detection helps prevent water damage and expensive repairs. Use a dry cloth to wipe potential leak spots and see if they get wet again.
Here’s a quick checklist to help you prevent leaks:
| Inspection Area | What to Look For |
|---|---|
| Drain Connections | Water droplets or dampness |
| P-Trap | Drips or signs of corrosion |
| Sink Flange | Moisture around the seal |
| Pipe Joints | Loose fittings or leaks |
| Water Flow | Steady drainage speed |
Verifying Proper Seal
Run water through your kitchen sink drain and watch closely to verify the seal is tight and effective. Ensuring seal integrity is key to preventing leaks and making sure everything works well in the long run.
Here’s how you can test your installation:
- Look at the drain connections for any water dripping or signs of moisture.
- Feel around the joints and seals for dampness to catch even small leaks.
- Check under the sink cabinet for puddles or water stains.
- Run water at different flow rates to test the seal under various pressures.
- Listen for any unusual sounds that might mean air or water is escaping.
If you see any leaks, tighten the connections or replace faulty seals right away. Confirming that the seal is good now can save you from costly repairs later and keep your sink draining properly.
Fix Leaks and Drainage Issues After Installation
Although you’ve completed the installation, you might still encounter leaks or slow drainage that need immediate attention. Start by inspecting all joints and connections carefully for drips or moisture to detect leaks.
Use troubleshooting techniques to identify common issues like loose fittings or improperly applied sealant. If you find leaks, apply sealant carefully around the affected areas to create a tight, waterproof barrier.
For slow drainage, check for clogs or improper pipe alignment that can disrupt water flow. Tightening connections or replacing damaged washers can often fix leaks effectively.
Drain maintenance is key—address these problems promptly to avoid bigger issues. You might also need to clear blockages or adjust pipe slopes to restore smooth water flow.
Taking preventive measures now helps ensure your kitchen sink drain functions well without recurring problems. Fixing leaks and drainage issues early saves time and keeps your plumbing in good shape.
Maintain Your Kitchen Sink Drain for Long-Term Use
To keep your kitchen sink drain running smoothly for the long haul, it’s a good idea to give it a regular clean and make sure debris doesn’t pile up. Just a few simple habits can make a big difference. For example, flushing it with hot water now and then helps clear out any buildup, and using a drain strainer can catch big pieces of food or grime before they cause a clog.
Regular Cleaning Tips
Keeping your kitchen sink drain clean is essential for preventing clogs and unpleasant odors. To keep your drain working smoothly, regular maintenance should be part of your routine.
Here are some simple tips to help you maintain a clean drain:
- Flush the drain with hot water weekly to dissolve grease buildup.
- Use a mixture of baking soda and vinegar once a month to break down residue.
- Remove and clean the drain stopper regularly to clear trapped debris.
- Avoid letting food scraps go down the drain to reduce buildup.
- Use a drain brush or flexible cleaning tool to reach inside the pipes.
Preventing Drain Clogs
Since drain clogs can disrupt your kitchen routine and lead to costly repairs, it’s important to take proactive steps to prevent them. Start by practicing good drain maintenance—avoid pouring grease, coffee grounds, and food scraps down the drain, as these often cause blockages. Use a drain strainer to catch debris and clean it regularly.
Once a week, flush your drain with hot water to help dissolve any buildup. You can also use a mixture of baking soda and vinegar to naturally break down residue. Avoid harsh chemical cleaners, which can damage your pipes over time.
Frequently Asked Questions
What Type of Sink Drain Is Best for a Farmhouse Sink?
For a farmhouse sink, you’ll want a drain size that’s at least 3.5 inches to handle larger debris and water flow efficiently.
Choose a drain with a sturdy, corrosion-resistant material like stainless steel or brass.
When installing, keep in mind tips like ensuring a proper seal to avoid leaks and using plumber’s putty for a tight fit.
This makes your drain durable and easy to maintain over time.
Can I Install a Kitchen Sink Drain Without Professional Plumbing Experience?
Yes, you can install a kitchen sink drain without professional plumbing experience if you’re comfortable with DIY projects. It’s doable with the right tools, clear instructions, and some patience.
Just remember to turn off the water supply first, follow step-by-step guides, and double-check all your connections for leaks. If you run into any issues or feel unsure, it’s a good idea to call in a professional to avoid costly mistakes.
How Do I Dispose of Old Drain Parts Responsibly?
You can sort, clean, and drop off your old drain parts at a local recycling center that accepts metal and plastic.
Look for drain recycling programs or eco-friendly disposal sites nearby. Avoid tossing parts in the trash to prevent environmental harm.
What Are Common Causes of Persistent Kitchen Sink Odors?
Persistent kitchen sink odors often come from food debris trapped in the drain or a clogged P-trap. You might also have buildup from grease or soap scum, which encourages bacteria growth.
To tackle this, focus on regular drain cleaning to remove gunk and prevent odors. Using odor prevention methods like pouring baking soda and vinegar down the drain or running hot water can keep your kitchen smelling fresh and clean.
Are There Eco-Friendly Materials for Kitchen Sink Drains?
If you want your kitchen sink drain to be a green warrior, you’ll love eco-friendly options like bamboo, recycled stainless steel, or biodegradable plastics. These sustainable materials help reduce your environmental footprint without sacrificing durability.
Choosing eco-friendly options isn’t just about fixing a drain. It’s about helping the planet breathe easier. So, go ahead and pick sustainable materials that match your values.
Keep your kitchen fresh and green with environmentally conscious choices.
Conclusion
Now that you’ve mastered installing your kitchen sink drain, you’re the captain steering clear of leaks and clogs. Like a well-oiled machine, your sink will flow smoothly, making daily chores a breeze.
Keep an eye on your connections and give them some TLC to ensure they stay strong. Regular checks can prevent future issues and keep everything working perfectly.
With these steps, you’re not just fixing pipes—you’re creating a hassle-free kitchen oasis that’ll serve you well for years to come. Your sink will be reliable, efficient, and ready for everyday use.