How to Make Omelette with Perfect Results: A Complete Guide for Beginners
A quick way to make an omelette that turns out fluffy and tender involves using 2 to 3 eggs, cooking them gently, and adding fillings once the eggs are mostly set. A good pan choice and proper cooking times help ensure your omelette slides onto the plate perfectly. Knowing how to make omelette at home lets you create a satisfying meal in under 10 minutes.
This advice suits anyone new to cooking eggs or looking for reliable steps to get consistent results. You’ll learn how to pick the right pan, prepare fillings, and cook eggs just right for a delicious, fluffy omelette every time.
Key Takeaways
- Use an 8-10 inch nonstick skillet with angled sides for easy folding and even cooking.
- Rest beaten eggs with salt for 15 minutes before cooking to improve tenderness and fluffiness.
- Cook eggs on medium heat until 75% set before adding fillings like cheese and herbs.
- Pre-cook all raw meat and vegetables to avoid undercooked fillings and excess moisture.
- Spread the eggs evenly in the pan once soft scrambled and gently press runny eggs for even setting.
- Cook the filled omelette for 1-2 minutes until mostly set but slightly soft in the center.
How to Make an Omelette Step-by-Step
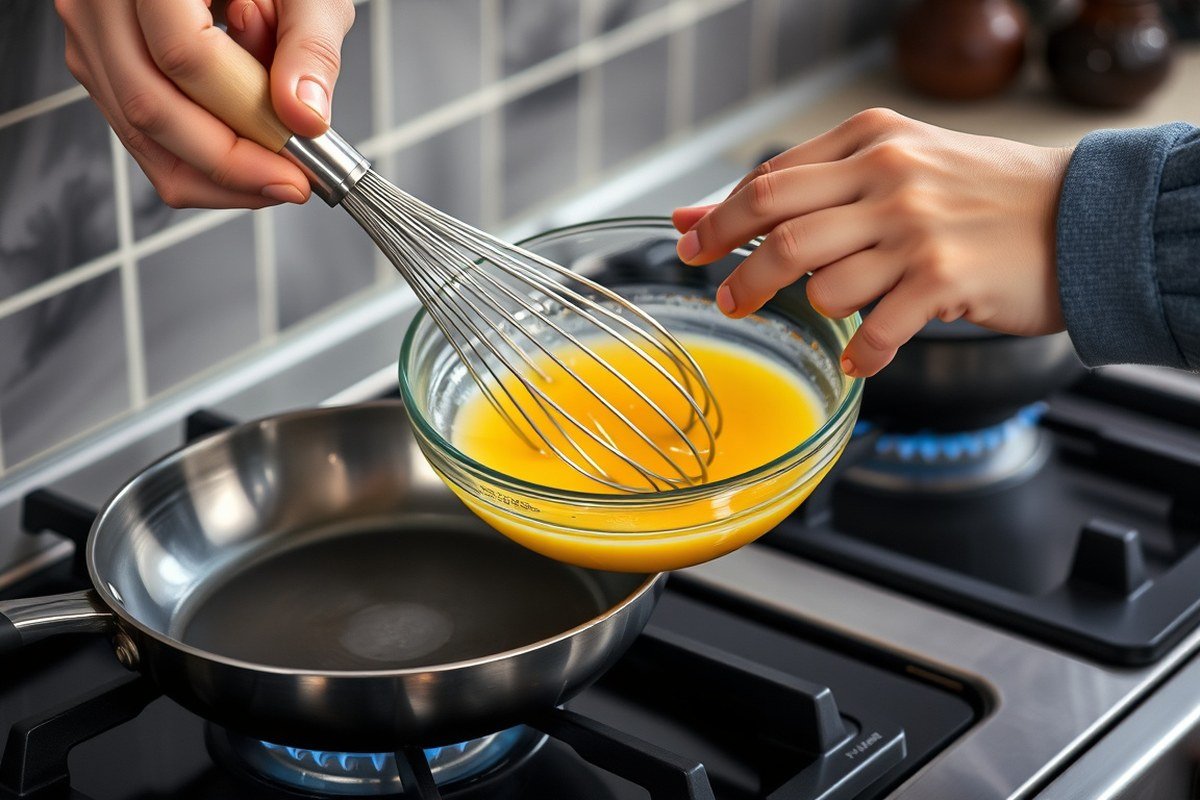
Making a basic omelette involves a few clear steps to ensure a fluffy texture and a perfect fold. Using 2 large eggs provides a good balance for an 8-inch pan, with about 1/4 to 1/2 cup of filling to keep the omelette light and easy to fold. Cooking it carefully at medium-low heat allows the eggs to set without burning while the fillings melt gently inside.
- Beat the eggs. Crack 2 large eggs into a bowl and whisk together with a pinch of salt, pepper, and a tablespoon of milk if you want a creamier texture. Whisk until the mixture is smooth and slightly frothy.
- Heat the pan and add butter. Place an 8-inch nonstick skillet over medium-low heat and melt about 1 teaspoon of butter. Swirl the pan to coat the bottom evenly, which helps prevent sticking.
- Pour in the eggs. Pour the beaten eggs into the pan and let them sit for about 15 seconds until the edges start to set. Then gently move the eggs with a spatula, pushing the cooked parts toward the center while letting the uncooked egg flow to the edges. Continue this for 1 to 2 minutes until most of the egg is set but the top remains a little wet.
- Add the filling. Arrange your chosen filling, such as cheese, cooked vegetables, or meats, down the middle of the omelette, using between 1/4 and 1/2 cup. Allow it to cook for an additional minute so the filling warms up and the cheese melts.
- Fold the omelette. Use a rubber spatula or fork to gently lift one edge while pushing the omelette toward the opposite side of the pan. Let the lifted edge fold over the filling so the omelette closes like a half-moon. This folding technique traps heat and finishes cooking the inside.
- Finish cooking under a lid. Cover the pan with a tight-fitting lid for 1 to 2 minutes on low heat to allow the steam to complete cooking the top and melt cheese. This step avoids overcooking while ensuring the inside is cooked through but still creamy.
- Plate your omelette. Use the spatula to slide the omelette gently onto a warm plate, folding to keep the shape intact. Serve immediately to enjoy the soft and fluffy texture at its best.
Keeping the heat medium-low and controlling the time carefully prevents overcooking, which can cause a dry or rubbery omelette. Avoid overfilling, as extra filling can make folding difficult and lead to tearing. Adjust the size of the egg batch and cooking time if using 3 eggs or larger pans. With practice, the folding motion will become smooth and the omelette will look neat and tender.
Choosing the Best Pan and Tools for Omelettes
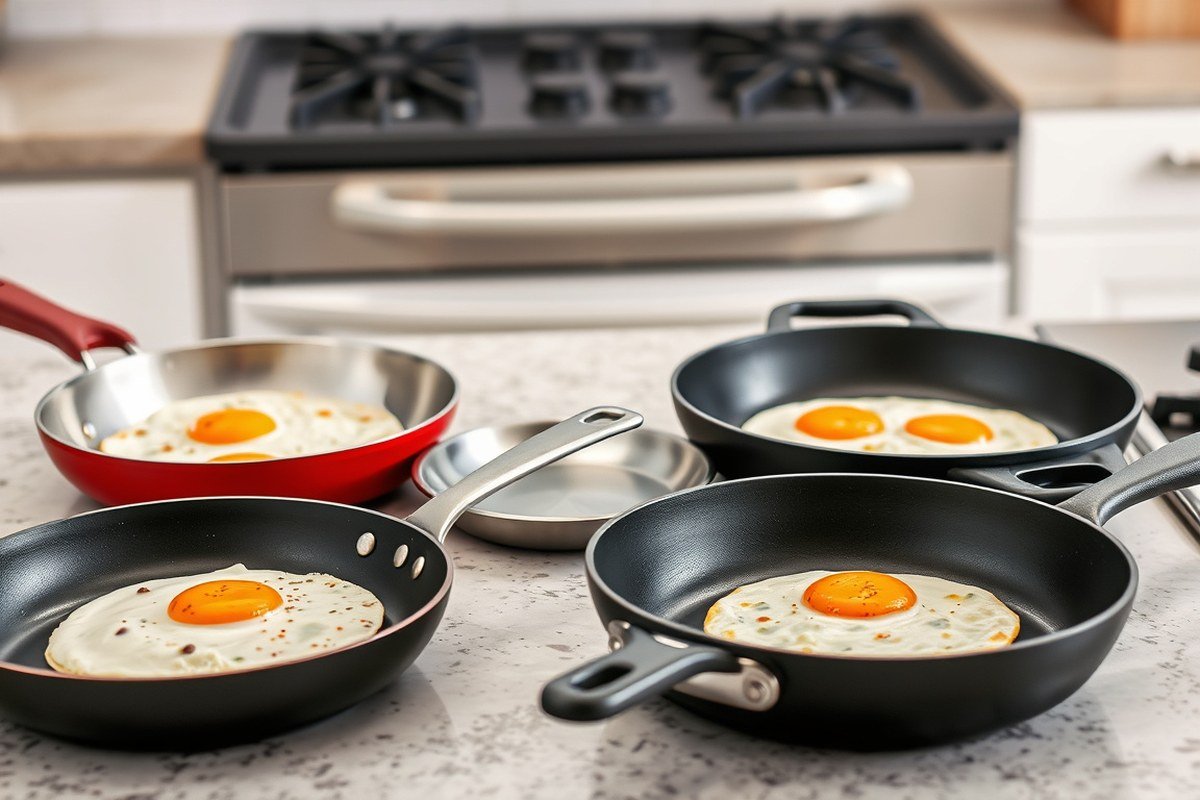
Choosing the right pan is essential for making a good omelette because eggs stick easily and cook unevenly if the heat is too high or the pan is wrong. A nonstick pan with a smooth surface will help eggs slide easily and form a nice, even base. For beginners, a 6- to 8-inch nonstick frying pan is ideal. Advanced cooks may prefer a 10-inch pan for larger omelettes, using 3 eggs to fill it just right. Avoid stainless steel or cast iron without nonstick coatings, as eggs tend to stick there without plenty of fat and careful technique.
Pan material impacts how evenly the omelette cooks. Nonstick pans typically have a coating like Teflon that reduces sticking and make flipping or folding the omelette easier. Preheating the pan on medium heat for about 2 minutes before adding oil or butter improves the cooking surface by expanding the metal and reducing porosity. This process creates a slick surface that further protects against sticking. Setting your stove to low heat prevents the bottom from cooking faster than the top.
Utensils also affect your omelette success. Use a silicone or rubber spatula. Metal ones can scratch your pan and cause sticking and damage. The spatula should be thin and flexible to slide easily under the delicate egg as you tilt the pan to let uncooked egg run underneath. The table below compares popular pan sizes and egg counts along with their best uses and temperatures.
| Pan Size | Egg Count | Best For | Recommended Heat |
|---|---|---|---|
| 6-inch | 2 eggs | Small, quick omelettes for one | Medium-low (low enough to prevent browning) |
| 8-inch | 2-3 eggs | Standard omelettes with moderate filling | Medium-low |
| 10-inch | 3 eggs | Large omelettes, more fillings, serving one or two | Low (to allow gentle cooking) |
Keeping your stove set to the lowest setting possible helps cook the omelette slowly, avoiding overcooked bottoms and undercooked tops. After flicking a little butter or cooking oil into your preheated pan, pour in the beaten eggs and tilt the pan as it cooks. Lift edges gently with your spatula to let the uncooked egg flow underneath. This technique avoids flipping the omelette entirely and keeps the texture soft and uniform.
Always use some fat like butter or oil even in a nonstick pan to prevent sticking and improve flavor.
Preparing and Cooking Fillings Safely and Deliciously
Preparing and cooking fillings properly prevents watery omelettes and ensures all ingredients taste great. Cook any raw meats or vegetables thoroughly before adding them to the eggs. Add fillings when the eggs are mostly set to avoid sogginess or undercooked spots.
Types of Popular Omelette Fillings
Meats like ham, bacon, smoked salmon, or cooked sausage add savory flavor and protein. Use cooked or pre-cooked meats to keep the omelette safe and evenly heated. Vegetables such as bell peppers, mushrooms, spinach, and onions work well when sautéed or roasted first, which releases moisture and prevents a watery texture. Cheeses like cheddar, Swiss, or feta melt nicely and complement both meats and vegetables.
Some people enjoy herbs like chives or parsley for fresh flavor, while others add tomatoes or avocado after cooking. The key is balancing the moisture level and cooking all fillings before adding to the omelette so they warm through without making the eggs runny.
Checklist for Safe and Flavorful Filling Prep
Follow these steps to properly prepare omelette fillings and avoid common pitfalls:
- Cook raw meats thoroughly to an internal temperature above 160°F for ground meats or 165°F for poultry.
- Sauté or roast vegetables until tender and most moisture evaporates, usually 5 to 10 minutes.
- Drain excess liquids from cooked vegetables to prevent sogginess.
- Cool cooked fillings slightly to room temperature before adding to eggs, especially meats.
- Add fillings only once the eggs are about 75% set but still slightly runny on top.
- Use a nonstick pan and a wooden or plastic utensil to avoid damaging the cooking surface or the omelette.
By following this checklist, you reduce the risk of undercooked fillings and watery eggs while keeping flavors balanced and textures appealing.
Portion Sizes and Timing for Fillings
For a 2 or 3 egg omelette, use about 1/3 to 1/2 cup total fillings. This amount strikes a good balance between flavor and texture without overloading the eggs. Too many fillings can make folding difficult and lead to uneven cooking or rupture.
Add fillings once the eggs have mostly set but the surface still looks slightly wet. This timing allows the fillings to warm through without overcooking the eggs. Fold the omelette carefully and cook another 30 seconds to 1 minute until the eggs are fully set with the fillings heated.
French vs. American Omelettes: Key Differences Explained
French and American omelettes differ mainly in texture, cooking technique, and presentation. French omelettes are smooth, tender, and lightly cooked without browning, while American omelettes are fully cooked with a golden crust and fluffy interior. These differences affect how you cook and fold the eggs, resulting in distinct eating experiences.
Texture and Ingredients
A French omelette has a soft, creamy texture with a barely set center that often oozes slightly when cut. It’s cooked gently and quickly, usually in about 3 to 4 minutes, without any browning. Traditionally, French omelettes contain just eggs and sometimes herbs but no milk or cream. In contrast, American omelettes include milk or cream in the beaten eggs, which adds fluffiness and richness. The fully cooked American style develops a golden crust and has a firmer, airy texture.
The inclusion of dairy in American omelettes thickens the egg mixture and helps achieve that characteristic fluffiness. French omelettes, lacking dairy, rely solely on careful heat control and stirring to achieve their delicate texture. The French style’s restraint in ingredients also keeps the flavor clean and focused on the eggs themselves.
Cooking Techniques
French omelettes start like scrambled eggs: eggs are beaten and poured into a hot, buttered pan. Instead of letting the eggs set fully, they are gently stirred and shaken to create small curds and a smooth texture. The cook lifts the edges as the eggs cook, but stops before browning. The omelette is then folded tightly, often in a tri-fold style, creating a neat package with a pale gold color and a smooth surface. Butter is sometimes added at the end for gloss and flavor.
American omelettes cook over medium heat until the bottom is golden and the eggs are mostly set. The edges are lifted with a spatula to let runny eggs flow underneath, encouraging fluffy, fully cooked layers. Fillings like cheese, vegetables, or meats are added on top before folding once or twice to enclose them. The result is a thicker, heartier dish with a textured, golden surface.
Folding and Presentation Differences
French omelettes are folded delicately into a tidy, oval or tri-fold shape. They emphasize finesse, subtlety, and simplicity, and don’t usually contain chunky fillings inside. Ingredients like finely chopped herbs or soft cheese can be scattered inside or on top, but the omelette itself remains smooth and uniform. Presentation is clean and understated, with no browned edges.
American omelettes are folded more casually, often in half or thirds to hold chunky fillings. This style embraces a more rustic, substantial appearance. The golden crust and visible fillings give it a satisfying look and texture. It’s typical to have fully cooked veggies, meats, and cheeses inside, making it a meal-sized dish rather than a light bite.
Choosing the Best Style for Beginners
American omelettes are generally easier for beginners because they allow more time and flexibility while cooking. Lifting edges and folding a thick, fluffy egg is forgiving and mistakes like slight browning or uneven cooking won’t ruin the dish. Fillings can be added liberally without worrying about delicate textures.
French omelettes require more precise timing and control of heat to avoid browning or overcooking. The stirring technique and tri-fold presentation may take practice to perfect. This style suits cooks interested in a refined experience and who want to master a gentle cooking method. Beginners might start with American style first before trying French.
How to Tell When Your Omelette Is Perfectly Cooked
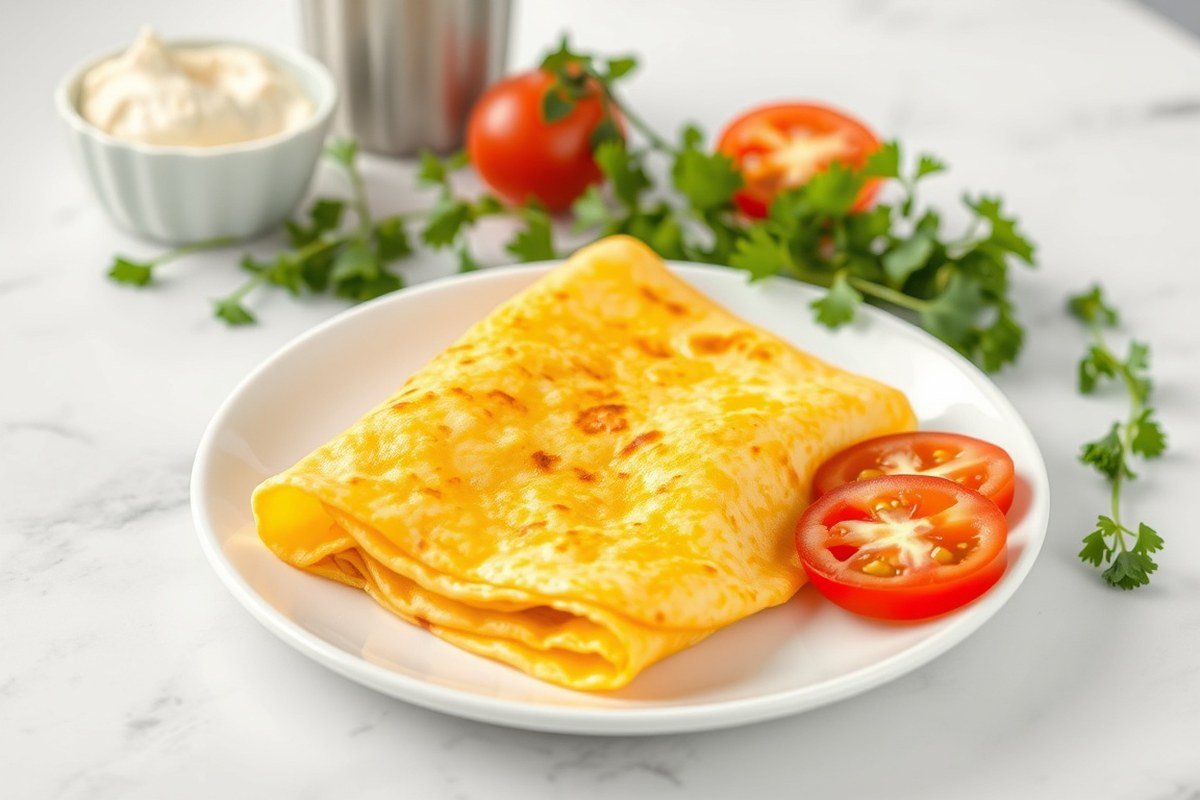
Your omelette is perfectly cooked when the eggs are set but still soft and slightly creamy on the surface. You’ll notice the edges begin to pull away from the pan, and the top loses its wet shine without becoming dry. Proper timing, moderate pan temperature, and knowing when to add fillings and fold help you spot this ideal doneness every time.
Visual and Texture Signs of Doneness
Look for a delicate balance of firmness and softness in your omelette. The edges should appear lightly golden and start lifting from the pan, signaling the eggs underneath have cooked through. The surface will lose most of its wet appearance but remain slightly glossy, this hints at creamy, tender eggs inside. If you see large bubbles or browning on the surface, the pan might be too hot or the omelette is overcooked.
Gently press the center with a spatula or your finger to check texture. It should feel set but still give inward slightly, like soft gel. This prevents the dryness and toughness of an overcooked omelette. Using a silicone spatula, carefully lift the edges and tilt the pan so uncooked eggs flow beneath, allowing even cooking without rushing the process.
Pan Temperature and Cooking Time
Cooking omelettes over medium-low heat is ideal. Higher heat can brown or toughen the eggs before the inside cooks, while lower heat may cause slow cooking and a rubbery texture. Your pan should feel warm enough that eggs begin to set in about 30 seconds but not so hot they sizzle aggressively. Most omelettes take around 45 to 60 seconds until just set but still tender.
Maintain steady, moderate heat and avoid flipping the omelette. This preserves a smooth surface and delicate consistency. Constantly moving the cooked edges inward and tilting the pan to spread liquid eggs helps control doneness evenly. Overcooking can start when the eggs go from glossy to matte and brittle.
When to Add Fillings and Fold
Add fillings when the eggs are mostly set but the top layer still looks slightly wet and soft. This gives the fillings enough time to warm inside without releasing moisture that could make your omelette soggy. Use about ¼ to ½ cup of fillings, depending on size, and spread them primarily on one side.
Fold the omelette once the edges are firm and you can easily slide a spatula beneath one half, covering the fillings. This moment usually occurs just before the eggs feel fully firm and still slightly creamy, around the 45 to 60-second mark. Folding too early can cause runny eggs and fillings falling out; too late, and the omelette may dry or break.
Adjustments for Different Situations
For larger omelettes or those with dense fillings like cooked mushrooms, sauté the fillings first to release moisture. This reduces sogginess and shortens time needed to warm the fillings inside the omelette. Thinner omelettes cooked in larger pans need more attention to edges, as they cook faster and fold less easily.
Leftover cooked vegetables can be added directly when the eggs are mostly set but still wet. For cheese and fresh herbs, add just before folding to keep their texture and flavor vibrant. Adding a small knob of butter at the end of cooking can improve gloss and richness, improving the omelette’s appearance and mouthfeel.
Watch the egg surface closely: fold your omelette as soon as the edges pull away and the center is just slightly wet to avoid dryness and maintain creamy texture.
Common Omelette Mistakes and How to Fix Them
Omelette sticking, tearing, overcooking, or undercooking are common issues that can frustrate any cook. These problems happen mainly because of heat control, pan choice, and handling techniques. Prevent sticking by using a good 8-inch nonstick skillet for a two-egg omelette and melting about 1 tablespoon of unsalted butter evenly before adding eggs. Butter acts as a barrier and helps the eggs slide out smoothly.
Overcooking usually makes the omelette dry and rubbery. Cooking over moderate heat is key because high heat can brown or burn the eggs quickly, causing them to stick and toughen. Cook the eggs slowly, allowing time for the center to set gently while the edges firm up. For a tender texture, avoid rushing this step and don’t turn the heat above medium.
Tearing happens when the omelette sticks or when the spatula used is too stiff. A rubber spatula will protect the delicate surface and prevent ripping the omelette while folding or flipping. When adding fillings, keep pieces small and evenly distributed so folds don’t strain and tear the eggs. Use gentle motions to slide under the omelette, lifting it carefully.
- Use an 8-inch nonstick skillet for 2 eggs or a 9-inch for 3 eggs
- Melt 1 tablespoon of unsalted butter before adding eggs
- Cook over medium heat, not high heat
- Beat eggs well for even cooking
- Use a rubber spatula to avoid tearing
- Keep filling pieces small and spread evenly
- Fold delicately and avoid rushing the process
Salvage a torn omelette by finishing it as a scramble right in the pan or by folding the broken pieces carefully and serving them as an open omelette. You can add a little butter or cheese on top to mask minor imperfections. If it sticks badly, run a thin knife gently around the edges to loosen it before trying to lift.
Despite being simple and quick, making the perfect omelette depends on proper pan size, heat control, butter use, and gentle handling. Avoiding high temperatures and using the right tools save time and prevent frustration. These efforts pay off with tender, intact omelettes that slide easily onto your plate and hold their fillings well.
Making Omelettes Without Dairy and Special Diet Tips
Making an omelette without dairy is completely doable and still delicious. You can replace butter with oils like olive, avocado, or refined coconut oil, which have high smoke points and neutral or mild flavors. These oils prevent sticking and help cook the eggs evenly without adding dairy. Choose an oil that complements your filling, for example, olive oil pairs well with Mediterranean vegetables, while avocado oil has a light taste that suits any combination.
To make a dairy-free liquid to mix with your eggs, unsweetened almond milk or coconut milk are good options. Use about one tablespoon of alternative milk for every two eggs to keep your omelette fluffy but avoid making the eggs watery or rubbery. These plant-based milks add moisture and tenderness, similar to what 2% milk or heavy cream would do without the dairy. Avoid sweetened or flavored milks, as they can change the dish’s taste.
Vegan omelettes require egg substitutes. Ingredients like chickpea flour, silken tofu, or commercial vegan egg replacers can be mixed with spices and non-dairy milk to mimic the texture of eggs. For instance, mix 1/4 cup chickpea flour with 1/4 cup water, a pinch of turmeric for color, and a little baking powder to create a batter. Cook it like a regular omelette, flipping carefully when the edges firm up. This method gives you a protein-rich base without animal products.
Don’t overheat the pan when cooking with oils or vegan bases: keep it on medium to medium-low heat to avoid burning and to cook evenly. Let the mixture sit without stirring for 2 to 3 minutes until the edges set, then gently lift and fold the omelette. Overcooking can make it dry or tough, especially without dairy fats. Cooking slowly helps maintain softness, even without butter’s natural creaminess.
Costs vary by ingredient choice. A bottle of olive oil might range from $8 to $15, avocado oil can be $10 to $20, while a carton of almond milk is typically $2 to $4. Chickpea flour costs about $4 to $6 per pound, which goes a long way. These prices are reasonable for the flexibility and dietary accommodation they provide. You can tailor the fats and liquids to suit your taste and health needs without sacrificing texture or flavor.
Making dairy-free or vegan omelettes may take some trial and error. When the omelette breaks apart, adding a bit more liquid or a small pinch of baking powder can help it bind better. Too oily or greasy omelettes can be fixed by using less fat or switching to a lighter oil. With attention to heat and ingredients, your dairy-free omelette can be tender, fluffy, and satisfying, just like a traditional one.
Storing, Reheating, and Serving Your Omelette
Store leftover omelettes by placing them in an airtight container and refrigerating within two hours of cooking to keep them safe. Cooked eggs will stay fresh in the fridge for up to 3 to 4 days. For longer storage, wrap the omelette tightly in plastic wrap or foil and place it in a freezer-safe container; frozen omelettes remain good for up to 3 months. Avoid storing omelettes at room temperature beyond two hours to prevent foodborne illness.
Reheat omelettes gently to prevent them from drying out or becoming rubbery. The best methods include using a microwave at 50% power in 20-second intervals, flipping the omelette halfway through, or warming it on a stovetop over low heat with a lid to retain moisture. Covering the pan and turning off the heat for about a minute once warmed can help melt any cheese fillings and heat the omelette evenly. Avoid high heat or prolonged reheating, which causes tough texture and moisture loss.
Pair your omelette with sides that add balance to the meal. Fresh fruit, whole-grain toast, or a light salad with vinaigrette complements eggs well and can provide fiber and vitamins. Roasted or sautéed vegetables, especially if used as fillings, can be served alongside to reinforce nutrients and flavor. For a heartier option, include a serving of crispy breakfast potatoes or avocado slices. Drinking tea, coffee, or a glass of wine according to the time of day can complete your dining experience.
Keep your refrigerator organized so leftovers cool quickly and stay safe. Label containers with the date to avoid eating spoiled food. When freezing, separate omelettes into meal-sized portions before wrapping to make defrosting and reheating more convenient. Defrost frozen omelettes in the refrigerator overnight for best texture. If in a hurry, use a microwave’s defrost setting but watch for uneven warming.
Always cool cooked omelettes to room temperature within two hours and store them promptly in the fridge to avoid bacteria growth that can cause food poisoning.
Step-by-Step Action Plan for Making Your Perfect Omelette
Follow these precise steps to make a fluffy and delicious omelette today. Each step ensures you build confidence and skill as you go.
- Before You Start: Gather your ingredients and tools, including a nonstick pan, spatula, and fresh eggs. This makes the cooking process smoother and prevents mistakes.
- Minute 1: Beat your eggs with a pinch of salt and pepper until the mixture is uniform and slightly frothy. This helps achieve a consistent texture and fluffiness.
- Minute 2-3: Heat your pan over medium-low heat and add a small amount of butter or oil, ensuring it coats the surface evenly. The right temperature avoids browning too fast or sticking.
- Minute 4: Pour the eggs into the pan and let them cook undisturbed for about 20 seconds until the edges start to set but the center is still runny. This timing creates the soft curd necessary for folding.
- Minute 5: Add your pre-cooked fillings evenly on one half of the omelette. Proper distribution ensures every bite has flavor without weighing it down.
- Minute 6: Use your spatula to gently fold the omelette in half and cook for an additional 30 seconds to 1 minute to melt cheese or warm fillings. Avoid overcooking to keep it tender.
- Minute 7: Slide the omelette onto a pre-warmed plate and serve immediately. The omelette should look lightly set, with no visible raw egg and remain moist but cooked through.
Frequently Asked Questions
How Long Should I Let My Eggs Rest After Adding Salt for a Tender Omelette?
Let eggs rest with salt for about 15 minutes to prevent yolk proteins from bonding tightly, which makes a fluffier omelette. This step helps create a tender texture without extra ingredients or complicated techniques.
What’s the Ideal Size Skillet for Making a 2-egg Omelette?
Choose an 8-inch nonstick pan for cooking a 2-egg omelette. This size ensures the eggs cook evenly and makes folding the omelette easier without it breaking or sticking.
Can I Make an Omelette Without Butter?
Yes, you can use oil or a nonstick pan to cook an omelette, but butter adds flavor and helps with browning. Choose one to suit your taste and dietary preferences.
How Do I Prevent My Omelette from Sticking to the Pan?
Use a quality nonstick skillet and add enough butter or oil to coat the pan evenly. Heating the pan before adding eggs also helps reduce sticking.
What’s the Easiest Way to Fold an Omelette Without Breaking It?
Use a spatula to gently lift one edge and fold it over the filling, then slide it onto a plate. Using angled skillet sides helps the omelette slide out smoothly.
Why Is My Omelette Watery on Top After Cooking?
Cook the omelette until the edges are firm and the top remains a bit moist but not liquid. Avoid overcooking and limit watery fillings to prevent sogginess.
The Bottom Line
Making a great omelette comes down to controlling heat, timing, and preparation. Start by mastering the simple steps today, and you’ll have a fluffy, tasty meal ready in minutes. Try making one tonight with your favorite fillings to build your skills.