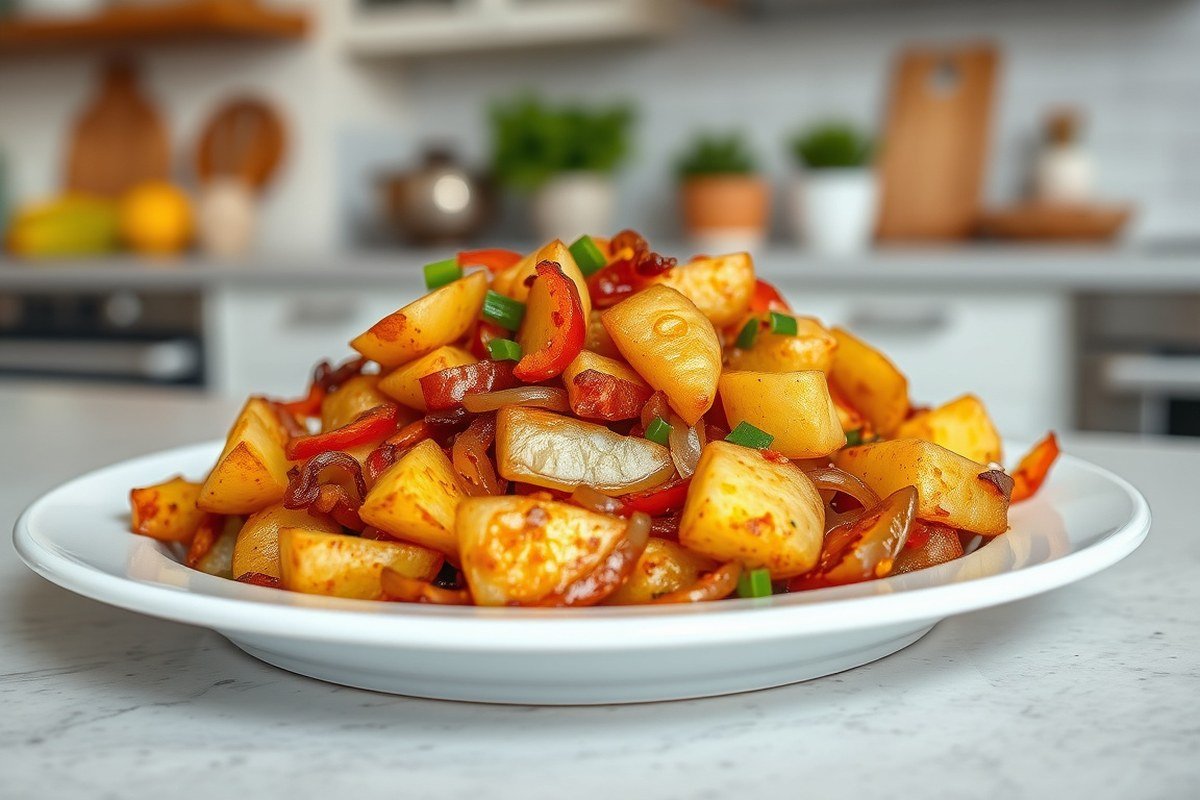
How to Make Breakfast Potatoes Perfectly Crispy with Easy Steps
To make breakfast potatoes perfectly crispy, start by parboiling diced potatoes, drying them well, and then frying without stirring for several minutes. Use a hot, oiled skillet to develop a golden crust before flipping the potatoes. This method locks in tenderness while creating a crispy exterior that many home cooks want.
This approach suits anyone looking to improve their breakfast potatoes, whether beginner or seasoned cook. You’ll learn how to choose potatoes, season them, employ different cooking techniques, and store leftover potatoes for quick reheats and make-ahead meals.
Key Takeaways
- Parboil diced potatoes until just tender, then steam dry before frying for a crisp crust.
- Use red potatoes cut into cubes just over ½-inch for ideal texture and browning.
- Spread potatoes evenly on a parchment-lined baking sheet and bake at 375°F for 10 minutes when using the oven.
- Fry potatoes in a hot, oiled skillet on medium-high heat, leaving them undisturbed for 3-5 minutes to form a crust.
- Store cut potatoes in an airtight container in the fridge up to 3 days to save prep time.
- Bake or broil potatoes until edges crisp, usually 45-60 minutes at roasting temperature or 3-4 minutes on broil.
How to Make Breakfast Potatoes Step by Step

Making breakfast potatoes with the perfect crispy crust and fluffy interior involves a few clear steps that balance prep and cooking time. Parboiling the potatoes first is key because it cooks the centers without browning the exterior, which helps the potatoes cook evenly and stay tender inside. After parboiling, letting the potatoes steam dry before frying ensures the oil doesn’t sputter and that the potatoes crisp up better. Proper heat management means starting with medium-high heat and letting the potatoes fry undisturbed for several minutes to develop that golden crust.
- Cut the potatoes: Cube your potatoes into roughly 1/2-inch pieces for even cooking. You can prepare and store the cubed potatoes in a covered container in the fridge for 2 to 3 days in advance, or keep them at room temperature in salted water for up to 4 hours before cooking.
- Parboil the potatoes: Place the cubed potatoes in a pot of salted water and bring to a boil. Let them cook for about 5 minutes until they are just tender but not fully cooked. This step softens the centers and shortens skillet cooking time.
- Drain and steam dry: Drain the potatoes well and let them sit in the colander for a few minutes, or return them to the hot pot off the heat to let excess moisture evaporate. Dry potatoes yield a better crust when frying.
- Heat the skillet: Preheat a dark, heavy skillet such as cast iron over medium-high heat and add enough oil to coat the bottom evenly. A hot pan ensures a good sear when the potatoes hit the oil.
- Add the potatoes and fry undisturbed: Spread the potatoes in a single layer and cook for 3 to 5 minutes without stirring. This allows the potatoes to develop a golden crust on one side.
- Flip and toss periodically: Stir or toss the potatoes every 2 to 3 minutes, cooking a total of 8 to 10 minutes, so all sides get crisp and browned. Adjust heat as needed; if potatoes brown too fast, lower the heat slightly to avoid burning.
- Season and finish cooking: Add your seasoning blend, herbs, or aromatics during the last minute to infuse flavor as they crisp. This short cooking time keeps the herbs fresh and improve the potatoes without burning them.
Choosing the Best Potatoes for Breakfast Potatoes
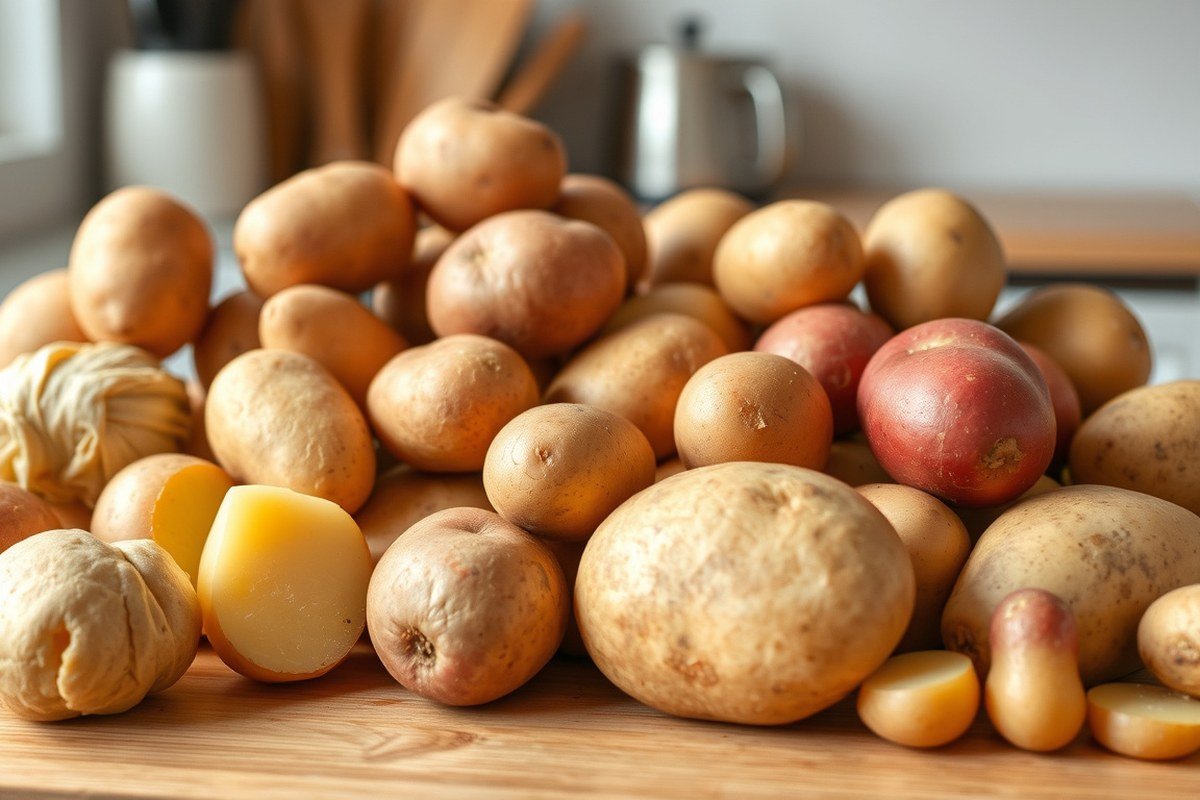
The best potatoes for breakfast potatoes balance a crispy exterior with a creamy, tender inside. Yukon Golds and red potatoes stand out for these qualities. The choice of potato affects your breakfast potatoes’ texture and flavor, and deciding whether to peel or leave skins on adds another layer of control over the final dish.
Popular Potato Varieties for Breakfast Potatoes
| Potato Variety | Texture and Flavor | Cooking Behavior | Pros | Cons |
|---|---|---|---|---|
| Yukon Gold | Buttery, creamy | Holds shape, crisps well | Rich taste, crispy outside, creamy inside | Slightly more expensive |
| Red Potatoes | Waxy, firm, slightly sweet | Retains shape, good crispness | Good for leaving skins on, holds together | Less fluffy inside |
| Russet Potatoes | Dry, fluffy | Breaks apart easily | Very crispy exterior | Can get mushy inside, skins rough |
| Sweet Potatoes | Sweet, moist | Tends to soften quickly | Unique flavor, colorful | Less crispy, cooks faster |
Yukon Gold potatoes provide a balanced texture that holds up well in both pan-frying and roasting. Red potatoes offer firmness and sweetness ideal for skin-on preparations. Russets create the crispiest crust but can become mushy if overcooked. Sweet potatoes bring a different taste profile but won’t crisp as firmly as traditional potatoes.
How Potato Varieties Affect Texture and Flavor
Texture in breakfast potatoes depends heavily on the potato’s starch content. Higher starch potatoes like russets produce fluffier interiors but can break down during cooking, which may make the potatoes lose their shape. Waxy potatoes such as reds hold their shape better but tend to be firmer and less fluffy. Yukon Golds fall in the middle, offering a creamy inside that resists turning mushy while still crisping nicely on the outside.
The flavor is influenced by the natural sugar content and moisture level, with Yukon Golds offering a subtle buttery taste and reds being slightly sweeter. Russets have a relatively neutral flavor but gain depth through seasoning and cooking method. Sweet potatoes stand apart with their distinctive sweetness, which complements savory spices differently than white potatoes.
Peeling vs. Leaving Skins On
Peeling potatoes for breakfast potatoes produces a smoother, more uniform texture and appearance. Removing skins ensures the crispiness forms evenly on the potato surface, resulting in a golden crust. Leaving skins on adds rustic texture and additional nutrients, including fiber and vitamins. Skins crisp up and contribute to the crunchiness, especially with red potatoes and Yukon Golds, which have thinner skins.
Peeling is recommended when you want a classic texture without any chewiness or roughness. Leaving skins on works well if you prefer a more natural, earthy bite or want to save prep time. For example, red potatoes with skins left on toast up nicely and hold their shape well, making them ideal for skillet breakfast potatoes. Make sure to scrub the potatoes thoroughly if you leave skins on to remove dirt and residues.
Choosing and Preparing Potatoes for Best Results
Select firm potatoes without green spots or sprouting eyes. For home cooks aiming for crispy, flavorful breakfast potatoes, cut the potatoes into small, uniform cubes about ½ inch to ensure even cooking. If you peel, do so carefully with a vegetable peeler to remove just the skin. When leaving skins on, scrub the potatoes with a stiff brush under running water.
After cutting, rinse the potato cubes briefly in cold water to get rid of excess starch, which improves crispiness. Pat them dry thoroughly with a kitchen towel before cooking to avoid sogginess. Parboil the potatoes for about 5 to 7 minutes if you want a soft interior and faster cooking, but avoid boiling too long or they may fall apart in the pan or skillet.
For the crispiest breakfast potatoes, dry your diced potatoes thoroughly and consider parboiling just until fork-tender but still firm, about 5 minutes for small cubes.
Essential Seasonings and Flavor Add-Ins
Seasonings and flavorful add-ins transform simple potatoes into delicious breakfast staples. A well-chosen combination of spices like garlic powder and smoked paprika, paired with onions and peppers, creates layers of taste and aroma. The key is knowing when and how to add each ingredient during cooking for full flavor and ideal texture.
Core Seasonings for Classic Flavor
Start with salt and black pepper to bring out the potatoes’ natural taste. Garlic powder and onion powder add a savory base that complements the crispiness. Smoked paprika introduces a subtle smoky note and a warm color, while a pinch of chili powder or cayenne pepper adds heat if you like spice.
For a balanced and flavorful crust on your breakfast potatoes, blend these seasonings before cooking. A typical ratio might be about 1 teaspoon each of garlic powder, onion powder, and paprika per 1.5 pounds of potatoes. Salt should be added generously, around 1 teaspoon kosher salt, to season throughout.
- Salt (kosher salt preferred for seasoning)
- Black pepper
- Garlic powder
- Onion powder
- Smoked paprika
- Chili powder or cayenne pepper (optional for heat)
Combining these spices with 2 tablespoons of olive oil helps the seasonings stick and promotes crisp edges when roasting or frying. Using too much salt early can draw moisture, so timing it right matters for texture.
Popular Vegetable Add-Ins and Preparation
Onions and bell peppers are common add-ins that bring sweetness and complexity. Slice onions thin or chop them finely to cook evenly with the potatoes. Bell peppers, whether green, red, or yellow, add color and mild tang. Minced garlic, added later in cooking, adds punch without burning.
Cooking the onions and peppers first softens them and mellows their flavors. Heat them with a bit of oil, stirring until onions become translucent and peppers soften, usually about 5 minutes. Add minced garlic toward the end of this step to avoid bitterness.
Layering Flavors During Cooking
Begin by coating potatoes with oil and your spice blend before placing them in the skillet or oven. The oil plus spices help create a crispy, flavorful crust as the potatoes cook. After the potatoes have started browning, usually around 10 minutes of roasting at 375°F or a few minutes in a hot skillet, add the softened onions and peppers to the pan. Incorporate the minced garlic here as well.
Stir ingredients together to distribute flavors and cook another 10 to 15 minutes until potatoes are golden and vegetables are tender. Adding salt and pepper at each stage improve the overall taste: sprinkle some on potatoes before cooking, then adjust seasoning when mixing in the onions and peppers. For maximum flavor, layering spices and vegetables throughout the cooking process prevents one flavor from overpowering another. Use the following sequence:
- Toss potatoes with olive oil and dry seasonings.
- Cook potatoes until partially browned and crispy.
- Sauté onions and peppers separately until soft.
- Add vegetables and garlic to potatoes, stir and continue cooking.
- Adjust salt, pepper, and a final dash of smoked paprika or cayenne if desired.
Comparing Cooking Methods for Breakfast Potatoes
You can prepare breakfast potatoes using three popular methods: skillet frying, oven roasting, and air frying. Each method offers unique benefits depending on how much time you have and the equipment you prefer. Skillet frying typically takes about 15 to 20 minutes, oven roasting requires 45 to 60 minutes, and air frying falls around 15 to 25 minutes.
Skillet frying gives you a chance to develop a deep golden crust by cooking the potatoes over medium heat with oil, leaving them undisturbed for 5 to 7 minutes at first. This method offers hands-on control for browning and flavor but needs constant attention to prevent burning. You can also add fresh herbs directly in the skillet to boost flavor.
Oven roasting is ideal for freeing up stove space and producing a golden, crispy exterior that keeps the potatoes creamy inside. Parboiling the potatoes first helps soften the inside before roasting. High oven temperature around 475°F near the end or briefly broiling the potatoes for 3 to 4 minutes intensifies crispiness. However, roasting takes significantly longer, so it’s better suited when you have more time.
Air frying concentrates high heat circulation for fast crisping and requires minimal attention like the skillet but with less oil. The quick cook time is convenient, and it easily reheats leftover potatoes at 400°F for about 10 minutes to regain crispiness.
| Method | Approximate Time | Typical Crispiness | Hands-On Attention | Equipment Needed |
|---|---|---|---|---|
| Skillet Frying | 15-20 minutes | High; golden crust developed by searing | High; requires stirring and monitoring | Stove, frying pan |
| Oven Roasting | 45-60 minutes | Very high; crispy edges, creamy centers | Low; occasional tossing needed | Oven, baking sheet |
| Air Fryer | 15-25 minutes | High; crisp exterior with less oil | Low; mostly unattended | Air fryer appliance |
Choose skillet frying if you want hands-on cooking and a quick finish with maximum browning control. Opt for oven roasting when preparing larger batches or multitasking, benefiting from its even crispiness and low maintenance. Use the air fryer for quick, easy cooking and reheating that still yields crispy results without much oil. Parboiling the potatoes before any method softens the interior and improves overall texture, making sure the potatoes cook evenly and turn out tender inside and crispy outside.
Tips for Getting Your Breakfast Potatoes Perfectly Crispy
Achieving perfectly crispy breakfast potatoes means balancing heat, timing, and handling. Start with the right temperature: medium to medium-high heat works best to brown the potatoes evenly without burning. Excessive heat can char the outside while leaving the insides raw. Aim for a temperature around 375°F (190°C) if roasting, or moderate stovetop heat if frying. Stir the potatoes regularly to expose all sides to the hot surface and allow moisture to escape, usually every 2 to 3 minutes when pan-frying or every 20 minutes when roasting on a sheet pan.
Using enough oil to coat the potatoes evenly is key. Too little oil, and the potatoes won’t get crispy; too much, and they become greasy. A tablespoon or two depending on quantity and pan size is a good rule of thumb. For consistent crispiness, make sure the potatoes are spread out in a single layer without crowding on the pan. When crowded, potatoes steam rather than brown, turning soggy instead of crispy.
- Overcrowding the pan causes steaming, fix by cooking in batches or using a larger pan.
- Using too high heat burns the exterior before potatoes cook inside; lower heat and cook longer.
- Skipping stirring leads to uneven browning; stir or shake the pan every 2, 3 minutes for pan-frying or every 20 minutes for roasting.
- Not using enough oil results in dull, dry potatoes; add a thin, even coating of oil before cooking.
- Cutting potatoes unevenly can cause some pieces to cook faster and burn; aim for uniform ½- to ¾-inch cubes.
- Starting with wet potatoes causes steaming; dry thoroughly after washing or parboiling.
Checking for perfect crispiness involves a few indicators: golden-brown color, a crunchy exterior you can hear or feel, and a soft interior when pierced with a fork. Avoid relying just on cooking time, since potato thickness and pan type affect results. Your potatoes may need a bit more heat and frequent stirring if they stay soggy beyond the usual cooking time. For potatoes that burn too quickly, reduce the temperature and stir more to prevent hot spots.
Let the potatoes cook uncovered to allow moisture to evaporate; covering traps steam and softens them.
Adapt your technique according to your cooking method. Oven roasting requires shaking the pan or turning the potatoes with a spatula every 20 minutes to achieve a crisp, golden texture, while on the stovetop, flipping or shaking every 2 to 3 minutes helps brown them evenly. Letting the potatoes sit off the heat for a few minutes before serving helps moisture escape and makes the crust firmer.
Storing, Reheating, and Making Breakfast Potatoes Ahead
Place cooked breakfast potatoes in a sealed container and refrigerate them within two hours after cooking. This practice slows bacterial growth and preserves the potatoes for up to three or four days. Allow the potatoes to cool fully before closing the container to prevent moisture buildup that leads to sogginess. Do not keep the potatoes at room temperature longer than two hours to reduce the chance of foodborne illness.
Reheating breakfast potatoes so they regain crispiness works best in an oven or air fryer. Preheat your oven to 400°F (205°C). Spread the potatoes in a single layer on a baking sheet lined with parchment paper or foil. Bake for about 10 to 15 minutes, flipping once halfway through, until they’re hot and crisp. Adding just a teaspoon of oil or a small pat of butter to the pan before reheating can help restore their golden crust without making them greasy.
Using an air fryer temperatures set to 375°F (190°C) is even quicker. Spread the potatoes in the basket without overcrowding, heat them for 5 to 8 minutes, shaking the basket halfway through for even crispiness. This method often revives their crunchy edges better than the microwave, which tends to soften them. Avoid reheating in the microwave unless you’re in a hurry; it will heat the potatoes but leave them mushy.
Breakfast potatoes can be made ahead to save time on busy mornings. You can peel and dice raw potatoes up to a day in advance. Store them submerged in cold water in a covered bowl in the fridge to prevent browning. Drain and dry thoroughly before cooking. This prep step helps the cooking process go faster and keeps the potatoes looking fresh. Once cooked, refrigerate leftovers promptly in airtight containers.
Freezing breakfast potatoes is possible but may impact their texture. To freeze, cool cooked potatoes completely and place them in a freezer-safe container or bag. Remove as much air as possible before sealing. Label with the date and use within one to two months for best quality. When ready to reheat, thaw overnight in the fridge, then crisp up in the oven or air fryer as described. Frozen potatoes often lose some of their original crunch because ice crystals break down the potato cells.
Incorporating Vegetables and Customizations
You can easily add vegetables and other ingredients to your breakfast potatoes to boost flavor and nutrition. Adding items like onions, peppers, garlic, or fresh herbs changes the dish’s taste and texture, but timing matters to avoid overcooked or soggy results. Understanding when and how to mix these ingredients ensures a well-balanced, crispy, and flavorful outcome.
Best Vegetables to Add
Onions, bell peppers, and garlic are popular choices to mix with breakfast potatoes because they cook within the same time frame and add complementary flavors. Diced onions bring sweetness and a bit of crunch, while bell peppers add color and a mild, fresh taste. Garlic should be finely chopped so it releases flavor without burning. Adding fresh herbs like rosemary, thyme, or parsley at the end brightens the dish with aromatic notes.
You can also experiment with other vegetables following the same principles, but some denser options like carrots or zucchini might need different cooking times to avoid being under- or overdone. For example, mushrooms can add umami but release moisture, so use them sparingly to keep potatoes crispy.
Timing Add-Ins for Even Cooking
Add potatoes to a hot pan with your chosen fat, olive oil or rendered bacon fat works well, to get a crispy base. Cook potatoes for about 10 minutes, stirring occasionally, until they start to brown but aren’t fully tender. Then add harder vegetables like diced onions and red bell peppers, which need around 7 to 10 minutes to soften and caramelize without turning mushy.
Minced garlic should go in last, in the final 1 to 2 minutes, because it cooks quickly and can burn, causing bitterness. Add fresh herbs right before serving to keep their flavor bright. Avoid overcrowding the pan because vegetables will steam instead of crisping up.
- Start potatoes in hot fat, cook 10 minutes until lightly browned
- Add onions and bell peppers, cook 7 to 10 more minutes
- Stir in garlic during last 1 to 2 minutes
- Add fresh herbs off heat just before serving
- Don’t overcrowd pan to ensure crispiness
Keeping this timing lets each ingredient cook properly while preserving crisp texture and balanced flavors.
Dietary Adaptations and Variations
Adjusting fat types can easily modify dietary preferences. Use olive oil or avocado oil for a heart-healthy, vegan-friendly option. Avoid butter and bacon fat if seeking low-fat or plant-based dishes, but keep in mind these fats also help potatoes crisp well. Spraying or lightly brushing oil can reduce calories compared to pouring.
For vegan variations, skip cheese or use plant-based cheese alternatives. To keep it low-carb, limit the starchy potatoes and add more non-starchy veggies such as zucchini or mushrooms, adjusting cooking times as needed. Spice blends and fresh herbs also provide powerful flavor without added fat or calories.
- Use olive or avocado oil for vegan and low-fat cooking
- Replace cheese with plant-based alternatives
- Add more non-starchy vegetables for lower carbs
- Limit heavy fats to maintain crispiness with less oil
- Use fresh herbs and spices to improve flavor without added calories
These simple swaps maintain great texture and taste while fitting different dietary needs. Always monitor cooking times closely, especially when changing vegetables or fats, to keep the desired crispness and flavor balance.
Essential Equipment and Safety Tips
To make breakfast potatoes, you’ll need a few essential tools to ensure success and safety. A heavy-bottomed skillet, preferably cast iron or stainless steel, works best for even heating and crisping. A sturdy spatula helps you turn and toss the potatoes without breaking them. You’ll also need a sharp knife and a cutting board to cut the potatoes into even 1/2-inch cubes for consistent cooking. For parboiling or steaming, a medium-sized pot with a lid is necessary to bring water to a rolling boil and steam the potatoes efficiently. Paper towels or a clean kitchen towel are useful for drying the potatoes after rinsing to avoid extra steam during frying. Measuring spoons help control the oil amount; typically, use about 3 tablespoons of oil or butter for flavor and crispness, but you can reduce to 1 tablespoon for a lighter version or use an oil spray.
Handling hot oil and steam requires careful attention to avoid burns or accidents. Always heat the skillet over medium-high heat before adding oil or potatoes so the oil reaches the right temperature quickly, around 350°F (175°C). This prevents the potatoes from absorbing excess oil and becoming soggy. Avoid overcrowding the pan because it lowers the temperature and causes steaming rather than frying. When adding potatoes to hot oil, gently place them in the pan to prevent splatter. Keep the pan lid handy to cover the skillet for steam softening, but tilt the lid slightly or remove it carefully to allow steam to escape safely and prevent condensation from dripping back into the pan. Use oven mitts or potholders when handling hot pans or lids to protect your hands from burns.
Steaming potatoes on the stovetop means working with boiling water and steam, both of which can cause serious burns. Use a pot with a secure lid and make sure it’s stable on the burner. Steam the potatoes covered for about 6 to 10 minutes in a pot or for 3 to 4 minutes in a covered skillet to soften before crisping. When lifting the lid, tilt it away from you to direct hot steam safely away from your face and hands. Allow the potatoes to drain thoroughly after steaming to prevent oil splatter when frying. Also, dry them well with paper towels to reduce moisture. Moisture causes oil to pop, which can be painful and dangerous.
For oven roasting breakfast potatoes, you’ll need a rimmed baking sheet lined with parchment paper or a silicone mat for easy cleanup and even cooking. Use oven mitts when placing or removing the hot tray from the oven at temperatures typically between 400°F and 425°F (200-220°C). Preheat the oven before adding the potatoes for even cooking. Monitor potatoes closely toward the end of cooking to prevent burning.
Always dry potatoes thoroughly after rinsing or steaming to avoid dangerous oil splatters during frying and keep the cooking area clear of clutter to prevent accidents.
Step-by-Step Action Plan for Crispy Breakfast Potatoes
Follow these steps to make perfectly crispy and flavorful breakfast potatoes starting today.
- Before Cooking: Choose Yukon Gold or Russet potatoes, as they crisp well and hold their shape. You’ll know you picked right if the potatoes feel firm and have no green spots.
- Preparation (10 minutes): Wash and dice potatoes into evenly sized cubes about ½ inch thick. Uniform size ensures even cooking and crispiness.
- Pre-Cooking Soak (Optional, 30 minutes): Soak potato cubes in cold water to remove excess starch. Clear water after soaking means starch is reduced, helping extra crispiness.
- Cooking Phase (15, 20 minutes): Use a large skillet with a mix of oil and butter over medium-high heat. Cook without crowding the pan, turning occasionally for even browning.
- Seasoning (During Cooking): Add salt, black pepper, paprika, and finely chopped onions or bell peppers halfway through cooking. Taste after a few minutes to adjust seasoning.
- Final Crisping (Last 5 minutes): Increase heat slightly and stir gently to form a crunchy crust. You’ll see golden-brown edges when potatoes are ready.
- Serving Immediately: Serve hot to enjoy the maximum crisp texture; cold potatoes will soften quickly.
Frequently Asked Questions
Can You Make Breakfast Potatoes in an Air Fryer?
Yes, air fry diced potatoes tossed in oil at 375°F for about 15-20 minutes, shaking halfway to crisp evenly. It gives a similar crunch to pan-frying but uses less oil.
Should I Soak Potatoes Before Cooking Breakfast Potatoes?
Soaking is optional but helps remove some starch and can make potatoes crisper after frying. Pat them dry thoroughly to avoid oil splatters.
What’s the Best Oil for Cooking Breakfast Potatoes?
Use oils with a high smoke point like canola, vegetable, or avocado oil to prevent burning and create crispiness. Avoid extra virgin olive oil as it burns quickly.
Can I Use Frozen Potatoes Directly for Breakfast Potatoes?
Thaw frozen potatoes first and pat dry before cooking. Cooking them frozen tends to result in soggy potatoes that don’t crisp well.
How Do I Avoid Soggy Breakfast Potatoes?
Dry potatoes completely before cooking and don’t stir them for the first 3-5 minutes in the pan to develop a crust. This helps them stay crispy outside and tender inside.
Are Breakfast Potatoes Healthy to Eat Daily?
They can be healthy when cooked with minimal oil and paired with veggies but watch portion size and oil amount. Frequent frying may add excess calories and fat.
The Bottom Line
Mastering breakfast potatoes depends on simple steps like proper potato choice, managing starch, and controlling heat. Start by prepping your potatoes tonight and giving the pan a good preheat. Your crispy breakfast potatoes will make every morning better.




5 Comments