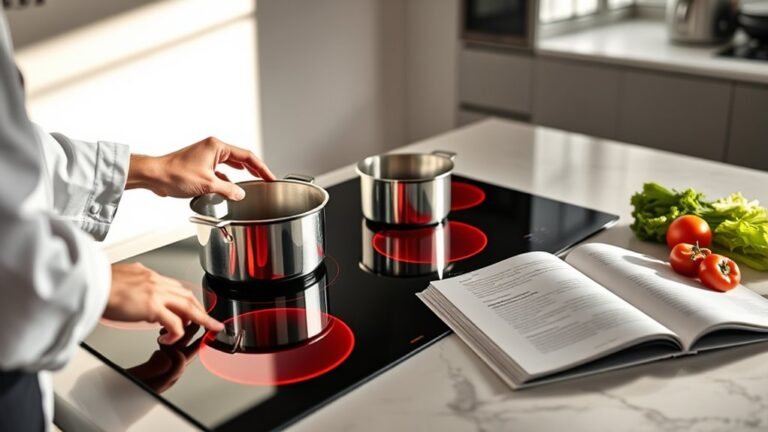
How to Cook Steak Perfectly Every Time: Expert Tips and Methods
To cook steak perfectly every time, choose the right cut and thickness, season it well, then use high heat for searing followed by precise temperature control to hit your desired doneness. Rest your steak before slicing to keep it juicy and tender. These steps help you get reliable, restaurant-quality results at home.
This advice suits home cooks of all skill levels seeking a foolproof approach to cooking steak. You’ll learn how to select cuts, season properly, control cooking heat and timing, and finish with perfect resting and slicing techniques for maximum flavor.
Key Takeaways
- Select a thicker steak, about 1 to 1.5 inches, for better control over medium-rare or medium doneness.
- Salt your steak at least 40 minutes before cooking to improve flavor and improve texture.
- Take the steak out of the fridge for 20-30 minutes before cooking for more even cooking results.
- Start by searing the steak in a hot pan for 2 to 3 minutes without moving it to develop a crust.
- Turn the steak every minute while cooking, aiming for about 6 minutes total for medium-rare.
- After cooking, rest your steak on a plate tented loosely with foil for at least 5 minutes before slicing.
How to Cook a Steak Perfectly Every Time
Cooking a steak perfectly every time requires following a clear, step-by-step process that covers preparation, cooking, and resting. Each phase plays an important role in achieving a flavorful, juicy steak with an even cook and a beautiful crust. Timing your seasoning, preheating your cooking surface, and allowing the steak to rest afterward are key to preventing dryness and ensuring your steak retains its natural juices.
Start by bringing the steak close to room temperature, seasoning it properly, and preparing your cooking setup. Pay close attention to cooking times and temperatures based on the steak’s thickness and desired doneness. Resting the steak after cooking allows the juices to redistribute, improving texture and flavour.
- Remove the steak from the refrigerator 30 to 40 minutes before cooking. This step helps the steak cook evenly by reducing the temperature difference between the cold meat and the hot pan or grill.
- Season the steak with salt at least 40 minutes before cooking, or right before. For best results, lightly salt and dry-brine your steak in advance to draw out moisture and intensify the flavor.
- Preheat your pan or grill until very hot. Use a heavy pan like cast iron or a preheated grill to create a strong, even sear on the steak. A hot surface ensures a good crust forms quickly without overcooking the interior.
- Cook the steak for about 6 minutes total for medium-rare doneness, turning every minute to sear all sides evenly. Adjust timing as needed based on thickness and preferred doneness. Use a thermometer if available (130, 135°F for medium-rare).
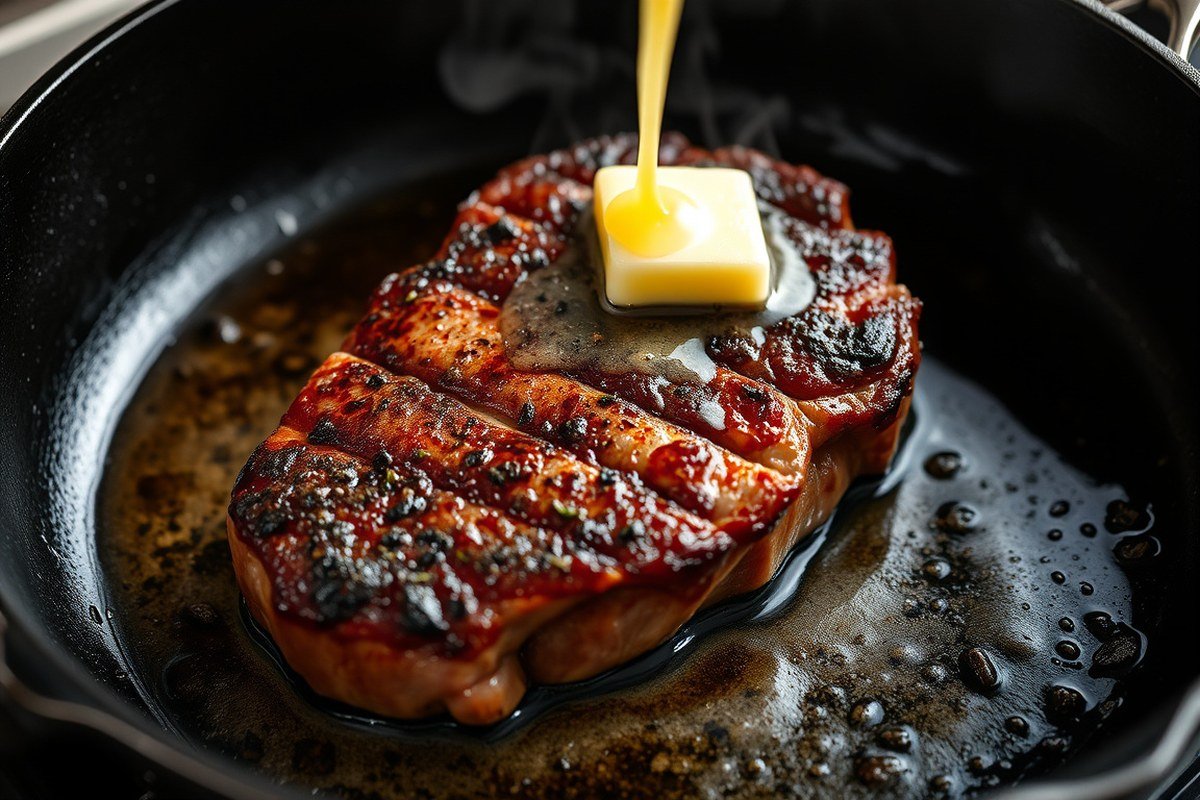
- During the last 4 to 5 minutes of cooking, add butter, fresh thyme, shallots, and garlic to the pan and baste the steak continuously. This finishing touch adds flavor and helps build a golden, tasty crust.
- Remove the steak from the heat and place it on a plate. Lightly cover it with foil to keep warm and let it rest for 5 to 10 minutes, roughly half of the cooking time. This resting period lets the juices settle and redistributes moisture throughout the steak.
- Slice the steak against the grain after resting. Cutting against the muscle fibers makes the steak more tender and easier to chew.
Choosing the Right Cut and Thickness for Best Results

Choosing the right cut and thickness is key for cooking steak perfectly. Different cuts vary in tenderness, fat content, and size, affecting how they respond to heat. Thickness changes how long you cook the steak to hit your desired doneness without drying it out or leaving it undercooked. Thinner steaks usually take 5-7 minutes to cook for medium rare, while thicker steaks (around 1.5 inch or 4 cm) can need 8-10 minutes or more, often benefiting from techniques like reverse searing.
Steaks like ribeye, strip, and filet mignon offer rich flavor and tender texture, making them popular choices for high-heat searing or grilling. Thicker cuts do well with methods that start low and finish hot, such as reverse searing in a low-temperature oven then a stovetop sear, giving even doneness throughout. Less tender cuts like flank or skirt steak perform better with quick, high-heat grilling or pan-searing and are best sliced thin against the grain after cooking.
| Steak Cut | Thickness | Ideal Cooking Method | Notes on Outcome |
|---|---|---|---|
| Ribeye | 1 to 1.5 inches | Searing, Grilling | High fat content, juicy with crusty exterior |
| Strip | 1 to 1.5 inches | Searing, Grilling | Firm but tender, great crust development |
| Filet Mignon | 1.5+ inches | Reverse Sear, Oven finishing | Very tender, benefits from gentle heat before sear |
| Flank Steak | 0.5 to 1 inch | Quick Grilling, Pan-Searing | Lean, should be thinly sliced after cooking |
| Sirloin | 1 to 1.5 inches | Searing, Grilling | Less fatty, good for medium heat cook and rest |
| New York Strip | 1 to 1.5 inches | Searing, Grilling | Good balance of flavor and tenderness |
Thicker steaks hold heat longer internally, so they need a slower initial cook to prevent the exterior from burning while the inside reaches the right temperature. The reverse sear is perfect here: start in a 250-275°F oven until the internal temperature is about 10-15°F below your target, then finish with a high-heat sear around 450°F for 1-2 minutes per side to build a crust. This method gives even cooking and a juicy interior.
Thinner steaks cook very quickly and are best seared or grilled over high heat for 2-3 minutes per side. Using a thermometer to check internal temperature is important. The steak will continue cooking after removal, rising another 5-10°F as it rests, which avoids overcooking.
Tip: Always let steaks rest at least 5 minutes after cooking to let juices redistribute, especially important for thicker cuts to keep them moist and flavorful.
Seasoning, Dry Brining, and Preparing Your Steak
Salting your steak at least 45 minutes before cooking gives it time to absorb the salt and develop a better crust. Removing the steak from the fridge about 30 minutes before cooking brings it close to room temperature, helping it cook evenly. Seasoning just prior to cooking after patting the steak dry ensures optimal browning and flavor.
Benefits of Dry Brining
Dry brining means salting your steak well ahead of cooking and letting it rest uncovered in the refrigerator. This process allows the salt to initially draw out moisture, which then dissolves the salt and is reabsorbed into the meat. The result is improved seasoning depth and a juicier steak.
Dry brining also tenderizes the steak by breaking down muscle proteins. Plus, the dry surface promotes a better Maillard reaction, giving you a richer crust. A minimum of 45 minutes for dry brining works well for steaks around 1 to 1.5 inches thick, but up to 24 hours in the fridge can improve flavor even more.
Timing Your Seasoning
Start by removing your steak from the refrigerator at least 45 minutes before you plan to cook it. Place it on a wire rack set over a sheet pan to allow air circulation. About 30 minutes before cooking, bring the steak to room temperature by simply leaving it out on your counter to reduce temperature shock and help it cook more evenly.
Pat the steak dry with paper towels to get rid of extra moisture before adding any seasoning. Excess moisture keeps the crust from forming properly. Right before cooking, sprinkle the steak with coarse salt and freshly ground black pepper. Adding pepper too soon can cause it to burn during cooking.
Oiling the Steak vs the Pan
Lightly oil the steak instead of the pan for a more even coating and better sear. Use an oil with a high smoke point, such as canola, grapeseed, or avocado oil, applying about 1 teaspoon per side. This thin layer helps heat transfer, prevents sticking, and contributes to the crust. Oiling the pan can also work, especially for a nonstick surface, but in cast iron or stainless steel skillets, oiling the steak ensures more direct contact with the hot surface, which improves crust development without excess smoke. Use the following checklist to prepare your steak for cooking:
- Remove the steak from the refrigerator 45 minutes before cooking and place it on a wire rack over a sheet pan.
- Let the steak rest at room temperature for about 30 minutes prior to cooking.
- Pat the steak dry thoroughly with paper towels.
- Lightly oil the steak using a high smoke point oil. Apply about 1 teaspoon per side, evenly coating both sides and edges.
- Season both sides with coarse salt and freshly ground black pepper just before cooking.
- Preheat your pan or grill to very hot for optimal searing.
Pan-Searing, Grilling, and Oven Finishing Explained
Pan-searing, grilling, and oven finishing each offer distinct ways to cook steak perfectly, depending on your equipment, cut, and desired doneness. Pan-searing is great for quick cooking and flavor development, grilling adds smoky char and suits outdoor cooking, and finishing in the oven helps reach precise doneness without overcooking the exterior.
Searing in a Cast Iron Skillet
Pan-searing lets you develop a rich crust and deep flavor by cooking steak at high heat on the stovetop. A cast iron skillet is ideal because it holds and distributes heat evenly, allowing you to sear without steaming. Choose quick-cooking cuts like NY strip, ribeye, or sirloin if you plan to cook solely on the skillet. Follow these steps for proper pan-searing:
- Preheat your cast iron skillet over medium-high heat for 5 minutes until it’s scorching hot.
- Pat the steak dry with paper towels to avoid steaming, then season both sides with salt and pepper.
- Add a small amount of high smoke point oil (like canola or grapeseed) to the pan and heat until shimmering.
- Place the steak in the pan without crowding; don’t move it once it’s down.
- Sear for 3, 4 minutes per side for a 1-inch thick steak aiming for medium-rare (130, 135°F internal temperature).
- Use tongs to sear the edges for 30 seconds to 1 minute each to render fat and add flavor.
- Take the steak off the heat and let it sit for 5 to 10 minutes before cutting to help the juices spread evenly.
Avoid pressing down on the steak or flipping repeatedly to ensure an even crust. Quick-cooking cuts perform best here because thicker or tougher cuts might need a gentler finish in the oven.
Grilling to Perfection
Grilling adds smoky flavor from open flames and high heat, making it a popular choice for steak. Setting up a two-zone fire, one side hot and one cooler, helps you get a perfect sear and then finish cooking without burning. The grill should reach around 450 to 500°F for searing. Follow these steps for grilling steak perfectly:
- Preheat your grill to 450, 500°F on the hot zone and 250, 300°F on the cooler zone.
- Pat the steak dry and season it with salt and pepper or your preferred steak seasoning.
- Place the steak on the hot side directly over the flame and sear for 2, 3 minutes per side to develop a crust.
- Move the steak to the cooler side of the grill and close the lid to finish cooking to your preferred doneness (about 4, 7 minutes depending on thickness and desired internal temperature).
- Turn the steak once halfway through the finishing time for even cooking.
- Remove the steak and rest for 5, 10 minutes before serving.
Grilling works well for nearly any cut, but thick cuts like ribeyes, porterhouses, or T-bones particularly benefit from this two-zone approach. Avoid opening the grill too often, as it drops the temperature and extends cook time.
Using an Oven Finish Method
Oven finishing works by starting the steak with a hot sear on the stovetop, then transferring it to a preheated oven to gently cook through. This method suits thicker cuts or when you want exact control over internal temperature without burning the crust. Follow these steps to finish steak in the oven:
- Preheat your oven to 400°F and heat a cast iron skillet over medium-high for 5 minutes.
- Pat the steak dry and season it well with salt and pepper.
- Add oil to the skillet and sear the steak for 2, 3 minutes per side until browned.
- Transfer the skillet with the steak to the preheated oven.
- Bake for 5, 10 minutes, depending on thickness and desired doneness (use a meat thermometer for 130, 135°F for medium-rare).
- Remove the skillet from the oven, transfer steak to a plate, and rest for 5, 10 minutes before slicing.
Oven finishing is especially useful for cuts over 1.5 inches thick or tougher steaks requiring uniform doneness. Avoid placing the steak in an oven that’s too hot, which can overcook the exterior before the center reaches temperature.
Using Temperature and Timing to Achieve Perfect Doneness
Using internal temperature to judge steak doneness is the most reliable way to achieve your desired results. Each level of doneness corresponds to a specific temperature range inside the steak reflecting how cooked it is from rare to well done. The key is to remove the steak from heat about 5°F (approximately 3°C) before it reaches the target temperature because of carryover cooking. This residual heat continues to cook the steak after it’s off the heat, bringing it to perfect doneness without overcooking.
Use an instant-read meat thermometer to get an accurate temperature reading. Push it into the thickest section of the steak, steering clear of bones or fatty areas that might skew the results. Plan to remove the steak from the heat a bit before it hits the desired temperature, then rest it for a minimum of 5 minutes. Resting helps the juices spread out evenly and the temperature to even out inside, making the steak more tender and juicy.
| Doneness | Target Internal Temperature (°F) | Target Internal Temperature (°C) |
|---|---|---|
| Rare | 120, 125 | 49, 52 |
| Medium-Rare | 130, 135 | 54, 57 |
| Medium | 140, 145 | 60, 63 |
| Well Done | 150+ | 66+ |
Because thinner steaks heat faster, the time window to check the internal temperature is shorter, making a thermometer even more necessary. For thicker cuts, you can rely a little more on timing and feel, but always confirm with a thermometer. Remove the steak from heat 5°F below your target; for example, if you want medium-rare at 130, 135°F, pull the steak at roughly 125°F. Carryover cooking will raise the temperature during resting to reach medium-rare perfectly without overcooking.
Using a thermometer prevents guesswork, always remove your steak from heat 5°F early to avoid dry, tough meat.
Following these steps ensures you hit the doneness you want every time. Checking temperature regularly with instant-read thermometers is affordable and quick, typically under $20, and it reduces the risk of overcooking. Letting the steak rest after cooking prevents loss of juices and allows the temperature to even out. Keep in mind, cooking times vary by steak thickness, heat source, and starting temperature, but targeting temperature with carryover cooking in mind delivers consistent, predictable results.
Resting, Slicing, and Serving Your Steak for Maximum Flavor
Resting your steak for 5 to 10 minutes after cooking is essential to keep it juicy and tender. Cutting into it too soon will cause flavorful juices to run out. Slice the steak against the grain to make each bite easier to chew, and plate it in a way that preserves those juices for maximum taste.
Why Resting Matters
Resting allows the juices, which move toward the meat’s surface during cooking, to redistribute evenly throughout the steak. This process keeps the meat moist and tender rather than dry or tough. The muscle fibers relax, holding onto more of their natural juices, so each bite stays flavorful.
Allow your steak to rest for 5 to 10 minutes depending on the size. Smaller cuts like a ribeye might need just 5 minutes, while larger cuts such as a Chateaubriand benefit from a full 10 minutes. Rest the steak on a warm plate to keep it hot, and cover it loosely with aluminum foil to prevent heat loss without trapping steam.
How to Slice Across the Grain
Identifying the grain of your steak, the direction of the muscle fibers, is key to achieving tenderness. Slicing against the grain means cutting perpendicular to these fibers, which shortens them and makes chewing easier.
Use a sharp knife and slice the steak thinly, about ¼ inch thick. This allows the meat to feel tender in your mouth without extra effort. For larger and thicker cuts like Picanha or Flat Iron, take your time to cut carefully and evenly for the best texture.
Serving Tips to Preserve Juices
Serving your steak properly helps you retain those precious juices and maintain flavor. Use a warm plate that can catch any juices as you transfer the sliced steak, preventing them from pooling on the cutting board or being lost. Follow these clear steps for resting, slicing, and serving your steak:
- Remove the steak from heat once it reaches your desired doneness.
- Place the steak on a warm plate or cutting board and loosely cover it with foil.
- Wait 5 to 10 minutes to let the juices redistribute and the meat fibers relax.
- Identify the grain by looking for long muscle fibers running in one direction.
- Using a sharp knife, slice the steak thinly against the grain at about a 90-degree angle.
- Arrange the slices neatly on a warm serving plate that can collect juices.
- Optionally, spoon some of the rested juices over the steak slices for extra flavor.
Common Steak Cooking Mistakes and How to Fix Them
One of the most common mistakes that causes a tough or dry steak is overcooking. Steak cooks quickly, and residual heat continues to cook it even after you remove it from the heat source, which can push it from medium rare to well done undesirably. To fix this, remove your steak from the pan or grill when it is 5 degrees below your target internal temperature. Use a meat thermometer to check, 130°F for medium rare, for example. Rest it for 5 to 10 minutes to let juices redistribute and finish cooking gently.
Undercooked steak is easier to fix but requires more care. Your steak may be underdone inside but have a good crust; finish it in a low oven at 250°F until it reaches the ideal temperature. This slow, even heat will bring it up to temperature without burning the outside. Avoid returning it to the pan or grill at high heat, as that may char the exterior.
Skipping preparation steps like seasoning or drying your steak’s surface can weaken flavor and crust formation. Always pat your steak dry with a paper towel before cooking, and season liberally with salt at least 40 minutes ahead for dry brining or just before cooking. This draws out moisture to help the Maillard reaction create a flavorful crust. Rubbing a halved garlic clove over the steak every time you turn it can add a subtle, complementary flavor without overpowering.
- Not letting steak rest after cooking causes juices to run out and dry meat; rest 5 to 10 minutes.
- Cooking steak at too low a temperature prevents a proper sear, resulting in a lack of crust and flavor.
- Turning steak too often cools the surface and stops browning; turn only once or twice.
- Seasoning too late or unevenly reduces flavor penetration; season ahead or just before cooking.
- Using a wet or oily surface on the steak keeps it from browning properly; pat dry first.
- Removing steak too early causes undercooked centre; use a thermometer to check internal temperature.
- Cooking only inside with gentle heat yields caramelization but no char; use direct high heat briefly for crust.
Your steak might miss the target crust or flavor; finish it by searing quickly on a very hot surface for 30 seconds per side after oven cooking. This generates the rich caramelized exterior that deepens flavor. Avoid cooking steak fully in an oven or at low heat only, since caramelization happens best at temperatures above 300°F on direct contact.
These practical fixes help you troubleshoot problems as they happen and adjust your technique live. Overcooking is most common but preventable by early removal and consistent use of a thermometer. Undercooking is correctable with finishing heat. Skipping prep steps reduces flavor and crust quality but is easy to fix with drying, seasoning, and occasional garlic rubs. Staying mindful during cooking keeps your steak tender, juicy, and flavorful every time.
Advanced Tips: Butter Basting, Reverse Sear, and Cooking from Frozen
Butter basting adds richness and flavor while helping develop a crispy crust on your steak. To do it, start by searing your steak in a hot pan with oil for about 2 minutes on each side. Then, add butter along with aromatics like fresh thyme, garlic, and shallots. As the butter melts, tilt the pan and spoon the butter over the steak repeatedly. This technique finishes cooking the steak gently and improve the crust and inner juices.
The reverse sear method is best for thick steaks, typically over 1.5 inches thick. It involves cooking the steak low and slow first, then finishing with a quick, high-heat sear for a crusty exterior. This gives evenly cooked meat from edge to center and a beautifully caramelized crust without overcooking the inside.
Cooking steak from frozen is possible and safe if done right. It takes longer than thawed steak because you need to allow the inside to cook through without burning the outside. Slowly cooking the steak in an oven or on low heat first, then finishing with a pan sear, works well to ensure even doneness. Follow these steps to butter baste, use the reverse sear method, and cook from frozen:
- Preheat your oven or a low-temperature grill to around 275°F for reverse searing or frozen steak cooking.
- Season your steak generously with salt and pepper and, if cooking from frozen, place it directly on a wire rack over a baking sheet.
- Slow-cook the steak in the oven or grill until it reaches about 10 to 15°F below your target doneness temperature (for medium-rare, aim for 115-120°F internal temperature).
- Heat a heavy skillet or cast iron pan on high and add a small amount of oil to coat the surface.
- Sear the steak for 1.5 to 2 minutes per side until a deep brown crust forms. For butter basting, add 2 tablespoons butter, 2 crushed garlic cloves, and a few sprigs of thyme or rosemary right after flipping.
- Tilt the pan and spoon melted butter repeatedly over the steak, especially during the last minute of cooking, to improve flavor and crust.
- Rest the steak for 5 to 10 minutes on a warm plate before slicing to allow juices to redistribute.
Tip: Avoid cooking frozen steak directly in a hot pan without pre-cooking; it can burn outside while the center remains raw.
Step-by-Step Action Plan to Cook Steak Perfectly
Follow these steps to nail every part of the steak-cooking process with confidence and consistency.
- Day Before or Morning Of: Season your steak generously with salt and let it rest uncovered in the fridge for at least one hour or overnight to dry brine. This helps tenderize the meat and deepen flavor.
- Before Cooking: Bring the steak to room temperature for 20 to 30 minutes to ensure even cooking without drying the outside. It should feel cool but not cold to the touch.
- Start Cooking: Preheat your pan or grill until very hot. For pan-searing, add a high smoke point oil; for grilling, clean and oil grates. You should see immediate sizzle on contact.
- During Cooking: Sear one side without moving the steak for 2 to 3 minutes until a golden crust forms. Flip and sear the other side similarly, adjusting time for thickness and desired doneness.
- Finishing Touch: If the steak is thick or not yet at the target temperature, move it to indirect heat or a preheated oven (around 375°F) and cook until it reaches your ideal internal temperature.
- Resting Period: Let the steak rest for 5 to 10 minutes on a warm plate, loosely tented with foil. The juices will redistribute, making it juicy and tender.
- Slicing and Serving: Slice steak against the grain in thin strips for the best texture. Serve immediately to enjoy peak flavor and juiciness.
- Extra Step (Optional): For rich flavor, spoon melted butter mixed with herbs and garlic over the steak during the last minute of searing or after cooking finishes.
Frequently Asked Questions
What Is the Best Internal Temperature for a Medium-Rare Steak?
Aim for 130°F to 135°F for medium-rare, ensuring juicy and tender meat without overcooking. Use a meat thermometer to check the temperature accurately.
How Long Should You Let a Steak Rest After Cooking?
Rest the steak for about 5 to 10 minutes to let juices redistribute, which keeps it moist and flavorful. Cover loosely with foil to maintain warmth during resting.
Can I Cook a Frozen Steak Without Thawing It First?
Yes, you can use the reverse sear method to cook a frozen steak evenly, starting in the oven and finishing on a hot pan or grill for a perfect crust.
What Is the Reverse Sear Method and Why Does It Work?
Reverse sear means cooking the steak slowly in the oven, then searing it in a hot pan for a flavorful crust. This method cooks the steak evenly every time.
Should I Season My Steak Before or After Cooking?
Season your steak before cooking, ideally dry brining it for at least 40 minutes to improve flavor and improve crust formation during searing.
How Can I Tell When a Steak Is Perfectly Cooked Without a Thermometer?
Use the finger test by comparing steak firmness to the fleshy base of your thumb to estimate doneness, but a thermometer is more reliable for precision.
Key Points to Remember
Cooking steak perfectly every time takes practice, but following precise steps with attention to temperature and timing makes a big difference. Start by mastering seasoning and timing with one favorite cut before trying advanced techniques. Enjoy experimenting and adjusting until you find what works best for your taste and setup.