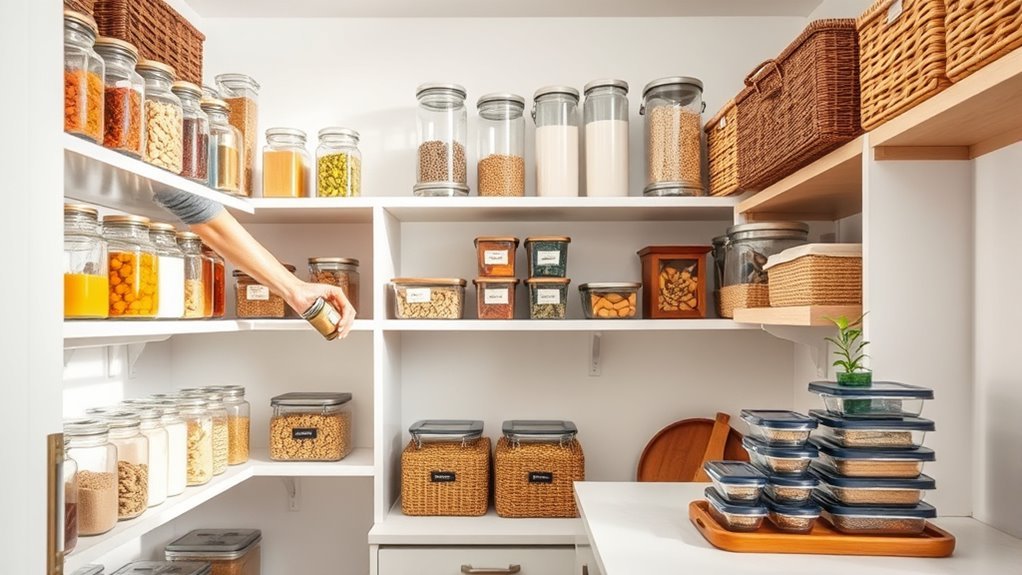
How to Organize Kitchen Pantry: A Step-by-Step Guide
Are you tired of digging through a cluttered, chaotic kitchen pantry every time you need something? You’re not alone—many people struggle with keeping their pantry organized and accessible. A well-organized pantry can save you time, reduce stress, and make cooking more enjoyable.
Start by taking stock of your pantry, noting what you have and what you need to restock. Empty everything out and clean shelves thoroughly, checking for expired items.
Next, sort your groceries into categories like canned goods, snacks, and baking supplies. Choose clear, labeled containers to keep items visible and organized. Create zones based on how often you use each item.
Finally, maintain your pantry with regular checks and simple habits. Keep going to uncover tips that make organizing easier and more efficient.
Key Takeaways
- Take a full inventory, discard expired items, and group similar foods to see what needs restocking or donating.
- Empty the pantry completely, give shelves and floors a thorough clean, and let everything air dry before restocking.
- Sort items into categories like grains, canned goods, and baking supplies. Keep frequently used items easy to reach.
- Use clear, labeled containers and create pantry zones based on food types and how you cook. This helps keep things streamlined.
- Check expiration dates regularly, clean shelves often, and adjust how you organize items based on how often you use them.
Take Stock Of Your Pantry And What You Need
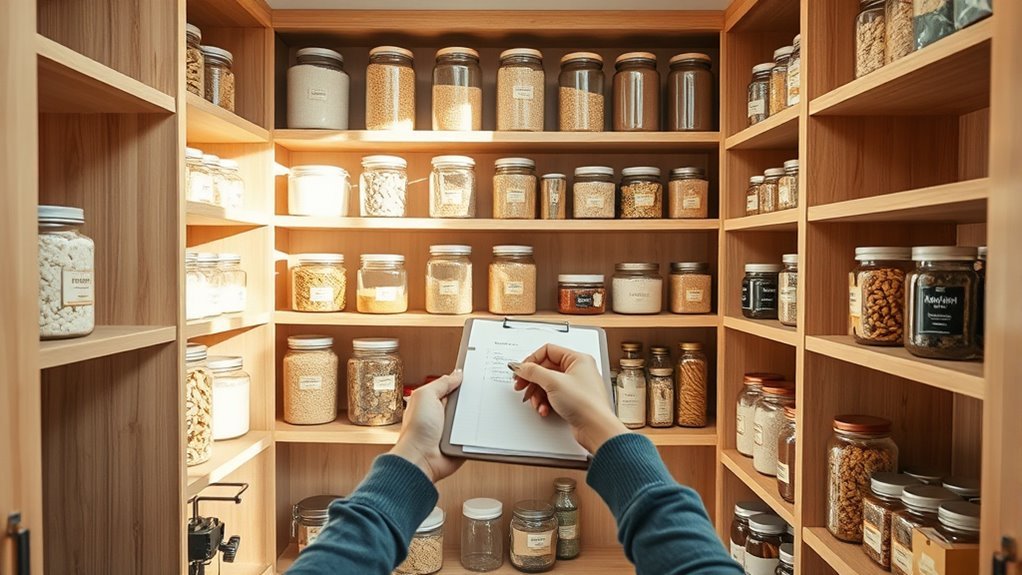
Before you start reorganizing, take a good look at your pantry and do a full inventory. This helps you see what you have, what’s expired, and what you’re running low on.
Group similar items together—like canned goods, baking supplies, snacks, and staples such as rice, pasta, and oils. While sorting, write down what needs to be replaced or restocked.
Knowing your essential staples means you won’t forget the basics when shopping next time. It also helps prevent buying duplicates, saving space and money.
Taking stock also shows you unused or forgotten items that you can donate or toss out later. This clear view of your pantry makes reorganization easier and more efficient.
Once you know what you have and need, you can plan storage solutions that fit your actual items. This makes your pantry more functional and easier to keep organized.
Empty And Clean Your Pantry Thoroughly
First things first, take everything out of your pantry so you can get a good look at the whole space. It’s a great way to see what you have and get ready for the cleaning.
Once it’s empty, give those shelves a thorough wipe-down to remove any crumbs, dust, or spills. While you’re at it, take a moment to check the expiration dates on all your items—anything that’s past its prime, go ahead and toss it out. Your pantry will feel fresh and organized in no time!
Remove All Pantry Items
Clear out every item from your pantry to get a fresh look at the space and see what you have. This step is key for pantry decluttering—removing everything helps you sort and evaluate items easily.
As you take things out, group them by type or expiration date. This makes planning storage solutions later much simpler.
Use sturdy bins or baskets to keep similar items together before reorganizing everything.
| Item Type | Quantity | Expiry Date |
|---|---|---|
| Canned Goods | 12 | 2025-03-01 |
| Baking Supplies | 8 | 2024-12-15 |
| Snacks | 15 | 2024-08-10 |
| Spices | 20 | 2026-01-20 |
| Pasta & Rice | 10 | 2025-06-05 |
Removing all items creates a clean slate for your next steps.
Deep Clean Shelves
Scrub every shelf and corner of your pantry to remove dust, crumbs, and spills that can attract pests or cause odors. Start by choosing cleaning supplies suitable for your shelf materials—wood, metal, or laminate—as each needs different care.
Use a mild detergent mixed with warm water and a soft cloth or sponge to avoid damage. For stubborn spots, a gentle scrub brush works well.
Don’t forget the pantry floor and walls; they often collect hidden debris. After cleaning, wipe shelves with a dry cloth to prevent moisture buildup that can lead to mold.
Allow everything to air dry completely before returning items. Taking the time to deep clean guarantees a fresh, hygienic space, making your pantry safer and more pleasant to organize.
Inspect For Expired Goods
Before you restock, take a moment to inspect every item in your pantry for expired or stale goods. Removing expired items is key to keeping your food safe and avoiding health issues. Start by checking dates on canned goods, dry foods, and spices.
Look out for signs of spoilage like strange odors or damaged packaging. If you find anything expired, toss it right away to prevent contamination. Items close to their expiration date can be set aside for quick use.
Don’t forget to clean the shelves again if you notice spills or residue. Regular checks help keep your pantry organized, safe, and ready for your next meal.
Sort And Categorize All Pantry Items
Once you’ve emptied your pantry, start sorting items into groups based on their type and use. This step is essential for creating clear pantry themes, like baking supplies, canned goods, snacks, and spices.
Grouping similar items together helps you see what you have and prevents duplicates. It also tackles common organization challenges head-on. As you sort, think about how often you use each category to decide where to place things later.
Be honest about what you’ll realistically keep and use. If you notice items that don’t fit any category or rarely get used, set them aside for donation or disposal. Sorting also shows how much space each group needs, making storage planning easier.
Choose The Right Storage Containers And Labels
When choosing storage containers, it’s important to pick ones made from durable materials that fit your pantry needs. Think about whether clear containers are better for you, so you can see what’s inside at a glance, or if opaque ones help keep everything looking neat and tidy.
And don’t forget about labels! Creating labels that are easy to read can make finding what you need a whole lot simpler — no more digging around or guessing.
Selecting Durable Container Materials
When choosing storage containers for your kitchen pantry, durability should be at the top of your list. You want containers that can handle daily use while keeping food fresh and safe.
Opt for materials like glass jars with airtight lids. They provide excellent food safety and resist stains or odors. Plus, eco-friendly options can help reduce waste and are easy to clean.
Focus on functionality by picking containers with stackable designs to make the most of your space. Look for size variations to fit different pantry items neatly. And consider color coding for quick identification and better organization.
Choosing Clear Versus Opaque
How do you decide between clear and opaque containers for your pantry? Clear containers let you see what’s inside, making it easier to spot items quickly. This boosts storage efficiency and helps reduce food waste.
They’re perfect if you want easy access and quick inventory checks. On the flip side, opaque containers can hide less attractive items and give your pantry a cleaner, uniform look. They also help protect food from light, which can keep certain foods fresher longer.
But consider that opaque containers might make it harder to see what’s inside at a glance. Budget is another factor—clear options often come in more affordable styles, while stylish opaque ones might cost more. Think about what’s most important to you and choose containers that fit your pantry needs best.
Designing Easy-to-Read Labels
Although choosing the right containers is important, designing easy-to-read labels helps you identify what’s inside quickly without opening every jar or box. Focus on creating labels that look good and are functional.
Pick a clear font to make sure the labels are easy to read. Keep the font size consistent across all labels for a uniform look. Use color coding to match your organization themes, making it easier to group similar items visually.
Don’t forget about the material. Choose labels that can handle spills and humidity in the kitchen. This way, your labels stay intact and readable over time.
To get your labeling system right, remember these key points:
- Use bold, simple fonts for quick recognition
- Apply color coding based on pantry categories
- Select durable materials that resist wear and tear
This approach keeps your pantry both stylish and highly functional.
Make The Most Of Vertical And Door Space
Maximizing vertical and door space can instantly boost your pantry’s storage. Start by installing tall shelves or stackable bins that make use of unused height. This way, you can store more without cluttering your counters or floors.
Next, add door racks inside your pantry door. They’re great for holding spices, snacks, or small bottles, freeing up shelf space for larger items. Choose adjustable racks so you can customize based on what you use most.
Remember to keep heavier items lower and lighter ones higher for safety and easy access. Using vertical storage and door racks wisely helps you find extra room for everything you need.
This simple step ensures you make the most of every inch, keeping your pantry organized and accessible.
Arrange Pantry Items By Frequency And Type
Start by organizing your pantry items based on how often you use them. Keep the everyday essentials—like coffee, sugar, or cooking oils—within easy reach so you don’t have to dig through everything every time. It’s all about making your routine smoother and more convenient.
Then, group your foods into clear categories such as baking supplies, snacks, canned goods, and cereals. This way, you can quickly find what you need without rummaging through piles of stuff. Having everything sorted by type makes your pantry look tidier and saves you time when you’re preparing meals or grabbing a quick snack.
Group Items By Usage
When you group pantry items by how often you use them and by their type, it becomes easier to find what you need quickly. Think about your cooking habits and meal prep routines to decide which items should be within reach.
Place kid-friendly snacks where kids can easily access them to encourage independence and make snack storage more efficient. Use clear containers and labels to improve visibility and keep things organized.
Focus on these areas to make the most of your space and boost efficiency:
- Store bulk and seasonal items separately to prevent clutter.
- Keep everyday essentials at the front for quick grabbing.
- Group items based on how often you use them to streamline meal prep.
This approach helps your pantry stay organized, functional, and tailored to your routine.
Separate By Food Categories
Although it might seem time-consuming at first, separating your pantry items by food categories makes it much easier to find what you need and keep everything orderly. Start by identifying your pantry essentials and grouping them by type and how often you use them.
This approach helps with better food preservation and reduces clutter, making your space more functional. Use a simple table like this to guide your sorting:
| Food Category | Example Items |
|---|---|
| Grains & Pasta | Rice, spaghetti |
| Canned Goods | Beans, tomatoes |
| Baking Supplies | Flour, baking powder |
Create Zones For Different Food Categories
Dividing your pantry into zones for different food categories helps you find items quickly and keeps everything orderly. When planning your pantry layout, think about how often you use each category and arrange zones accordingly to maximize food accessibility. This way, you’ll save time and reduce frustration when grabbing ingredients.
Start by grouping similar items together in designated areas, like baking supplies such as flour, sugar, and baking powder. You can also create a snack zone for chips, nuts, and granola bars, and a canned goods zone for soups, beans, and vegetables.
Assign zones based on your cooking habits and your pantry space. Keep frequently used items at eye level or within easy reach, while less-used foods can go higher or lower. This zoning approach makes your pantry more organized, so meal prep is smoother and cleanup is easier.
Use Clear Containers To See Everything At A Glance
Once you’ve set up clear zones in your pantry, the next step is to make sure you can easily spot what you need. Using clear containers boosts pantry visibility, allowing you to identify contents at a glance without opening each box or bag. This simple switch improves organization by reducing clutter and preventing expired items from hiding in the back.
Clear containers also enhance space efficiency. Their uniform shapes stack neatly, maximizing shelf room. Beyond practicality, their style adds to an inviting pantry, letting you choose looks that match your kitchen’s vibe.
These containers promote food freshness by sealing out air and moisture, keeping your ingredients longer. Plus, their easy accessibility means less time searching and more time cooking. Container versatility allows you to store anything from grains to snacks, making them a must-have for a well-organized pantry.
Switching to clear containers is a smart, stylish way to streamline your kitchen storage.
Maintain Pantry Organization With Regular Checks
To keep your pantry organized and efficient, make regular checks part of your routine. Doing so helps prevent clutter and expired items from piling up.
Here are some simple pantry maintenance tips to keep everything in top shape:
- Inspect expiration dates: Quickly spot and toss out any expired or soon-to-expire products to keep things fresh.
- Rearrange items: Move frequently used goods to the front and less-used ones to the back for easy access.
- Clean shelves: Wipe down surfaces regularly to avoid crumbs or spills that can attract pests and create messes.
Easy Habits To Keep Your Pantry Organized
Regular checks help you stay on top of your pantry’s condition, but developing easy daily habits will make organization second nature. Start by using inventory management to track pantry essentials so you avoid overbuying or letting items expire.
Incorporate meal prep routines that utilize what you already have, reducing waste and keeping your pantry functional. Use storage solutions and organization tools like clear containers and labeled bins to improve space and visibility.
Pay attention to shelf life by rotating older items to the front and bulk buying only what you can store properly. Establish simple weekly cleaning routines to maintain food preservation and prevent pests.
Frequently Asked Questions
How Do I Prevent Pests in My Pantry?
You prevent pests in your pantry by practicing good pest control and prioritizing food safety. Keep all food in airtight containers to block pests and reduce crumbs or spills that attract them.
Clean shelves regularly and check expiration dates to avoid spoiled items. Also, seal cracks or gaps where pests might enter.
What Are the Best Pantry Staples to Always Keep?
You know what they say: “Don’t put all your eggs in one basket.” For your pantry staples, keep versatile items like rice, pasta, canned beans, tomatoes, and spices. These essentials make meal prep easier and let you whip up a bunch of different dishes.
Also, practice food rotation by using older items first, so nothing goes to waste. Stock up on oils, flour, and dried herbs to round out your pantry efficiently.
How Can I Maximize Pantry Space in a Small Kitchen?
You can maximize pantry space in a small kitchen by using vertical storage and shelf dividers to create more usable areas. Clear containers and labeled bins help keep everything visible and tidy, so you don’t waste time searching.
Pull out drawers make accessing items in deep shelves much easier. Multi-purpose shelves also help you store different-sized items efficiently.
These strategies keep your pantry organized and make the most of every inch of space.
What Is the Ideal Temperature for Pantry Storage?
You probably thought your pantry could handle any temperature, right? Well, the ideal conditions for pantry storage are actually pretty specific.
You want to keep it cool, around 50-70°F, with low humidity to prevent mold and spoilage.
Too hot or too damp, and your snacks will throw a tantrum faster than you can say “expired.”
How Long Can Different Foods Be Stored Safely in the Pantry?
You can safely store canned goods in your pantry for about 1 to 5 years, depending on the item. Just be sure to check the expiration dates to stay safe.
Dry goods like pasta, rice, and flour usually last 1 to 2 years if kept sealed and dry. Nuts and seeds tend to stay good for about 6 months.
Make it a habit to regularly inspect your pantry and toss out anything past its expiration date. This way, you keep your food fresh and safe to eat.
Conclusion
Now that your pantry sparkles with order, imagine how easy it is to grab what you need without second-guessing. Shelves lined with clear containers, zones humming with harmony, and labels guiding your way—your kitchen feels lighter and brighter.
By keeping up simple habits and regular checks, you’ll enjoy this organized pantry every day. It’s all about making your space work for you, with everything in its right place.
So, take a step back, breathe in the fresh, tidy space, and savor the joy of a kitchen pantry that truly functions for you. Staying organized with your pantry ensures it stays a cheerful, efficient part of your home.