How to Season a Steak Perfectly: 8 Essential Steps for Rich Flavor
To season a steak perfectly, salt it generously between 1 and 24 hours before cooking to improve tenderness and flavor. Apply other seasonings just before cooking or about 30 to 40 minutes prior to let the salt work its magic inside the meat. This method helps your steak develop rich taste and a satisfying texture.
Whether you’re a beginner or advancing your steak skills, understanding how to season a steak can transform your cooking. This article offers clear, practical steps to boost flavor, choose the right seasonings, and time everything for the best results.
Key Takeaways
- Salt steak at least 40 minutes before cooking to allow salt to tenderize and season inside the meat.
- For steaks 1½ to 2 inches thick, use about 2 teaspoons of seasoning per side; for 1 inch or less, use 1 teaspoon.
- Season steaks just before cooking or 30 to 40 minutes ahead, avoiding seasoning right between these times.
- Let seasoned steaks rest uncovered on a wire rack in the fridge for 1 to 24 hours for maximum flavor.
- Hold your hand about 12 inches above the steak when sprinkling seasoning for an even layer.
- Letting the steak sit after salting draws moisture out and back in, seasoning deeper than the surface.
1. How to Season a Steak for Maximum Flavor
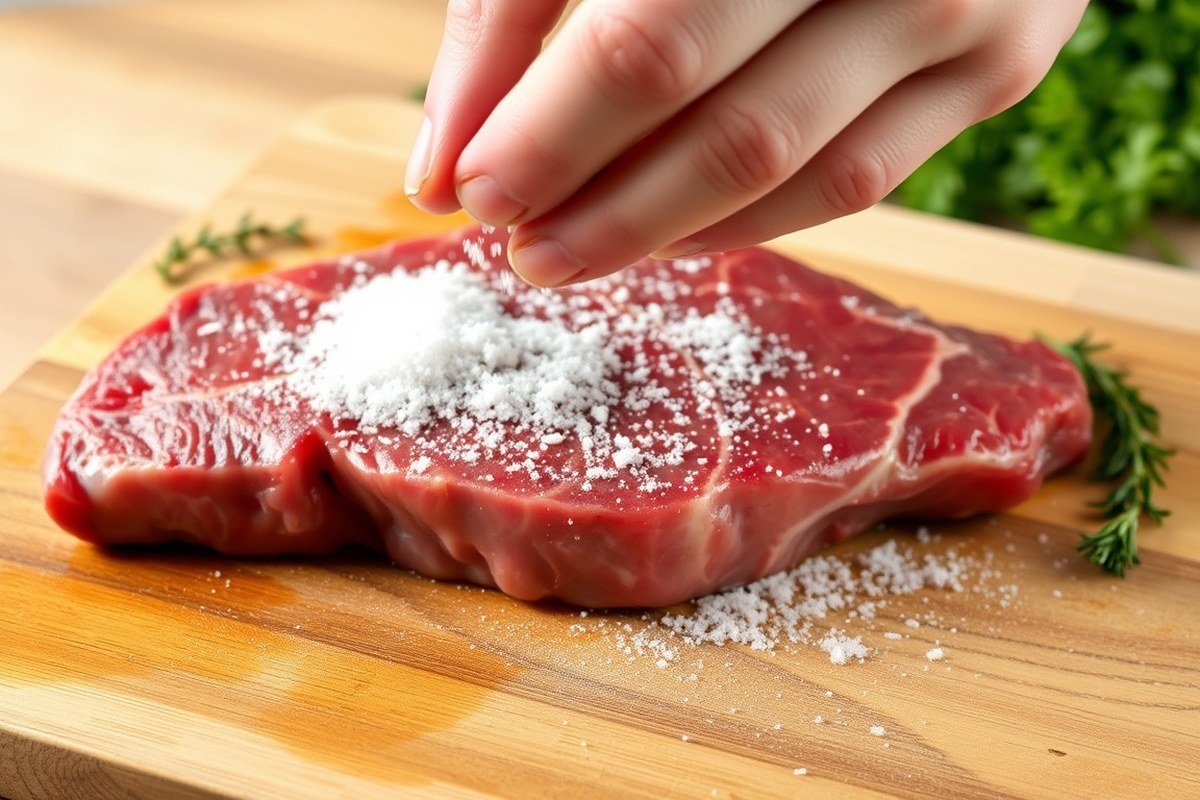
Seasoning a steak properly is key to unlocking its full flavor. Using kosher salt and freshly ground black pepper is a classic method that forms a delicious crust and highlights the meat’s natural taste. The main idea is to apply enough salt and pepper so you can see a distinct layer of seasoning that sticks well to the steak’s surface and edges.
For the right amount, use about ¾ to 1 teaspoon of kosher salt per pound of steak and ¼ teaspoon of freshly ground black pepper per pound. This ratio preserves the steak’s natural juices without overpowering it. Season both flat surfaces and the edges to ensure every bite has flavor.
- Pat the steak dry: Use paper towels to remove any moisture. This prevents steaming and helps salt create a crust during cooking.
- Bring the steak to room temperature: Let it sit uncovered for 20 to 40 minutes before seasoning. This promotes even cooking.
- Sprinkle kosher salt evenly: Apply about ¾ to 1 teaspoon per pound across both sides and the edges. Hold your hand about 6 to 8 inches above the steak to distribute salt evenly and visibly coat the surfaces.
- Add freshly ground black pepper: Sprinkle about ¼ teaspoon per pound just before cooking. Freshly ground pepper provides the best aroma and flavor. Apply on all sides, including edges.
- Let the seasoned steak rest: For best results, rest it uncovered on a wire rack in the fridge for 30 to 40 minutes or up to 24 hours. This allows the salt to penetrate the meat, improving tenderness and crust formation.
- Bring the steak back to room temperature (if chilled): Remove it from the fridge about 20 minutes before cooking to avoid a cold center.
- Cook immediately after seasoning and resting: Avoid seasoning just after the steak comes to room temperature without resting, as this reduces the crust quality and seasoning penetration.
Using kosher salt is preferred because its coarse texture helps form a crust while drawing moisture to the surface that then reabsorbs, seasoning the meat deeply. Table salt melts too quickly and can make the steak too salty. Black pepper works best freshly ground: pre-ground loses flavor and does not deliver the same punch. Seasoning the steak edges ensures uniform flavor and a better overall eating experience.
Properly seasoned steak will have a visibly coated surface with salt crystals glistening slightly. Salt dissolves partially during resting, so don’t worry if it looks wet. Avoid undersalting, which produces bland results, or oversalting, which masks the beef’s flavor. Following these steps helps your steak develop a flavorful crust and juicy interior every time.
2. The Science Behind Timing Your Steak Seasoning

Seasoning your steak about 40 to 45 minutes before cooking yields the best balance of flavor and tenderness. This timing allows salt to draw moisture out, let it dissolve, then reabsorb into the meat. This process, called dry brining, boosts juiciness and helps form a flavorful crust when grilling. For every pound of steak, apply about 1 teaspoon of salt evenly on both sides. After salting, keep the steak uncovered on a rack in the fridge if possible, so the surface dries and browns better on the grill.
Some cooks prefer seasoning their steak up to 24 hours in advance. This longer dry brining can intensify flavor and tenderize tougher cuts but requires advance planning and refrigerator space. You don’t need hours to spare; seasoning your steak right before cooking will work well too. The key is to pat the steak dry with paper towels first so the seasoning isn’t watered down and the surface can crisp up nicely on high heat.
Resting time after seasoning depends on your schedule. Letting the steak sit for at least 5 to 10 minutes at room temperature after seasoning allows the salt to begin working and reduces the chill from refrigeration, which helps cook steak more evenly. However, leaving the steak out longer than 60 minutes is generally not necessary and can affect food safety unless cooking immediately afterward.
Seasoning early or just before cooking also influences tenderness and moisture retention. Salt improve muscle protein breakdown, making the steak more tender if given time. But seasoning too late means salt only improve surface flavor. Avoid seasoning too far in advance without refrigeration, or the meat could start to break down improperly and lose texture. Also, finishing salt applied after cooking adds a burst of crunchy texture and flavor contrast that seasoned salt alone won’t achieve.
One decision rule is to assess your cooking timeline. Season the steak 40 minutes to an hour ahead on a rack in the fridge, uncovered, to get the best results. When short on time, season the steak just before grilling, but make sure to dry it thoroughly first. These methods adapt well regardless of steak thickness or cut, though longer dry brining particularly benefits thicker and tougher steaks that need extra tenderizing.
Pat your steak dry before seasoning it immediately before cooking to maximize browning and flavor crust formation on the grill.
3. Choosing and Using the Best Seasonings for Steak
Good seasoning for steak starts with classic herbs and spices that improve the beef’s natural flavor without overpowering it. Salt and pepper are essential, but adding spices like garlic, chili powder, and herbs such as thyme or rosemary can create richer, more complex tastes. How and when you apply these seasonings affects the final flavor and texture.
Classic Steak Spice Combinations
Salt and black pepper remain the foundation for seasoning steak. Coarse salt seasons the outside while helping draw out moisture that turns into a tasty crust. Freshly ground pepper adds pungency that brightens the beef. Beyond those basics, good blends often include granulated garlic, smoked paprika, chili powder, and cumin, which bring warmth and a hint of earthiness. Common and effective spice combinations include:
- Salt, pepper, granulated garlic, and smoked paprika
- Chili powder, ground cumin, salt, and pepper
- Dried thyme, garlic powder, salt, and black pepper
- Paprika, onion powder, ground coriander, salt, and pepper
Adding any of these will deepen the steak’s flavor, creating a savory crust when seared. Use these blends confidently but sparingly enough to let the steak’s quality shine through.
Dry Rubs Versus Marinades: When to Use Each
Dry rubs made of spices, herbs, and salt work well directly on steak to create a flavorful crust. They require only a few minutes of contact before cooking, cutting out long waits. Dry rubs are best for tender cuts like ribeye or New York strip where you want immediate flavor impact.
Marinades soak steak in a liquid mixture with acid (like vinegar or lemon juice), oil, and seasonings. They tenderize and infuse flavor, but the process takes 30 minutes to several hours. Choose marinades when using tougher cuts such as flank or skirt steak to improve tenderness and add complexity.
Both methods can be combined. After marinating, pat the steak dry and apply a light dry rub or simple salt and pepper before cooking to build a crust.
Fresh Herbs to Improve Steak Flavor
Fresh herbs add brightness and a subtle flavor boost that dried herbs can’t match. Parsley, thyme, and rosemary work best fresh on steak, applied as a garnish or melted into finishing butter. Fresh herbs sprinkled just before serving retain their aroma and offer a contrast to the rich, cooked beef.
Dried herbs shine when included in dry rubs or marinades. Dry thyme or oregano are convenient and distribute flavor evenly during cooking. Avoid using large amounts of dried herbs on steak, as they can be overpowering. Here’s how to use fresh herbs effectively:
- Sprinkle chopped parsley or thyme on steak after resting
- Melt fresh rosemary into butter and brush it onto steak right before serving
- Add a few sprigs of fresh herbs to pan sauces for a finishing aroma
Using herbs fresh in finishing touches keeps flavors vibrant and aromatic without masking the steak.
How to Time Spice Application
Applying seasoning at the right time helps the flavors develop and improves steak texture. Salt the steak at least 40 minutes before cooking to allow the salt to penetrate and tenderize the meat. For faster meals, seasoning just before cooking is acceptable but won’t provide as deep a flavor.
Dry rubs containing other spices can be applied up to an hour before cooking to let the beef absorb the aromatics. Avoid applying fresh herbs before cooking, as the heat diminishes their brightness.
Grind your own black pepper right before seasoning for maximum freshness and heat. When seasoning, spread spices evenly over both sides and edges of the steak for balanced flavor. After seasoning, let the meat rest at room temperature briefly to help the seasoning settle.
4. How Steak Thickness Affects Seasoning Amounts and Methods
Steak thickness has a direct impact on how much seasoning you need and when to apply it to ensure the flavor penetrates deeply, not just stays on the surface. Thinner steaks require less salt because they have less interior to season, whereas thicker cuts benefit from a generous amount of salt that can gradually draw moisture out and then reabsorb, improving flavor inside the meat.
Salt should ideally be applied at least 40 minutes before cooking for thicker steaks. This timing allows the salt to dissolve and penetrate inward, creating a deeper seasoning. For thinner steaks under 1 inch thick, seasoning right before cooking or just 20 minutes beforehand helps avoid drawing too much moisture to the surface, which can cause uneven cooking. Thick steaks like ribeye or filet mignon need more salt, around 1 tablespoon per pound of meat, to make sure the seasoning is balanced throughout.
Besides timing and quantity, don’t forget to season the sides of thick steaks, especially those 1.5 inches or thicker. The edges can be overlooked and end up bland compared to the rest of the steak. For dry-aged steaks, skip or reduce early salt application to maintain the unique dry-aged flavor profile.
| Steak Thickness | Salt Amount | When to Season | Additional Notes |
|---|---|---|---|
| Less than 1 inch | About ½ tablespoon per pound | Just before cooking or up to 20 minutes before | Avoid drawing out too much moisture |
| 1 to 1.5 inches | 1 tablespoon per pound | At least 40 minutes before cooking | Season sides thoroughly |
| More than 1.5 inches | 1 to 1.5 tablespoons per pound | Salt while thawing in fridge or at least 40 minutes ahead | Blot surface moisture if needed before cooking |
Coarse kosher or Himalayan pink salt works best for seasoning. They dissolve slowly, helping salt absorb into the meat steadily without over-seasoning the surface. Timing the seasoning ahead also helps dry the surface slightly, aiding the sear. For thick steaks salted while still thawing, a light blot with a paper towel before cooking prevents excess moisture that can cause steaming instead of caramelizing.
Applying seasoning in this way is more than just sprinkling salt; it’s about controlling moisture and flavor depth for the cut’s size. Over- or under-seasoning a thick steak can lead to blandness inside or an uneven crust, while seasoning a thin steak too early can make it dry and leathery. Adjust your seasoning amounts and timing by thickness to get evenly seasoned, flavorful results every time you cook steak.
5. Step-by-Step Guide to Applying Steak Seasoning Evenly
Apply steak seasoning evenly by holding your hand about 12 inches above the meat and sprinkling salt and spice blends uniformly on all surfaces, including edges. This ensures balanced flavor and proper crust formation during cooking.
How High to Sprinkle Salt
Hold your hand approximately 10 to 12 inches above the steak when sprinkling salt. This height allows the salt flakes to spread out and cover the surface evenly instead of clumping in one spot. Kosher salt works best due to its coarse grains, which distribute more uniformly than fine table salt.
Sprinkling from this distance also helps avoid overly salty areas and promotes better seasoning penetration. Use a gentle wrist motion to cast the salt lightly and consistently over the entire steak surface.
Seasoning the Edges and Sides
Don’t skip seasoning the edges and sides of the steak. These areas often get overlooked, but they develop important flavor and texture. Rub or sprinkle seasoning onto all sides before cooking to ensure every bite is seasoned.
Before seasoning, pat the steak dry with paper towels. Then, after the top and bottom are seasoned, tilt the steak on its side to access the edges easily. Lightly brush the edges with oil first if you use oil to help the seasoning stick better.
Avoiding Clumps and Gaps
Apply seasoning in thin, even layers rather than dumping it all at once. This helps prevent clumps and leaves no gaps without flavor. After sprinkling, gently press the seasoning into the meat to stabilize it without rubbing too hard, which can cause uneven coating.
Using a small spoon or your fingers to distribute seasoning in targeted spots can fill in bare patches. Brushing the steak lightly with neutral oil like vegetable or canola beforehand also encourages the spices to adhere evenly across the surface. Follow these steps for even steak seasoning application:
- Bring your steak to room temperature for about 30 minutes before seasoning to promote even cooking.
- Pat the steak dry thoroughly with paper towels to remove surface moisture.
- Brush all sides, including edges, with a light coat of high smoke point oil such as vegetable or canola oil.
- Hold your hand 10 to 12 inches above the steak and evenly sprinkle 1 teaspoon of kosher salt per pound across the top surface using a gentle back-and-forth motion.
- Flip the steak and repeat salting on the other side and the edges by tilting the steak and seasoning all exposed parts.
- Optionally apply freshly ground black pepper or your seasoning blend evenly in the same manner.
- Gently press seasoning into the meat if needed, avoiding vigorous rubbing.
- Let the seasoned steak rest uncovered at room temperature for 30 minutes before cooking to allow salt to dissolve into the meat.
Hold the salt higher rather than closer to prevent piles of seasoning that can create uneven flavour.
6. Common Steak Seasoning Mistakes and How to Fix Them
One common mistake when seasoning steak is under-seasoning or using too little salt. Salt improve the beef’s natural flavor and, when applied generously, draws moisture out and then back in during a resting period of at least 40 minutes. This process seasons the steak deeply rather than just the surface. Seasoning lightly might leave your steak tasting bland, so be sure to apply salt evenly and allow time for it to work.
Over-salting is another frequent problem. It happens when salt is applied heavily and last-minute, often right before cooking, without time for absorption. This can make the steak taste overpowering or crusty. To avoid this, measure the salt carefully, about ¾ teaspoon per pound of meat is a good baseline, and season the steak at least 40 minutes before cooking. For quick cooking or thin cuts, a shorter 10 to 15-minute window still helps, but avoid piling on salt right before searing.
Bitter flavors can come from overusing black pepper or garlic powder. Pepper contains compounds that can burn on high heat, creating bitterness, especially if you apply too much or add it before cooking. To prevent this, season with ground black pepper right before or after searing, not too early. Garlic powder adds flavor but burns easily, so sprinkle it sparingly, about ¼ teaspoon per steak, and only before cooking if you’re pan-frying at moderate heat. For grilling, consider adding garlic after cooking or using garlic salt instead for milder flavor and less burn risk.
- Season generously with salt at least 40 minutes before cooking to allow proper absorption.
- Use about ¾ teaspoon salt per pound of steak for balanced saltiness.
- Avoid adding black pepper too early; apply it right before or after cooking to reduce bitterness.
- Limit garlic powder to ¼ teaspoon per steak or add garlic flavor after cooking if grilling.
- Don’t overcrowd the steak surface with seasoning; keep an even, moderate layer for consistent flavor.
Using too much spice or seasoning at once can overpower the meat’s natural taste. Stick to simple blends like salt, pepper, and a small amount of garlic powder for an ideal balance. If you want stronger seasoning, try adding herbs or spices in finishing touches rather than before cooking. Taste tests by cooking small portions can help you find the right seasoning amount without risking bitterness or excess salt.
7. Creating and Storing Your Own Steak Seasoning Blends
You can easily prepare a versatile homemade steak seasoning blend with common spices from your kitchen. A basic and well-balanced recipe includes 2 tablespoons kosher salt, 1 tablespoon coarsely ground black pepper, 1 tablespoon garlic powder, 1 teaspoon onion powder, and 1 teaspoon smoked paprika. This blend combines salty, peppery, savory, and smoky flavors that suit most cuts of steak and mimic classic steakhouse profiles like Montreal seasoning.
Mix these ingredients thoroughly in a small bowl or jar until well combined. Use about 1 to 2 teaspoons of this seasoning per side to coat your steak evenly. The salt helps improve the meat’s flavor and promotes a good crust, while garlic and onion powders add depth. Smoked paprika contributes a subtle smoky note without needing a grill. There is room to customize the blend by adding pinch of cayenne for heat or dried herbs like thyme or rosemary for an herby twist. Keep changes moderate to avoid overpowering the steak’s natural flavor.
Store your homemade seasoning in an airtight container, such as a glass jar with a tight lid or a small spice jar. Keep it in a cool, dry place like your pantry or cupboard, away from heat, direct sunlight, and moisture. Proper storage will preserve the spices’ potency and aroma for up to 6 months. Beyond this period, the seasoning may lose its vibrancy and some flavor nuances but will remain safe to use. Always check for clumping or off smells before using older blends.
Creating your own blend saves money and ensures you avoid fillers or preservatives found in some commercial mixes. For example, premade steak seasonings can cost around $5 to $10 for a small container, whereas buying individual spices and making several batches at home offers more servings for nearly the same price. Once you have your blend ready, label the container with the mixture date to track its freshness. Shake the jar before each use to redistribute any settled spices.
One potential drawback is the need to replenish individual spices over time, especially if you use this blend regularly. However, most spices have a long shelf life of one to three years when stored correctly. Avoid storing your seasoning blend near the stove or dishwasher where steam and heat can degrade the spices faster. If you want a quick alternative, classic Montreal steak seasoning is widely available and shares similar flavor characteristics.
8. Finishing Touches: Resting, Butter, and Garnishing Steak
Resting your steak after cooking preserves its juices and improve seasoning absorption. Finishing with compound butter or a light sauce boosts richness and layers of flavor. Garnishing with fresh herbs adds an aromatic touch that improve your steak to restaurant-quality.
Proper Resting Time and Technique
Allow your steak to rest for 5 to 10 minutes after cooking to let the juices redistribute. Resting prevents the juices from spilling out when cut, keeping the steak moist and flavorful. Wrap loosely in foil or place on a warm plate, away from direct heat, to maintain temperature without cooking further.
Timing matters because seasoning flavors continue developing during rest. Salts and herbs penetrate deeper, balancing the taste. Resting too long, however, can cause the steak to cool and lose texture, so aim for the sweet spot within that 5 to 10-minute range.
Adding Compound Butter and Sauces
Using compound butter, butter mixed with herbs, spices, citrus zest, or garlic, adds richness and a burst of fresh flavor right after cooking. Apply a tablespoon-sized dollop to the top of the hot steak so it melts evenly. This step improve juiciness and offers a steakhouse-quality finish.
In the final minutes of cooking, baste your steak with butter infused with garlic cloves and herbs like thyme or rosemary. This method imparts flavor deep into the crust and crust and seals in moisture. Alternatively, pour a prepared herb butter sauce on the steak after plating for a flavorful presentation.
- Prepare compound butter by mixing softened butter with chopped herbs (such as parsley, thyme), minced garlic, and optional citrus zest.
- Cook the steak to your preferred doneness using your chosen method.
- In the last 1 to 2 minutes on the heat, add butter, garlic, and herbs to the pan and baste the steak continuously.
- Remove steak from heat and transfer to a plate or cutting board.
- Top steak with a spoonful of compound butter while still hot to allow melting.
- Cover loosely with foil and rest for 5, 10 minutes.
- Serve and optionally drizzle with any leftover herb butter sauce from the pan.
Never skip resting after cooking; it locks in juices and lets finishing touches like butter absorb without diluting the steak’s natural flavor.
Garnishing with Fresh Herbs
Finish your steak with a sprinkle of freshly chopped herbs like parsley, chives, or tarragon for a bright, aromatic accent. Adding fresh herbs right before serving preserves their flavor and adds color, making the dish more appetizing.
Consider placing whole sprigs of rosemary or thyme on or beside the steak as a garnish. These herbs also pair well with compound butter and infuse subtle fragrance without overpowering the meat. For a citrusy note, add a light zest of lemon or orange over the finished steak.
Step-by-Step Action Plan for Perfect Steak Seasoning
Follow these steps to season your steak right and taste the difference immediately.
- Before cooking: Pat the steak dry with paper towels to remove moisture for better seasoning adherence.
- 30 minutes before cooking: Sprinkle salt evenly over both sides of the steak. You’ll know it’s right when the salt starts to draw out moisture and create a slight crust.
- 15 minutes before cooking: Add black pepper and any additional spices or herbs. The seasoning should stick without sliding off when you touch the steak.
- Right before cooking: Apply a light coating of oil to help the seasoning seal in flavor and promote even browning.
- During cooking: Avoid flipping too often; one or two times is best to maintain the crust your seasoning forms.
- After cooking: Rest the steak for 5 minutes, then add a pat of butter or fresh herbs to finish and improve flavor.
- Storing seasoning blends: Keep homemade blends in airtight containers away from light to maintain potency for up to 6 months.
- Adjust for thickness: Thicker steaks require more seasoning and a longer application time to penetrate fully, test by cutting a small piece after resting.
Frequently Asked Questions
How Do You Evenly Salt a Thick Steak?
Use about ¾ to 1 teaspoon of salt per pound, applying it evenly on both sides and the edges to ensure consistent flavor. Thick steaks especially benefit from seasoning their sides to avoid under-seasoned spots.
Can I Use Other Acids Besides Vinegar to Season Steak?
Yes, lemon juice or citrus can add brightness, but use sparingly to avoid overwhelming the meat. Acids help tenderize but can change texture if applied too early.
Should I Season Steak Differently for Pan-Searing Versus Grilling?
The amount stays consistent, but for grilling, season about 40-45 minutes prior; for pan-searing, seasoning just before cooking works well. Both methods benefit from full coverage for best flavor.
How Long Can Seasoned Steak Sit Before Cooking Safely?
It can safely sit seasoned at room temperature for 30 to 60 minutes without affecting taste or safety. This rest helps salt penetrate and improves texture when cooked.
Can I Reuse Steak Seasoning After Cooking?
Used seasoning loses potency and can pick up burnt flavors, so it’s best to use fresh seasoning each time for optimal taste.
Does Salting Steak Hide the Meat’s Natural Flavor?
Proper salting improve natural flavors rather than masking them, making the steak taste juicier and more beefy when done correctly.
Before You Go
Seasoning steak properly brings out its full flavor and texture, making your cooking more satisfying. Start by mastering salt timing and simple blends, then build your skills with more complex spices. Try seasoning a steak tonight following the steps provided to experience a noticeable improvement in taste and texture.