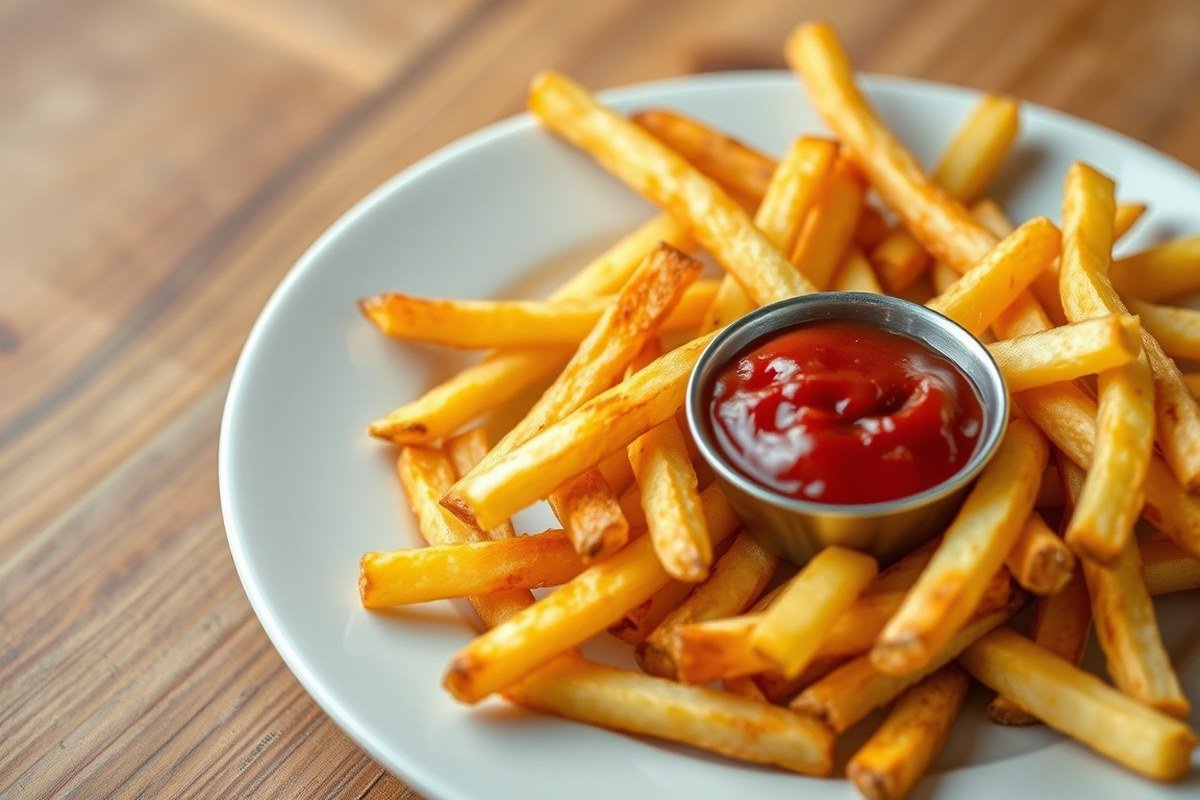
How to Make French Fries: Easy Steps and 8 Cooking Methods Compared
Making perfect homemade french fries starts with choosing the right potatoes, soaking and drying them properly to remove excess starch, and using the double-fry method for extra crispiness. These steps ensure golden, crispy fries every time, whether you fry, bake, or air fry them. You’ll find clear instructions for preparing and cooking potatoes to get delicious fries that hold up well after cooking.
This article is designed for home cooks and beginners looking to master french fries without fancy equipment. It covers essential techniques and compares common cooking methods, helping you select the best approach for your kitchen and taste preferences.
Key Takeaways
- Use russet potatoes peeled for the crispiest french fries.
- Soak potato slices in cold water for a minimum of 2 hours or overnight to wash away excess starch.
- Completely dry potatoes before cooking to prevent oil splatter and ensure crispiness.
- Fry potatoes in small batches to keep oil temperature steady around 300°F during cooking.
- Use a double-fry technique: par-fry first, then fry again at 375°F for 3 to 5 minutes to get golden crisp fries.
- Bake fries at 425°F on parchment paper for 25 to 30 minutes as a healthier alternative to frying.
1. Choose and Prepare Potatoes for Perfect Fries

Russet potatoes work best for crispy french fries because their high starch content produces a soft inside and a crisp outside when fried. Potatoes like Yukon Gold or red varieties contain more water and less starch, which often leads to fries that are softer and less crunchy. The thicker skin of russets also helps keep fries firm as they cook.
Deciding whether to peel potatoes depends on the texture and type of fries you want. Peeling results in smooth, classic fries, while leaving the skin on gives a rustic look and added crispness. Leaving the skin on means you need to scrub the potatoes well to remove all dirt. For peeled fries, the cost is minimal, a few cents per potato for peeling effort, but the taste and texture become more uniform.
Cutting the potatoes into consistent pieces is important to ensure even cooking and uniform crispiness. Sticks that are about 1/4 inch (0.64 cm) wide tend to fry evenly and become crispy all around without overcooking the center. Thicker cuts around 1/2 inch (1.3 cm) give a chunkier fry but may require longer cooking to get the inside tender.
Use a sharp serrated knife or a sturdy kitchen knife. A serrated blade can grip the potato better and give clean cuts without crushing it. Cutting on a steady surface and maintaining uniform size stops some fries from burning while others remain undercooked. Follow these steps to prepare your potatoes for crispy fries:
- Pick the right potatoes: Choose firm russet potatoes, about 4 large ones (around 2 pounds or 900 grams) for a standard batch.
- Wash and peel (optional): Scrub potatoes well under running water. Peel them if you want classic smooth fries. Leave the skin on for rustic fries, but clean thoroughly.
- Cut lengthwise: Slice each potato into 1/2-inch thick slabs, laying them flat on the cutting board.
- Cut into sticks: Cut each slab lengthwise into 1/4-inch wide sticks for crispy fries. For chunkier fries, cut into 1/2-inch sticks.
- Submerge in cold water: Place cut fries in a bowl of cold water to prevent browning and remove excess starch before cooking.
Good results show fries with an even golden-brown colour and very crisp outsides. Uneven cuts can lead to some fries burning while others stay soft and pale. Too thick fries will take longer to cook, risking oil absorption or mushiness inside, while too thin fries may burn quickly and dry out.
2. Soak and Dry Potatoes to Remove Starch
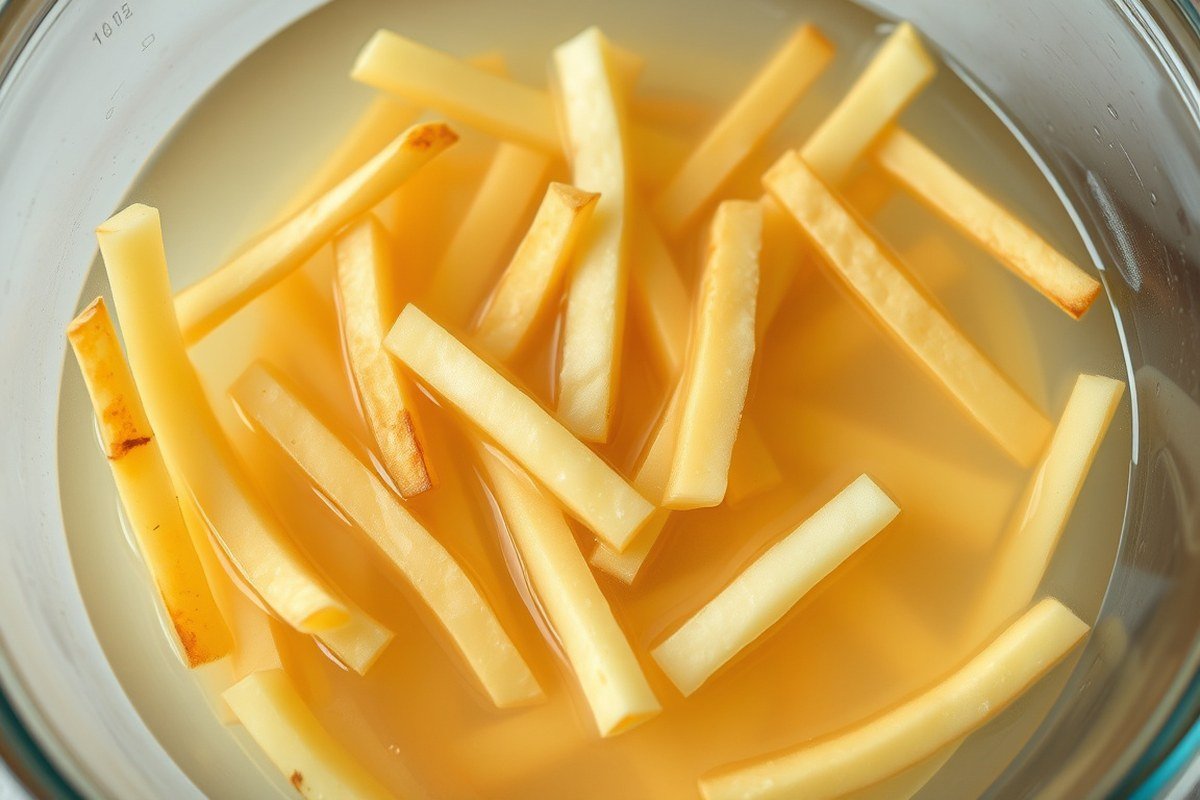
Removing excess starch from cut potatoes is key to making crispy french fries. Soaking your fries in cold water helps wash away this starch, which otherwise causes fries to stick together or develop a soft, gummy texture during frying. To get the best results, soak your cut potatoes for at least 2 hours. Soaking longer, up to overnight, can improve crispiness even more but requires storing the fries in the refrigerator to keep them fresh. Avoid soaking for less than 30 minutes, since shorter times won’t remove enough starch and could lead to limp fries.
Use a large bowl filled with cold water for soaking. Adding 1 tablespoon of white vinegar per quart of water can prevent fries from sticking while they soak, though it’s optional. Keep the fries fully submerged and stir them occasionally to help loosen starch. After soaking, drain the potatoes in a colander and rinse briefly with cold water to remove any remaining starch residue on the surface.
Drying the fries thoroughly after soaking is just as important as the soak itself. Excess surface water causes the oil temperature to drop during frying, leading to greasy fries that don’t crisp properly. Place your drained fries on a clean kitchen towel or layers of paper towels. Pat them gently but firmly to remove as much moisture as possible. For best results, let them air-dry for 15 minutes or more to evaporate remaining wetness before frying. Using a salad spinner can speed up drying without damaging the potatoes.
Never skip drying your fries well; oil splatters and soggy fries often come from leftover moisture on the potato surface.
Still wet potatoes fry unevenly and tend to steam rather than crisp. The ideal frying oil temperature is generally around 375°F, and any water on the fries can drop the temperature quickly, producing limp fries. Taking the time to soak your fries in cold water for a few hours and then drying them thoroughly boosts your chances of getting fries with a golden, crunchy exterior and a fluffy interior.
3. Master the Double-Fry Method for Extra Crispiness
Frying your fries twice gives you a crisp outside with a tender inside, which single frying can’t achieve. Start by cooking the potatoes at a lower temperature to soften them, then raise the oil temperature and fry again for that classic golden crunch. This method requires adjusting your oil temperature carefully and frying in batches to keep fries from sticking together.
First Fry at Lower Temperature
The first frying step cooks the potatoes through without browning them. Heat your oil to around 300°F. Add the fries in small batches, about one-third of your fryer’s capacity, to avoid crowding, which lowers oil temperature and causes soggy fries. Fry the potatoes for 3 to 5 minutes until they become soft but still pale. This par-frying step ensures the centers cook fully.
Lower temperatures allow the fries to cook evenly without developing a crust yet. You’ll know this step is done when the fries are tender and limp but have little color. Avoid overcooking in this step since the second fry will crisp them up.
Resting and Cooling the Fries
After the first fry, drain your potatoes on paper towels or a wire rack to remove excess oil and moisture. Let them cool for at least 10 to 15 minutes. This resting period helps the fries firm up slightly and makes the second frying more effective in creating a crispy outer layer.
Set the fries aside while you increase your oil temperature to prepare for the second fry. Cooling also prevents the fries from cooking too quickly or burning during the second frying.
Second Fry for Golden Crispiness
Raise the oil temperature to 375°F for the second frying. Cook the fries again in batches for 2 to 4 minutes. This step crisps the outside, turning the fries golden brown without overcooking the interior.
Maintain consistent oil temperature, too low and the fries will become greasy, too high and they risk burning. Remove the fries when they reach a uniform golden color and feel crisp to the touch. Drain on paper towels before seasoning and serving.
- Heat oil in a deep fryer or heavy pot to 300°F.
- Add a third of the prepared potatoes carefully to keep them separated.
- Fry for 3 to 5 minutes until the fries are soft but not browned.
- Remove fries and drain them on paper towels or a wire rack.
- Allow fries to cool and rest for 10 to 15 minutes.
- Increase oil temperature to 375°F.
- Fry the potatoes again in batches for 2 to 4 minutes until golden and crisp.
- Drain the cooked fries on paper towels, season, and serve immediately.
4. Compare Frying, Baking, and Air Frying Methods
Choose deep frying for the crispiest fries in the shortest time. Baking takes longer but uses less oil, resulting in a milder texture. Air frying sits in the middle, offering faster cooking than baking and crispiness closer to frying, with fewer calories. Each method needs proper potato preparation and cooking space to avoid soggy fries.
Deep Frying
Deep frying involves submerging potato sticks fully in hot oil heated to 350°F (175°C). Start by heating oil in a deep fryer or heavy pot at medium-high heat, using a thermometer to keep the temperature steady. Fry the potatoes in small batches to avoid overcrowding, maintaining the oil temperature for even cooking.
This method typically takes about 5 minutes per batch to reach golden crispness. A double-fry method can be used: start at 325°F (163°C) to cook the fries through, then increase to 400°F (205°C) for a final crisping. Deep frying creates fries that are golden and crunchy on the outside while staying fluffy inside.
Watch for oil temperature drops when adding fries, as too low temperatures yield greasy, soggy results. Also, drain fries well on paper towels to remove excess oil after frying.
Baking in Oven
Baking fries requires spreading them in a single layer on a parchment-lined sheet to allow airflow and avoid sogginess. Preheat the oven to 400°F (204°C). Bake the fries for 25 to 30 minutes, flipping halfway for even browning.
This method uses little to no oil (just a light toss to coat) making it healthier but slower compared to frying. A crisp exterior develops gradually, but fries will lack the intense crunch of deep-fried versions. Using a wire rack on a rimmed baking sheet helps keep fries crisp when reheating, warming them for 5 to 10 minutes at the same temperature.
Use drying the potatoes well after soaking and applying a little oil for better texture. Overcrowding the tray traps steam and prevents crisping.
Air Frying
Air frying circulates hot air at 380°F (195°C) around the fries to crisp them. After tossing soaked and dried fries lightly in oil and salt, arrange them in a single layer in the air fryer basket without overlap.
Cook the fries for 12 to 15 minutes, making sure to shake the basket once halfway through to cook them evenly. Air frying takes less time than baking but more than deep frying, resulting in fries with a crunchy exterior and soft inside while using minimal oil.
This method is healthier due to significantly reduced oil but may not fully replicate the texture of deep-fried fries. For reheating, set air fryer to 350°F and warm fries for 3 to 5 minutes.
Batch cooking is important to avoid overcrowding. Dry the fries well before air frying to help achieve maximum crispness.
| Method | Duration | Temperature | Oil Use | Crispness Level |
|---|---|---|---|---|
| Deep Frying | 5-10 minutes per batch | 350-400°F (175-205°C) | High (submerged) | Highest (very crisp) |
| Baking | 25-30 minutes | 400°F (204°C) | Low (light coating) | Moderate (mild crisp) |
| Air Frying | 12-15 minutes | 380°F (195°C) | Low (light coating) | High (crispy, less oily) |
Choosing a method depends on your goals. Deep frying delivers restaurant-quality fries with a quick cook but uses the most oil and needs careful temperature control. Baking suits those wanting less oil but with more cooking time. Air frying strikes a balance, offering a faster, healthier option with good crispness, especially for smaller batches or reheating leftovers.
5. Season and Serve Fries for Maximum Flavor
Seasoning homemade french fries right after frying or baking makes all the difference in flavor. The classic choice is simple: a good sprinkle of fine sea salt or kosher salt while the fries are still hot. Salt improve the natural potato flavor and gives you that familiar taste you expect from fresh fries. Adding salt immediately allows it to stick better as the fries cool slightly.
You can customize your fries by experimenting with herbs, spices, and other seasonings. Popular options include garlic salt, onion powder, paprika for a smoky touch, or Cajun seasoning for a bit of heat. Toss your hot fries with 1 to 2 teaspoons of your chosen seasonings right after cooking. For extra flavor, melt about 1 1/2 tablespoons of butter with a minced garlic clove over medium heat for 1 minute, then drizzle it over the fries and toss. This creates a rich, garlicky coating that turns ordinary fries into something memorable.
- Sea salt or kosher salt for a classic base
- Garlic salt and onion powder for savory notes
- Paprika or smoked paprika adds subtle smokiness
- Cajun or chili powder for spicy fries
- Fresh herbs like rosemary or thyme, tossed with melted butter
- Grated Parmesan cheese sprinkled on top for cheesy flavor
- Lemon zest or vinegar powder for tang
Dipping sauces complement your fries and can change your whole experience. Classic choices include ketchup, mayonnaise, and yellow mustard. For something richer, try homemade or store-bought aioli, garlic mayo, or ranch dressing. Barbecue sauce pairs well with smoky fries, while hot sauce adds a spicy kick. You can also mix sour cream with chopped fresh herbs and garlic for a cool, creamy dip.
Sprinkle seasoning on fries while they’re still hot to help the flavor adhere evenly and avoid sogginess.
Serving your fries hot on a platter or in a bowl maximizes that fresh, crispy texture everyone loves. Pair fries with a main like a hamburger, grilled steak, or even steamed mussels to make a satisfying meal. Keep in mind that seasoning isn’t just about taste, it also impacts the texture and moisture. Avoid over-salting or adding wet sauces too early, which can make fries soggy. Instead, add any dips on the side and enjoy each crispy bite.
6. Keep Fries Crispy: Cooling, Holding, and Reheating
To keep your fries crispy if you aren’t serving them immediately, use a warm oven set around 200°F (90°C). After frying, drain the fries and spread them on a wire rack placed over a baking sheet. This setup allows air to circulate around the fries, preventing sogginess. Then, place the whole assembly in the oven to maintain temperature and crispness while you finish frying other batches. Avoid stacking fries directly on a pan, which traps steam and softens the crust.
Holding fries warm in the oven works best when you keep them in a shallow layer without overcrowding. You can sprinkle a little extra salt at this stage to refresh the flavor. These fries will remain crispy for about 15 minutes, giving you a helpful window to serve multiple batches hot and crunchy. Keep the oven temperature low, between 200°F to 300°F; higher heat can dry them out, while cooler temperatures aren’t enough to maintain crispness.
To keep leftover fries crispy when reheating, avoid microwaving because it steams the fries and makes them soggy. Instead, set your oven to 400°F and spread the fries in a single layer on a baking sheet. Warm them for 5 to 10 minutes, flipping halfway through to help them crisp up evenly and release moisture.
Start by heating your oven to 400°F to prepare for reheating fries effectively. Next, line a baking sheet with foil or parchment paper for easy cleanup. Arrange your fries in a single layer to prevent steaming. Bake for 5 minutes, then carefully toss or flip the fries, and bake for an additional 3 to 5 minutes. This process restores a crispy exterior and warms the soft inside effectively. Keep an eye on the fries during the last minutes to avoid burning, especially if they were pre-seasoned or fried with coatings.
For quicker reheating with a crispy result, use a stovetop skillet over medium heat. Add a small amount of oil, about a tablespoon, and toss the fries frequently for several minutes. This method re-crisps the fries by directly frying their surfaces again but requires close attention to prevent burning. It can be a practical option if you do not want to heat a whole oven or if you’re preparing smaller quantities.
Always cool your fries on a wire rack right after frying and before storing to maintain their crisp texture. Fries that cool flat will trap steam and become soggy faster. Using an oven both as a warming station and for reheating leftovers balances keeping fries pleasingly crisp without drying them out. Be aware that even with the best methods, fries are at their peak crispiness when fresh; any holding or reheating will slightly reduce that perfect crunch but can still deliver satisfying results with these careful techniques.
7. Store and Freeze Homemade French Fries Safely
Store homemade french fries in an airtight container or sealable plastic bag to keep them fresh in the refrigerator. Refrigerated fries can last up to 5 days without losing quality. Wrap them tightly or press out excess air before sealing to prevent moisture buildup, which can make fries soggy.
For longer storage, freeze your fries in a sealable freezer bag or a sturdy airtight container. Properly stored, frozen french fries maintain their best quality for up to 3 months. Make sure to spread the fries out on a baking sheet and freeze them individually for about an hour before placing them in a container. This prevents them from sticking together, making it easier to take out just what you need.
| Storage Method | Container | Storage Time | Temperature |
|---|---|---|---|
| Refrigerate | Airtight container or foil wrap | Up to 5 days | Below 40°F (4°C) |
| Freeze | Freezer-safe bag or airtight container | Up to 3 months | Below 0°F (-18°C) |
When you’re ready to eat frozen fries, avoid thawing them first. Instead, reheat or cook fries directly from frozen to preserve crispiness and prevent sogginess. One effective way to reheat frozen fries is to flash-fry them for 30 seconds to 1 minute at 350°F (175°C). This quickly reheats the fries and restores their crunch without overcooking.
- Cool fries completely before storing to avoid condensation
- Use airtight or freezer-safe containers to reduce air exposure
- Freeze fries individually on a baking sheet before bundling to keep them separate
- Do not thaw frozen fries; cook or reheat directly from the freezer
- Flash-fry reheated frozen fries for extra crispness
- Label and date your containers to keep track of storage times
Following these storage and reheating practices helps preserve the texture and flavor of your homemade fries. Avoid storing fries in loosely covered containers or at room temperature since that speeds up spoilage. Freezing fries with minimal air exposure both extends their shelf life and maintains quality for several months. Reheating straight from frozen reduces sogginess and brings back that fresh-out-of-the-fryer crunch you want.
8. Equip Your Kitchen and Avoid Common Frying Mistakes
You only need a few basic tools to make crispy french fries at home. Most importantly, choose cookware and utensils that let you fry safely and remove fries quickly. Avoid common frying mistakes like overcrowding or wet potatoes to prevent soggy fries and oil splatters.
Necessary Equipment for Frying
Start with a deep, sturdy pot at least 10 cm (4 inches) tall to hold enough oil safely. Use about 3 cm (1.2 inches) of oil depth so fries fully submerge yet keep 7 cm (3 inches) from the oil surface to the pot’s rim to avoid spills as the oil foams.
A kitchen thermometer is essential to monitor oil temperature precisely, keeping it around 325°F to 350°F (163°C to 177°C) for perfect frying. A slotted spoon or kitchen spider lets you lower fries gently into the oil and remove them safely after frying while draining excess oil.
Prepare a baking sheet lined with paper towels or a kitchen towel to place fries immediately after frying. This absorbs oil and keeps fries crisp. These tools are inexpensive and widely available, often costing $10, $20 each, with pots and thermometers lasting indefinitely with proper care.
Safety Tips for Home Frying
- Always dry potatoes completely before frying: moisture causes violent oil splatters.
- Heat oil slowly and use a thermometer to maintain the proper frying range, preventing burns or fires from overheated oil.
- Never fill your pot more than half full with oil to allow space for fries and prevent overflow.
- Keep a lid nearby to smother any small oil fires quickly if they occur.
- Avoid overcrowding fries during frying; this lowers oil temperature and causes soggy fries.
Follow these steps precisely, and wear long sleeves and an apron to protect your skin from splashes. Never leave hot oil unattended.
Common Mistakes and Solutions
Several common issues can sabotage homemade fries, but simple fixes work well. The table below lists typical problems, symptoms, and how to correct them:
| Mistake | Symptom | Fix |
|---|---|---|
| Not drying potatoes | Oil splatters and fries become soggy | Pat potatoes completely dry before frying |
| Overcrowding the pot | Fries cook unevenly and turn limp | Add only 1/3 batch at a time, keep fries loose in oil |
| Oil temperature too low | Fries absorb excess oil, turn greasy | Heat oil to 325, 350°F and monitor with a thermometer |
| Using wrong utensils | Fries break or oil drips dangerously | Use a slotted spoon or a kitchen spider to lift the fries out safely. |
Apply these fixes to keep fries crisp, golden, and evenly cooked every time. Consistent oil temperature and proper handling matter most for home frying success.
Warning: Lower fries gently into oil to prevent splashing and wait 10 seconds after adding them for the oil temperature to stabilize before stirring or adding more fries.
Step-by-Step Action Plan for Perfect Homemade French Fries
Follow these steps to make crispy, flavorful homemade french fries with confidence, right from prepping your potatoes to serving them hot.
- Before you start: Select starchy potatoes like Russets and peel them if you prefer. The right potatoes give you a crisp inside and fluffy texture.
- 30 minutes before frying: Cut potatoes evenly and soak them in cold water for at least 30 minutes to remove excess starch and prevent sticking.
- Right before frying: Dry the potatoes thoroughly with a clean towel to avoid oil splatter and ensure crispiness.
- First fry (blanching): Fry potatoes at 275°F for 3-5 minutes until tender but not browned; this softens the inside without crisping.
- Rest phase: Remove fries from oil and let them cool on a paper towel-lined rack for at least 10 minutes for better texture.
- Second fry (crisping): Heat oil to 375°F and fry again until golden brown and crispy, about 2-4 minutes. Watch for even color and texture.
- After frying: Drain fries on fresh paper towels, season immediately while still hot, and serve to enjoy maximum flavor.
Frequently Asked Questions
How Long Should I Soak Potatoes Before Frying for Best Results?
Soak sliced potatoes in cold water for a minimum of 2 hours or overnight to reduce starch, which makes fries crispier after cooking.
Can I Reuse Frying Oil for Making French Fries?
Yes, you can reuse frying oil a few times if it’s strained and stored properly; discard it when it smells off or darkens.
What Oil Temperature Is Ideal for Frying French Fries?
Heat the oil to about 375 °F (191 °C) to get crispy fries without absorbing too much oil.
Should I Fry All the Potatoes at Once or in Batches?
Fry fries in batches, about one-third at a time, to keep oil temperature stable and fries crispy.
Can I Make French Fries Ahead and Reheat Them Later?
You can par-fry and refrigerate fries for up to 24 hours before finishing the second fry or reheating.
How Thick Should Fries Be Cut for Extra Crunch?
Cut fries thinner, around 1/4 inch thick, for crunchier fries compared to the usual 1/2 inch.
Final Thoughts
Making french fries at home takes a bit of patience but pays off with crispy, delicious results you control. Try the double-fry technique and precise drying steps to see a big difference in texture. Start your next batch by soaking your cut potatoes properly, then take it from there, your perfect fries are just around the corner.





One Comment