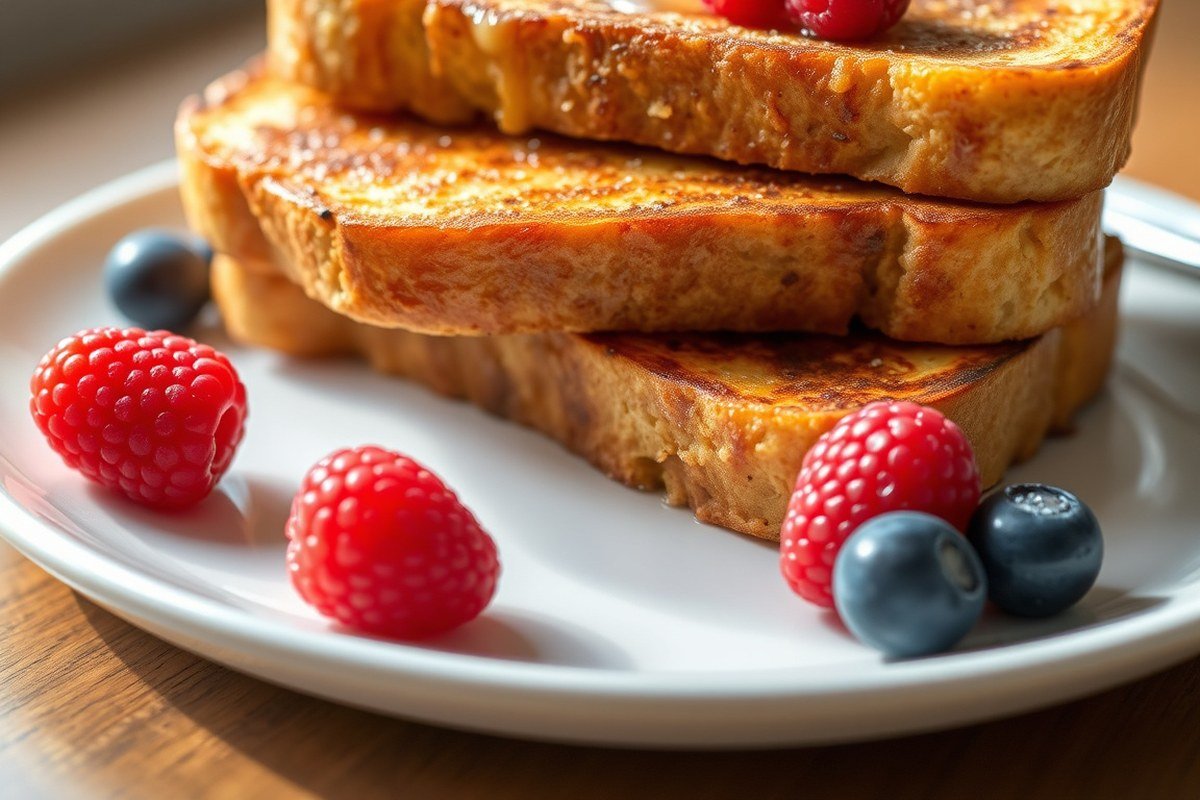
How to Make French Toast: A Complete Guide for Perfect Results
Making French toast is simple: soak thick bread slices in a mixture of eggs, milk, and seasoning, then cook on a hot skillet until golden brown. This method works well for a quick, tasty breakfast using pantry staples and takes less than 15 minutes from start to finish. Learning how to make French toast correctly ensures fluffy, flavorful results every time.
This guide suits home cooks and beginners seeking dependable steps and tips for perfect French toast. You’ll discover how to choose the right bread, prepare the ideal batter, fix common mistakes, and store leftovers properly for later enjoyment.
Key Takeaways
- Use thick slices of sturdy bread like brioche for best French toast texture and flavor.
- Mix eggs with milk and a pinch of salt and sugar to create the perfect batter consistency.
- Preheat your skillet to medium heat around 350°F for even cooking without burning.
- Cook bread slices for about 3 minutes per side until both sides turn golden brown.
- Make the batter up to two days ahead to save time without losing freshness.
- Freeze cooled French toast in airtight containers for up to 3 months to keep it fresh.
How to Make French Toast Step-by-Step
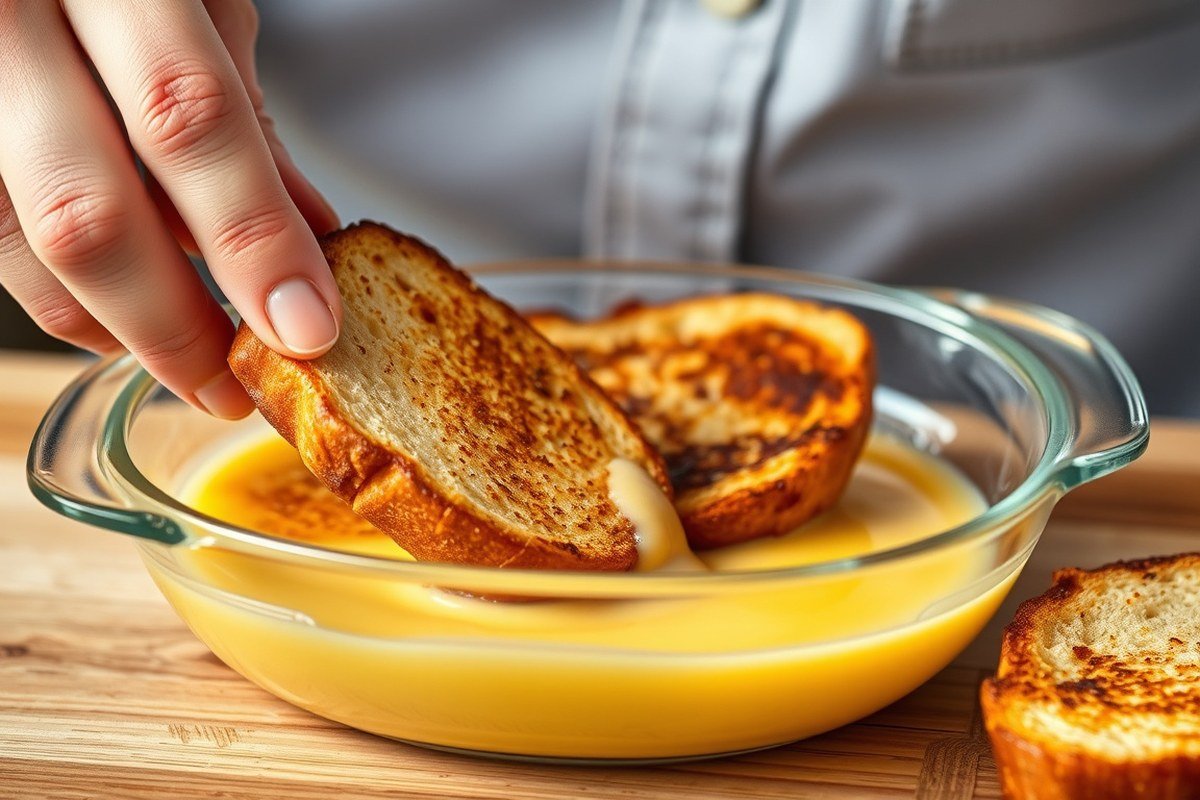
Preparing French toast involves soaking bread slices in a well-balanced egg and milk mixture, then cooking them until golden brown with a tender interior. Achieving the right soak time is important to soften the bread without making it soggy. Cooking on medium heat ensures the toast cooks through and caramelizes nicely without burning or drying out. When cooking multiple batches, keeping finished slices warm in the oven helps maintain texture and flavor for serving.
- Prepare the custard mixture: In a shallow dish, whisk together 3 large eggs with 1 cup of milk or cream. This ratio creates a custard that gives French toast its classic tender interior and golden exterior.
- Soak the bread slices: Dip each slice of bread into the egg mixture, allowing it to soak about 15 to 30 seconds per side. Use stale or slightly dried bread to absorb liquid well without falling apart.
- Preheat your pan or griddle: Heat a lightly greased nonstick skillet or griddle over medium heat. The surface should be hot enough to sizzle when bread touches it but not so hot that the toast burns quickly.
- Cook the bread: Place soaked bread slices on the pan and cook each side for 2 to 3 minutes. Look for a golden brown color with slight caramelization, indicating the right texture. Avoid turning heat up to prevent burnt outsides and undercooked centers.
- Cook in batches as needed: Most skillets hold 2 slices only, so cook in groups and keep finished toast warm on a rack in a 200°F oven. This method prevents sogginess and preserves crispness until serving.
- Serve immediately or store: Serve French toast hot with your favorite toppings. For leftovers, cool completely, then freeze in airtight bags for up to 3 months. Reheat in a 375°F oven for about 8 minutes, flipping halfway for the best texture.
Caring for heat control and soak time allows French toast to cook evenly with a fluffy inside and a golden, flavorful crust. Stale bread’s dryness helps the soaking step work better, and cooking on medium heat balances caramelization with complete cooking through. Cooking in small batches and warming slices in the oven ensures consistent quality if making for a group.
Choosing the Best Bread for French Toast

Picking the right bread shapes your French toast’s taste, texture, and how well it soaks up the custard batter. Thicker, denser breads hold moisture better, creating that sought-after fluffy inside with a slightly crisp outside. Softer, fresher breads absorb too quickly, sometimes ending soggy, while very stale bread can become rigid and dry. Oven-drying stale bread is a smart way to refresh it, it rehydrates evenly without losing flavor, making your French toast just right.
The choice between fresh and stale bread depends on texture preferences and the bread type. Fresh bread needs light toasting before dipping, so it doesn’t turn overly wet or mushy while soaking. Stale bread, especially if oven-dried, works best for uniform custard absorption and a balanced texture that isn’t soggy or too firm. This step is simple: slice the bread, place it in a single layer on a rack, and bake at 300°F for about 10 minutes, turning once.
| Bread Type | Taste | Texture | Soakability | Best Use |
|---|---|---|---|---|
| Brioche | Buttery, slightly sweet | Soft but sturdy | Excellent, absorbs evenly | Fresh or lightly stale, with optional orange zest |
| Thick sandwich bread | Neutral, mild | Firm, consistent crumb | Good soak, risk of sogginess if too fresh | Oven-dried stale preferred |
| French bread / baguette | Crunchy, slightly sour | Crusty outside, chewy inside | Moderate, can become dry if too stale | Best oven-dried stale |
| White sandwich bread (soft) | Mild | Very soft, delicate | Absorbs quickly, easy sogginess | Lightly toasted fresh slices only |
Oven-dried bread lands between fresh and stale, keeping the bread’s fresh taste while reducing excess moisture. This balance means custard mixes into the bread evenly without sogginess or a tough bite. It’s particularly helpful for thicker breads or older loaves that are too hard to soak properly but too tasty to waste.
Toast fresh bread lightly in the oven before dipping to prevent it from becoming soggy in the batter.
Brioche stands out as a breakfast favourite because its flavor is rich and buttery, lending well to extra touches like fresh orange zest. However, bread from your local store, like Trader Joe’s sliced French brioche or a thick sandwich loaf, offers a good base you can easily adapt. Remember, stale bread benefits from oven-drying for 10 minutes at 300°F, which also allows you to use leftovers and cut costs. Avoid very fresh, soft bread for soaking unless you toast it first to keep the texture fluffy but stable.
The Perfect French Toast Batter Ingredients and Ratios
The perfect French toast batter balances eggs, milk, and seasonings to create a custardy soak that gives you tender, flavor-rich results without a scrambled egg taste. Understanding ingredient roles, ideal egg-to-milk ratios, and the right flavor additions will help you make consistent French toast every time. Milk substitutes, optional flour, and sugar also play distinct roles depending on your flavor preference and dietary needs.
Basic Ingredients and Their Roles
French toast batter needs only a few key ingredients: eggs, milk, sugar, spices like cinnamon, vanilla extract, and a pinch of salt. Eggs act as the main binder and provide structure, thickening the batter into a custard. Milk thins the eggs to make it easier for the bread to soak without becoming soggy, contributing moisture and richness. Sugar adds a subtle sweetness that improve the overall flavor but isn’t absolutely required, some recipes omit sugar to control sweetness, relying on syrup or toppings instead. Salt balances flavors and cuts any potential egginess. Vanilla and cinnamon bring aromatic, warm notes that improve the taste and mask any egg flavor.
Mixing the batter thoroughly is important. Use a whisk or blender to combine eggs and flour first if included, then gradually add milk and other ingredients. The batter should be smooth and uniform with no lumps.
Milk Alternatives and Substitutions
Whole milk is the standard choice for French toast batter because it provides richness without being too heavy. Adding a splash of heavy cream can make the batter thicker and richer but may leave a greasy mouthfeel if overused. Skim milk is not recommended as it lacks enough fat to produce a satisfying texture and flavor.
You can use unsweetened plant-based milks like almond or oat milk as a substitute for milk. These milks will give a lighter texture and slightly different flavor. Using water as a substitute will result in a more pronounced egg taste, so it’s critical to boost flavor with more cinnamon, vanilla, and salt to balance that out. Avoid milk substitutes with strong flavors like soy or coconut unless you want those flavors to come through in your French toast.
Ideal Egg to Milk Ratios for Texture
The best texture comes from a balanced custard made with about three whole eggs per cup of milk. This ratio achieves a custardy soak that’s firm enough to hold together while cooking but still tender and light inside. Too many eggs make the flavor overly eggy and the bread dense or rubbery. Too little egg leaves the bread soggy and fragile. For a slightly richer custard, you can replace a quarter cup of milk with heavy cream, but keep total liquid volume close to one cup per three eggs.
For smaller batches, use one egg with a third cup of milk to maintain the ratio, and scale up accordingly. Stir the mixture well to fully combine eggs and milk for consistent soaking.
Adding Flavor: Vanilla, Cinnamon, and Sugar
Vanilla extract and ground cinnamon are the most popular flavor enhancers in French toast batter. A typical amount is about three-quarters of a teaspoon each per cup of liquid custard. Vanilla adds a subtle sweetness and depth, while cinnamon provides warmth and spice that complements the eggs and bread. These ingredients prevent the French toast from tasting bland or too “eggy.”
Sugar, around 1 to 1½ tablespoons per cup of custard, boosts sweetness but is optional. Some cooks prefer no sugar in the batter, relying on powdered sugar, syrup, or fruit toppings to provide the sweet contrast. When you add sugar to the batter, dissolve it thoroughly to prevent graininess or uneven caramelization that can darken your toast.
Using Flour and Other Add-Ins in Batter
Flour is rarely necessary but can be added in small amounts, about one to two tablespoons per cup of batter, to slightly thicken the custard. This can help the batter cling better to the bread and create a firmer crust. Mixing flour with eggs before adding milk prevents lumps and promotes even coating.
Flour may cause a slight change in texture, making the French toast denser or less creamy inside. Use it sparingly, especially with thicker breads. Other add-ins like nutmeg or allspice can complement cinnamon for a more complex spice profile, but keep spice amounts moderate to avoid overpowering the eggs and bread flavor.
For convenience, you can prepare the batter up to two days ahead and store it covered in the refrigerator. Give it a quick whisk before dipping the bread. This saves time on busy mornings while keeping the custard fresh and flavorful.
Making French Toast Sticks: A Handy Variation
French toast sticks are made by cutting traditional French toast into finger-sized pieces before soaking and frying them. This variation makes the dish easy to handle, especially for kids. Serving with fun dipping sauces encourages picky eaters to enjoy breakfast.
Preparing and Cutting the Bread
Start with thick slices of bread, about 3/4 to 1 inch thick, for sturdy French toast sticks that hold up during cooking. Use white sandwich bread, brioche, or challah for the best texture. Trim crusts if children prefer softer edges, but leaving them on adds a slight crunch.
Cut each slice into evenly sized sticks around 1 inch wide and 3 to 4 inches long. Keeping them uniform ensures they soak and cook evenly, avoiding undercooked centers or burnt edges.
Soaking French Toast Sticks in Batter
Use the same egg and milk batter as regular French toast. Dip the sticks one by one, submerging each fully. Let them soak for about 20 to 30 seconds to absorb the custard. Avoid soaking too long, as sticks can become soggy and break apart when cooking.
Place soaked sticks on a plate or tray while cooking. Working in small batches helps maintain temperature and prevents overcrowding.
Cooking French Toast Sticks on the Stovetop
Preheat a nonstick or cast iron skillet over medium heat and add a small amount of butter or oil to coat. Arrange the sticks in a single layer with a little space between them.
Cook for about 90 seconds to 2 minutes per side, or until each side is golden brown and slightly crisp. Flip carefully using tongs or a spatula to avoid breaking the sticks. Cooking times vary with thickness; thicker sticks may need an extra 30 seconds per side.
Serving Kid-Friendly Portions and Dip Options
French toast sticks are perfect for portioning, with 4 to 6 sticks per child depending on age and appetite. Serve with pats of butter and classic maple syrup for dipping.
To add variety, try small bowls of honey, fruit preserves, or creamy peanut butter as alternative dips. Mild cream cheese or yogurt blends are good for kids who dislike sweeter sauces. Keep sauces in small dipping cups for easy handling and less mess.
Steps to Make French Toast Sticks
Follow these steps to make French toast sticks from start to finish:
- Slice thick bread into 3/4 to 1-inch thick pieces, then cut each slice lengthwise into 1-inch wide sticks.
- Prepare your egg and milk batter.
- Dip each bread stick fully in the batter, soaking for 20 to 30 seconds.
- Preheat a skillet over medium heat and melt butter to coat.
- Place soaked sticks in a single layer, leaving space.
- Cook sticks for 90 seconds to 2 minutes per side until golden brown.
- Drain cooked sticks on a paper towel-lined plate briefly to remove excess fat.
- Serve with butter pats and dipping sauces like maple syrup or honey.
Common Mistakes and How to Fix Them
One of the most frequent mistakes when making French toast is soaking the bread for too long or too briefly. Over-soaking can cause the bread to fall apart or become soggy, while under-soaking results in dry, underflavored toast. Aim to dip each slice for about 20 to 30 seconds per side, allowing the custard to fully absorb without losing structure. Use sturdy bread like brioche or challah to hold up well during soaking.
Another common error is using a batter with too much egg or not enough liquid. A high egg ratio leads to a strong cooked egg flavor that can be mistaken for scrambled eggs. To avoid this, balance eggs with milk or cream at a ratio close to 1:1 by volume, such as 2 large eggs to 1/2 cup milk for four slices. This mix keeps the taste creamy and custardy rather than eggy.
Many cooks struggle to get the coveted texture of French toast that is crispy on the outside yet soft and creamy inside. Cooking over too-high heat can burn the surface before the center cooks, while too-low heat leaves the toast dry. Medium heat, around 325°F on a griddle or pan, works best. Preheat the pan thoroughly, then add a small spoon of butter for each batch. Cook each side for 2 to 3 minutes until golden brown. Flip carefully to maintain the crust, and avoid pressing down on the bread.
Another point is choosing the right cooking fat. Butter adds flavor but burns easily, which can cause uneven browning. Mixing butter with a bit of neutral oil (like vegetable or canola) extends cooking time and provides a balanced crust. Use about one tablespoon of butter mixed with one teaspoon of oil per batch to get a nice crust without burning.
Keeping French toast warm after cooking can be tricky. Stacking slices traps steam, making them soggy. Instead, place cooked slices in a single layer on a baking sheet in a 200°F oven to maintain crispness until serving. This prevents moisture buildup and keeps each slice crisp.
Use bread a day old or slightly stale; fresh bread absorbs too much custard and can break apart easily during cooking.
Reheating and Storing French Toast for Later
Storing French toast properly keeps it safe to eat and preserves its texture and flavor for later. After cooking, let the French toast cool completely to room temperature before storing. Warmth traps moisture and encourages bacteria growth, so don’t put hot French toast directly in the fridge. Place it in an airtight container or wrap it tightly with plastic wrap to prevent it from drying out or absorbing odors from other foods. Stored this way, it will stay fresh for up to 4 days in the refrigerator.
Freezing French toast is a good option if you want to enjoy it later without losing much quality. To freeze, arrange the cooled slices in a single layer on a baking sheet lined with parchment paper. Freeze them for about 1 to 2 hours until firm; this keeps slices from sticking together. Then transfer the frozen slices into a resealable freezer bag or airtight container. Label the package with the date and use within 1 to 2 months for best taste.
Reheating leftover French toast requires gentle heat to regain crispness without drying it out. The oven is the ideal method. Preheat your oven to 350°F (175°C). Place the slices on a baking sheet in a single layer and heat for 10 to 15 minutes, flipping once halfway through. This method warms the toast evenly and helps keep its exterior slightly crisp. When using a toaster oven or regular toaster, choose slices that aren’t too thick to prevent uneven heating. Microwave reheating is quicker but may make French toast soggy. To reduce sogginess, microwave slices on a microwave-safe plate lined with a paper towel for about 20 to 30 seconds, then crisp in a hot skillet for a minute per side.
Avoid reheating French toast more than once since each cycle reduces quality and can raise food safety concerns. Should French toast develop a sour smell, slimy texture, or mold, throw it away right away. Proper cooling, airtight wrapping, and prompt refrigeration or freezing minimize these risks.
When thawing frozen French toast, do not leave it out at room temperature. Instead, thaw thaw slices in the refrigerator overnight or reheat directly from frozen in the oven, adding a few minutes to the warming time. This careful approach prevents bacterial growth and keeps the texture firm.
Following these steps ensures your leftover French toast tastes fresh and safe the next time you serve it. The extra preparation for freezing and reheating requires minimal time but makes busy mornings or unexpected guests easier to handle. Paying attention to cooling, wrapping, and heating methods maintains the best flavor and texture you want from this breakfast classic.
Serving Suggestions and Flavor Enhancements
Serving French toast with the right toppings and accompaniments can transform this simple dish into a memorable meal. Syrups, fruits, and spice mixes add layers of flavor and texture. Syrups like maple, honey, or fruit-flavored varieties provide sweetness that complements the eggy, rich bread. Maple syrup remains the classic choice, with pure grades typically costing between $5 and $10 per 12-ounce bottle. Drizzling it warm over the toast ensures the syrup soaks slightly without making the bread soggy.
Fresh fruits add brightness and balance the dish’s richness. Berries like strawberries, blueberries, and raspberries offer a natural tartness and colorful contrast. Bananas add creamy sweetness, while sliced apples or pears provide crispness and a mild bite. For best results, slice fruits just before serving to preserve freshness and nutrition. Combining multiple fruits creates visual appeal and a variety of flavors that suit different preferences.
Spice mixes can bring warmth and depth. Cinnamon is the most popular spice for French toast and pairs well with both sweet syrups and fruits. A pinch of nutmeg or cardamom complements cinnamon and adds a more complex aroma. You can sprinkle these spices on top or mix them into the batter before cooking. Store-bought cinnamon costs around $3 to $6 per jar, and using ¼ to ½ teaspoon per serving improve flavor without overpowering.
- Classic maple syrup, warmed to about 100°F for easy pouring
- Fresh mixed berries (½ cup per serving), rinsed and hulled if needed
- Sliced ripe bananas or crisp apple slices, ¼ inch thick
- Powdered sugar dusted lightly on top for extra sweetness
- A dash of ground cinnamon or pumpkin pie spice on finished toast
- Whipped cream or Greek yogurt for creaminess and tang
- Chopped nuts such as pecans or walnuts for crunch and texture
For a richer twist, add a pat of butter on the French toast right after cooking to melt for a glossy finish. Whipped cream or a dollop of Greek yogurt adds moisture and balances sweetness with mild tang. Nuts add crunch and healthy fats but should be chopped finely to avoid overpowering the soft texture. Avoid soggy toast by adding wet toppings like syrup and fruit just before eating rather than soaking the toast in advance.
Adjust toppings based on the occasion: use berries and light syrup for a fresh, summery feel; switch to apples, cinnamon, and nuts for a cozy fall brunch. Savory options like cream cheese and smoked salmon can also be paired with minimal sugar toppings for a unique variation. Keeping toppings balanced ensures each bite maintains the perfect blend of crispness, softness, and flavor burst.
Essential Kitchen Tools for Perfect French Toast
Preparing French toast well requires a few key kitchen tools to get the texture and flavor just right. The right pan ensures even cooking without sticking, and the proper utensils help manage each slice smoothly and safely. Choosing tools that balance performance and easy cleanup makes cooking French toast faster and less messy.
Best Pans and Skillets
A heavy-bottomed skillet or frying pan with a nonstick surface usually works best for cooking French toast evenly. Look for pans that heat evenly across the bottom to prevent hot spots that cause burning or uneven browning.
Cast iron skillets are excellent because they retain heat well and create a crisp exterior. Seasoned well, they provide natural nonstick qualities but typically require more careful cleaning to maintain their surface. Nonstick pans with ceramic coatings offer easy release and quick cleanup but might not last as long as cast iron.
For home cooks, an 8 to 10-inch pan size is ideal to fit one or two slices comfortably. Avoid small pans that crowd the bread, causing steaming instead of toasting.
Utensils Needed
Some basic utensils help make the French toast process go smoothly. A whisk is necessary to blend eggs, milk, and seasonings fully for a consistent custard. Using a fork or tongs to dip the bread keeps your fingers clean and prevents soggy slices from falling apart.
A spatula with a thin, flexible edge makes flipping easy without tearing the bread. Metal or silicone spatulas both work; silicone handles heat safely and reduces scratches on nonstick pans.
- Whisk for mixing batter
- Tongs or fork for dipping bread
- Turner spatula with a thin edge
- Measuring cups and spoons for ingredients
- Plate or tray to hold dipped bread before cooking
- Cooking spray or butter for greasing the pan
Using these utensils reduces mess and speeds up the cooking process, preventing custard from settling unevenly and protecting your hands from hot surfaces.
Optional Tools for Convenience
Some tools aren’t necessary but can make the French toast process easier, especially if cooking in batches. A griddle or electric flat-top cooker with a temperature control keeps multiple slices warm and evenly cooked all at once. You can maintain a medium heat around 325°F for consistent browning without burning.
A shallow dish or pie plate can hold batter and make dunking bread faster than a bowl, especially for thicker slices. A kitchen timer helps avoid overcooking, as French toast usually needs about 2 to 3 minutes per side.
Be careful not to overcrowd the pan, as adding too many slices at once lowers the pan temperature and leads to soggy French toast.
Cleaning and Maintenance Tips
Cleaning your cookware promptly after cooking French toast prevents buildup of cooked-on egg and syrup. Nonstick pans should be washed with a soft sponge and mild detergent to avoid damaging their coating. Avoid abrasive scrubbers and metal utensils during cooking to extend their lifespan.
Cast iron skillets need to be cleaned by wiping out excess oil and washing with warm water only, no soap, to preserve the seasoning. Dry the pan thoroughly and apply a thin layer of oil after each use to prevent rust.
Step-by-Step Action Plan
Follow this simple plan to make perfect French toast today and build your confidence with each attempt.
- Before you start: Gather your ingredients and kitchen tools. You’ll know you’re ready when all items are on hand and your pan is preheating.
- Step 1: Choose day-old or slightly stale bread with a sturdy texture. Success shows when the bread soaks up the batter without falling apart.
- Step 2: Whisk together eggs, milk, vanilla, and spices to create the batter. It’s ready when combined smoothly with no lumps.
- Step 3: Dip the bread slices fully in the batter, allowing at least 20 seconds per side for even absorption. The bread should feel moist but not soggy.
- Step 4: Cook on a medium-hot, greased skillet or griddle for 3 to 4 minutes per side until golden brown. Look for a crisp crust and cooked-through interior.
- Step 5: Keep cooked French toast warm in a low oven if making multiple batches. Check by touch; toast should stay crisp but not dry.
- Step 6: Serve with your favorite toppings or syrup right away for best texture and taste.
Frequently Asked Questions
How to Make French Toast Sticks Step by Step?
Cut thick bread into sticks, dip in egg and milk batter, then fry in a skillet until golden. Cook in batches for best results and flip sticks halfway through for even browning.
What Is French Toast Batter Made Of?
The batter usually includes eggs, milk or cream, and sometimes cinnamon or sugar. This combination soaks into the bread to create a rich, custard-like texture once cooked.
What Is the Trick to French Toast?
The key is the batter ratio and soaking time. Use three eggs per cup of milk for a custardy texture and soak bread long enough to absorb without becoming soggy.
What Is the Ratio of Milk to Eggs for French Toast?
The ideal ratio is three eggs to one cup of milk for a balanced custard. Adjusting this affects how firm or soft the finished French toast will be.
Can I Use Frozen Bread for French Toast?
Yes, frozen bread works but should be thawed slightly. Slightly stale or day-old bread also absorbs batter better than fresh bread.
How Long Should I Soak the Bread in the Batter?
Soak bread for about 20 to 30 seconds per side. This allows the custard to soak in but prevents the bread from becoming too soggy.
Key Points to Remember
Perfecting French toast is about controlling your ingredients, timing, and cooking temperature. Once you master the batter and choose the right bread, you create a reliable base to customize flavors and styles. Try this plan today to confidently make French toast that’s golden, tender, and delicious.


3 Comments