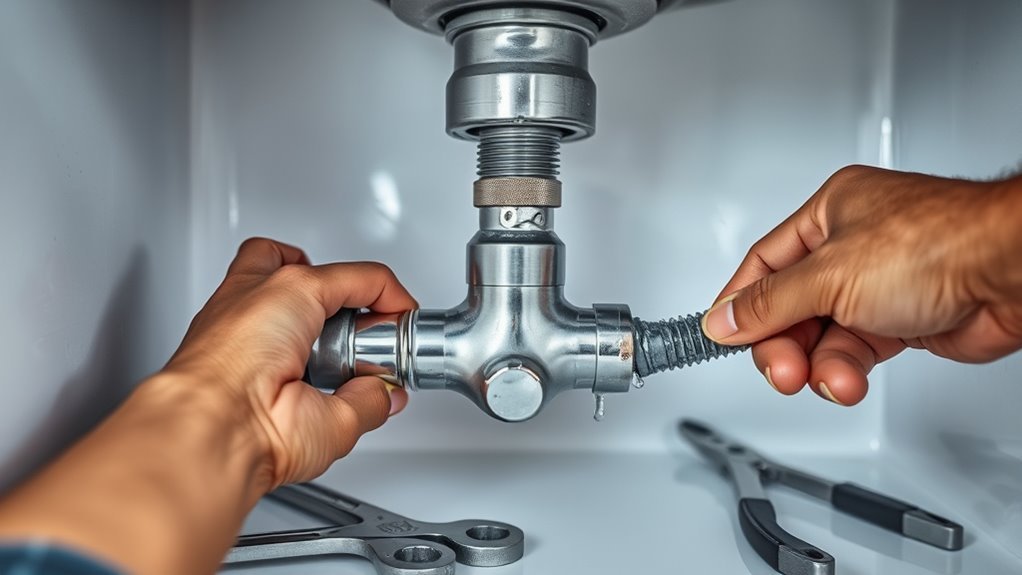
How to Remove Kitchen Sink Drain: A Step-by-Step Guide
Dealing with a stubborn or clogged kitchen sink drain can be frustrating, and many people struggle with removing it properly. If you’re planning to replace or repair your sink, knowing how to remove the drain is essential.
Don’t worry—you’re not alone in facing this challenge, and with a little guidance, you can do it yourself.
To remove your kitchen sink drain, start by turning off the water supply and clearing the cabinet below.
Gather tools like an adjustable wrench, basin wrench, and a bucket for spills.
Loosen slip nuts to disconnect drain pipes carefully, then unscrew the locknut to lift out the drain flange.
Clean any old sealant and inspect parts for damage.
Following these steps helps avoid leaks and damage.
Keep going to uncover tips on handling stubborn parts and preventing common mistakes.
Key Takeaways
- Turn off the water supply valves and open the faucet to drain any remaining water before starting the removal process.
- Place a bucket under the sink and loosen the slip nuts on the drain pipes with an adjustable wrench to disconnect them safely.
- Loosen and remove the large locknut under the sink to free and lift out the drain flange from above the sink.
- Clean away old sealant and residue around the drain area using a plastic scraper and adhesive remover before installing a new drain.
- Wear gloves and eye protection throughout the process. Organize your tools to avoid damage and stay safe.
Gather the Right Tools First

Before you start removing your kitchen sink drain, make sure you have the right tools ready. Gathering the proper equipment beforehand makes the job easier and helps avoid delays.
You’ll usually need an adjustable wrench to loosen nuts, a basin wrench for tight spots, and pliers for gripping and twisting. A bucket or container is handy for catching any water that spills during removal.
Don’t forget a screwdriver, since some drains are secured with screws. A utility knife can help you cut through old plumber’s putty or caulking. And gloves will protect your hands from grime and sharp edges.
Turn Off Water and Prepare Your Workspace
Once you’ve gathered your tools, make sure to turn off the water supply to avoid any leaks or spills while working on the drain. Find the shut-off valves under the sink and turn them clockwise until they’re fully closed. If you don’t see individual shut-offs, turn off the main water supply for your home.
After that, open the faucet to drain any remaining water from the pipes.
Open the faucet to clear out any leftover water in the pipes before starting your work.
Next, focus on organizing your workspace. Clear out the cabinet under the sink so you have plenty of room to work comfortably. Lay down a towel or shallow pan to catch drips or small parts that might fall.
Keep your tools nearby so you can reach them easily without disrupting your workflow. A tidy workspace helps prevent accidents and makes the process go smoothly.
Taking these steps ensures you’re ready to safely and efficiently move on to removing the kitchen sink drain.
Disconnect Sink Drain Pipes Safely
With the water supply turned off and your workspace set, you can now focus on disconnecting the sink drain pipes. Start by placing a bucket underneath to catch any residual water or debris. Following proper plumbing safety precautions is essential to avoid messes and injuries.
Here’s how to proceed:
- Loosen the slip nuts connecting the drain pipes using adjustable pliers or a wrench. Turn them counterclockwise slowly to prevent damage.
- Carefully detach each pipe section, noting their order for reassembly. Use a rag to wipe off any grime.
- Inspect the pipes for clogs or damage as part of your drain maintenance tips, ensuring smooth drainage when reconnected.
Remember to wear gloves and eye protection throughout the process. By following these steps and safety measures, you’ll disconnect the sink drain pipes efficiently and safely, setting you up perfectly for the next steps.
How to Remove the Kitchen Sink Drain Flange
Start by loosening the drain flange, which connects the sink basin to the drain assembly. You’ll usually find a large locknut underneath the sink holding the flange in place. Use channel-lock pliers or a wrench to turn the locknut counterclockwise until it’s free.
As you remove it, be careful not to damage the sink or surrounding plumbing. Once the locknut is off, you can lift the flange out from above the sink.
Take care to avoid damage when removing the locknut, then lift the flange out from above the sink.
Keep in mind that flange installation varies depending on flange materials—common ones include metal, plastic, or brass. Each type may have a different seal or plumber’s putty to guarantee a watertight fit.
After removal, inspect the flange and clean away old putty or residue before reinstalling or replacing it. Proper flange installation guarantees a secure, leak-free connection, so pay attention to how the flange was originally seated and sealed.
How to Remove Stubborn or Rusted Drain Parts Safely
Although removing kitchen sink drain parts is usually straightforward, stubborn or rusted components can make the job tricky.
To handle rust safely and efficiently, try these techniques and tips for drain maintenance:
Apply a rust remover or a mixture of vinegar and baking soda to the affected parts. Let it sit for 15-20 minutes to loosen the corrosion before trying to remove them.
Use penetrating oil on rusted nuts and bolts. Let it soak in for at least 10 minutes, then gently tap with a wrench to break the rust bond without damaging the plumbing.
If parts still won’t budge, carefully use a pipe wrench or locking pliers for extra grip. Just avoid using too much force to prevent cracking pipes or fittings.
Clean the Drain Area Before Installing a New Drain
Before you install your new drain, make sure to remove any leftover sealant from the old one. It’s important to have a clean surface so everything fits properly. Take some time to scrub away any dirt or debris—that way, you won’t run into leaks later on.
Once everything’s clean, dry the area completely. This step is key because it helps the new sealant stick better and keeps everything sealed tight.
Remove Old Sealant Residue
Scrape away any old sealant residue clinging to the drain area to confirm a clean surface for your new installation. Removing this buildup guarantees the new sealant adheres properly, preventing leaks.
Here are some effective sealant removal techniques to try:
- Use a plastic scraper or putty knife to gently lift and peel away the residue without damaging the sink surface.
- Apply adhesive residue options like rubbing alcohol, mineral spirits, or a commercial adhesive remover to soften stubborn sealant. Let it sit briefly, then wipe clean.
- For tough spots, carefully use a utility knife blade to cut through hardened sealant, taking care not to scratch the sink.
These steps help you thoroughly remove old sealant residue, preparing the drain area for a secure, leak-free seal when installing your new kitchen sink drain.
Scrub Away Debris
Clear away any remaining debris from the drain area to guarantee a smooth installation for your new kitchen sink drain. Start by using a stiff brush or an old toothbrush to scrub the surface thoroughly.
Use effective cleaning techniques, like applying a mild detergent or a vinegar solution, to break down grease and grime. Rinse the area with water afterward to remove loosened particles.
Be sure to reach every nook and cranny, as leftover debris can cause improper sealing and leaks. Practicing proper debris prevention now will save you from future plumbing headaches.
Taking the time to clean the drain area carefully ensures your new drain fits snugly and functions properly. This simple step is vital before moving on to drying and installing the new drain.
Dry Surface Thoroughly
Make sure you dry the drain area completely to prevent any moisture from messing with the new installation. Moisture can weaken seals and cause leaks, which can ruin your DIY plumbing efforts.
Use a clean, absorbent cloth to wipe away water and debris from the drain and the sink area. Then, let it air dry for a few minutes or use a hairdryer on low heat to speed things up.
Check the surface for any remaining moisture or residue. If you see any, repeat the drying process until it’s completely dry.
How to Decide When to Replace Drain Parts
You should think about replacing drain parts if you see any obvious signs of wear, like cracks or rust. It’s a good idea to keep an eye out for these issues so small problems don’t turn into bigger ones down the line.
Also, consider what material the parts are made of. Some metals tend to last longer than plastic, so if you’re dealing with metal that’s showing signs of aging, it might be time to replace it. And don’t forget to weigh the cost of fixing things up versus just replacing them — sometimes it’s more practical to go for a new part altogether.
Signs of Wear
Although a kitchen sink drain can last for years, certain signs indicate it’s time to replace parts before bigger problems happen. Keep an eye out for wear indicators that show material is degrading and leaks might occur.
Here are three key signs to watch for:
1. Visible Cracks or Corrosion
These indicate the drain parts are breaking down and might fail soon.
2. Persistent Leaks
If tightening the connections doesn’t stop the dripping, internal damage could be the cause.
3. Slow Drainage or Blockages
Material breaking down inside the pipes can restrict flow, signaling it’s time to replace.
Material Durability
When deciding whether to replace your kitchen sink drain parts, pay close attention to the material durability. Different materials wear down at different rates, so knowing their lifespan and resistance to corrosion helps you make an informed choice.
This way, you can avoid leaks or clogs by replacing parts before they fail. Here’s a quick guide to common drain materials:
| Material | Material Lifespan | Corrosion Resistance |
|---|---|---|
| PVC | 25-40 years | High |
| Stainless Steel | 20-30 years | Excellent |
| Brass | 40+ years | Very High |
| Cast Iron | 20-50 years | Moderate (rust prone) |
| Chrome-plated | 10-15 years | Low (prone to peeling) |
If you notice rust, cracking, or peeling, it’s a sign to replace the parts and keep your sink leak-free.
Cost of Repairs
Three key factors influence whether replacing your kitchen sink drain parts is worth the cost: the extent of damage, material type, and labor involved. To decide effectively, consider the following:
- Extent of Damage: Minor leaks or clogs might only need small repairs, keeping repair costs low. Extensive corrosion or cracking usually requires full replacement.
- Material Type: Durable materials like stainless steel cost more upfront but save money long-term. Cheaper plastics might need frequent repairs, which can impact your budget.
- Labor Involved: Simple DIY fixes reduce expenses, but complex replacements require professional help, increasing total costs.
Weigh these factors against your budget to decide if repair or replacement is more cost-effective, helping you make an informed choice for your kitchen sink drain maintenance.
Common Mistakes When Removing a Kitchen Sink Drain
Anyone tackling a kitchen sink drain removal can easily run into avoidable errors that complicate the process. One of the biggest pitfalls is falling for common misconceptions, like assuming all drains are the same or that you can skip shutting off the water supply. These misunderstandings often lead to leaks or damage.
Another frequent mistake is neglecting essential safety measures. Always wear gloves and eye protection to avoid injury from sharp parts or chemicals. You might also overlook loosening all the necessary connections before trying to remove the drain, which can cause strain and breakage.
Using the wrong tools or forcing parts apart can damage your sink or pipes, creating costly repairs. Finally, failing to clear out debris before removal can cause blockages or make the process harder. Staying mindful of these errors will help you remove your kitchen sink drain smoothly and safely.
How to Troubleshoot Leaks After Drain Removal
Detect leaks quickly after removing your kitchen sink drain to avoid water damage and costly repairs. The key is to check your connections carefully. Here are three simple steps to troubleshoot leaks after drain removal:
1. Check for loose fittings
Tighten all slip nuts and connections. Loose fittings are often the main cause of leaks.
2. Inspect gaskets and washers
Look for damaged or misaligned gaskets. Replace any worn parts and make sure they sit properly.
3. Test with water
Run water through the drain and watch closely for drips. Focus on joints and seals to catch any leaks early.
Dispose of Old Drain Parts and Waste Properly
Once you’ve taken out the old drain parts, it’s a good idea to sort them by material. This makes disposal a lot simpler. You might want to check your local guidelines to see if any of the parts can be recycled or need to be handled as hazardous waste. Properly getting rid of these materials not only helps protect the environment but also keeps your workspace tidy and safe.
Sorting Drain Components
Before you toss out old drain parts, take a moment to separate reusable pieces from those that need disposal. Understanding different drain types and component functions helps you decide what to keep.
Some parts, like metal washers or nuts, might still be useful, while rubber gaskets often wear out and should be discarded.
Follow these steps to sort efficiently:
- Identify the drain types you have—PVC, metal, or rubber—and group parts accordingly.
- Examine each component’s function. Reusable parts usually show no cracks, corrosion, or deformation.
- Set aside worn or broken items like cracked pipes or damaged seals for proper disposal.
Sorting components this way guarantees you only keep what’s functional and avoid mixing waste with reusable parts.
Environmental Waste Disposal
After sorting your drain components, it’s important to handle the disposal of old parts and waste responsibly. Start by checking which materials can be recycled—metal pipes and fittings usually qualify.
Use eco-friendly practices by separating recyclables from non-recyclables to reduce landfill impact. For non-recyclable waste, consult your local waste management guidelines to guarantee proper disposal.
Avoid tossing old drain parts in regular trash if hazardous substances like sealants or corrosion are involved. Instead, take them to a designated facility for safe handling.
Frequently Asked Questions
Can I Remove a Kitchen Sink Drain Without Shutting off the Water?
You shouldn’t remove a kitchen sink drain without shutting off the water first. Even with the right drain tools, water can spill and cause damage or injury.
For your safety and plumbing safety, turning off the water supply prevents leaks and accidents. Always double-check valves before starting.
Taking this precaution helps you work efficiently and avoids unexpected messes. This makes your drain removal much smoother and safer overall.
What Is the Average Time to Remove a Kitchen Sink Drain?
You can expect to spend about 30 to 60 minutes removing a kitchen sink drain. The actual time depends on your experience and the condition of the drain.
Using the right plumbing tools can make the process faster, and following drain cleaning tips helps prevent damage or clogs.
If you’re prepared and work carefully, you’ll likely finish within an hour. But stubborn parts or corrosion might take extra time.
Are There Eco-Friendly Drain Parts Available for Replacement?
Yes, you can definitely find eco-friendly materials for your kitchen sink drain replacement. Many brands now offer sustainable options made from recycled metals or biodegradable plastics, which help reduce environmental impact.
When choosing parts, look for certifications or labels that highlight sustainability. By opting for these eco-friendly materials, you’re not only keeping your sink working well but also supporting greener choices.
This helps conserve resources and minimizes waste, making your repair both practical and environmentally responsible.
How Do I Know if My Drain Is Compatible With New Parts?
You’ll know if your drain is compatible with new parts by checking key factors like size, threading, and material type. Measure your existing drain’s diameter and note the connection style.
Then, compare these details with the specifications provided by the manufacturer of the replacement part. Make sure to also consider the type of sink and plumbing system you have.
Matching these factors ensures your new parts will fit properly and work as they should.
Can a Kitchen Sink Drain Removal Affect My Home’s Plumbing Warranty?
Yes, removing a kitchen sink drain can impact your plumbing warranty. If you try to do it yourself without professional help, you might damage the pipes or connections.
That kind of damage could potentially void your warranty because it’s considered a drain removal risk. It’s always a good idea to check your warranty terms first before starting any work.
To avoid any issues with your warranty, think about hiring a licensed plumber. They guarantee their work meets standards, which helps protect your home’s plumbing system and your coverage.
Conclusion
Removing your kitchen sink drain might seem tricky, but with the right steps, it’s totally doable. Did you know that nearly 60% of DIY plumbing projects succeed when homeowners follow clear guides?
By gathering the right tools, working safely, and knowing when to replace parts, you’ll avoid common mistakes and leaks. Taking your time and disposing of old parts properly will make the process smoother.
Remember, patience is key, and your kitchen sink drain removal will be a success. You’ve got this—your sink will be as good as new in no time!