How to Make Chocolate Lava Cake: Simple Steps for Perfect Gooey Center
Learning how to make chocolate lava cake starts with using the right ingredients, carefully timed baking, and selecting the perfect baking dish. This recipe yields a rich dessert with a warm, gooey chocolate center and a tender cake exterior. You can make these impressive treats in under 20 minutes, ideal for a cozy night in or a quick dessert for guests.
This guide is for home cooks who enjoy chocolate desserts and want to master a simple, foolproof way to create molten chocolate cakes. It covers each step from ingredient choices to baking techniques, ensuring you achieve that signature molten center every time, plus tips for storage, reheating, and creative variations.
Key Takeaways
- Use high-quality chocolate and butter, melting them gently in 10-15 second microwave bursts until smooth.
- Choose small ramekins for individual lava cakes, coating them with butter and dusting with cocoa powder to prevent sticking.
- Bake lava cakes for 12 to 14 minutes at 350°F to safely cook eggs while preserving a gooey center.
- Check for doneness when cake edges pull away and the center still jiggles slightly to avoid overbaking.
- Keep leftover cakes fresh by placing them in an airtight container and refrigerate for up to 5 days, or freeze them for 1-2 months for longer storage.
- Reheat refrigerated cakes in a 350°F oven for best results, ensuring the center softens without overcooking.
How to Make Chocolate Lava Cake Step-by-Step
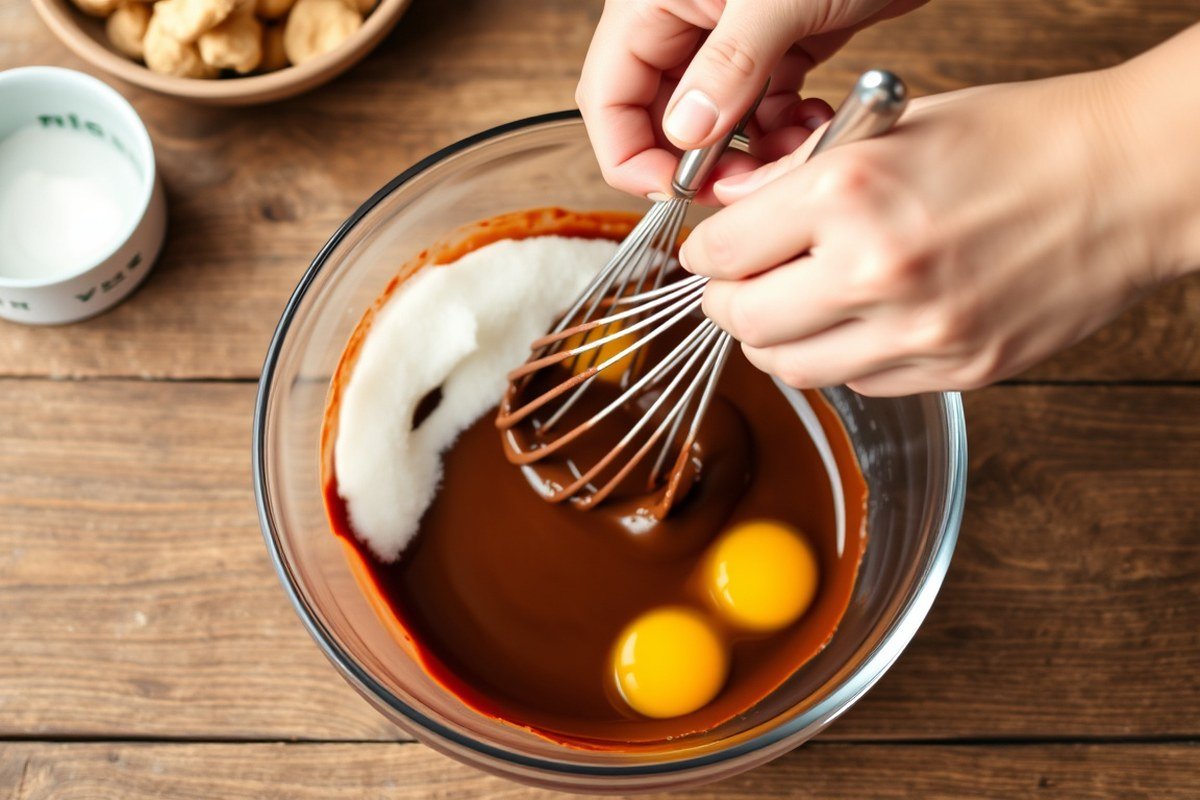
To make chocolate lava cake using simple ingredients, gather dark chocolate, unsalted butter, powdered sugar, eggs, and all-purpose flour. Slowly melt the chocolate and butter together before beating the eggs and sugar until fluffy. Combine all components gently and bake at about 425°F, so the outer edges firm up while the middle remains soft and slightly wobbly. Serve immediately by inverting the ramekins onto plates.
Melting Chocolate and Butter Safely
Start by chopping both the chocolate and butter into small, even pieces to ensure they melt evenly. Use a double boiler on the stovetop, place a heatproof bowl over simmering water without letting the bowl touch the water, and stir occasionally until smooth. Alternatively, melt in a microwave-safe bowl in 30-second increments at medium power, stirring well between bursts to prevent scorching.
Set the melted mixture aside to cool to room temperature before mixing it with eggs. Adding eggs to hot chocolate risks scrambling them and ruining the batter’s texture.
Whisking Eggs and Sugar to the Right Consistency
Combine the eggs, egg yolks, and powdered sugar in a mixer, beating at medium-high speed. Keep mixing until the blend becomes pale in color, thick in texture, and nearly doubles in size, which usually takes about 2 to 3 minutes. This process incorporates air that makes the cakes rise and results in a lighter consistency.
Fold in the cooled chocolate mixture gently to avoid deflating the batter. Then add sifted flour with slow, careful motions to combine without overworking, which can make the cake dense and tough.
Baking Time and How to Check Doneness
Preheat your oven to 425°F and place the batter-filled ramekins on a baking sheet. Bake for 12 to 14 minutes, starting to check around the 11-minute mark. Your cakes are ready when the edges look firm and start pulling away from the sides, but the centers still jiggle slightly when you gently shake the baking sheet.
This method ensures the exterior is fully cooked while preserving the gooey molten center. Baking too long will cook the center through, missing the lava texture. Also, remember that larger ramekins take longer to bake, so adjust your time accordingly.
Removing Cakes from Ramekins
Allow the cakes to cool in their ramekins for about 1 minute after baking. Run a thin knife gently along the inner edges to loosen any stuck parts. Next, invert each ramekin over a serving plate and tap or gently shake to release the cake.
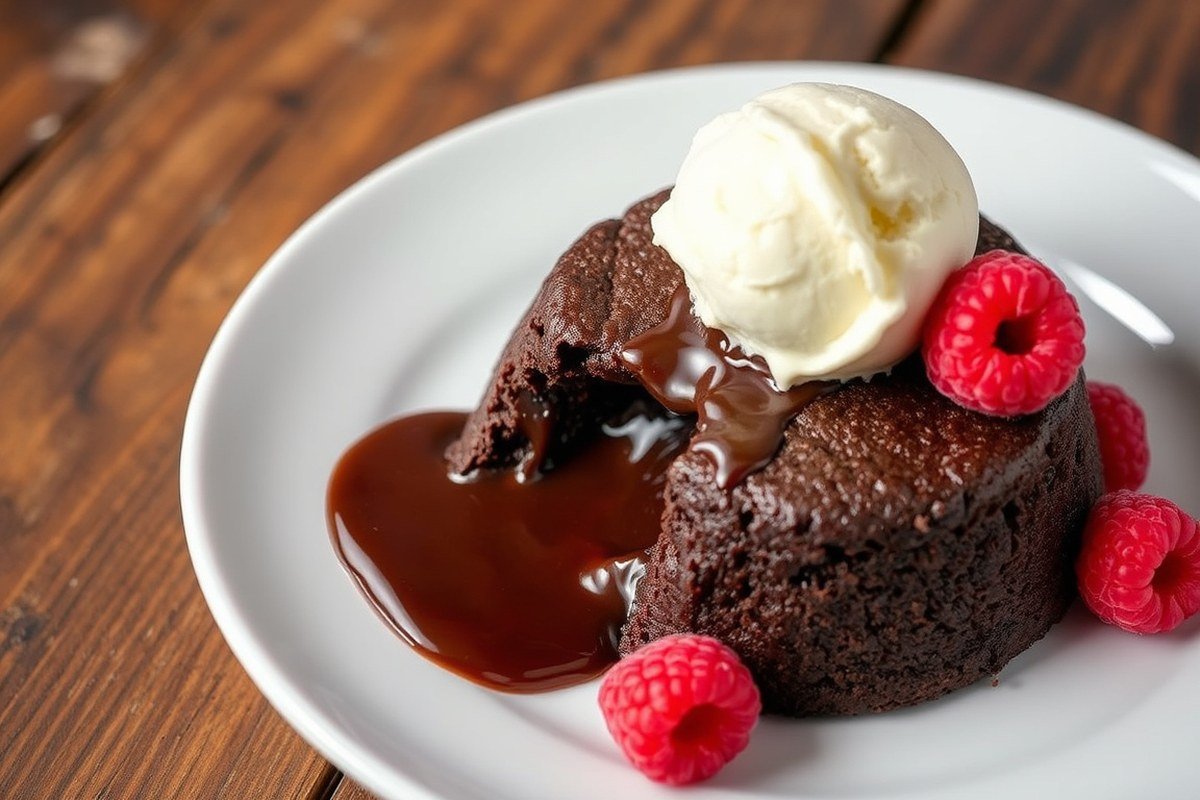
Serving the cakes warm maintains the flowing lava effect. Allowing the cakes to cool too much causes the centers to become firmer and lose their molten texture. For presentation, add a dusting of powdered sugar or a scoop of vanilla ice cream right after unmolding.
- Chop and melt the butter and chocolate together using a double boiler or microwave, then let cool.
- Beat eggs, egg yolks, and powdered sugar until pale and thick.
- Fold in the cooled chocolate mixture carefully, then gently mix in sifted flour.
- Grease ramekins and pour batter evenly into each.
- Bake at 425°F for 12, 14 minutes, checking after 11 minutes for the perfect gooey center.
- Cool cakes in ramekins for 1 minute, run a knife around edges, then invert onto plates.
- Serve immediately with optional toppings like ice cream or fresh berries.
Choosing Ingredients That Affect Lava Cake Quality
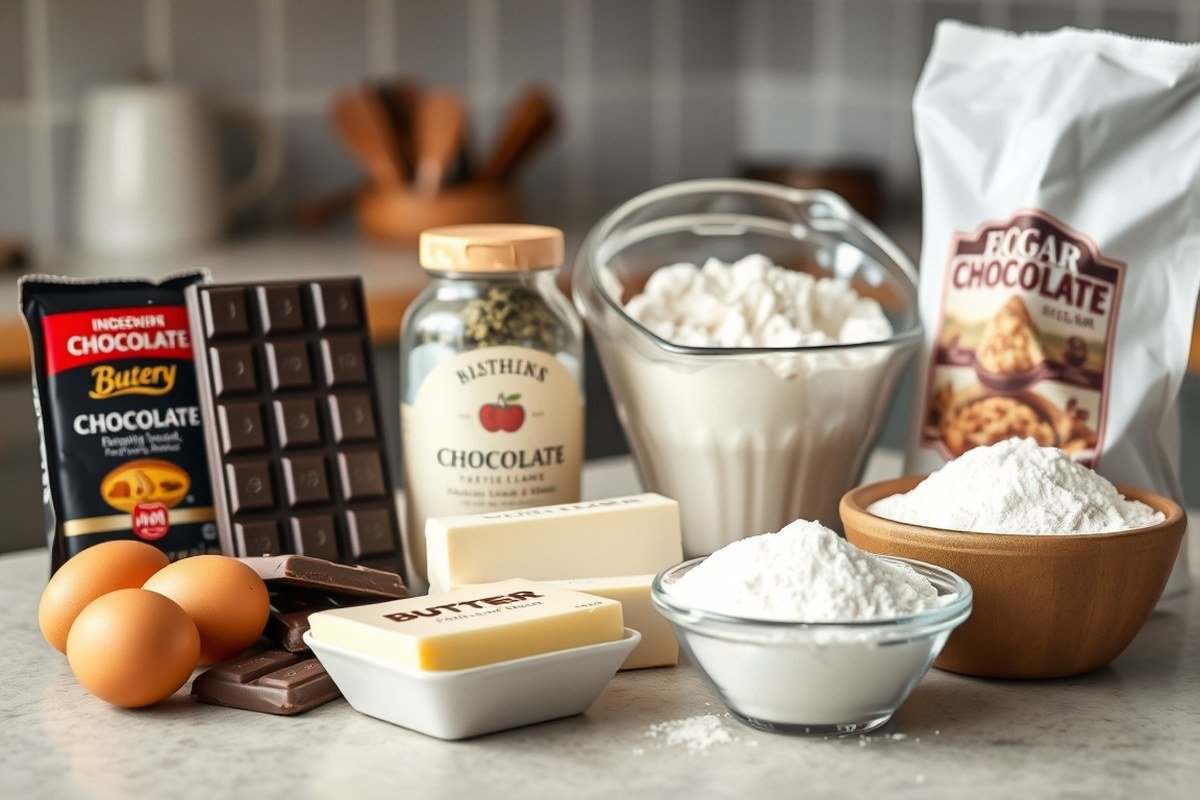
Dark or bittersweet baking chocolate is the best choice for chocolate lava cake. It offers a rich flavor that stands out without being overly sweet. Bars of baking chocolate melt more smoothly than chips, which is key for achieving the molten center. While you can use chocolate chips in a pinch, expect the final texture to be less gooey and the flavor less intense. Choose chocolate with at least 60% cocoa content for balanced bitterness and sweetness.
Unsalted butter is ideal because it lets you control the salt level in the recipe. Salted butter varies in salt content, which can affect both taste and chemically how the cake rises and sets. Use high-quality butter with about 80% fat for the best richness and texture. Melt the butter gently with the chocolate to create a smooth base that helps the lava cake cook evenly.
All-purpose flour works well here, but quantity matters. Using about 2 to 3 tablespoons per individual cake usually gives the right balance between a moist, tender crust and a molten center. Too much flour makes the cake dense and dry; too little can cause the cake to collapse or be overly runny. Measuring flour correctly, spoon it into the cup and level it off, prevents using excess flour.
Eggs play a important role, providing structure and richness. Using whole large eggs offers the protein to hold the cake while the yolks add fat for moistness and flavor. The right number of eggs helps the cake firm on the outside while keeping the middle gooey. Overbeating the eggs or using too many can lead to a cakey texture without that signature lava flow.
Sugar gives sweetness and helps with the texture but reducing it too much risks losing the molten center. Since the batter relies on sugar to create the right crumb and moisture, stick close to the recommended amount, typically ¼ to ⅓ cup for a standard recipe. Substituting sugar with alternatives or cutting sugar drastically can change the cake’s ability to hold its liquid center and may change the taste.
Use baking chocolate bars and unsalted butter for a melt that is both smooth and flavorful; avoid chocolate chips if you want the perfect ooey-gooey lava center.
How to Choose and Prepare Baking Dishes for Lava Cake
You can bake chocolate lava cakes in various dishes, but size, material, and preparation influence how the cakes bake and hold their shape. Four-ounce ramekins are common for individual servings, while muffin pans offer an alternative if ramekins aren’t available. Properly greasing and dusting your dishes keeps the cakes from sticking and makes removal easier.
Ramekins vs. Muffin Pans
Four-ounce ceramic ramekins with straight sides are ideal for lava cakes because they fit single servings perfectly and help the cakes keep their shape. A standard set includes six ramekins, which suits most baking needs.
You can use muffin pans instead, either jumbo or regular size. Muffin pans conduct heat faster due to thinner walls, so baking times are shorter by about 2 minutes. Muffin pans usually come as 6 or 12 counts, offering more portions but with different cake shapes.
| Bakeware Type | Typical Size | Baking Time | Shape & Serving |
|---|---|---|---|
| Ceramic ramekins | 4 oz (about ½ cup) | 12, 14 minutes | Individual, straight-sided cakes |
| Regular muffin pan | Standard muffin cup (~3.5 oz) | 8, 10 minutes (reduce by 2 min) | Smaller, round cakes |
| Jumbo muffin pan | Larger muffin cup | Similar to ramekins, check earlier | Bigger portions, less structured |
The shape of ramekins gives a neater presentation, especially important for serving guests. Muffin pans work well if you want a quicker option or don’t have ramekins, but the cakes come out less uniform.
Preparing Bakeware to Prevent Sticking
Greasing and dusting your bakeware is key to getting lava cakes out cleanly. Start by coating inside each ramekin or muffin cup with butter or nonstick spray. Butter adds richness that complements the chocolate flavor very well.
After greasing, dust the pans with cocoa powder rather than flour. Cocoa powder prevents sticking while adding a subtle chocolate note that flour lacks. To do this, tap a small spoonful of cocoa powder into each buttered cup, shake to cover all sides, then tap out excess.
Use this technique with either ramekins or muffin tins. It reduces sticking and helps preserve the delicate cake edges, making the dessert easier to unmold and serve beautifully.
Material Types and Heat Effects
The material of your baking dish affects how evenly and quickly your lava cakes bake. Ceramic ramekins heat slowly and hold heat well, which provides an even bake and keeps the inside molten. That’s why they often require 12 to 14 minutes in the oven at 350°F.
Metal pans, including muffin tins, conduct heat faster. Dark metal pans absorb heat quickly, so cakes baked in them can finish about two minutes sooner, sometimes as early as 10 to 12 minutes. Watch the cakes closely to avoid overbaking.
Choosing ceramic helps maintain shape and smooth edges, which is great if presentation matters. Metal pans work well for speed but can produce slightly rougher edges and more variation in doneness. Either type works as long as you adjust baking time and keep a close eye on the cakes.
Exact Baking Times and How to Judge Doneness
For baking chocolate lava cakes, a temperature of 425°F works well in most home ovens. The typical bake time ranges from 10 to 12 minutes. You want to see the cake edges fully set and firm while the center remains soft and slightly wobbly. This contrast of textures ensures the cake has a firm exterior with a molten, gooey chocolate core.
Pay close attention to the cake’s surface as your key indicator. The edges will look dry and feel springy to the touch. The top should no longer appear wet but still hold a slight jiggle in the middle. When the center feels very loose and the batter looks raw, the cake needs more time. Conversely, if the entire cake feels firm and springs back quickly, it’s likely overbaked and won’t have the signature molten center.
Oven types and baking dishes affect baking time. Convection ovens circulate air and may bake faster, so check your cakes a minute or two earlier than the suggested time. Dark or nonstick ramekins absorb heat more quickly and can cause edges to set sooner, also shortening baking time by a minute or so. Lighter-colored or glass dishes bake more gently and can require the full 12 minutes or slightly more. You can test doneness based on feel and wobble rather than just the clock.
Baking the cake too briefly results in a center that is too raw and unstable, which can collapse or be overly runny when cut. Overbaking leads to a fully firm cake with little to no molten chocolate, losing the contrast that defines lava cake. The ideal balance is set edges with a center soft enough to be gooey but not liquid batter.
To decide exactly when to remove your lava cakes, check at 10 minutes by gently shaking the pan. Once the edges are set but the center still wobbles distinctly, it’s time to take them out. Allow the cakes to cool in the ramekins for 1 to 2 minutes before unmolding. This brief rest helps the exterior firm up further while keeping the inner lava molten.
This method ensures a perfectly molten inside while preserving a tender cake around the edges. The time you bake depends mostly on your oven’s accuracy and the style of your baking dish. Careful visual and tactile checks will guide you better than relying solely on a timer.
Storing, Freezing, and Reheating Chocolate Lava Cakes
Chocolate lava cakes can be made ahead by refrigerating the batter or freezing the baked cakes, but timing and storage method affect their texture and taste. The batter, once mixed, can be kept in the ramekins covered tightly with plastic wrap and refrigerated for up to 2 days before baking. This approach lets you prepare the dessert early and bake the cakes fresh just before serving, preserving the molten center.
For already baked lava cakes, cool them completely before storing. Place the cooled cakes in an airtight, freezer-safe container and freeze for up to 3 months. Freezing preserves the flavor well, although the texture might be slightly less tender after thawing and reheating. Thaw frozen cakes overnight in the refrigerator or for a few hours at room temperature to avoid condensation that can make the surface soggy.
Reheating is best done carefully to keep the signature molten center from drying out. Using a preheated oven at 350°F (175°C) for about 8 minutes allows the cake to warm evenly without overcooking. Alternatively, microwave the cake in 30-second intervals, checking frequently to prevent overheating and tough edges. Avoid reheating for too long, which can solidify the lava and alter the cake’s texture.
- Refrigerate batter in ramekins covered for up to 48 hours before baking
- Freeze cooled baked cakes in airtight containers for up to 3 months
- Thaw frozen cakes overnight in the fridge for best texture
- Reheat cakes in a 350°F oven for around 8 minutes
- Microwave in short 30-second bursts to avoid drying out
- Do not refreeze thawed cakes
- Serve warm for the molten chocolate effect
Reheating lava cakes too long can ruin the molten center, so warm them just until heated through.
The main tradeoff with freezing is texture: fresh lava cakes offer the best melt-in-the-mouth experience, while frozen and reheated versions can be slightly firmer or less gooey inside. Making the batter in advance avoids last-minute preparation stress, but the best molten flow happens when the cakes are baked fresh. When time is tight, freezing baked cakes still provides a delicious option that retains most flavors.
Toppings and Serving Ideas to Complement Lava Cakes
Chocolate lava cakes are naturally rich and indulgent, but the right toppings and sides can improve their flavor and presentation. A classic choice is a scoop of vanilla ice cream, which contrasts the cake’s warm, gooey center with cold creaminess. For variety, ice cream flavors like salted caramel, coffee, or raspberry sorbet add complementary notes without overpowering the chocolate.
Garnishes make a big difference in appearance and taste. Fresh berries such as raspberries, strawberries, or blueberries bring bright acidity that cuts through the dessert’s richness. A dusting of powdered sugar adds a simple but elegant look, while a drizzle of caramel or raspberry sauce contributes moisture and complexity. For a deeper chocolate flavor, sprinkle 1 teaspoon of instant espresso coffee granules into the batter or on top just before serving. This technique intensifies the chocolate without adding any coffee taste.
Some home cooks try fruit or caramel fillings inside the lava cake, but this requires more precise baking to prevent overcooking. If you want to add fillings, use a small spoonful of caramel or fruit preserves, inserting it in the center before baking. Expect the baking time to increase slightly by 1 to 2 minutes, and watch closely to keep the lava texture intact.
- Serve lava cakes warm, allowing them to cool in the ramekin for 1 to 2 minutes before inverting onto plates to maintain the molten center.
- Add a scoop of vanilla, salted caramel, or raspberry sorbet ice cream right after plating for contrast in temperature and flavor.
- Top with fresh berries or a mix of sliced strawberries and raspberries for a tart, colorful garnish.
- Drizzle with caramel, raspberry, or hot fudge sauces to add moisture and richness.
- Dust with powdered sugar for a delicate, decorative touch.
- Sprinkle a pinch of espresso powder on top to boost chocolate depth without tasting like coffee.
Plating your lava cake attractively starts with careful inversion. Place a small dessert plate over each ramekin and flip gently to release the cake. Use plates with a slight rim to catch the flowing chocolate sauce. For a sophisticated touch, create a streak of sauce on the plate before placing the cake, or garnish with a mint leaf or edible flower. Adding a small glass of ruby port or a berry coulis on the side can bring an additional layer of flavor that pairs well with rich chocolate.
Though lava cakes are primarily sweet, some savory touches can balance the dish. A sprinkle of sea salt flakes on top improve the chocolate’s flavor and adds a subtle crunch. Another option is serving with a small side of sharp cheeses like aged gouda or blue cheese, which contrast the sweetness and can impress on a special occasion menu.
Easy Variations and Ingredient Substitutions
Chocolate lava cake recipes can be adapted in several ways to fit your pantry, dietary needs, and taste preferences. You can make a simple 3-ingredient cake, add a fruity filling, or adjust ingredients for health or allergy needs, and still end up with a molten center and deep chocolate flavor.
Simplest 3 Ingredient Recipe
You can make a lava cake with only chocolate, eggs, and butter by skipping flour entirely. This results in a fudgy, rich cake with a molten core, similar to a thick brownie or mousse texture. Without flour, the cake won’t rise as much but the molten center remains luscious.
- Melt together 4 ounces of good-quality bittersweet chocolate and 1/4 cup unsalted butter until smooth.
- Whisk 2 large eggs vigorously until slightly frothy.
- Slowly blend the melted chocolate mixture into the eggs, stirring constantly to avoid cooking the eggs.
- Grease ramekins and divide the batter evenly.
- Bake the cake at 425°F (220°C) for 9 to 11 minutes; the edges should look firm while the center has a slight jiggle.
- Let rest briefly, then invert cautiously onto plates.
This method saves ingredients and prep time. The texture stays dense and moist, with a molten center ensured by the low flour content. It suits quick dessert needs or if you have limited pantry staples.
Adding Fruit or Salted Caramel
Incorporating fruit or caramel adds a fresh or gooey complement to the rich chocolate cake. Raspberries, cherries, or dollops of salted caramel nestled inside create a pleasant surprise that bursts when you cut into the cake.
- Spoon the basic batter into greased ramekins, filling each about halfway.
- Place 3 to 4 fresh or thawed raspberries (or a tablespoon of caramel sauce) into the center of each ramekin.
- Cover the fruit or caramel with the remaining batter, ensuring it is completely sealed inside.
- Bake as directed for 12 to 14 minutes at 425°F (220°C).
- Allow cakes to cool for 1 to 2 minutes before inverting.
Pressing fruit below the surface prevents sinking and blending into the batter. Using salted caramel improve the chocolate’s richness and adds a sweet-salty contrast. Both options slightly increase baking time but keep your molten center intact.
Sugar and Ingredient Substitutions
Reducing sugar or switching to alternative sweeteners is possible but affects texture and browning. You can also swap all-purpose flour for gluten-free blends or use dairy-free butter to suit allergies or diets.
- Replace white sugar 1:1 with coconut sugar or maple syrup, noting that liquid sweeteners may require decreasing additional liquids slightly.
- Use a 1:1 gluten-free all-purpose flour blend if avoiding gluten, as regular cake or all-purpose flour works equally well otherwise.
- Substitute unsalted butter with plant-based butters or coconut oil in the same amount for dairy-free versions.
- For egg replacements, use commercially available egg replacers or 1/4 cup unsweetened applesauce per egg, but expect a slightly less rich texture and less rise.
- Monitor baking closely; some substitutions can make the cake bake faster or slower, adjusting time by 1 to 2 minutes.
Cutting back sugar too much can make cakes dense and less tender, so moderate reductions of 25% often work best. Using gluten-free flour or dairy-free substitutes often results in similar taste but slight texture changes, so test batches help.
Troubleshooting Common Chocolate Lava Cake Issues
Overbaking is the main reason lava cakes end up dry or fully cooked throughout. The goal is to bake the edges until set but keep the center soft and molten. To avoid overbaking, start checking your cakes about 1 to 2 minutes before the minimum recommended time. Look for firm edges with a slight wobble in the middle. Removing them from the oven at this stage ensures a gooey center rather than a dry crumb.
Sticking happens most often when the baking dish or ramekin isn’t properly greased or dusted. To fix this, thoroughly butter the interior, then dust with cocoa powder or flour to create a non-stick layer. You can also use non-stick spray designed for baking. Use a small offset spatula or knife edge to gently loosen the cake after baking if it resists release.
Temperature differences in ovens affect baking times and results. Gas ovens often have hot spots and can require rotating your dishes halfway through baking. Convection ovens circulate heat differently and may bake lava cakes faster by 5 to 10 minutes at the same temperature. Use an oven thermometer to check the accuracy of your oven temp and adjust accordingly. Reducing temperature by 25°F and increasing baking time slightly works well for convection settings to prevent overcooking.
Ensuring the molten center requires precise timing and cooling. Take the cakes out just as the edges are set but the center still jiggles slightly. Let them rest for 1 to 2 minutes to allow slight thickening, then invert onto a plate. If the center doesn’t flow out easily, the cake likely baked too long. Use slightly less baking time next time and try using eggs at room temperature to improve texture.
- Grease ramekins thoroughly and dust with cocoa powder for easy release
- Test doneness 1-2 minutes before the recipe’s minimum time
- Use an oven thermometer to verify your oven’s temperature accuracy
- Rotate dishes halfway through baking in gas ovens
- Reduce temperature by 25°F and extend baking time for convection ovens
- Let cakes rest 1-2 minutes before unmolding to maintain molten centers
Using cold eggs straight from the fridge can make the batter less smooth and affect the cake’s texture; always bring eggs to room temperature for best results.
Sticky or uneven-release cakes also result from using wrong types of ramekins. Glass or ceramic rise reliably and conduct heat evenly. Avoid silicone molds unless the recipe specifically states otherwise, since silicone can cause sticking and inconsistent browning. Using a thin knife or offset spatula along the edges right after baking helps loosen any suction that forms, making it easier to unmold without breaking.
Step-by-Step Action Plan for Making Chocolate Lava Cake
Follow these steps to bake chocolate lava cake with gooey centers and rich flavor. Each phase helps you check the results as you go.
- Before You Start: Gather quality ingredients like bittersweet chocolate, fresh eggs, and unsalted butter to ensure rich taste and good texture.
- Mixing Phase: Combine melted chocolate and butter with sugar, eggs, and flour gently until smooth; your batter should be thick but pourable.
- Preparing Dishes: Grease and lightly dust your ramekins with cocoa powder to prevent sticking; batter should coat evenly on the sides.
- Baking Time: Bake at 425°F for 12 to 14 minutes; the edges must be firm but the center slightly jiggly when you gently shake the ramekin.
- Cooling and Serving: Let cakes cool for 1 to 2 minutes before inverting onto a plate; a perfect lava cake will have a molten center that flows when cut.
- Storage: Refrigerate any leftovers in an airtight container for up to 2 days or freeze for up to 1 month; reheat gently in a microwave or oven to preserve texture.
- Toppings: Add fresh berries, a dusting of powdered sugar, or a scoop of vanilla ice cream to complement the chocolate flavor.
Frequently Asked Questions
How to Make Chocolate Lava Cake Ingredients?
To make chocolate lava cake, you’ll need basic ingredients like chocolate, butter, sugar, eggs, flour, and optional toppings. These simple pantry staples create a rich dessert with a molten chocolate center and soft cakey edges.
Is Molten Chocolate Cake the Same as Lava Cake?
Yes, molten chocolate cake and lava cake refer to the same dessert, small chocolate cakes with a liquid, gooey chocolate center. Both names describe the distinctive molten core that oozes when cut.
How to Make Lava Cake with 3 Ingredients?
You can simplify lava cake with chocolate, eggs, and butter, but the texture might change slightly. This minimal recipe focuses on the gooey chocolate center, skipping flour and sugar for a very basic version.
How to Basic Chocolate Lava Cake?
Basic chocolate lava cake involves melting chocolate and butter, mixing with eggs, sugar, and flour, then baking briefly to keep the center molten. Precise baking time is key to a soft exterior and gooey interior.
Can I Make Chocolate Lava Cake Without a Ramekin?
Yes, you can use small oven-safe cups or muffin tins, but keep an eye on baking time as thickness affects doneness.
Does Chocolate Lava Cake Need to Be Refrigerated?
No, chocolate lava cake can be stored at room temperature for a day, but refrigerate leftovers to keep them fresh longer.
Before You Go
Making chocolate lava cake from scratch lets you enjoy a warm, indulgent dessert with a molten center every time. Start with quality ingredients and close attention to baking time for the best gooey texture. Try baking one tonight and experiment with toppings to find your favorite combo.