How to Repaint Kitchen Cabinets: A Step-by-Step Guide
Thinking about giving your kitchen a fresh new look but feeling overwhelmed by the idea of repainting your cabinets? You’re not alone—many people struggle with knowing where to start or worry about ending up with a less-than-perfect finish.
Luckily, repainting kitchen cabinets is a doable project that can totally transform your space with a little guidance.
To repaint your kitchen cabinets, start by removing doors and hardware carefully, labeling each piece so you can reassemble everything easily.
Clean and degrease all surfaces thoroughly to remove grease and grime.
Then, sand the cabinets to strip away old finishes and create a smooth base.
Apply a suitable primer in thin layers, letting each coat dry completely.
Follow with two to three coats of high-quality cabinet paint, allowing proper drying time between coats.
Finally, reinstall doors and hardware precisely for a perfect fit.
Keep going to uncover tips that guarantee a flawless, lasting finish.
Key Takeaways
- Carefully remove cabinet doors and hardware, and label each part so you can keep everything organized during the repainting process.
- Clean and degrease all surfaces thoroughly to make sure the paint sticks well and lasts longer.
- Sand the cabinets with medium-grit sandpaper to remove the gloss and create a smooth surface for the primer.
- Apply primer, then follow with two to three thin coats of paint, letting each coat dry completely before adding the next.
- Reinstall the doors and hardware carefully, checking that everything lines up and the doors open smoothly for that polished, professional look.
Choose the Best Paint and Tools for Kitchen Cabinets
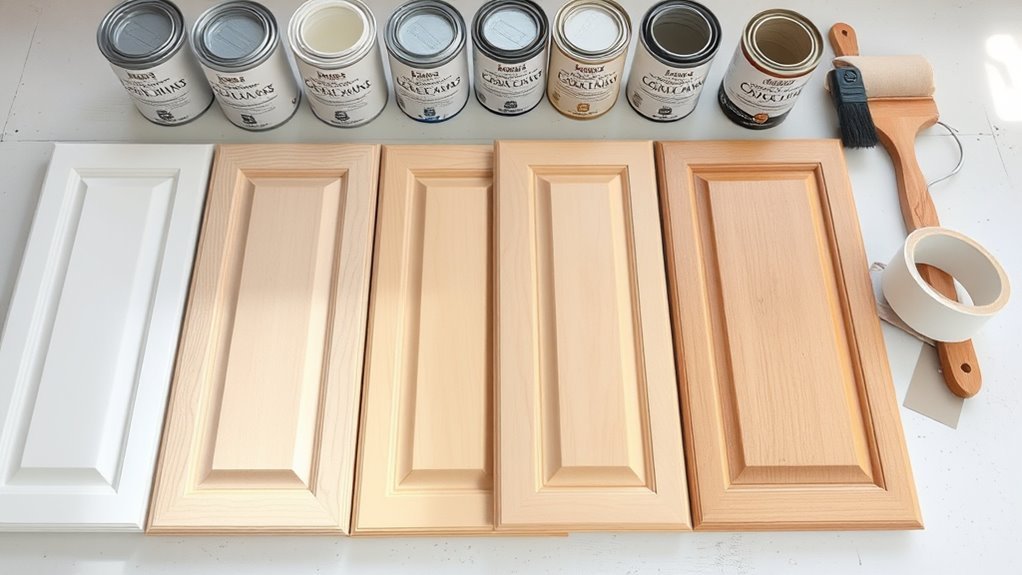
Selecting the right paint and tools is key to getting a smooth, durable finish on your kitchen cabinets. Start by choosing paint types made specifically for cabinetry, like acrylic latex or oil-based paints. They stick better and resist chips and stains more than standard wall paints.
When it comes to finishes, semi-gloss or satin are your best bets because they look nice and are easy to clean. Next, pick quality brushes and rollers designed for smooth surfaces. A high-density foam roller helps avoid brush marks and gives a flawless look.
Don’t forget a good angled brush for corners and detailed areas. Investing in painter’s tape and a fine-grit sanding block will also help prep your cabinets perfectly. With the right paint, finish, and tools, your cabinets will look professional and last for years.
Removing Cabinet Doors and Hardware Without Damage
If you’re looking to take off your cabinet doors and hardware without messing anything up, the first thing you want to do is get the right tools. A screwdriver that matches your screws perfectly is a must, so take a moment to find one that fits just right.
Once you’ve got your tools ready, go slow and be gentle. Rushing can lead to stripped screws or even cracked wood, and nobody wants that. Patience really pays off here, making the whole process much easier and helping you get everything ready for your repainting project without any surprises.
Proper Tool Selection
You’ll need a few essential tools to remove cabinet doors and hardware without causing damage. Start with the right tool types: a screwdriver set with various heads—Phillips, flathead, and possibly Torx—is vital, along with a putty knife or pry bar for gently lifting stubborn pieces.
Keep your tools in good condition. Tool maintenance matters. Sharp, clean screwdrivers reduce slipping risk, preventing stripped screws or scratched surfaces. Magnetic screwdrivers can help keep track of small screws.
Before starting, check each tool for wear or damage to avoid surprises. Using proper tools and maintaining them guarantees you remove doors and hardware efficiently while preserving their integrity, setting a solid foundation for repainting your cabinets.
Gentle Removal Techniques
Although it might be tempting to rush, handle your cabinet doors and hardware with care during removal to avoid damage. Start by unscrewing hinges and knobs slowly, supporting the doors so they don’t drop.
For hardware stuck with adhesive, gently scrape with a plastic putty knife to lift it without scratching the surface. Avoid metal tools that could cause dents or chips.
If adhesive remains, use a mild adhesive remover or warm soapy water to soften it. Then continue gentle scraping. Label doors and hardware as you go to keep track.
Taking your time with these gentle removal techniques helps ensure your cabinets stay intact and are ready for a smooth repainting process.
Clean and Degrease Kitchen Cabinets Before Painting
A thorough cleaning and degreasing process guarantees your kitchen cabinets are ready for paint to adhere properly. Start by removing all cabinet doors and hardware to make cleaning easier. Use a degreasing solution specifically designed for kitchen surfaces, or mix a mild detergent with warm water.
Apply it with a sponge or cloth, focusing on areas with grease buildup, fingerprints, and food stains. Avoid harsh chemicals that could damage the wood or finish. After scrubbing, rinse the cabinets with clean water to remove any residue.
Dry each surface thoroughly with a lint-free cloth. This cabinet cleaning step is essential because leftover grease or dirt can cause paint to peel or bubble later on. Taking your time here guarantees a smooth, long-lasting finish.
Once your cabinets are completely clean and dry, you’ll be ready to move on to the next step in your repainting project.
Sand Kitchen Cabinets for a Smooth, Long-Lasting Finish
Sanding kitchen cabinets creates a smooth surface that helps paint stick better and last longer. Start by choosing the right sanding techniques based on your cabinet material—medium-grit sandpaper (around 120 grit) works well for most wood surfaces.
Use a sanding block or an orbital sander for even pressure and to avoid gouges. Focus on removing the glossy finish and any imperfections left after cleaning. Pay close attention to crevices and corners where paint might peel later.
Surface preparation is key; sanding not only smooths but also opens the wood pores, helping the paint bond effectively. After sanding, wipe down the cabinets with a damp cloth or tack cloth to remove all dust particles. Skipping this step can cause bumps and unevenness in your finish.
Proper sanding sets the foundation for a durable, professional-looking paint job that can stand up to kitchen wear and tear.
Priming Cabinets for a Perfect Paint Job
Since properly priming your cabinets creates a strong base for paint to stick to, you’ll ensure a smooth, durable finish that resists chipping and peeling. Priming is a key step after sanding because it seals the surface and helps the paint adhere better. Be sure to choose a primer suited for your cabinet material—whether wood, laminate, or metal.
Properly priming cabinets ensures paint adhesion, durability, and a smooth finish tailored to your cabinet material.
Here are some essential priming tips to keep in mind:
Use a high-quality brush or foam roller to get an even coat. Apply the primer in thin, consistent layers to prevent drips and lumps. Let each coat dry fully before adding another, following the manufacturer’s recommended drying time.
Before painting, lightly sand the primed surface with fine-grit sandpaper to smooth out any imperfections. This step helps achieve a flawless finish and prepares the surface for the paint.
Paint Kitchen Cabinets Evenly: Best Techniques
Two key techniques will help you paint kitchen cabinets evenly and get a professional look: using the right tools and applying paint in thin, consistent layers. Start by choosing high-quality brushes and rollers designed for smooth surfaces.
Use specific brush techniques, like long, even strokes following the grain of the wood, to avoid streaks and brush marks. When painting flat cabinet surfaces, rollers work best—they give a smooth, uniform finish and cut down on drying lines.
Apply the paint lightly, building coverage gradually instead of flooding the surface. Rollers should be used with a light touch in multiple directions to prevent texture buildup. Always keep a wet edge to avoid lap marks.
Between coats, check your work under good lighting to catch missed spots or uneven areas. By combining precise brush techniques with effective roller methods and thin coats, your cabinets will look flawless and professionally painted.
How Many Coats of Paint Do You Need?
When painting kitchen cabinets, you’ll generally want to apply two to three coats of paint to achieve a smooth and durable finish. But keep in mind, the exact number can vary based on a few things like the type of paint you’re using, whether you’re changing to a significantly different color, and what kind of material your cabinets are made of.
Knowing these details ahead of time can really help you plan how much paint you’ll need and how long the project might take. It’s always better to have a little extra paint on hand just in case, so you don’t run out halfway through!
Ideal Number Of Coats
Applying the right number of paint coats is key to getting a smooth, durable finish on your kitchen cabinets. Usually, two to three coats strike the perfect balance between longevity and a rich, even color.
Your color choice also matters. Lighter shades might need extra coats for full coverage, while darker colors often cover well with fewer layers.
Here are some tips for a great finish:
- Start with a primer coat to help the paint stick and last longer
- Apply two coats of your chosen paint for consistent color
- Use a third coat if your cabinets get a lot of use or if you’re using a lighter color
- Let each coat dry completely before adding the next one
Following these steps will help your cabinets look fresh and last longer.
Factors Affecting Coats
Knowing the ideal number of coats is just part of the equation when repainting kitchen cabinets. Several factors affect how many coats you’ll need.
Your color choice plays a big role. Darker or more vibrant colors often require more coats for full coverage, while lighter shades may cover in fewer layers.
The finish type also impacts the process. Glossy finishes tend to need extra coats for evenness and durability, whereas matte finishes might cover more quickly but could need touch-ups later.
Plus, the material of your cabinets and their current condition influence the number of coats. If there are stains or uneven surfaces, you might need additional layers for a smooth, consistent look.
Keep these factors in mind to achieve a flawless, long-lasting finish.
Drying and Curing Time for Painted Cabinets
Although the paint may feel dry to the touch within a few hours, your kitchen cabinets need much more time to fully cure and harden. Curing time depends heavily on drying conditions like temperature, humidity, and ventilation. To ensure your cabinets develop a durable finish, be patient before putting them to use.
Keep these tips in mind for ideal drying and curing:
- Allow at least 24 hours between coats to prevent smudging or peeling.
- Maintain a warm, well-ventilated space to speed up curing.
- Avoid heavy use or cleaning for at least a week so the finish can fully harden.
- Monitor humidity levels, as high moisture can significantly extend drying times.
Reinstall Kitchen Cabinet Doors and Hardware Carefully
Now that your cabinets are dry, it’s time to put the doors and hardware back on. Take your time to align the doors carefully so they sit evenly and there aren’t any gaps. It’s all about making sure everything looks nice and tidy.
Once the doors are in place, tighten the hardware firmly. You want to make sure everything is secure so the doors open and close smoothly without any wobbles. Just double-check everything as you go, and you’ll have your kitchen looking great in no time!
Align Doors Precisely
Three key steps will help you align your kitchen cabinet doors precisely during reinstallation. Mastering door alignment techniques guarantees your cabinets look professional and function smoothly.
Start by loosely attaching the doors, then make cabinet door adjustments before fully tightening the screws. This approach lets you fine-tune the fit without struggling.
Keep these tips in mind as you work:
- Use a level to check for even spacing between doors.
- Adjust hinges incrementally to avoid over-correcting.
- Test door swings to guarantee they close flush and don’t rub.
- Tighten screws only after confirming perfect alignment.
Secure Hardware Firmly
Secure the hardware firmly to guarantee your kitchen cabinet doors stay properly attached and function smoothly over time. Begin by using the right installation techniques, making sure screws are tightened but not overdriven to avoid stripping.
When reinstalling cabinet hardware, check each hinge and handle for alignment before fully tightening. If your cabinet hardware includes screws that don’t hold well, consider using longer screws or wall anchors for extra stability.
Be sure to test door movement after securing hinges, adjusting as needed to prevent sagging or misalignment. Properly reinstalling hardware not only improves your cabinets’ appearance but also extends their lifespan.
Taking these careful steps will help your freshly painted cabinets look professional and last longer without issues.
Avoid These Common Mistakes When Painting Kitchen Cabinets
Although painting kitchen cabinets can really transform your space, it’s important to avoid some common mistakes that can ruin all your hard work. Many people stumble over these pitfalls, especially during preparation, which affects the final look.
Skipping proper sanding, for example, can cause paint to peel or chip quickly. Also, not cleaning the surfaces thoroughly leaves behind grease and dirt, making it hard for the paint to stick properly.
Here are four common mistakes to watch out for:
- Using the wrong type of paint. Choose durable, kitchen-friendly paint for the best results.
- Rushing the drying process. Make sure each coat is fully dry before applying the next.
- Forgetting to use primer. Primer helps with better adhesion and gives you a smoother finish.
- Painting in poor lighting. Good lighting helps you see missed spots or uneven coverage.
Avoiding these mistakes will help you get a professional, long-lasting look on your cabinets. Take your time, prep well, and enjoy the fresh new feel of your kitchen!
Frequently Asked Questions
Can I Use a Paint Sprayer Instead of Brushes for Cabinets?
Yes, you can definitely use a paint sprayer instead of brushes for cabinets. Paint sprayers offer faster coverage and a smoother, more even finish, which many people prefer for cabinet painting.
You’ll save time and avoid brush marks, but just make sure to mask off surrounding areas well to prevent overspray. With the right prep and technique, a sprayer can give your cabinets a professional-looking result quickly and efficiently.
How Do I Fix Paint Drips or Bubbles on Cabinets?
To fix paint drips or bubbles on cabinets, start by gently sanding the affected area to smooth it out. Use a putty knife to scrape off any drips before sanding.
For bubbles, make sure your paint is well-mixed and apply thin, even coats. Avoid painting in high humidity to help prevent bubbles from forming.
After sanding, clean the surface thoroughly before repainting. This will help you achieve a smooth, flawless finish.
What Type of Paint Finish Is Best for Kitchen Cabinets?
You’ll want to choose a semi-gloss or satin paint sheen for your kitchen cabinets. These finishes are great because they resist moisture, stains, and are easy to clean.
Semi-gloss has a bit more shine and is easier to wipe down, making it a popular choice. Satin gives a softer look but still holds up well against daily wear.
Both finishes help your cabinets stay looking fresh longer and handle the bumps and scrapes of everyday life without chipping or peeling.
How Do Humidity and Temperature Affect Cabinet Paint Drying?
Humidity effects slow down your cabinet paint drying because moisture in the air prevents proper curing. High humidity can make paint stay tacky longer and might cause bubbling or uneven finishes.
Temperature is just as important. If it’s too cold, the paint won’t dry or harden properly. Too hot, and it can dry too fast, leading to cracks.
For the best results, aim for moderate humidity and temperature levels.
Can I Repaint Over Old Paint Without Stripping It First?
Think of repainting like planting seeds in a garden. You wouldn’t scatter them on rocky soil and expect flowers.
You can repaint over old paint without stripping it first, but only if you focus on surface preparation. Lightly sanding and cleaning guarantees paint adhesion.
This helps the new layer stick firmly. Skipping this step is like ignoring the soil’s condition. Your fresh paint might peel or chip sooner than you want.
Conclusion
Now that you’ve followed these steps, your kitchen cabinets will look as fresh as a daisy. Remember, patience is key. Rushing can lead to a paint job that chips or peels.
Take your time cleaning, sanding, and priming to guarantee a finish that lasts. With careful attention and the right tools, you’ll transform your kitchen without breaking a sweat.
Your hard work will truly pay off in the end. Repainting your kitchen cabinets can be a simple and rewarding project with the right approach.