How to Sharpen Kitchen Shears: A Step-by-Step Guide
Ever tried to cut through a stubborn piece of meat or hack some herbs, only to find your kitchen shears aren’t as sharp as they used to be? You’re not alone—many people struggle with dull scissors that make kitchen tasks frustrating.
Luckily, sharpening your kitchen shears is simpler than you might think.
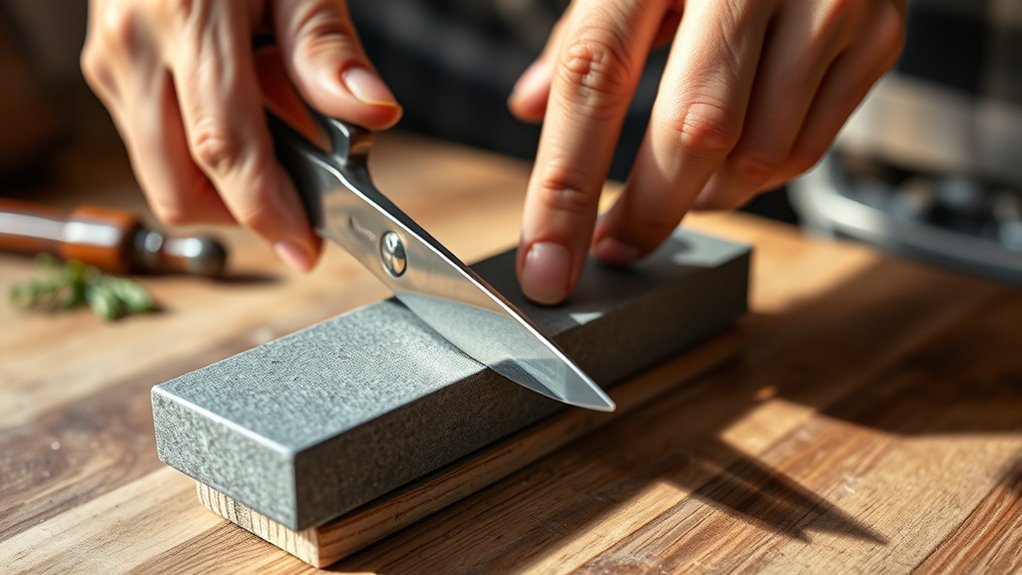
To sharpen your kitchen shears, start by cleaning them and loosening the pivot screw to separate the blades. Use a sharpening stone soaked in water, holding each blade at a 20-degree angle, and make smooth, even strokes on both sides.
You can also realign edges with a honing rod for maintenance.
After sharpening, test sharpness by cutting paper cleanly. Keep shears oiled and stored safely to prolong sharpness.
Keep going to uncover tips that make this process even easier.
Key Takeaways
- Disassemble your kitchen shears by loosening the pivot screw, then separate the blades for a thorough sharpening. This makes it easier to get into all the nooks and crannies.
- Before sharpening, clean the blades completely to remove any debris or residue. Use a soaked sharpening stone and gently work on both sides for a clean surface.
- Keep the sharpening angle steady at about 20 degrees and make smooth, even strokes on each blade. This helps maintain a sharp, consistent edge.
- Regularly use a honing rod to realign the blades’ edges. It’s a quick way to keep your shears sharp between full sharpenings.
- To check if your shears are sharp enough, try cutting through a piece of paper. Also, look closely for any nicks, chips, or misalignment that might need more attention.
Why Sharpening Kitchen Shears Improves Safety and Efficiency
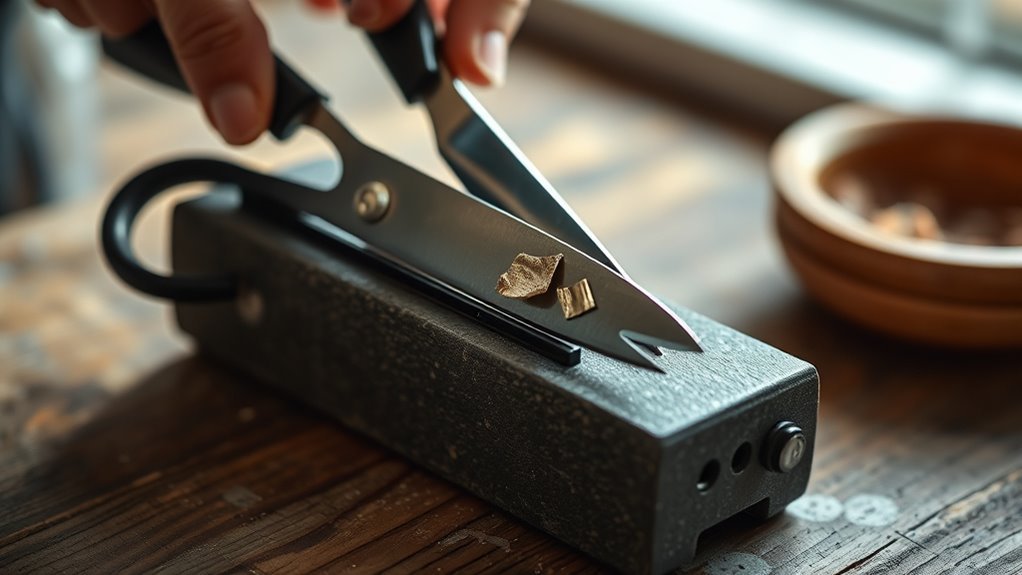
Although you might not think about it often, sharpening your kitchen shears directly boosts both your safety and efficiency in the kitchen. Dull blades force you to apply more pressure, which increases the risk of slips and accidental cuts. Keeping your shears sharp helps protect your fingers and hands from injury.
Sharp blades cut cleanly and predictably, reducing frustration and minimizing mistakes. This makes your work safer and more predictable.
In addition, sharpening your kitchen shears leads to big efficiency gains. You’ll spend less time struggling with tough materials like meat, vegetables, or packaging. Your tasks become smoother and faster, so you can focus more on cooking.
Essential Tools to Sharpen Kitchen Shears at Home
Keeping your kitchen shears sharp not only makes cutting safer and easier but also means you need the right tools to do it properly. Before you get started, gather these essential sharpening tools to make the process smooth and help your shears last longer.
Using the right equipment will make sharpening easier and ensure you follow good maintenance habits to keep your blades in top shape. Here’s a quick list of must-have tools for the job:
| Tool | Purpose | Maintenance Tips |
|---|---|---|
| Sharpening Stone | Refines and sharpens blades | Soak before use; clean after |
| Honing Rod | Realigns blade edges | Wipe clean after each use |
| Screwdriver | Tightens or loosens screws | Keep dry to prevent rust |
| Cloth/Towel | Cleans blades and tools | Use microfiber; avoid abrasive cloth |
With these tools at hand, you’ll be ready to sharpen your kitchen shears efficiently and safely.
How to Safely Take Apart Your Kitchen Shears
Before you start sharpening, you’ll want to take your kitchen shears apart first. The key is to identify each part — especially the pivot screw that keeps the blades together. Once you’ve found it, gently loosen or remove that screw to separate the blades. Just take your time and handle everything carefully so you don’t accidentally damage the blades or hurt yourself. Doing it this way makes the sharpening process much safer and more effective.
Identify Shear Components
A clear understanding of your kitchen shears’ components makes disassembly much safer and easier. Start by examining the shear materials. Most blades are made from stainless steel for durability and rust resistance, but some may include carbon steel for sharper edges. Knowing this helps you handle the blades with care.
Next, take note of the handle types. They’re usually plastic, rubber-coated, or metal. Rubber-coated handles offer better grip but can hide screws, while metal handles might have visible fasteners.
Also, identify any additional features like built-in bottle openers or serrated edges, as these parts can affect how you take the shears apart. By familiarizing yourself with these components, you’ll prevent damage and guarantee you can safely proceed with sharpening.
Locate the Pivot Screw
When you’re ready to take your kitchen shears apart, start by locating the pivot screw that holds the two blades together. This screw is key for maintaining your shears, as it helps you adjust blade tension and keeps the cut smooth. Look carefully near the center where the blades overlap.
Here’s what to keep in mind:
- The pivot screw is usually flat-headed or Phillips type.
- It’s located at the joint that connects both blades.
- Some shears have a locking mechanism near the pivot.
- Dirt or rust can hide the screw, so clean the area first.
Knowing exactly where the pivot screw is will help you make precise adjustments, making disassembly safe and easy without damaging your kitchen shears.
Separate Blades Carefully
Loosen the pivot screw just enough to separate the blades without forcing them apart. This careful step helps prevent damage and keeps the blade alignment intact, which is essential for effective shear maintenance. Once loosened, gently pull the blades apart to avoid bending or misaligning them.
Here’s a quick reference for separating blades safely:
| Step | Action | Tip |
|---|---|---|
| 1. Loosen Screw | Turn screw counterclockwise | Don’t remove completely |
| 2. Separate Blades | Gently pull blades apart | Avoid twisting or forcing |
| 3. Check Alignment | Inspect blade edges | Realign if necessary |
| 4. Clean & Sharpen | Proceed with sharpening | Keep blades sharp |
Following these steps helps keep your kitchen shears in top condition.
Sharpen Kitchen Shears With a Sharpening Stone
To sharpen your kitchen shears effectively, the first step is to pick the right sharpening stone for your blades. It’s important to choose one that matches the type of metal your shears are made of to get the best results.
Once you’ve got your stone, give your shears a good clean to remove any dirt or debris. Then, carefully separate the blades so you can work on each side more easily.
Finally, follow some proper sharpening techniques—like maintaining a consistent angle and using smooth, even strokes—to bring back that sharp, clean edge without damaging the metal. It’s a simple process, and with a little patience, your shears will be cutting like new!
Choosing The Right Stone
Selecting the right sharpening stone is key to restoring your kitchen shears’ edge effectively. You want to focus on grit selection and stone types to get the best results.
Coarse stones, around 220-400 grit, are great for quickly reshaping dull or damaged blades. Finer stones, between 1000-6000 grit, help polish and refine the edge for a sharper finish.
Different stone types like whetstones, diamond stones, and ceramic stones each offer unique benefits. Some are more durable, while others sharpen faster.
When choosing your stone, think about these factors:
- Use coarse grit for very dull or damaged blades
- Medium grit works well for regular sharpening maintenance
- Fine grit is best for honing and polishing
- Pick a stone type based on your budget and how often you sharpen
Selecting the right stone makes sure your kitchen shears become sharp again smoothly and efficiently.
Preparing The Shears
Start by cleaning your kitchen shears thoroughly to remove any grease or food residue, making sure the sharpening stone can work effectively on the blades. Proper shear maintenance begins with this essential step because leftover grime can dull the sharpening stone and reduce its efficiency.
Use warm, soapy water and a soft brush to reach all crevices, applying effective cleaning techniques that prevent rust and buildup. After washing, dry the shears completely with a clean towel to avoid moisture damage.
Check the pivot area for debris and loosen it slightly if possible. This helps you access the blade edges better during sharpening. Taking time to prepare your shears properly sets the foundation for a smooth, precise sharpening process that extends their lifespan and cutting performance.
Sharpening Techniques Explained
Once your kitchen shears are clean and the pivot area is free of debris, you’re ready to sharpen the blades using a sharpening stone. This method is effective and gives you good control over the edge you create.
Start by wetting the stone. Hold the shears at a 20-degree angle and draw each blade across the stone in a smooth, consistent motion, keeping that angle. Repeat evenly on both blades.
Keep these maintenance tips in mind: use light, even pressure for precision, sharpen each blade the same number of strokes, regularly clean and lubricate the pivot area, and store your shears properly to protect the edge.
Following these sharpening methods will help ensure your kitchen shears stay sharp and ready for use.
Sharpen Kitchen Shears Using a Manual Sharpener
Although manual sharpeners take a bit of effort, they give you precise control over the sharpening process. Using one lets you focus on the blade’s edge, making sure you get the right angle and pressure.
One of the best things about manual sharpeners is that they adapt well to your kitchen shears’ specific needs. Over time, you’ll get better at sharpening them just the way you want.
Here’s a quick emotional snapshot of what you might feel during this process:
| Emotion | Moment | Why It Happens |
|---|---|---|
| Satisfaction | After a few strokes | Seeing the blade sharpened |
| Confidence | Midway through | Controlling the angle |
| Accomplishment | Final test cut | Shears cut smoothly again |
Sharpen Kitchen Shears With a Honing Rod
Using a honing rod is a quick and effective way to keep your kitchen shears sharp between full sharpenings. This tool realigns the blade edges without removing metal, so it’s a must-have for regular maintenance.
Honing rods quickly realign kitchen shears, keeping blades sharp without removing metal.
To use the honing rod properly, hold it vertically with the tip on a stable surface. Open your shears and position one blade at about a 20-degree angle against the rod. Draw the blade down smoothly, applying light pressure. Then, repeat on the other blade.
Keep these tips in mind:
- Use a fine grit honing rod for kitchen shears.
- Maintain a consistent angle on each stroke.
- Hone your shears after every few uses to keep them sharp.
- Clean the blades before and after honing to avoid residue buildup.
How to Test If Your Kitchen Shears Are Sharp Enough
Want to see if your kitchen shears are still sharp? Just try cutting through a piece of paper—if it slices easily and cleanly, you’re good to go. If it struggles or tears the paper, it might be time to sharpen them up.
You can also take a close look at the blades. Check for any nicks, dull spots, or maybe even some rust. Those little imperfections are clues that your shears could use a bit of sharpening.
Doing these quick tests will save you time and effort, making sure your shears are always ready when you need them!
Paper Cutting Test
How can you quickly check if your kitchen shears are still sharp? The paper cutting test is simple and effective for this. Just pick a piece of good-quality paper—standard printer paper works great.
Hold the paper firmly and cut through it with steady, smooth pressure. If the shears slice cleanly without tearing or snagging, they’re still sharp.
Here’s how to do the test:
- Use a flat sheet of paper, avoiding crumpled or thick types.
- Hold the paper taut so it doesn’t move during cutting.
- Make a single, smooth cut without sawing back and forth.
- Look at the edges—are they clean or ragged after cutting?
This quick test will tell you if your kitchen shears need sharpening.
Visual Edge Inspection
Although the paper cutting test gives a quick idea, closely examining the blades themselves shows more about your kitchen shears’ sharpness. Start with a visual inspection by holding the blades under good light. Look for nicks, chips, or uneven spots along the edges.
Pay close attention to how the blades meet. If they don’t line up evenly when closed, your shears won’t cut efficiently. You can gently run your finger (carefully) along the blade to feel for roughness or dullness.
If you notice irregularities or misalignment, your shears probably need sharpening or adjustment. This visual check helps you identify specific issues, so you only sharpen what’s necessary. It’s a simple but effective way to keep your kitchen shears in top shape.
Tips to Keep Kitchen Shears Sharp Between Sharpenings
Keeping your kitchen shears sharp between sharpenings just takes a few simple habits. By staying consistent with basic maintenance and cleaning, you’ll help them last longer and cut more smoothly.
After each use, rinse your shears with warm water and mild soap to remove any food residue. Be sure to dry them thoroughly to prevent rust from forming. Occasionally, apply a drop of food-safe oil to the pivot point to keep the movement smooth.
Store your shears in a dry place, ideally in a protective sheath or a drawer organizer, to keep them safe from damage. Here are some quick tips to maintain their sharpness between sharpenings:
- Clean your shears immediately after use to prevent buildup.
- Avoid cutting hard materials like bones or frozen foods.
- Apply a drop of food-safe oil on the pivot joint once a month.
- Store shears properly to prevent dulling and corrosion.
Common Kitchen Shear Sharpening Mistakes to Avoid
Maintaining your kitchen shears with regular cleaning and oiling helps preserve their sharpness. When it’s time to sharpen them, though, certain mistakes can undo all that care.
One common error is applying uneven pressure while sharpening. This can create blunt edges instead of smooth, sharp ones. Make sure to keep a consistent angle to avoid this problem.
Another mistake is neglecting to clean the shears thoroughly before sharpening. Dirt and residue can damage your sharpening tool and affect the blade’s edge.
Avoid rushing through the process. Sharpening too quickly can lead to imprecise results and safety risks. Handle the shears carefully, as dull or improperly sharpened blades increase the chance of slips and cuts.
Finally, don’t forget to reassemble and test your shears after sharpening. This ensures they function safely and efficiently. By avoiding these pitfalls, you’ll keep your kitchen shears sharp and safe.
When to Replace Kitchen Shears Instead of Sharpening
If your kitchen shears show signs of rust, looseness, or significant damage, it’s time to consider replacing them instead of sharpening. While sharpening can help extend their life, some signs clearly indicate that a new pair will serve you better. Don’t waste time trying to salvage shears that are beyond repair.
Here are the main signs you should replace your shears:
- Blades that no longer align properly, causing uneven cuts
- Handles that are cracked, bent, or too loose to grip securely
- Rust that’s deeply pitted and can’t be removed with cleaning
- Springs or screws that are broken or missing, affecting how they work
Recognizing these signs helps you decide when sharpening won’t restore performance. Investing in new kitchen shears guarantees safety, efficiency, and durability for your cooking tasks.
Frequently Asked Questions
Can I Sharpen Kitchen Shears With a Regular Knife Sharpener?
You can sharpen kitchen shears with a regular knife sharpener, but it’s not always the best choice.
Standard sharpeners might not match the unique angles of the blades or the pivot point.
For the best results, try sharpening techniques made for scissors, like a whetstone or a special shear sharpener.
This helps keep the blades’ proper edge and prevents damage during sharpening.
How Often Should I Sharpen My Kitchen Shears?
You should sharpen your kitchen shears every few months, depending on how often you use them. For regular cooks, that might mean every 3 to 6 months to keep blades sharp and efficient.
Keeping your shears clean and dry after each use also helps maintain their sharpness and prolongs their life.
If you notice they’re harder to cut with or the edges look dull, it’s probably time to sharpen them.
Staying on top of the sharpening schedule ensures your shears work well and last longer.
Are There Specific Kitchen Shears Brands That Sharpen Better?
Think of kitchen shears like knights’ swords—some are made from better shear materials, making them easier to sharpen and more durable. When you compare brands, those using high-quality stainless steel or carbon steel tend to hold an edge longer and sharpen more easily.
Brands like Wüsthof or Zwilling usually outperform generic options because their materials and craftsmanship help you keep your shears sharp with less effort. So, if you’re looking for shears that stay sharp longer and are easier to maintain, those brands are worth considering.
Can Sharpening Damage the Coating on My Kitchen Shears?
Yes, sharpening can damage the coating on your kitchen shears if you’re not careful. Different coatings, like non-stick or titanium, need gentle methods to keep them intact.
Using harsh tools or aggressive techniques can chip or dull the finish. It’s best to stick with fine sharpening stones or honing rods.
Avoid electric sharpeners unless they’re made specifically for coated blades. This way, you’ll keep both your shears sharp and the coating protected.
Is It Safe to Sharpen Kitchen Shears With Electric Sharpeners?
Yes, you can safely use an electric sharpener for kitchen shears, but you should be cautious.
Safety with electric sharpeners depends on using the right techniques—apply light pressure and keep the blades at the correct angle.
Avoid overheating the metal, as that can damage the blades or their coating.
If your shears have a delicate finish, consider using manual sharpening methods to preserve their quality and make them last longer.
Conclusion
Now that you know how to sharpen your kitchen shears, you’ll find cooking becomes safer and easier. Dull blades can cause accidents and slow you down in the kitchen.
Regularly sharpening your shears with the right tools and techniques keeps them efficient and reliable. It’s a simple step that makes a big difference.
Remember, sharp kitchen shears aren’t just convenient—they’re a smart investment in your safety and success. Keep them sharp, and they’ll serve you well!