How to Use a Pasta Roller: A Step-by-Step Guide for Perfect Pasta Dough
Using a pasta roller is an essential skill for anyone wanting to make fresh, restaurant-quality pasta dough at home. A pasta roller helps you achieve thin, even sheets of dough that are perfect for cutting into noodles or shaping into ravioli. To use it, simply roll your dough through the widest setting first, gradually reducing thickness as you work the dough through the rollers multiple times for a smooth finish.
Mastering a pasta roller improves dough texture and cooks more evenly than hand-rolled sheets, giving your homemade pasta a professional edge. This technique saves time and effort compared to rolling dough by hand, and allows you to customize thickness to your preferred pasta style.
In this article, we will guide you through preparing your dough for the pasta roller, step-by-step instructions on using the roller, tips on cleaning and maintaining the machine, and recommended settings for popular pasta types like fettuccine and lasagna sheets.
Preparing Dough for Your Pasta Roller

Choosing the Right Dough Consistency
For the best results, pasta dough should be smooth and elastic without being too sticky or dry. Use a basic mixture of flour and eggs, kneading thoroughly for about 10 minutes. If the dough sticks to your hands, dust it lightly with flour but avoid adding too much as it can stiffen the dough.
Once kneaded, allow your dough to rest covered with a damp cloth for at least 30 minutes. This resting time helps the gluten relax, making it easier to roll out thin sheets without the dough tearing or shrinking back.
- Use ’00’ flour or all-purpose flour
- Add eggs gradually for correct moisture
- Rest the dough for 30+ minutes before rolling
Cutting and Dividing Dough Before Rolling
Divide your dough ball into smaller portions that can be handled easily by the roller. Each piece should be roughly the size of a tennis ball to avoid strain on the machine and inconsistent rolling.
Keep unused dough portions covered to prevent drying while rolling one piece at a time. Flatten the dough with hands or a rolling pin until it fits into the widest setting of your pasta roller.
- Divide dough into 4-6 equal pieces
- Cover pieces not in use to retain moisture
- Pre-flatten dough pieces to fit roller input
Using the Pasta Roller: Basic Technique

Setting Up the Roller and Initial Passes
Attach your pasta roller securely to a sturdy countertop or table edge to prevent slipping. Set the roller to the widest thickness setting, usually the number 1, which accommodates thicker dough sheets.
Feed a pre-flattened dough portion through the rollers slowly and steadily. Catch the dough as it emerges to prevent wrinkling. Fold the dough into thirds and pass it through the roller again on the same setting to develop an even texture.
- Clamp the roller firmly to a workstation
- Start at the widest thickness setting
- Fold dough into thirds for smoothness
Adjusting Thickness for Desired Pasta
After several passes on the widest setting, progressively switch the roller to thinner settings one notch at a time. Pass the dough through each setting once or twice, adjusting speed and alignment to maintain an even sheet.
For most pasta like fettuccine or ravioli wrappers, aim for setting 5 or 6, which yields sheets about 1-2 millimeters thick. For lasagna, a slightly thicker sheet at setting 4 usually works well.
- Reduce thickness setting incrementally with each pass
- Avoid skipping intermediate settings to prevent tearing
- Stop when dough reaches desired thinness
Cutting and Shaping Pasta After Rolling
Using Cutters and Attachments
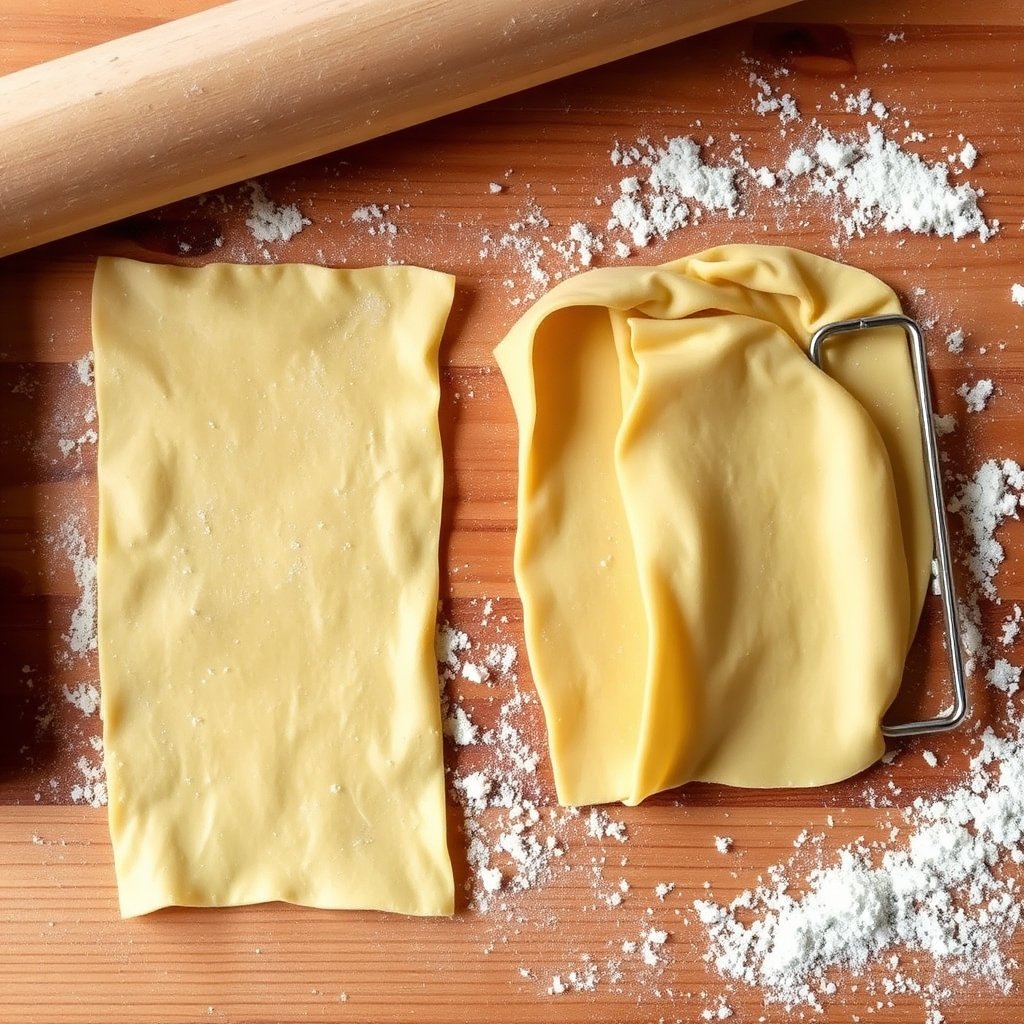
Many pasta rollers come with cutters or attachments to shape sheets into strands like spaghetti or fettuccine. After rolling your dough to the correct thickness, feed it through these attachments slowly to create consistent widths.
If your machine doesn’t have cutters, simply slice the dough sheets with a sharp knife or pizza cutter on a floured surface to custom widths based on your recipe.
- Use machine cutters for uniform pasta noodles
- Cut by hand if no attachments available
- Lightly dust cutters to prevent sticking
For more on this, see our related guide: How to Make Homemade Pasta: A Complete Guide for Beginners.
Shaping Special Pasta Types
For stuffed pasta like ravioli, cut sheets into squares or rounds. Place your filling, fold or layer another sheet on top, and seal edges with a fork or ravioli press to trap air inside.
To make lasagna, simply roll the dough into wider sheet sizes and parboil or bake as needed. Fresh egg pasta cooks faster, so monitor closely during boiling.
- Shape ravioli by sealing filled dough pockets carefully
- Cut lasagna sheets to fit baking dishes
- Handle fresh pasta gently to prevent breakage
Cleaning and Maintenance of Your Pasta Roller

Proper Cleaning Techniques
Never submerge your pasta roller in water or put it in the dishwasher. Instead, use a dry brush or wooden stick to remove stuck flour or dough pieces after use. Wipe the machine’s exterior with a damp cloth if necessary.
If dough residues harden, let the machine sit at room temperature until dry and brittle, then carefully remove buildup with a toothpick or soft brush.
- Avoid water contact inside rollers
- Use brushes and picks to remove debris
- Wipe exterior with damp cloth only
Storage and Lubrication Advice
Store your pasta roller in a dry place to prevent rust on metal components. Occasionally, apply a small amount of food-grade lubricant oil to the rollers’ exposed shafts to keep movements smooth.
Check screws and attachments periodically and tighten as needed to maintain stable operation during pasta making.
- Keep machine in a moisture-free environment
- Lubricate moving parts with food-safe oil
- Regularly inspect and tighten screws
Pasta Roller Settings and Their Effects

Understanding Thickness Numbers
Most pasta rollers number their settings from the widest (#1) to the thinnest (#8 or #9). The number indicates the gap in millimeters between the rollers, so smaller number means thicker dough sheets.
Using the correct pasta roller settings allows you to achieve desired dough texture and pasta type, whether for thin noodles or thicker pasta shapes.
For more on this, see our related guide: What Is the Best Restaurant for a Family Dinner? A Complete Guide with Insider Tips.
Using Pasta Roller Settings for Different Pasta Types
For wide noodles like pappardelle or lasagna, start at setting 3 or 4 for a sturdy sheet. For delicate pasta like ravioli or tagliatelle, reduce to setting 6 or 7 for thin, pliable dough.
Experiment with the pasta roller settings gradually to find the sweet spot that fits your recipe and dough type, balancing stretchiness with strength.
- Settings 1-3 for thick pasta sheets
- Settings 4-6 for standard pasta thickness
- Settings 7-8 for very thin pasta or wrappers
Troubleshooting Common Pasta Roller Issues

Dealing with Dough Tearing or Sticking
If your dough tears while rolling, it’s often due to dryness or over-thinning. Add a small splash of water when kneading or roll through thicker pasta roller settings before thinning further.
Sticking occurs if there isn’t enough flour dusted on the dough or rollers. Use light, even flouring on dough and work surface to prevent sticks.
For a broader background on pasta varieties and history, the Pasta article on Wikipedia offers comprehensive insights. Pasta.
Fixing Uneven Pasta Thickness
Uneven dough sheets may result from inconsistent kneading or rolling speed. Apply even pressure on the rolling crank and feed dough straight into rollers without folds or bunching.
Ensure the pasta roller is clamped tightly and doesn’t wobble during use, as movement can cause thickness variation.
Pasta Roller Types Comparison
Here’s a comparison of various pasta roller types highlighting their key features and uses to help you select the best option for your kitchen.
| Type | Material | Crank vs. Electric | Price Range | Best Use Case |
|---|---|---|---|---|
| Manual Steel Pasta Roller | Stainless steel | Crank | $30 – $100 | Home use, budget-friendly |
| Electric Pasta Roller | Stainless steel/plastic | Electric motor | $150 – $400 | Frequent or large batch pasta making |
| Compact Travel Pasta Roller | Lightweight aluminum | Crank | $25 – $70 | Small kitchens, occasional use |
| Commercial Pasta Roller | Heavy-duty steel | Electric motor | $500+ | Restaurants and large volume production |
Frequently Asked Questions
Can I use a pasta roller for gluten-free dough?
Yes, you can use a pasta roller with gluten-free dough, but it may be more delicate. Use gentle pressure, dust with flour often, and roll at a thicker setting to avoid tearing.
How thin should I roll pasta dough with a pasta roller?
Most pasta types are rolled to about 1-2 millimeters thickness, typically around the setting 5 or 6 on most rollers. Thinner sheets work best for ravioli; thicker sheets suit lasagna.
Is it necessary to rest the pasta dough before rolling?
Resting the dough is helpful because it relaxes gluten, making it easier to roll out smooth, elastic sheets without shrinkage or tearing.
How do I clean my pasta roller after use?
Avoid water; clean by brushing off dry dough residue with a dry brush or wooden stick. Wipe the exterior with a damp cloth if needed. Ensure the machine is dry before storing.
Can I roll frozen dough with a pasta roller?
Rolling frozen dough isn’t recommended because it can crack or damage the rollers. Always thaw dough fully and bring it to room temperature before rolling.
Key Takeaways
- Start with properly kneaded and rested dough for best rolling results
- Gradually reduce pasta roller settings from widest to desired thickness
- Use cutters or knives to shape pasta after rolling sheets
- Clean rollers without water and store in a dry place
Conclusion
Using a pasta roller transforms homemade pasta-making from a laborious task into an efficient process that yields professional-looking results. Focusing initially on dough preparation, kneading, and resting ensures sheets glide smoothly through the rollers. Adjusting the pasta roller settings incrementally allows you to customize the thickness for your recipe, balancing the dough’s elasticity for varied pasta shapes and textures. Through proper technique and care, the pasta roller becomes an indispensable tool in your kitchen.
For beginners or occasional chefs, a manual steel pasta roller is a practical, affordable choice that offers versatility and control, ideal for small batches of fettuccine or lasagna sheets. Those making pasta frequently or in larger quantities might find an electric pasta roller more efficient, especially when combined with compatible cutters for noodles. Understanding how different roller settings affect dough thickness helps in crafting delicate ravioli wrappers or sturdy noodles for traditional Italian dishes.
Once you feel confident using a pasta roller, the next step is experimenting with recipes and customizing thickness settings to suit personal preferences or classic pasta varieties. Remember to maintain your pasta roller by cleaning it carefully and lubricating moving parts to extend its lifespan. As you continue, fresh pasta will become an enjoyable and rewarding part of your cooking repertoire.