How to Fix Leaky Kitchen Faucet: A Step-by-Step Guide
Dealing with a leaky kitchen faucet is a common frustration many homeowners face. It’s not just annoying; it can also waste a lot of water and increase your utility bills.
If you’re tired of the constant drip, don’t worry—many people struggle with this issue, and the fix is often simpler than you think.
To fix a leaky kitchen faucet, start by identifying your faucet type—single-handle, double-handle, or pull-out.
Turn off the water supply by closing valves under the sink or shutting off the main valve if needed.
Use basic tools like a wrench and screwdriver to disassemble the faucet, inspect washers and O-rings, and replace worn or damaged parts.
Reassemble carefully to avoid misalignment.
After reattaching everything, test for leaks by running the water.
Keep following for detailed tips to help you make a lasting repair and keep your kitchen drip-free.
Key Takeaways
- Before starting any repair, turn off the water supply under the sink to stop the water flow.
- Use a screwdriver to remove the faucet handle, then loosen the packing nut with a wrench to access the internal parts.
- Check for worn washers, O-rings, or cartridges that might be causing the leak. Replace them with the right sizes and good-quality materials.
- Put the faucet back together carefully, making sure all parts are aligned properly. Be careful not to overtighten, so you get a good seal.
- Turn the water back on and run the faucet to check for leaks. Look at all the joints and connections to be sure everything is tight.
What Causes a Kitchen Faucet to Leak
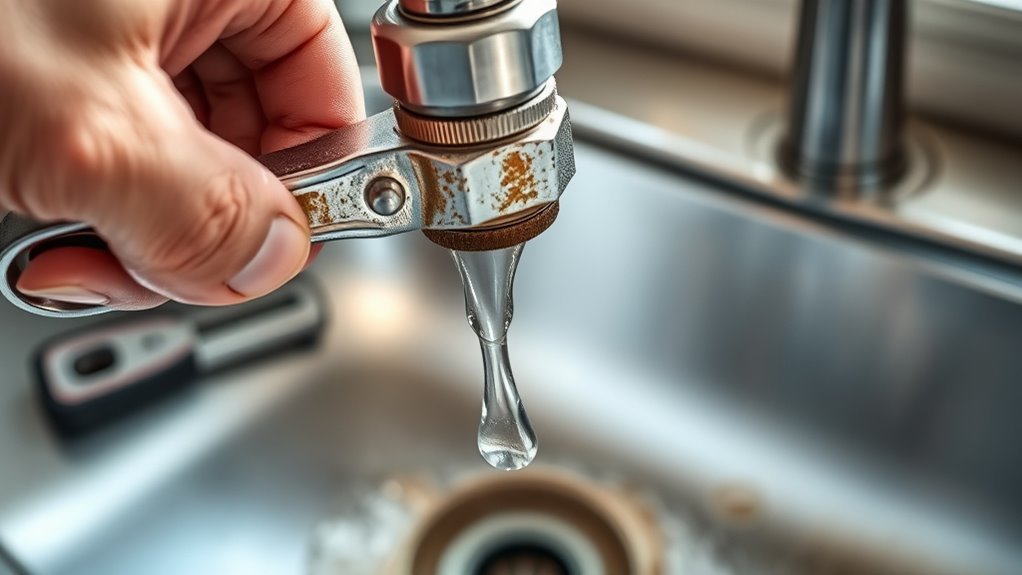
Although a leaky kitchen faucet might seem minor, it usually signals worn-out parts or buildup inside the faucet.
You’ll often find common leak sources like worn-out washers, O-rings, or corroded valve seats causing the drip.
Mineral deposits from hard water can also clog or damage components, leading to leaks.
To prevent these problems, you should follow regular faucet maintenance tips, such as cleaning aerators and replacing washers before they fail.
Ignoring small leaks can worsen damage and increase water bills.
Sometimes, the cartridge inside the faucet wears out, causing leaks, especially in single-handle models.
You’ll want to check these parts first when troubleshooting.
Also, loose or damaged connections under the sink can cause leaks, so verify all fittings are tight.
How to Identify the Type of Kitchen Faucet You Have
How can you tell which type of kitchen faucet you have? Start by examining its handle and spout design, as faucet types vary based on these features. Material differences also help in identification—some faucets use brass, stainless steel, or chrome finishes. Recognizing your faucet type is essential before attempting any repairs.
Here’s a quick guide to help you identify common kitchen faucet types:
| Faucet Type | Key Features |
|---|---|
| Single-Handle | One lever controls both temperature and flow |
| Double-Handle | Separate handles for hot and cold water |
| Pull-Out/Pull-Down | Spout detaches for flexible use |
| Wall-Mounted | Installed on the wall instead of the countertop |
Tools You Need to Fix a Leaky Faucet
To fix your leaky kitchen faucet, you’ll want to gather a few basic tools first. A wrench, screwdriver, and some replacement parts are usually what you need. It’s a good idea to go for high-quality replacements so you don’t have to deal with leaks again anytime soon.
And don’t forget to play it safe — wearing gloves and goggles can really protect you while you’re working on the repair. Better safe than sorry, right?
Essential Repair Tools
You’ll need a few essential tools to fix your leaky kitchen faucet efficiently. Having the right tools makes repair work easier and helps you follow maintenance tips more accurately.
Here’s a quick rundown of what you’ll need:
| Tool | Purpose | Tip |
|---|---|---|
| Adjustable Wrench | Loosens or tightens nuts | Use smooth jaws to avoid damage |
| Screwdrivers | Removes screws | Have both flathead and Phillips on hand |
| Pliers | Grips and twists parts | Needle-nose pliers are great for tight spots |
| Replacement Parts | Fix leaks | Keep some handy for quick swaps |
With these tools, you’ll confidently tackle leaks and keep your faucet running smoothly. Keep them ready so your repairs are quick and effective.
Choosing Quality Replacements
Selecting the right replacement parts is key to fixing a leaky kitchen faucet effectively. You want to choose parts made from high-quality materials to ensure durability and a long-lasting repair.
Avoid cheap components that can wear out quickly or cause more leaks. Instead, look for reliable brands known for making sturdy faucet parts, as they often meet higher manufacturing standards.
When shopping, compare product reviews and make sure the parts are compatible with your faucet model. Investing in quality replacements saves you time and frustration later on.
It helps prevent repeat repairs and keeps your faucet functioning smoothly. By focusing on trusted brands and durable materials, you’ll get a solid fix that lasts.
Safety Gear Recommendations
Before diving into repairs, gather the essential safety gear to protect yourself and make the job easier. Start with safety goggles to shield your eyes from unexpected splashes or debris. Even small drips can spray water, so goggles keep your vision clear and safe.
Next, put on rubber gloves to protect your hands from sharp edges, hot water, and harsh cleaning chemicals. Rubber gloves also improve your grip when handling slippery parts, reducing the chance of dropping tools or components.
Wearing this gear helps you stay safe and focused throughout the repair process. Don’t skip these simple precautions—they’ll keep you comfortable and confident as you fix your leaky kitchen faucet. Safety gear is a small investment for a smoother, safer repair experience.
How to Turn Off the Water Supply Safely
Before you dive into fixing that leaky faucet, it’s a good idea to find the shutoff valves under the sink or, alternatively, turn off the main water supply. Just remember to turn the valves clockwise—that’s the usual way to stop the water completely. Once you’ve done that, go ahead and open the faucet to make sure the water has really stopped flowing before you start working on it.
Locate Water Shutoff Valves
Since water can cause a lot of damage if it keeps flowing, you’ll need to find the water shutoff valves to stop it safely. Start by looking under the sink; most kitchen faucets have individual shutoff valves for hot and cold water right there. These valves usually have small handles or knobs—turn them clockwise to close and cut off the water supply.
If you don’t see valves under the sink, check nearby cabinets or along the wall behind the sink. Knowing where these valves are is key for quick repairs and to prevent flooding. After closing the valves, turn on the faucet to make sure the water is fully off. This way, you avoid surprises and keep your workspace dry.
Turn Off Main Supply
If the individual shutoff valves under your sink don’t stop the water flow, you’ll need to turn off the main supply to prevent further leaks.
Locate your home’s main water supply valve, usually near the water meter or where the kitchen plumbing connects to the main line. It might be a wheel-shaped valve or a lever you can turn.
Before turning it off, make sure you have a wrench or pliers handy in case it’s stuck. Slowly turn the valve clockwise to close it, cutting off all water to your kitchen and possibly the entire house.
Shutting off the main water supply guarantees you can safely work on your plumbing without worrying about unexpected water flow or damage during your repair.
Verify Water Is Off
After turning off the main water supply, you should confirm that the water is completely shut off before starting any repairs.
First, open the kitchen faucet to see if water still flows. If it drips or sprays, the main valve might not be fully closed, or there could still be residual water pressure in the pipes.
Wait a few moments and try again. If water keeps flowing, turn off the supply valves under the sink for extra security.
Making sure the water is off is crucial for safe and effective faucet repairs. This step prevents unexpected leaks and water damage while you’re working.
Verifying there’s no water pressure helps ensure a smooth, mess-free repair process for your leaky kitchen faucet.
How to Disassemble Your Kitchen Faucet Step-by-Step
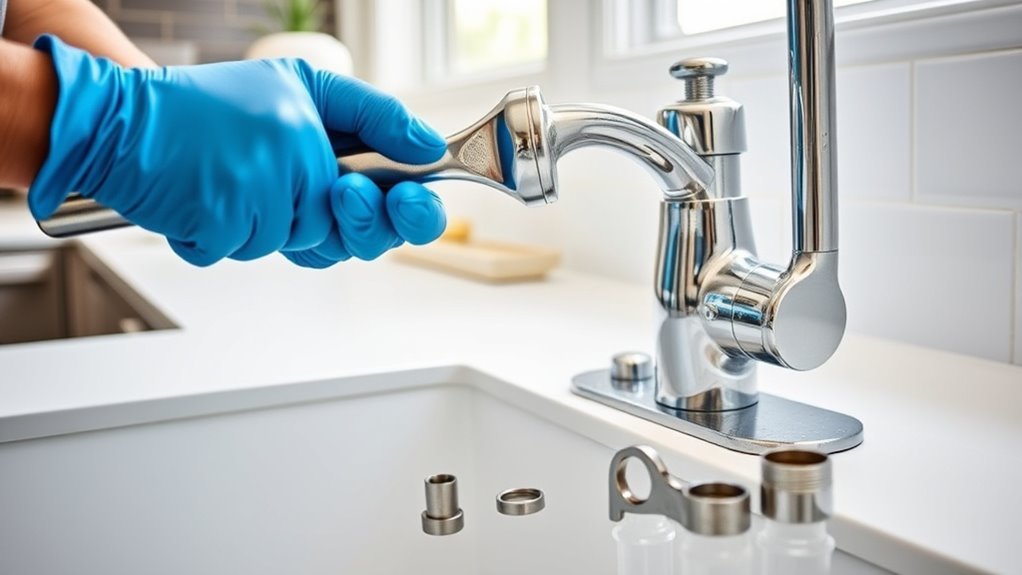
Before you start fixing your leaky kitchen faucet, gather your tools like an adjustable wrench, screwdriver, and pliers.
Begin by removing the handle. Look for a small cap or screw on top or behind it, and use your screwdriver to loosen it.
Once the handle is off, use the wrench to loosen the packing nut. Carefully lift out the stem or cartridge.
Keep track of every part you remove so you don’t get confused later.
Organize removed parts carefully to stay on track during your faucet repair process.
Disassembling your faucet carefully is a key maintenance tip that helps prevent damage and catch common issues early.
Work patiently to avoid stripping screws or breaking parts. Remember, not all faucets are the same, so check your manual if you’re unsure.
This step-by-step approach ensures you’re ready to inspect and replace worn-out washers and O-rings without causing further problems.
How to Inspect and Replace Worn-Out Washers and O-Rings
Since washers and O-rings are common culprits behind leaks, you’ll want to carefully examine them for signs of wear, cracks, or flattening. Start by removing the old washer and O-ring from the faucet stem.
Inspect each part closely. If the washer materials look hardened or cracked, or the O-ring appears brittle or misshapen, it’s time for replacements. Make sure you note the exact O-ring sizes and washer dimensions, as these vary by faucet model.
Using the wrong size can cause further leaks or damage. When purchasing replacements, opt for durable washer materials like rubber or silicone, which offer better longevity.
To install, simply slide the new washer and O-ring into place, ensuring a snug fit. Tighten everything back carefully, avoiding overtightening that could damage the new parts.
Properly inspecting and replacing these seals should stop leaks and restore your faucet’s smooth operation.
Fixing Cartridge and Ball-Type Kitchen Faucet Leaks
Start fixing cartridge and ball-type kitchen faucet leaks by understanding how their internal parts work. Cartridge faucets use a movable cartridge to control water flow, while ball-type faucets rely on a ball joint to regulate water mixing and direction. Leaks often happen because of worn cartridges or damaged ball joints.
For cartridge replacement, turn off the water supply first. Remove the handle and then extract the cartridge. Check it for any damage, and if needed, install a new one that fits your faucet model. For ball-type faucets, inspect the ball joint for wear or corrosion and replace it if necessary.
| Component | Issue | Solution |
|---|---|---|
| Cartridge | Worn or cracked | Replace cartridge |
| Ball joint | Corroded or loose | Replace ball joint |
| O-rings | Hardened or damaged | Replace O-rings |
| Springs | Worn out | Replace springs |
| Seats | Worn or corroded | Clean or replace |
Following this approach will help you fix leaks efficiently before reassembling your faucet.
How to Reassemble Your Faucet and Test for Leaks
Now that you’ve swapped out the faulty parts, it’s time to put everything back together. Just take your time and make sure each piece fits snugly — you don’t want anything loose. Once you’ve tightened everything up, go ahead and turn the water back on. Keep a close eye on your faucet to spot any leaks right away. Doing a thorough test like this helps you catch and fix any problems before you finish up.
Reassemble Faucet Components
Carefully align and fit the faucet components back together to ensure a proper seal and smooth operation. Start by placing the cartridge or valve into its housing, making sure it sits flush.
Next, reinstall any retaining clips or screws that hold the parts firmly in place. Use proper reassembly techniques like tightening screws evenly and avoiding overtightening, which can damage seals.
Reattach the handle and decorative covers, making sure they fit snugly without wobbling. Don’t forget to reconnect the water supply lines securely to prevent leaks.
Double-check each component’s position during reassembly to avoid misalignment. By following these steps and using proper techniques, you’ll restore your faucet’s function efficiently and reduce the chance of leaks when you test it.
Conduct Leak Testing
Turn on the water supply and watch your faucet closely for any signs of leaking. Checking for leaks is key to making sure your fix worked.
Use these troubleshooting tips to ensure your faucet is sealed properly: check all joints and connections for drips or moisture.
Operate the faucet handles and spout, paying attention to leaks during different flow settings.
Look under the sink for any water pooling or dampness that might mean hidden leaks.
If you see any leaks, tighten connections or reassemble parts as needed.
Repeating these steps helps catch issues early and prevents further damage.
When to Replace Your Kitchen Faucet Instead of Repairing
How do you know when it’s better to replace your kitchen faucet instead of fixing it? Start by considering the faucet age. If it’s over 10-15 years old, parts might be worn out or no longer available, making repairs costly and ineffective.
If your kitchen faucet is over 10-15 years old, repairs may be costly and parts hard to find.
Model factors also matter. Some older or specialty models have unique parts that are hard to find or expensive to replace. If leaks keep happening despite multiple repairs, or if the faucet’s design causes frequent issues, it’s probably time to replace it.
Look for signs of corrosion, cracks, or significant damage. These are clear indicators that a new faucet is needed. Replacing your faucet can improve water efficiency and give your kitchen a fresh look.
In the end, assess the faucet’s age, model, and overall condition. This will help you decide if repairing is worth it or if replacing will save you time and money in the long run.
Tips to Prevent Future Kitchen Faucet Leaks
Once you decide to keep your current faucet, taking steps to prevent leaks can save you time and hassle. Regular faucet maintenance is key to leak prevention and ensures your kitchen runs smoothly. Here are three essential tips:
1. Check and Replace Seals Regularly
Worn-out seals are a common cause of leaks. Inspect O-rings and washers every few months and replace them as needed to keep your faucet watertight.
2. Clean Faucet Aerators and Cartridges
Mineral buildup can cause pressure issues that lead to leaks. Remove and clean these parts periodically to maintain smooth water flow.
3. Avoid Excessive Force When Operating
Turning handles too hard can damage internal components. Use gentle, steady pressure to prolong your faucet’s life and prevent leaks.
Frequently Asked Questions
Can a Leaking Kitchen Faucet Increase My Water Bill Significantly?
Yes, a leaking kitchen faucet can increase your water bill quite a bit. Even a small drip wastes gallons over time, which can really add up.
By fixing leaks quickly, you not only save money but also help protect the environment. Regular plumbing checks can catch problems early and prevent expensive damage.
Are There Eco-Friendly Faucet Repair Kits Available?
Yes, you can find eco-friendly faucet repair kits that use sustainable materials designed for plumbing. These kits often include biodegradable lubricants, recycled or recyclable parts, and non-toxic sealants, helping you reduce your environmental impact while fixing leaks.
How Long Does a Typical Faucet Repair Take?
A typical faucet repair usually takes about 30 minutes to an hour, depending on the faucet types you’re dealing with. Simple compression or cartridge faucets are quicker to fix.
More complex styles like pull-out or touchless faucets might take longer. Make sure you have the right repair tools handy, like wrenches, screwdrivers, and replacement parts.
Being prepared helps you tackle the job efficiently without unnecessary delays.
Is It Safe to Fix a Faucet Leak Without Professional Help?
Yes, you can safely tackle faucet leaks with DIY repairs if you follow basic plumbing tips. Just make sure to turn off the water supply before starting and use the right tools.
If you feel confident, fixing minor leaks is straightforward and saves money. However, if the leak is severe or involves complex parts, it’s best to call a professional to avoid causing more damage or water waste.
What Should I Do if My Faucet Leak Causes Water Damage?
Before you call the town crier, start by identifying where the leak is coming from to stop more water damage. Turn off your faucet and the water supply immediately to prevent further harm.
Next, focus on preventing water damage by drying the area thoroughly and checking for hidden moisture, which can lead to mold growth. If the damage looks serious, don’t hesitate to call a professional.
Quick action now can save your home from costly repairs and keep everything running smoothly.
Conclusion
Fixing your leaky kitchen faucet might seem tricky, but once you’ve turned off the water and taken it apart, you’ll see it’s not as intimidating as you thought. It’s funny how a small drip can push you to learn handy skills you never expected to have.
By following these steps, you’ll save water, money, and maybe even impress someone with your newfound plumbing know-how. Fixing a leaky kitchen faucet is a simple task that can make a big difference.