How to Plumb a Kitchen Sink: A Step-by-Step Guide
Many homeowners find plumbing a kitchen sink to be a daunting task, especially if you’re not familiar with the process. You’re not alone—plumbing can seem tricky at first, but with the right steps, you’ll get it done smoothly.
To plumb a kitchen sink, first gather your essential tools and turn off the water supply. Remove the old sink by disconnecting the plumbing, then install your new sink securely with caulk and mounting clips.
Connect the faucet and attach drain pipes carefully, including the garbage disposal or dishwasher drain if needed. Seal all connections to prevent leaks, then test for proper water flow and drainage.
Follow these basics, and you’ll be ready to handle the finer details smoothly.
Key Takeaways
- Gather all the necessary plumbing tools, materials, and supplies before you start installing your kitchen sink. Having everything ready makes the process smoother.
- Turn off the water supply and carefully remove the old sink, disconnecting all plumbing connections safely. Take your time to avoid any mess or damage.
- Install the new sink by securing it with mounting clips, then connect the faucet with the appropriate supply lines. Make sure everything fits snugly.
- Mount the garbage disposal and connect the dishwasher drain hose, ensuring the setup is leak-proof and drains properly. Double-check all connections.
- Seal all pipe connections with plumber’s putty or tape. Finally, test the water flow and joints for leaks to ensure everything is working perfectly.
Gather Essential Tools and Materials for Kitchen Sink Plumbing
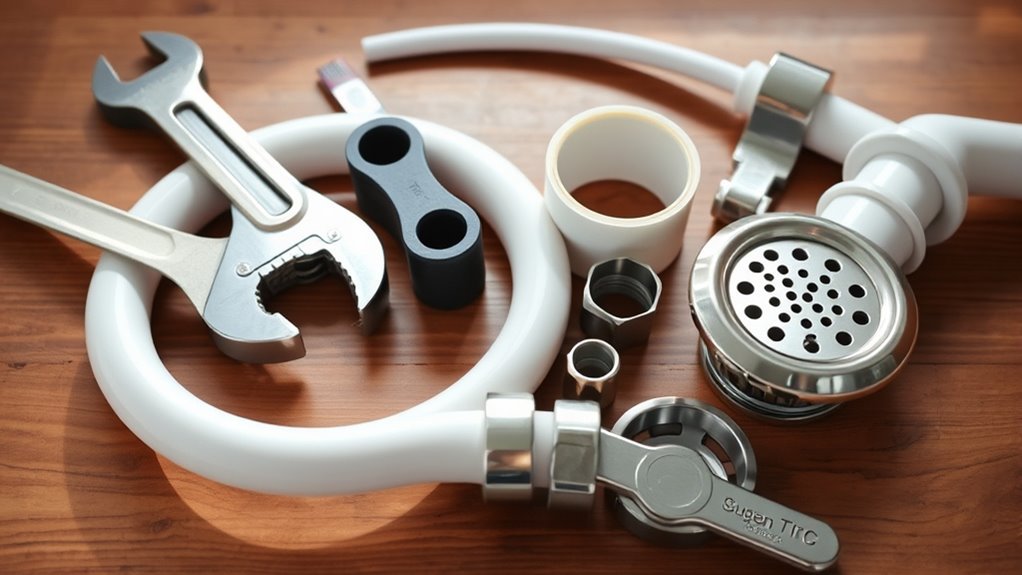
Before you start plumbing your kitchen sink, make sure you have all the essential tools and materials ready. Gathering everything upfront saves you time and headaches during installation.
Ensure all tools and materials are ready before plumbing your kitchen sink to avoid delays and frustration.
You’ll need a pipe wrench, adjustable wrench, plumber’s tape, and a basin wrench for tight spots. Slip-joint pliers and a hacksaw are also handy for cutting pipes accurately.
For materials, stock up on PVC or metal pipes, fittings, drain assemblies, and pipe sealant. A bucket and rags are great for managing spills and messes.
Having these tools and materials prepared ensures you’re ready for each step, whether connecting water lines or assembling the drain. Skipping this step can cause delays and mistakes.
Take a moment to double-check your inventory. Being prepared helps you work confidently and efficiently as you plumb your kitchen sink.
Turn Off Water Supply and Prepare Your Workspace
Once you’ve gathered all your tools and materials, the next step is to turn off the water supply to prevent leaks and flooding while you work. Locate the shutoff valves under the sink or the main water valve for your home. Turn them clockwise until fully closed. Then, open the faucet to drain any remaining water from the pipes. This step guarantees you won’t have unexpected water flow while plumbing your kitchen sink.
Next, focus on workspace organization. Clear the area around your sink and countertop to give yourself enough room to move freely. Lay down a towel or bucket to catch drips and place your tools within easy reach. Keeping your workspace tidy reduces the risk of accidents and makes the process smoother. By turning off the water supply and preparing a well-organized workspace, you set a solid foundation for successful kitchen sink plumbing.
Remove Your Old Sink and Disconnect Plumbing (If Replacing)
Start by disconnecting the plumbing under your sink to avoid water spills. Turn off the water supply valves and place a bucket under the pipes to catch any remaining water. Use an adjustable wrench to loosen the nuts on the drain trap and supply lines.
Remember, plumbing safety is essential. Wear gloves and safety goggles to protect yourself from debris and sharp edges.
Next, remove any mounting clips or brackets holding the sink in place. Gently lift the old sink out, being careful not to damage the countertop. Here are some sink removal tips to keep in mind:
| Step | Tip |
|---|---|
| Turn off water supply | Confirm valves are fully closed |
| Drain pipes | Use a bucket to catch residual water |
| Loosen connections | Use the right wrench size |
| Remove mounting clips | Keep screws and clips organized |
| Lift sink carefully | Avoid damaging the countertop edges |
Following these steps guarantees a smooth, safe sink removal process.
Install Your New Kitchen Sink and Secure It in Place
Place your new sink carefully into the countertop opening, making sure it fits snugly and lines up with the plumbing fixtures. Before securing it, check that it sits level to prevent drainage problems.
Apply a bead of silicone caulk around the sink’s edge to create a waterproof seal. Use the recommended securing methods, like mounting clips or brackets from the manufacturer.
Tighten these clips evenly underneath the countertop to hold the sink securely, but don’t over-tighten — that could cause damage. Double-check the alignment as you go to make sure it hasn’t shifted.
Finally, wipe away any excess caulk for a tidy finish. Following these tips and securing the sink properly will give you a stable, leak-free installation that lasts.
This sets a solid foundation before moving on to connecting the faucet and plumbing.
Connect the Kitchen Sink Faucet
With your sink firmly installed and sealed, you can now connect the kitchen sink faucet. Start by identifying your faucet type—whether it’s single-hole, widespread, or wall-mounted—as this impacts your installation steps.
Place the faucet into the designated holes on the sink or countertop, making sure the gasket or putty is properly positioned to prevent leaks. From underneath, secure the faucet with mounting nuts, tightening them evenly to keep it stable without over-tightening, which could damage components.
Installation tips include checking that the faucet is aligned correctly before fully tightening and confirming all seals are in place. If your faucet has a separate sprayer or soap dispenser, install these at the same time, following the manufacturer’s instructions.
Take your time to avoid cross-threading nuts and verify that moving parts operate smoothly. Once everything is connected, inspect the faucet for stability before moving on to attaching the water supply lines.
Attach Water Supply Lines to the Faucet
Now that you’ve got your faucet installed, it’s time to connect the water supply lines. Picking the right lines for your setup is pretty important — you want something that fits well and is durable. Once you’ve got the right ones, make sure each connection is nice and tight so you don’t end up with any leaks. Let’s walk through how to choose and secure those lines properly.
Choosing Proper Supply Lines
Two key factors determine the right supply lines for your kitchen sink: durability and compatibility. When choosing supply line types, think about materials like braided stainless steel. It’s durable, resistant to kinks, and won’t corrode easily.
On the other hand, flexible plastic lines are more budget-friendly but might not last as long. Make sure the supply lines match your faucet’s connection size and water pressure needs to prevent leaks or damage.
Check that the length of the supply lines fits your setup without stretching or bending sharply. This avoids strain that could cause early wear and tear. By choosing supply lines that are durable, properly sized, and compatible, you’ll ensure a steady water flow to your faucet.
Connecting Lines Securely
Start by firmly attaching each water supply line to the corresponding faucet connection, making sure you match hot and cold lines correctly. Use the right pipe fittings to create a secure seal and prevent leaks.
Different connection types, like compression or threaded, need different tightening methods. Hand-tighten first, then secure with a wrench—just avoid overtightening to prevent damage.
| Step | Action | Tip |
|---|---|---|
| 1 | Identify hot/cold lines | Hot is usually marked red |
| 2 | Attach supply line | Use correct pipe fitting |
| 3 | Hand-tighten | Prevent cross-threading |
| 4 | Secure with wrench | Tighten snugly, not too much |
Secure connections ensure lasting performance and help prevent water damage.
Assemble and Attach Drain Pipes Correctly
Properly assembling and attaching drain pipes guarantees your kitchen sink drains smoothly without leaks. Start by choosing the right drain pipe materials—usually PVC or ABS plastic—since they’re durable, easy to cut, and resistant to corrosion.
Measure and cut each pipe to fit exactly between the sink drain, trap, and wall drain outlet. Next, focus on the trap installation; the P-trap is important for stopping sewer gases from entering your kitchen.
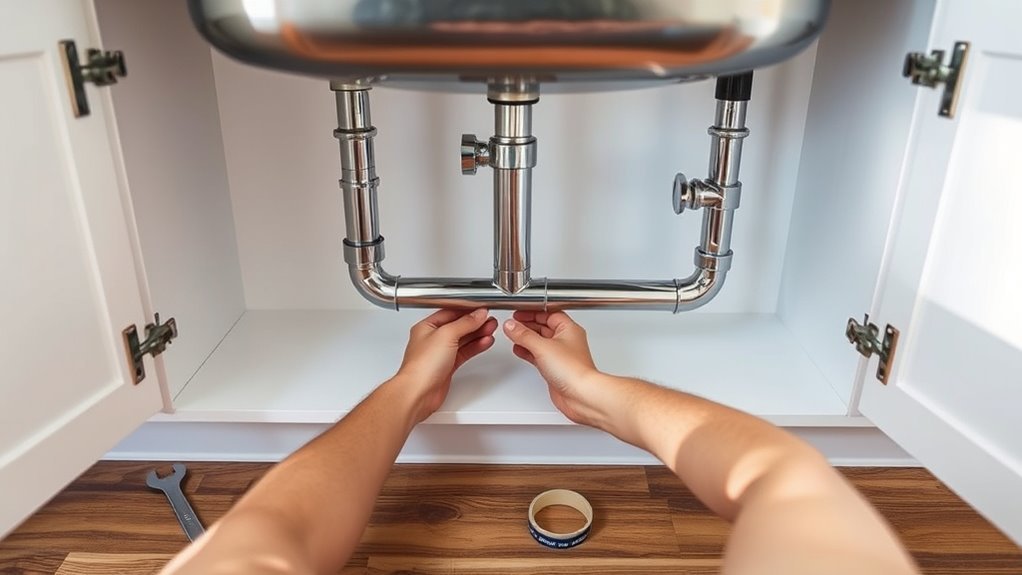
Attach the trap securely underneath the sink drain, making sure it lines up perfectly with the tailpiece and waste arm. Use slip joint nuts and washers to connect each section, tightening them by hand first and then slightly with pliers to avoid overtightening.
Secure the trap under the sink, aligning it with the tailpiece and waste arm, and tighten connections carefully.
Check that all joints are tight and properly sealed with plumber’s putty or pipe thread tape if needed. Finally, test your connections by running water and looking for leaks, adjusting fittings as necessary to keep everything watertight.
Install Garbage Disposal or Dishwasher Drain (If Needed)
If your kitchen has a garbage disposal or a dishwasher, you’ll need to connect their drains to your sink’s plumbing system.
For garbage disposal installation, start by mounting the unit securely under the sink, aligning it with the drain opening. Attach the disposal’s outlet to the drain pipe using a proper flange and gasket to ensure a snug fit.
Next, if you have a dishwasher, connect its drainage hose to the designated dishwasher inlet on the disposal or directly to the drain pipe via a branch tailpiece. Make sure the hose is clamped tightly to prevent leaks.
When setting up the dishwasher drain, create a high loop with the hose. This helps prevent backflow into the dishwasher, which is important for proper drainage and avoiding contamination.
Seal Drain and Supply Line Connections to Prevent Leaks
Once you’ve connected the garbage disposal and dishwasher drains, it’s important to seal all drain and supply line connections. Proper sealing helps prevent water damage and costly repairs from leaks.
Start by choosing the right sealant for your setup. Plumber’s putty works well for sink drains, creating a watertight barrier, while Teflon tape is ideal for threaded supply line fittings.
Apply plumber’s putty evenly around the drain flange before securing it. Wrap Teflon tape clockwise around threaded connections to ensure a tight seal.
After sealing, tighten all fittings firmly but avoid overtightening, which can damage threads and cause leaks. Keep an eye out for even minor drips during leak detection, as small leaks can worsen over time.
Test Your Kitchen Sink Plumbing for Leaks and Proper Flow
Turn on the water and watch closely for any leaks or slow drainage. This step is vital for leak detection and flow testing to guarantee your kitchen sink plumbing works perfectly. Here’s what you should do:
- Inspect all joints and connections for drips or moisture. Even a tiny leak can cause damage over time.
- Check the water flow by letting the water run through both hot and cold taps. Make sure it drains quickly without backing up.
- Test under pressure by turning the water on full blast for a minute. This helps reveal leaks that only appear when flow is strong.
If you spot any leaks, tighten connections or reseal joints immediately. Proper flow and leak-free plumbing mean fewer headaches and a kitchen that runs smoothly.
Taking the time for thorough leak detection and flow testing protects your investment and keeps your sink functioning flawlessly.
Frequently Asked Questions
What Type of Sink Material Is Easiest to Install?
You’ll find stainless steel sinks the easiest to install because they’re lightweight and come with pre-drilled holes, making your job quicker.
Composite sinks, while durable and attractive, tend to be heavier and require extra support, which complicates installation.
How Do I Choose the Right Faucet Style for My Kitchen?
Choosing the right faucet style might seem simple, but paying attention to a few details can really make a difference.
First, think about faucet heights. Tall faucets work well with deep sinks, while shorter ones are better for shallower bowls.
Next, consider faucet finishes. Chrome gives a sleek look, while brushed nickel hides spots and fingerprints better.
Match your faucet’s style and finish to your kitchen’s vibe, and you’ll get both function and style without any hassle.
Can I Install a Kitchen Sink Without Professional Plumbing Experience?
Yes, you can tackle DIY plumbing and complete a sink installation without professional experience if you’re willing to learn. Start by researching basic plumbing concepts, watching tutorials, and gathering the right tools.
Take your time to carefully follow instructions, turn off the water supply, and double-check connections for leaks. If you run into trouble, don’t hesitate to ask for advice or call a pro to avoid costly mistakes.
What Are Common Plumbing Code Requirements for Kitchen Sinks?
You need to follow plumbing code requirements like proper drainage systems to prevent leaks and backups.
Codes often specify fixture heights, making sure your kitchen sink is installed at a comfortable and accessible level.
You also must include venting for drainage and use approved materials for pipes.
Don’t forget to install a trap to block sewer gases.
Checking local codes is essential since they can vary, but these basics keep your installation safe and functional.
How Often Should I Check for Leaks in Kitchen Sink Plumbing?
You should check for leaks in your kitchen sink plumbing at least once a month to catch problems early. Doing regular leak checks can help prevent water damage and costly repairs.
Make it part of your routine, especially after heavy use or any plumbing work. Keep an eye on pipes, joints, and under the sink for moisture or drips.
Staying proactive like this ensures your plumbing stays in good shape and helps you avoid surprises down the line.
Conclusion
Now that you’ve learned how to plumb your kitchen sink step-by-step, aren’t you ready to enjoy a perfectly functioning workspace? With the right tools and careful connections, you’ve prevented leaks and guaranteed smooth water flow.
Plumbing your sink might seem intimidating, but following these steps makes it manageable. So go ahead—take on the challenge, save money, and feel proud every time you turn on your faucet without a worry.
Getting your kitchen sink plumbing right means fewer leaks, better water flow, and a hassle-free experience. Mastering the process of how to plumb a kitchen sink helps you enjoy a fully functional kitchen.