
How to Cook Chicken so It Stays Moist: 8 Proven Ways for Juicy Results
To cook chicken so it stays moist, use proper seasoning, control cooking temperature, and avoid overcooking to lock in juices. Brining, choosing the right cut, and resting the meat after cooking can significantly improve juiciness. This advice works for all home cooks looking to keep chicken tender and flavorful every time.
The following tips focus on practical steps for beginners and experienced cooks alike to master juicy chicken. You’ll learn how to handle different cuts, use seasoning and temperature techniques, plus avoid common drying mistakes for consistently moist results.
Key Takeaways
- Brine chicken before cooking to boost moisture and add flavor.
- Cook chicken at temperatures between 375°F and 425°F for optimal juiciness.
- Use a meat thermometer to ensure chicken reaches 165°F without overcooking.
- Pound chicken breasts to even thickness to promote uniform cooking.
- Rest cooked chicken for at least 5 minutes before slicing to retain juices.
- Coat chicken with butter or oil to help seal in moisture during cooking.
1. How to Cook Chicken for Maximum Moisture
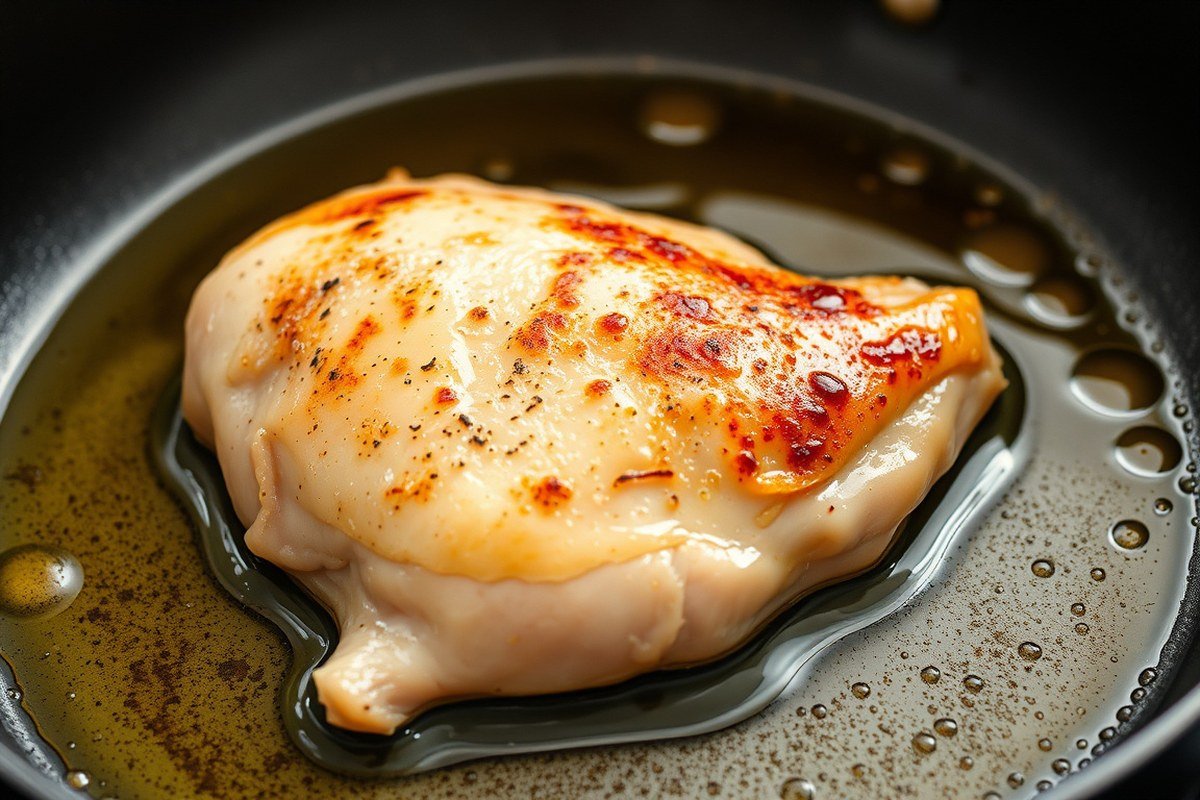
Cooking chicken so it stays moist starts by managing temperature, timing, and the addition of fat. Aim for a cooking temperature between 375°F and 425°F, which balances thorough cooking without drying out the meat. For example, baking chicken breasts at 425°F for about 20 to 25 minutes usually works well if they are pounded to an even thickness. This ensures the chicken cooks evenly and avoids dry, tough spots.
Using skin-on chicken or coating skinless pieces with oil or butter adds a protective layer that retains moisture during cooking. The fat melts and bastes the meat, helping prevent drying. When pan-frying, cook over medium-high heat with a bit of oil for a quick sear that locks juices inside. For baking or roasting larger cuts, rub the chicken with oil or softened butter before placing it in the oven.
Flattening chicken breast pieces to an even thickness of about ½ inch promotes uniform cooking and helps avoid overcooking thinner edges while waiting for the thicker middle to finish. For breasts, pounding the meat with a meat mallet or rolling pin inside plastic wrap works well. Consistent thickness cuts down on cooking time and keeps all parts juicy.
Another key step is to monitor internal temperature closely, ideally with a meat thermometer. Chicken should reach 165°F internally for safety but pulling it off the heat at around 160°F allows carryover cooking to finish the process, preserving moisture. Rest the chicken for at least 5 to 10 minutes after cooking to let juices redistribute; cutting too soon causes loss of that moisture.
When roasting whole chickens, cooking at the higher end of the temperature range (about 425°F) helps sear the skin rapidly, sealing in juices while the interior cooks. Basting with pan drippings or brushing with oil also improve moisture retention. Cooking times vary by size, but 1.5 to 2 hours for a 4- to 5-pound chicken is typical, checking doneness by temperature.
For quick-cooking methods like grilling or frying, maintain heat at medium-high to get a good crust fast, then lower the heat or move the chicken to indirect heat to finish cooking without drying. Applying a seasoning rub under the skin or on the surface with oil keeps the meat tender and flavorful throughout.
2. Understanding Chicken Cuts and Their Moisture Needs
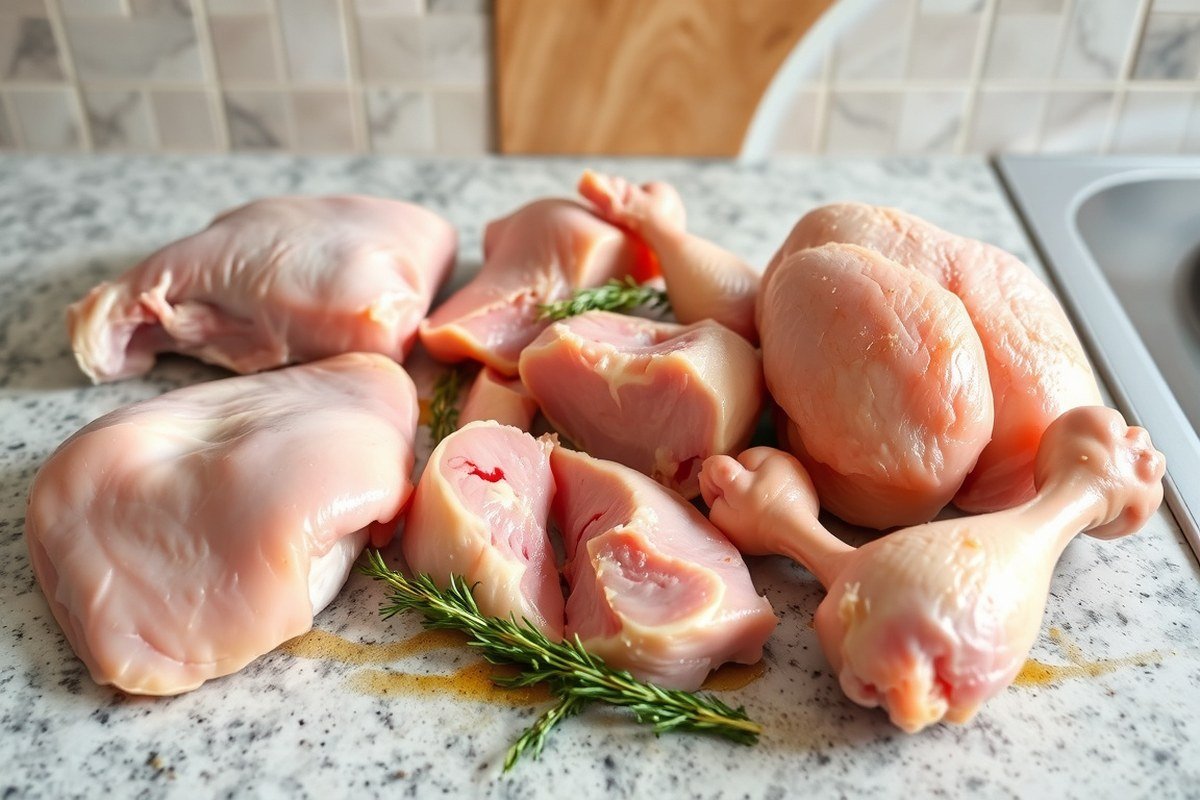
Chicken cuts vary in how they hold moisture during cooking, which means adjusting your approach by cut is key to juicy results. Bone-in, skin-on pieces generally stay moister than boneless, skinless ones. Cooking times also differ significantly depending on the cut’s thickness and bone presence, requiring tailored cooking methods and temperatures.
Differences Between Bone-In and Boneless Cuts
Bone-in chicken cuts such as thighs, legs, and quarters retain moisture better because the bone helps conduct heat evenly and slows down drying. The skin further acts as a natural barrier, locking in juices during cooking. Boneless cuts, especially chicken breasts, cook faster but tend to dry out if overcooked, since they lack the protective qualities of skin and bone.
For moist cooking, start bone-in, skin-on cuts skin side down to render fat and seal moisture. Covering the chicken initially traps steam, which helps keep these cuts tender. Removing bones or skin requires more careful timing and sometimes marinating or brining to compensate for moisture loss.
Skin-On vs Skin-Off: Which Retains Moisture Best?
Leaving skin on chicken pieces is one of the best ways to keep moisture locked in. The skin creates a barrier that prevents juices from escaping while cooking, also adding flavor and a crispy texture if cooked uncovered toward the end. For methods like roasting or baking, start with skin side down to maximize fat rendering.
Removing skin exposes the meat directly to heat, increasing the risk of dryness. Skinless cuts benefit from added moisture through brining, marinades, or cooking with added fat like oil or butter. Skin-on cooking does typically require slightly longer times to reach safe internal temperatures, which bones can help regulate.
Cooking Time Guidelines by Cut and Thickness
Cooking times vary widely by whether the chicken is bone-in or boneless, and by cut thickness. Generally, boneless breasts take about 20 to 30 minutes at 375°F (190°C). Bone-in pieces such as thighs or drumsticks need 40-50 minutes or more depending on size. Covering the chicken during part of cooking prevents drying and speeds cooking by trapping moisture.
| Cut | Bone-in or Boneless | Skin-On or Skin-Off | Approximate Cooking Time at 375°F (190°C) |
|---|---|---|---|
| Chicken Breast | Boneless | Skin-Off | 20-30 minutes |
| Chicken Thigh | Bone-in | Skin-On | 40-50 minutes |
| Chicken Drumstick | Bone-in | Skin-On | 40-50 minutes |
| Chicken Breast | Boneless | Skin-On | 25-35 minutes |
| Chicken Thigh | Boneless | Skin-Off | 30-40 minutes |
Adjust cooking times based on thickness and whether the meat is covered. For example, covering bone-in, skin-on pieces with foil can retain moisture and shorten cooking times slightly by trapping steam.
Always start cooking bone-in, skin-on chicken skin side down to help render fat and hold moisture better.
3. Brining and Marinating for Juiciness and Flavor
Brining and marinating both help chicken stay juicy by increasing moisture retention and adding flavor before cooking. Brining soaks chicken in a saltwater solution that locks in moisture, while marinating uses acidic or enzymatic ingredients to tenderize and infuse taste. Marinating can replace brining if it includes salt and moistening components, but brining is especially reliable for moisture. Salting right before cooking seasons the surface but doesn’t hydrate the meat like brining does.
Preparing a Basic Saltwater Brine
Brining involves soaking chicken in a saltwater mix that helps it absorb and hold onto moisture as it cooks. This prevents dryness and makes the texture more tender. A simple brine requires just water, salt, and optional flavorings like herbs or spices. Here’s how to make a basic brine that works well for boneless chicken breasts, the most moisture-sensitive cut:
- Measure 4 cups (1 quart) of cool water into a container.
- Add 1/4 cup of kosher salt or 3 tablespoons of table salt; stir until dissolved.
- Optional: Add 1 tablespoon sugar to balance saltiness and 1 teaspoon garlic powder or herbs for flavor.
- Submerge 2, 4 boneless chicken breasts completely in the solution.
- Cover and refrigerate for 30 minutes to 2 hours, depending on size.
- Remove chicken, rinse briefly under cold water, and pat dry thoroughly before cooking.
This brine helps protein fibers retain water, so less liquid escapes during cooking. Avoid brining longer than 4 hours for breasts to prevent them from becoming too soft or salty.
Effective Marinades for Moist Chicken
Marinating adds moisture and flavor using acidic ingredients like lemon juice, yogurt, or buttermilk, which tenderize the meat and help it hold juices. Oil in marinades also coats the chicken, locking in moisture during cooking. For a simple marinade that keeps chicken juicy and tasty, combine these ingredients:
| Ingredient | Quantity | Purpose |
|---|---|---|
| Olive oil | 2 tablespoons | Keeps chicken moist |
| Lemon juice | 1 tablespoon | Tenderizes meat |
| Garlic powder | 1 teaspoon | Adds depth |
| Paprika | 1 teaspoon | Adds color and flavor |
| Sea salt & black pepper | To taste | Basic seasoning |
Mix all ingredients and coat the chicken pieces evenly. Marinate in the fridge in a sealed container or zip-top bag to prevent contamination.
Marinating works well for about 1 to 4 hours. Over-marinating with high-acid ingredients can cause the texture to turn mushy, so avoid cooking with marinades left longer than 24 hours.
Timing: How Long to Brine or Marinate
Correct timing keeps chicken juicy without compromising texture or safety. Brining times generally range from 30 minutes to 2 hours for boneless pieces. Longer times risk oversaturation and softness. For bone-in parts, you can extend brining up to 4 hours if desired.
Marinating typically takes 1 to 4 hours for lean cuts like breasts. Marinades with dairy or citrus should not exceed 24 hours, as prolonged acid exposure breaks down muscle fibers too much. For quick flavor and moisture infusion, 30 minutes is enough for small pieces like tenders or cubes.
Salting immediately before cooking seasons the outside but does not hydrate the meat like brining. For moisture benefits, use salt in the brine or marinade solution instead of applying it dry just before heat.
4. Choosing the Right Cooking Method to Lock in Moisture
Choosing the right cooking method plays a major role in keeping your chicken moist. Methods that use gentle, moist heat, like poaching and braising, are excellent because they cook the chicken slowly and evenly without drying it out. Poaching involves submerging the chicken in simmering water or broth at about 160°F to 180°F. This slow, low-heat cooking helps retain moisture and tenderness. Poach chicken pieces for 15 to 20 minutes depending on their size, checking for doneness to avoid overcooking. This requires a pot, liquid, and some attention, but results in very juicy chicken.
Baking also works well to lock in moisture, especially when done at moderate oven temperatures of 325°F to 375°F. Baking chicken at too high a temperature causes the outer parts to dry out while the inside cooks, leading to less juicy meat. Baking with a covering or basting the chicken helps preserve moisture. For example, roasting bone-in chicken breasts at 350°F for about 25 to 35 minutes usually yields tender results. Avoid high heat baking over 400°F, which can shrink the muscle fibers and squeeze out moisture faster.
On the stove, cooking chicken over medium heat is preferable. Searing chicken breasts for just one minute on medium heat each side can create a flavorful crust. Continue cooking on medium heat while turning frequently to avoid burning or drying out the chicken. High-heat methods like frying or grilling can seal in juices if done quickly, but longer cooking times or very high heat will dry the meat. When grilling, use medium heat and monitor the cooking time carefully to prevent moisture loss. Braising chicken in a Dutch oven with some liquid is another stovetop technique that keeps chicken juicy by maintaining a moist cooking environment at lower temperatures.
In contrast, deep frying and high-heat grilling expose chicken to intense direct heat that causes rapid moisture loss, especially with lean cuts like breasts. High temperatures shrink proteins aggressively and push water out, resulting in drier meat. Use these methods only for quick cooking or when you can keep the chicken coated or marinated to help lock in moisture.
In summary, the best way to keep chicken moist is to cook it gently and evenly with methods using moist heat or moderate dry heat. Poaching, braising, and slow baking allow the meat to retain its natural juices, while medium-heat pan cooking or grilling can work if monitored closely. Avoid high heat and prolonged cooking times which dry out the chicken. Choosing the right method depends on your available tools, time, and recipe goals, but slow, steady cooking is usually the best way to get tender, juicy chicken every time.
5. Using a Meat Thermometer: Ensuring Perfect Doneness
Using a meat thermometer is the most reliable way to cook chicken perfectly moist and safe. The ideal internal temperature for chicken is 165°F (74°C), which kills harmful bacteria while keeping the meat juicy. Overcooking happens if the temperature goes much above this point, causing the proteins to dry out and the chicken to lose moisture.
How to Calibrate and Use a Meat Thermometer
Accurate temperature readings depend on a calibrated and properly used thermometer. Before using, you can check calibration by placing the thermometer in ice water; it should read close to 32°F (0°C). If it doesn’t, adjust it if the model allows or note the difference. During cooking, insert the probe into the thickest part of the chicken, avoiding bones and fat since they heat differently. Follow these steps to use a meat thermometer effectively:
- Calibrate your thermometer in ice water or boiling water according to the manufacturer’s instructions.
- Insert the probe into the thickest part of the chicken (usually the breast or thigh), steering clear of bone.
- Check the temperature toward the end of the estimated cooking time rather than earlier.
- Wait for a stable reading, which usually takes 10 to 20 seconds with an instant-read model.
- Repeat the measurement in a few different spots if the cut is large or uneven.
- Clean the probe with hot, soapy water after each use to maintain hygiene and accuracy.
Always avoid touching bones with the thermometer probe as it can give you a falsely high temperature reading.
Target Temperature Ranges for Various Chicken Cuts
The USDA recommends 165°F (74°C) for all chicken parts to guarantee safety. White meat, like chicken breasts, tends to dry out faster, so hitting 165°F exactly and not higher is key. Dark meat, such as thighs and drumsticks, can be more forgiving and remain juicy even just past this temperature due to higher fat content.
For whole chickens, check the temperature in the thickest part of the thigh and breast. For smaller cuts like boneless breasts or wings, verify in the thickest spot only. Sous vide cooking uses lower temperatures for longer times, but these require special equipment and precise controls to keep the chicken tender and safe.
When to Remove Chicken from Heat
Remove chicken from the heat when the internal temperature reaches 160°F (71°C), allowing carryover cooking to bring it to the safe 165°F (74°C) while keeping it moist. The meat continues to cook for several minutes after you take it off the heat, so pulling it too late risks dry meat.
Use your thermometer frequently near the end of cooking to avoid overcooking. After removing the chicken, cover it loosely and let it rest for 5 to 10 minutes. This resting allows juices to redistribute and temperature to rise slightly, resulting in a juicier bite.
6. The Importance of Resting Chicken After Cooking
Resting chicken after cooking is essential for keeping it moist and flavorful. Right after you take chicken off the heat, its juices are pushed toward the center and surface of the meat by the heat. Slicing into the chicken right away causes the juices to flow onto the cutting board, which dries out the meat. Letting it rest allows the juices to move back and redistribute evenly through the meat, making each bite juicy.
Letting chicken rest for 5 to 10 minutes before slicing helps keep it moist. Smaller cuts like breasts or thighs usually need about 5 minutes, while a whole roast or bigger pieces do better with 10 minutes or slightly more. This pause allows the moisture pushed out during cooking to be reabsorbed.
Loosely covering chicken with foil while it rests traps heat and stops the surface from drying without making the skin soggy. Avoid wrapping it tightly or sealing in containers, as trapped steam softens the skin. The ideal temperature to maintain during resting is roughly 130 to 140°F, which lets the juices redistribute.
Here’s a simple checklist to follow when resting chicken: Remove from heat and transfer to a cutting board or plate. Loosely tent it with aluminum foil. Set a timer for 5 to 10 minutes depending on size. Avoid pressing on the meat, which can squeeze out juices. After resting, slice and serve immediately to keep the juices locked inside.
For thicker pieces or whole chickens, resting up to 10 minutes ensures the internal temperature evens out and the juices spread throughout. Allowing the meat to rest before assembling sandwiches or salads cools it enough to slice thinner without juices spilling out. In any case, skipping the rest or cutting too soon leads to drier chicken that doesn’t meet expectations for moistness.
Taking these few minutes to rest chicken after cooking takes little effort but pays off with noticeable improvements in texture and juiciness. Covering it loosely with foil during rest costs nothing more than a piece of foil, but prevents heat and moisture loss. Slicing only after 5 to 10 minutes ensures you fully enjoy the moist, tender results you worked for during cooking.
7. Common Mistakes That Dry Out Chicken and How to Fix Them
Dry chicken often results from a few common cooking mistakes. Overcooking is the top cause because even a slight increase above 165°F (74°C) can push chicken from moist to dry. Another error is skipping resting time after cooking, which lets juices redistribute instead of running out when you slice. Using high heat without enough moisture or cooking time also causes dryness, especially in lean cuts like chicken breast.
Preparation impacts moisture more than it seems. Not marinating or brining strips away water retention capacity, so the meat cooks drier. Cooking chicken directly on a dry surface without a protective layer or liquid can draw out moisture quickly. Lastly, improperly reheating or storing cooked chicken without sealing it in moisture accelerates drying.
- Check internal temperature with a meat thermometer to stop cooking right at 165°F (74°C).
- Rest the chicken on a plate, tented loosely with foil, for at least 5 minutes before cutting.
- Use a marinade or a quick brine with salt and water for at least 30 minutes before cooking.
- Cook chicken in a pan with at least 1/4 cup of broth or sauce to keep it moist.
- Avoid high heat alone; combine with slower cooking methods or cover to trap steam.
- Store leftovers in airtight containers and reheat gently in a microwave or low oven with cover.
Fixing dry chicken starts with temperature control. Use a digital thermometer inserted into the thickest part of the meat to remove it from heat as soon as it hits 165°F (74°C). Quick overcooking by even a few minutes makes breast meat tough and dry. Resting lets the muscle fibers relax and reabsorb juices, so don’t slice right away.
Adding moisture during cooking makes a big difference. Simmer chicken breasts in broth or add a splash of water to the pan to create steam. Slow cooking at moderate temperatures with a lid traps moisture inside. Marinating adds water and flavor molecules that hold juice, especially if you include a bit of salt. For reheating, return the chicken to a covered dish with a little liquid and heat at low power or a low oven temperature to avoid further drying out.
Preparation requires some extra time but doesn’t cost much. A simple brine uses about 1 tablespoon of salt per 4 cups of water, soaking chicken for 30 minutes to a few hours. Thermometers can range from $10 to $30 and make a noticeable difference. These steps prevent dryness and result in chicken that’s tender, juicy, and flavorful instead of tough and crumbly.
8. Storing and Reheating Cooked Chicken to Keep It Moist
Cooked chicken stays moist in the fridge for 3 to 4 days when stored correctly. Use airtight containers or wrap the chicken tightly with plastic wrap or foil to limit air contact and prevent drying. Let the chicken cool down a bit before storing to avoid condensation that can change the meat’s texture.
Freezing cooked chicken is an option that affects moisture depending on how you freeze it. Wrap the chicken tightly in plastic wrap and then place it in a freezer-safe bag to reduce freezer burn, which dries out the meat. Frozen cooked chicken retains good moisture for about 2 to 6 months, but longer storage can cause it to become dry and tough after reheating. Always thaw frozen cooked chicken in the refrigerator overnight, not at room temperature, to keep it moist and safe to eat.
Reheating chicken without drying it out requires gentle, even heat and some moisture. The oven is a solid choice: preheat it to 300°F, place the chicken in an oven-safe dish, add a splash of chicken broth or water, and cover it with foil. Heat for 20 to 30 minutes, depending on the size of the pieces. This creates steam that protects the chicken from drying. The stovetop works well with small pieces, covered in a pan over low heat with a little broth, stirring occasionally. Avoid microwaving chicken uncovered since microwaves can quickly dry out meat; if you use a microwave, cover the chicken with a damp paper towel and heat in short intervals, checking often.
Incorporating moist ingredients during reheating can help, especially if you plan to use the chicken in recipes like casseroles or soups. Adding sauces, gravies, or vegetables with high water content locks in moisture and improves texture. Dark meat cuts like thighs naturally hold moisture better than white meat, so they tolerate reheating somewhat more reliably.
Always reheat chicken to an internal temperature of 165°F as recommended by the USDA to ensure it’s safe and moist without overcooking.
Step-by-Step Action Plan to Keep Your Chicken Moist
Follow these clear steps the next time you cook chicken to ensure it stays juicy and flavorful every time.
- Before cooking: Brine your chicken for at least 30 minutes or marinate for up to 4 hours to help it retain moisture and improve flavor. Check for a subtle seasoning aroma.
- Just before cooking: Pat the chicken dry to promote even browning and crisp skin without drying the meat. The surface should feel damp but not wet.
- While cooking: Use a meat thermometer to monitor internal temperature, removing the chicken once it hits 160°F, knowing it will rise to 165°F when resting.
- Immediately after cooking: Let the chicken rest for 5 to 10 minutes on a warm plate, loosely covered with foil. The juices will redistribute, and the meat will feel firmer to the touch.
- Storing leftover chicken: Refrigerate cooked chicken within two hours in an airtight container to keep moisture locked in. Reheat gently to 165°F without overcooking.
Frequently Asked Questions
What Is the Key to Preventing Chicken from Drying Out During Baking?
To prevent dryness, bake chicken at around 425°F after brining and coating with oil or butter. This cooks it quickly and helps retain moisture by avoiding prolonged heat exposure.
Can You Keep Chicken Moist Without Using a Brine?
Yes, using a marinade or simply coating with oil and cooking it evenly also locks in moisture, but brining is best for consistent juiciness.
Why Should Chicken Breasts Be Pounded to Even Thickness?
Pounding ensures the chicken cooks evenly, preventing thin parts from drying out while thicker areas finish cooking.
How Does Resting Cooked Chicken Improve Its Moisture?
Resting lets juices redistribute inside the meat after cooking, which keeps the chicken moist when sliced.
What Is the Benefit of Using a Meat Thermometer for Chicken?
A thermometer ensures chicken reaches the safe temperature of 165°F without overcooking, preserving moisture.
Which Chicken Cuts Naturally Stay Juicier During Cooking?
Chicken thighs and drumsticks have more fat, which helps them stay tender and juicy compared to lean breasts.
Wrapping Up
Cooking chicken so it stays moist takes some attention but becomes easier with practice. Focus on controlling temperature and giving the meat time to rest after cooking. Start applying one technique today, like using a meat thermometer or brining, and you’ll notice a juicier, tastier meal every time.




2 Comments