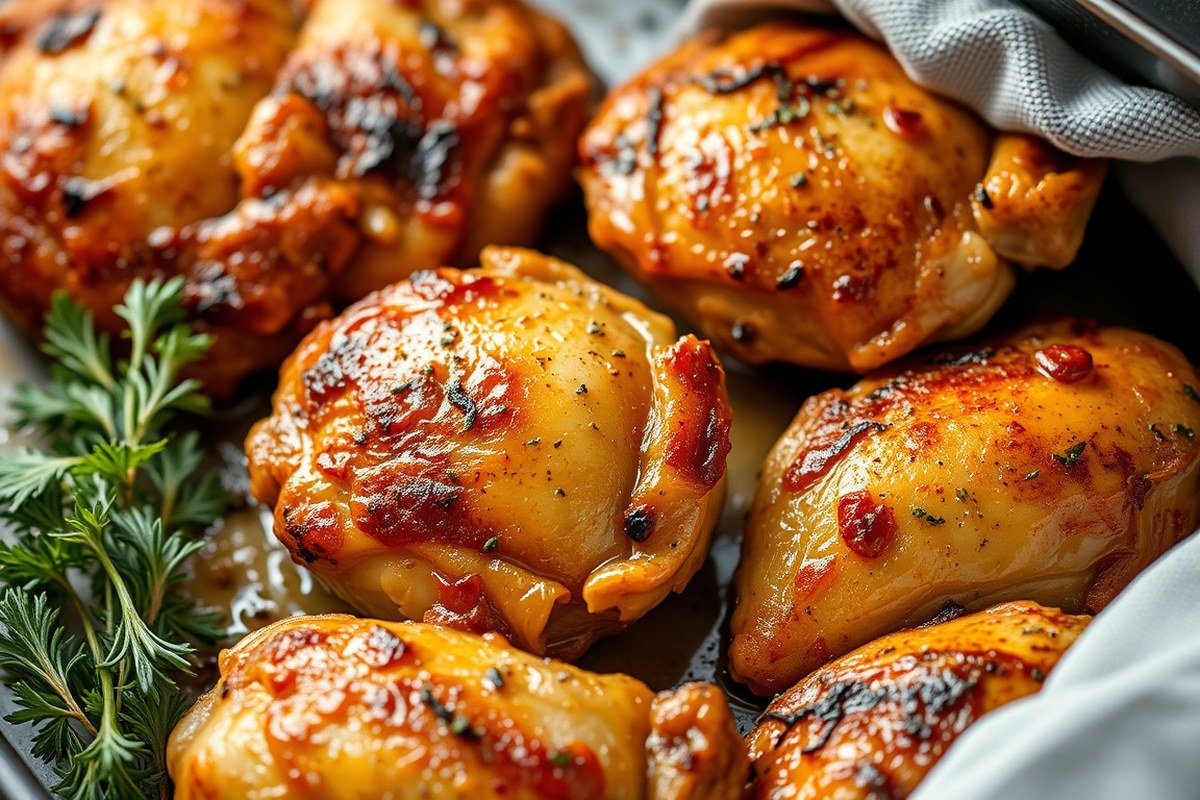
How to Cook Chicken Thighs Perfectly: 8 Proven Methods That Work
To cook chicken thighs perfectly, focus on achieving the right internal temperature of 165°F to ensure safety while retaining juiciness. Use methods that suit the cut and your preferred texture, such as baking, grilling, or pan-searing. This approach works with all types of chicken thighs, whether bone-in or boneless, skin-on or skinless.
This guide is for home cooks and beginners seeking clear, practical steps for how to cook chicken thighs. You’ll learn which chicken thigh types suit each cooking method and how to get the best flavor and texture every time.
Key Takeaways
- Cook all chicken thighs to an internal temperature of at least 165°F for safety.
- Boneless, skinless thighs cook faster, usually within 15 to 20 minutes depending on size.
- Bone-in thighs need longer cooking times, about 30 minutes in the oven or 20 minutes on the grill.
- Let chicken rest for 5 to 10 minutes after cooking to keep juices inside.
- Season chicken thighs before cooking and optionally let them sit at room temperature for more even cooking.
- Cooking skin-on thighs at higher temperatures, like 425°F in the oven, helps achieve crispy skin.
1. How to Cook Chicken Thighs Safely and Effectively
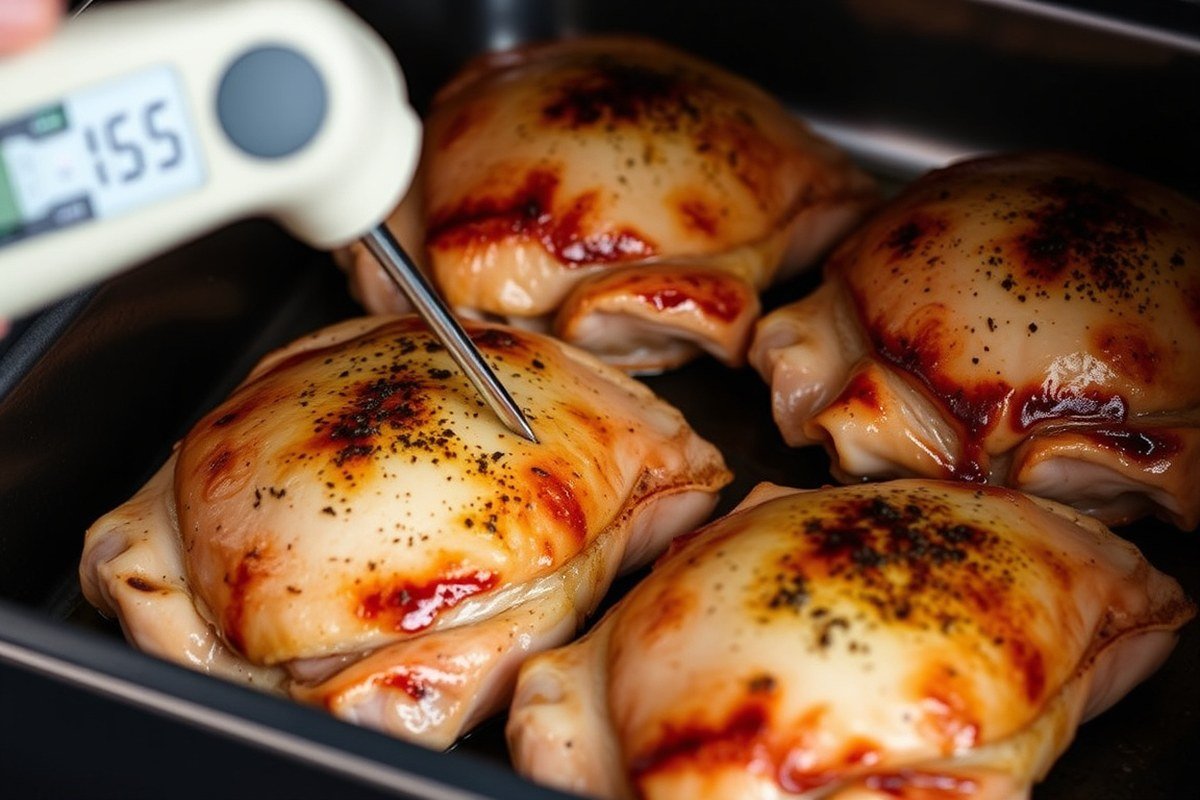
Chicken thighs should be cooked to a safe internal temperature of 165°F to prevent foodborne illness. This temperature, recommended by the USDA, ensures that harmful bacteria like salmonella are destroyed. Using a reliable meat thermometer is the best way to check the internal temperature. Insert it into the thickest part of the thigh, avoiding the bone, for an accurate reading.
Chicken thighs are more forgiving than chicken breasts when it comes to cooking past 165°F. Because dark meat contains more fat and connective tissue, thighs can be cooked up to 175°F or slightly higher without drying out. This extra cooking helps break down connective tissue, making the meat more tender while maintaining juiciness. However, avoid overcooking the exterior to prevent a dry, tough crust.
For bone-in chicken thighs, expect them to take longer to reach the recommended temperature compared to boneless thighs. Depending on the size, boneless, skinless thighs typically take about 15 to 20 minutes, while bone-in thighs might need 8 to 15 minutes longer. To ensure even cooking, let the thighs sit at room temperature for 20 to 30 minutes before cooking. This step reduces cooking time and avoids uneven doneness.
If you don’t have a thermometer, look for visual and texture cues. Properly cooked chicken thighs have opaque, white to light brown meat with clear juices when pierced. The flesh should be tender and pull away easily from the bone if it’s bone-in. Avoid any pink or bloody spots near the bone or in the thickest part. Slight pink coloration can sometimes occur even at safe temperatures, but combined with firm texture and clear juices, it usually indicates safety.
Leaving chicken thighs resting off heat for 5 to 10 minutes after cooking allows the juices to redistribute. This makes the meat juicier and easier to carve. Resting also helps carryover cooking slightly raises the internal temperature, ensuring thorough doneness without drying the meat.
Cooking chicken thighs safely means balancing proper temperature with careful observation of texture and juices. Always prioritize using a meat thermometer for accuracy. Cooking beyond 165°F is safe and can improve tenderness in dark meat, but watch the exterior closely to prevent drying. These steps ensure your chicken thighs will be both safe and delicious.
2. Differences Between Bone-In, Boneless, and Skin Options

Choosing between bone-in, boneless, and skin choices greatly affects cooking time and the flavor you get from chicken thighs. Bone-in, skin-on thighs offer the richest taste and best texture. The bone helps retain moisture, while the skin crisps up nicely. These thighs usually take about 30 minutes in an oven or 20 minutes on a grill, with a flip halfway through. They are often the most affordable option and suit almost any cooking method, especially grilling or searing in a skillet.
Boneless, skinless thighs cook the fastest, perfect for quick meals. They take roughly 10 to 12 minutes on a grill or under the broiler. Without skin or bone, they lose some juiciness but still work well for moist, tender dishes. Bone-in, skinless thighs strike a balance by keeping moisture thanks to the bone but omitting the extra fat from skin, making them a leaner choice while still juicy.
| Type | Skin | Bone | Cooking Time (Oven) | Cooking Time (Grill) | Flavor & Texture | Best Use |
|---|---|---|---|---|---|---|
| Bone-In, Skin-On | Yes | Yes | About 30 minutes | About 20 minutes (flip halfway) | Best moisture retention, crispy skin, deepest flavor | Grilling, searing, oven roasting |
| Boneless, Skinless | No | No | Faster; around 10-12 minutes | 10-12 minutes | Quick cooking, less fat, tender but less juicy | Broiling, quick grilling, fast weeknight meals |
| Bone-In, Skinless | No | Yes | Longer than boneless but less than skin-on | Moderate time | Moist, juicy thanks to bone, less fat than skin-on | Healthier option with good flavor retention |
Skin-on chicken thighs make a noticeable difference in taste and texture. The skin crisps during cooking and adds a satisfying crunch and rich flavor. Removing the skin reduces fat and calories but sacrifices this element. For flavor without the added fat, you can cook thighs with the skin on and peel it off just before serving.
Always pat chicken thighs dry before cooking; dry skin crisps better and bone-in thighs won’t overcook if flipped regularly on medium-high heat.
Choose boneless, skinless thighs when speed matters most. Bone-in, skin-on thighs are best for flavor and texture when you have more time. Bone-in, skinless thighs offer a middle ground, keeping moisture with less fat. Each type calls for slightly different cook times and approaches to get tender, juicy results. Cooking all with proper heat and flipping techniques helps prevent dryness and ensures even cooking.
3. Preparing and Seasoning Chicken Thighs for Best Flavor
Properly preparing and seasoning chicken thighs before cooking improve flavor and texture. This includes drying the meat to improve browning, applying the right seasonings, marinating or brining when desired to boost juiciness, and resting briefly to allow flavors to absorb.
Drying and Patting the Chicken
Removing excess moisture from chicken thighs is key to achieving a good sear and crispy skin. Excess water on the surface creates steam when cooking, which prevents browning and can lead to soggy skin. Using paper towels to dry the thighs thoroughly before seasoning helps improve texture and flavor.
To do this, lay the chicken thighs on a clean surface and gently press or pat with paper towels until most visible moisture is gone. For skin-on thighs, air drying in the refrigerator for 1 to 2 hours uncovered can further dry the skin, improving crispiness when cooked at higher temperatures like 425°F.
Seasoning Essentials
Proper seasoning improve the meat’s natural flavor. Salt is essential because it not only adds taste but helps proteins retain moisture during cooking. Ground black pepper, garlic powder, onion powder, and paprika are great basic seasonings that develop rich, savory notes. A simple seasoning checklist:
- Pat chicken dry, then place in a bowl or on a tray.
- Sprinkle salt evenly, about ½ teaspoon per pound of chicken.
- Add ground black pepper, about ¼ teaspoon per pound.
- Sprinkle garlic powder, onion powder, and paprika, ¼ to ½ teaspoon each depending on your taste.
- Rub the seasoning evenly over all sides of the thighs, including under the skin if possible.
- Optional: Drizzle 1 tablespoon olive oil and toss with 1 teaspoon Italian seasoning and juice of 1 lemon for a fresh, tangy flavor.
Seasoning right before cooking works well for dry rubs, but allow some resting time if you want deeper flavor penetration.
Marinating and Optional Resting for Flavor
Marinating adds moisture and infuses flavor but requires planning. A buttermilk marinade is a popular method for chicken thighs. For 8 boneless, skinless thighs, combine 2 cups buttermilk with a pinch of salt, black pepper, and your choice of spices like paprika, cayenne, garlic, onion powder, or oregano. Submerge the chicken and refrigerate for 4 to 8 hours, or overnight for best results. This breaks down proteins and results in tender, juicy meat.
If short on time, use a simple olive oil, lemon juice, and Italian seasoning mix for 30 minutes to 1 hour. Avoid marinating over 24 hours, which can negatively affect texture, especially with acidic marinades.
Resting chicken thighs at room temperature for 20 to 30 minutes before cooking allows more even cooking and lets seasoning settle into the meat. After seasoning or marinating, cover loosely and leave the thighs out briefly (not longer than 2 hours for food safety). This step is optional but recommended for better results.
4. How to Get Crispy Skin on Oven-Baked Chicken Thighs
Baking chicken thighs at 400°F is the best way to get crispy skin while keeping the meat juicy and tender. This oven temperature allows the fat in the skin to render properly and dry out, creating a golden, crunchy crust without overcooking the meat inside. Bone-in, skin-on thighs exposed directly to hot air in the oven will develop that sought-after crispiness as the heat melts the fat beneath the skin. The key is to bake them uncovered to avoid trapping steam, which softens the skin.
Cooking time depends on the size of the chicken thighs. Standard bone-in thighs typically take about 35 to 40 minutes to reach an internal temperature between 185°F and 200°F, which ensures juicy meat that pulls away easily from the bone. Smaller thighs may be done in closer to 30 minutes, while extra-large pieces might need 45 minutes. Using a meat thermometer is the most reliable way to check doneness and prevent overcooking or dryness.
- Pat thighs dry with paper towels to remove surface moisture before seasoning
- Begin by placing the chicken thighs on the baking sheet with the skin facing down, then turn them over midway through the baking time.
- Use bone-in, skin-on thighs for optimal flavor and texture
- Do not cover the chicken while baking to keep skin crispy
- Optionally, pan-sear skin first to render fat and jump-start crisping before baking
- Finish under the broiler for 2 to 3 minutes if additional crispiness is desired
- Let the cooked thighs rest 5 minutes before serving to redistribute juices
Patting the skin dry is essential because water on the surface steams the skin, preventing it from crisping. Starting skin-side down on the baking sheet promotes even browning. Flipping the thighs halfway not only crisps both sides but also helps cook the meat evenly. Pan-searing the thighs first in a hot skillet renders some fat and begins the crisping process, which the oven then completes. Skipping the searing step means the chicken will bake well at 400°F, though the cooking time might increase slightly. A brief broil at the end creates an irresistible crunch but watch closely so the skin doesn’t burn.
Released fat pools during cooking, so using a wire rack on a baking sheet allows excess to drip away, further preventing sogginess. Resting the thighs after baking is a small step that makes a big difference in juicy meat. Checking for a final temperature around 185°F to 200°F ensures the thighs are tender and shreddable, a sign the connective tissue has broken down without drying the muscle.
5. Grilling and Broiling Chicken Thighs for Smoky Flavor
Grilling and broiling chicken thighs both use high heat to cook the meat quickly and develop smoky, caramelized flavors. Grilling cooks chicken over direct charcoal or gas flames, adding a smoky, charred taste, while broiling uses intense radiant heat from an oven element. Both methods require careful temperature control and timing to keep thighs juicy and prevent burning.
Grilling Chicken Thighs
Grilling chicken thighs typically means cooking over a direct heat source at temperatures around 450°F to 500°F. This high heat quickly browns the skin and seals in juices. Bone-in thighs work well on the grill, as their fat helps maintain moisture. Skin-on thighs develop a crispy, flavorful crust that keeps meat tender inside.
To grill thighs evenly, use a two-zone setup if possible: one side of the grill on high heat and the other on medium or low. This allows you to sear the chicken over direct heat and then move it to indirect heat to finish cooking without burning.
- Preheat the grill to about 450°F to 500°F and clean the grates.
- Allow the chicken thighs to rest outside the fridge for 15 to 20 minutes so they cook evenly.
- Place thighs skin-side down over direct heat and cook for 3 to 4 minutes until browned.
- Flip and cook the other side for another 3 to 4 minutes.
- Move the thighs to the cooler side of the grill, cover, and cook for 8 to 12 minutes until internal temperature reaches 165°F.
- Remove and let rest for 5 minutes before serving.
Keep a close eye while grilling; high flames can quickly burn the skin. Use indirect heat to finish cooking for juicy results.
Broiling Chicken Thighs
Broiling places chicken just inches under a high heat source in your oven, usually around 500°F to 550°F. This quick, intense heat crisps skin and browns meat similarly to grilling but without smoke. Broiling works best for smaller, thinner thighs or boneless skinless options.
Adjust the oven rack so the thighs are about 4 to 6 inches from the broiler. Because broilers can vary, watch thighs closely and turn them halfway through cooking to prevent burning. Broiling typically takes about 5 to 7 minutes per side depending on thickness.
- Turn on the broiler and arrange the oven rack so it is 4 to 6 inches away from the heating element.
- Line a broiler pan or baking sheet with foil for easy cleanup.
- Arrange thighs skin side up in a single layer.
- Broil for 5 to 7 minutes until the skin starts to brown, then flip.
- Broil the other side for another 5 to 7 minutes until internal temperature hits 165°F.
- Let the meat rest for 5 minutes before serving.
Keep the oven door slightly open when broiling to prevent overheating and burning the chicken.
Managing Heat and Flipping
Both grilling and broiling require managing heat carefully to avoid drying out or charring chicken thighs. Start with high heat to develop a brown crust, then reduce or move the thighs to lower-temperature zones to finish cooking. Using a meat thermometer to check for 165°F internal temperature helps prevent overcooking.
Flip thighs only once or twice. Excessive flipping causes uneven cooking and can tear skin. When grilling, flipping after 3 to 4 minutes per side encourages even browning. For broiling, flipping halfway through the total cook time works best. Let thighs rest after cooking to redistribute juices for tender results.
6. Pan Searing and Frying Chicken Thighs for Quick Cooking
Pan searing and frying chicken thighs deliver a golden-brown crust with juicy meat inside. The key is controlling oil temperature and cooking time. Heat the oil to about 350ºF; this temperature is hot enough to crisp the skin without burning it or leaving the inside raw. Use an instant-read thermometer to monitor the oil temperature. The thighs should sizzle but not smoke. Sear the chicken for 6 to 8 minutes on each side until the skin is deeply golden and the internal temperature reaches 165ºF.
Overcrowding the pan lowers the oil temperature, causing soggy or greasy skin. Cook in batches if needed. Also, move the thighs gently during cooking to brown them evenly. Adjust the heat often to maintain steady sizzling. Avoid turning the chicken repeatedly; one flip per side helps develop a good crust. After searing, rest the thighs a few minutes on a wire rack or paper towels to drain excess oil and keep the skin crisp.
- Pour a high smoke-point oil like canola or vegetable oil into a heavy skillet, filling it about 1/4 to 1/3 inch deep. Heat to 350ºF, checking with a thermometer.
- Pat the chicken thighs dry with paper towels to remove moisture, which helps prevent splattering and soggy skin.
- Season your thighs with salt and pepper or your preferred seasoning before adding to the pan.
- Place the thighs skin side down carefully in the hot oil without crowding the pan, allowing space between each piece for even frying.
- Cook the thighs for 6 to 8 minutes on the first side. During this time, occasionally shake or move the pieces slightly for even browning but do not flip repeatedly.
- Flip the thighs once and cook 6 to 8 minutes on the other side, adjusting heat so the oil stays hot but not smoking.
- Use an instant-read thermometer inserted into the thickest part to confirm the internal temperature has reached 165ºF.
- Remove the chicken thighs and rest them on a wire rack or paper towels for 5 minutes to drain excess oil and maintain crispiness.
7. Using an Instant Pot or Slow Cooker for Tender Chicken Thighs
Both the Instant Pot and slow cooker are effective tools for cooking chicken thighs that turn out tender and full of flavor. Using pressure cooking in the Instant Pot requires only minutes, while slow cooking gently breaks down the meat over several hours. Proper timing, settings, and resting help keep the chicken moist and tasty.
Instant Pot Guidelines
Pressure cooking chicken thighs in the Instant Pot is fast and convenient. Use the manual or pressure cook setting on high pressure and set the timer for 5 minutes for bone-in or boneless thighs. Before sealing the lid, add at least 1 cup of liquid such as broth or water to create the necessary steam. To add extra flavor and promote moisture, sear the thighs first on the sauté setting with a little oil for 2 to 3 minutes per side, then remove them before pressure cooking.
After the 5-minute cooking cycle finishes, allow a natural pressure release for about 5 minutes to help the meat retain its juices. Then, manually release any remaining pressure before opening the lid. This method yields tender thighs with a rich texture. Avoid overcooking by sticking close to the recommended time, as too long under pressure can dry out the chicken.
Slow Cooker Instructions
Slow cooking chicken thighs takes between 4 to 6 hours on the low setting or about 2 to 3 hours on high. Bone-in thighs work particularly well in slow cookers since the gentle heat and extended cooking time break down the connective tissue, resulting in very tender meat. Use enough liquid to cover the bottom of the slow cooker, such as broth or sauce, which helps preserve moisture during the long cooking process.
For best results, season the thighs and place them skin-side up to prevent sogginess. Avoid lifting the lid unnecessarily, as slow cookers lose heat quickly and extend the cooking time. When the thighs reach an internal temperature of 165°F, they are safe to eat but can benefit from resting so the juices redistribute evenly.
Post-Cooking Rest and Serving Tips
Both methods benefit from letting the chicken thighs rest for 5 to 10 minutes after cooking. Resting allows the juices to settle, making the meat juicier and easier to slice or pull apart. In the Instant Pot, the natural pressure release acts as a built-in rest, but an additional wait time after removing the thighs further improves texture.
If you want a crisp skin, especially after slow cooking, briefly broil or pan-sear the thighs once they are cooked and rested. Brushing a little oil on the skin before this final step improve browning and locks in moisture. Serving right after resting ensures tender, flavorful chicken thighs that hold their juices well.
8. Common Cooking Mistakes and How to Fix Them
Dry chicken thighs usually result from overcooking. Because they contain more fat and connective tissue than breasts, they can stay moist longer, but exceeding 165°F (74°C) internal temperature will start to dry them out. Use a reliable meat thermometer to check the temperature and remove the thighs promptly when they reach it. Resting the thighs for 5 to 10 minutes after cooking lets juices redistribute, keeping the meat tender and juicy.
Chicken skin that fails to crisp often has moisture on its surface or is crowded in the pan. Pat thighs completely dry before cooking and apply a thin coat of oil or cooking spray to help crisp the skin. Cooking skin-side up in an oven-safe dish or starting with a hot pan for searing allows fat to render properly and produce a golden crust. Avoid flipping the thighs too often, as this cools the skin and prevents crisping.
Uneven cooking or burning frequently happens because of inconsistent heat or overcrowding the pan. Keep the chicken spaced apart so hot air or oil can circulate properly. Lower the heat if browning occurs too fast, and finish cooking in the oven to get a more even temperature. Bone-in thighs generally take longer to cook through than boneless, so adjust times accordingly to avoid burning the exterior before the interior is done.
Lack of flavor or poor texture can come from skipping seasoning or not allowing the chicken to marinate. Salt added even 15 minutes before cooking improves taste and moisture retention. Using skin-on thighs while cooking promotes juiciness because the fat renders into the meat, and you can remove skin afterward if you prefer less fat. Also, do not overload the pan or cooker to avoid steaming instead of roasting, which results in softer skin and less flavor.
- Not drying thighs before cooking, pat completely dry to help skin crisp
- Overcooking above 165°F internal temperature, use a meat thermometer and rest meat after cooking
- Overcrowding pan or baking dish, leave space for even heat and air flow
- Starting with cold pan, preheat skillet or oven to avoid sticking and uneven browning
- Flipping too often during searing, limit flips to preserve crispy skin
- Skipping seasoning or short marinating time, salt at least 15 minutes before cooking
- Using boneless cooking times for bone-in thighs, add extra 5 to 10 minutes for thicker pieces
Always measure the internal temperature in the thickest part of the thigh near the bone for an accurate doneness check.
Following these tips reduces common errors and makes cooking chicken thighs straightforward. Even basic adjustments, like drying the skin and watching the thermometer instead of the clock, lead to better texture and flavor. Adjust cook times when using different cuts and appliances to avoid typical pitfalls like dryness or uneven cooking.
Step-by-Step Action Plan for Perfect Chicken Thighs
Follow these steps to cook delicious chicken thighs with confidence and great flavor.
- Before you start: Choose bone-in, skin-on thighs for flavor and juiciness, or boneless if you need quick cooking. Make sure your chicken is thawed and pat dry for best results.
- 30 minutes before cooking: Season the thighs with salt, pepper, and your favorite spices. This helps the flavors penetrate and the skin crisp up.
- Start cooking: Use your chosen method, oven, grill, pan, Instant Pot, or slow cooker, and maintain a medium-high heat for a crispy outside or low and slow for tender meat.
- During cooking: Use a meat thermometer to check for an internal temperature of 165°F. This ensures safety without overcooking.
- Midway for oven-baked thighs: Flip or baste the chicken to keep it juicy and encourage even browning.
- After cooking: Let the chicken rest for 5 minutes to allow juices to redistribute, making each bite moist and flavorful.
- Ready to serve: Pair your thighs with a crunchy side or fresh salad for a balanced meal.
Frequently Asked Questions
Can I Cook Chicken Thighs from Frozen Safely?
Yes, you can cook chicken thighs from frozen, but it takes about 50% longer than thawed. Use a thermometer to ensure they reach 165ºF for safety.
How Long Should Chicken Thighs Rest After Cooking?
Let chicken thighs rest for 5 to 10 minutes after cooking. This helps the juices redistribute, keeping the meat juicy and tender.
Is It Better to Marinate Chicken Thighs Before Cooking?
Marinating chicken thighs is optional but improves flavor and moisture. Use a marinade for at least 30 minutes, up to several hours.
Can I Use the Same Pan for Searing and Finishing Chicken Thighs?
Yes, start by searing skin-side down in a skillet, then finish cooking in the same pan by lowering the heat or covering it.
Should I Cook Chicken Thighs Covered or Uncovered?
Cooking uncovered helps get crispy skin. Covering traps moisture and softens the skin, so choose based on texture preference.
How Do I Know Chicken Thighs Are Fully Cooked Without a Thermometer?
Fully cooked chicken thighs lose pink inside and their juices run clear. Use a fork to check texture but a thermometer is best for safety.
Wrapping Up
Chicken thighs offer versatility and flavor but require attention to temperature, seasoning, and cooking time to turn out perfect. Experiment with different methods and seasonings to find what works best for you. Start with one cooking style and focus on mastering it before trying new techniques.




One Comment